
How Fonts Work in Elfsight Widgets
Elfsight widgets offer several ways to customize fonts. In this guide, we'll explain how the font settings work, how to choose or add a font, and how to fix common font issues.
In this article
Choosing a Font in the Widget Editor
Most Elfsight widgets let you choose a font directly in the widget editor. To do this, go to your Elfsight Dashboard, click Edit next to your widget, and find the Font setting. Depending on the widget, it may be located on the Style, Appearance, Theme, or similar tab:
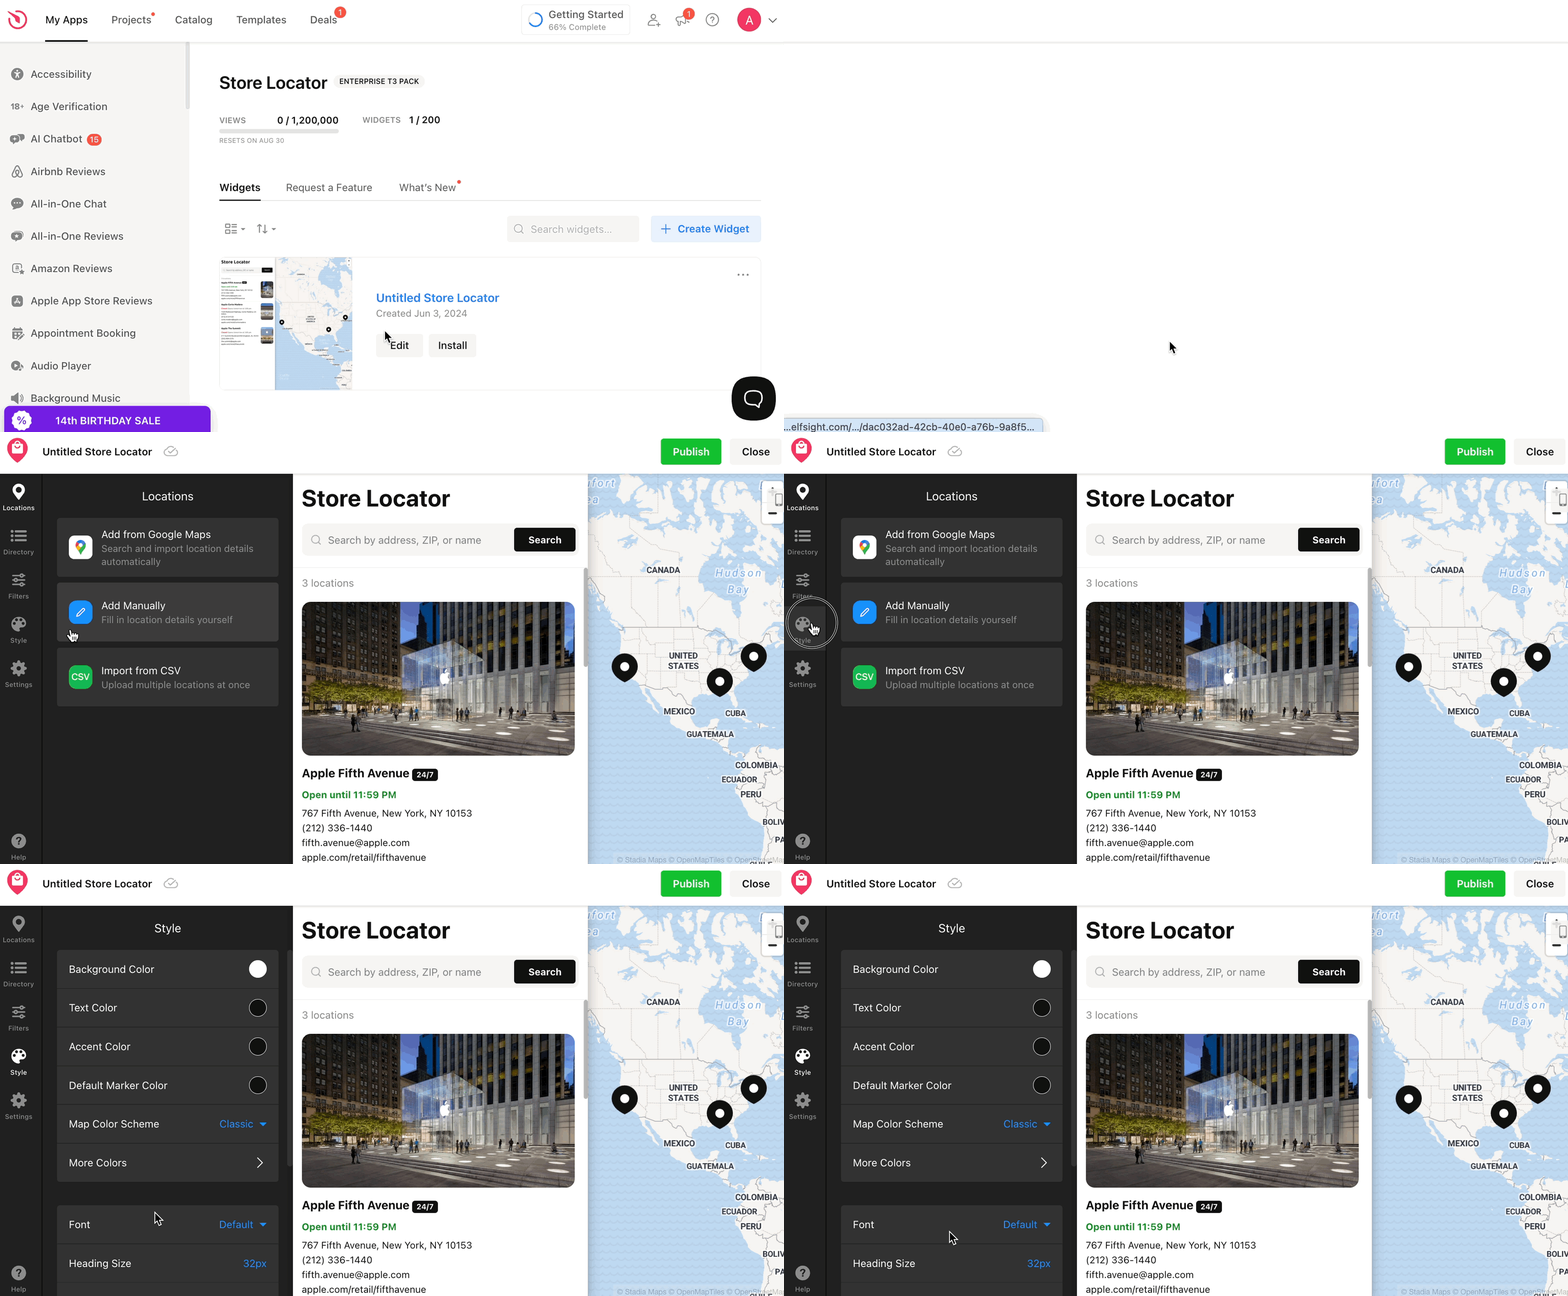
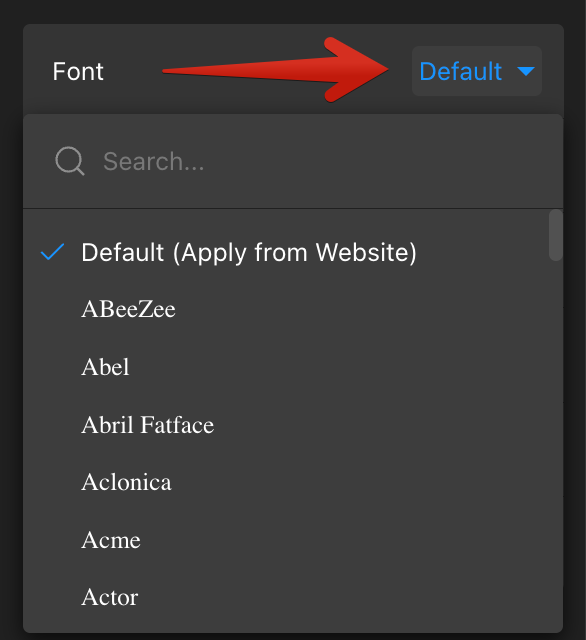
Open the font dropdown and use the search field to quickly find the font you need:
Google Fonts and GDPR: Fonts selected from the dropdown are loaded through Google Fonts, which may require user consent under GDPR. Learn more in Google Fonts in Elfsight Widgets.
Once you select a font from the list, the widget will use it both in the editor and on the published website.
Using Your Website Font
Want your widget font to match your website font? Select Default (Apply from Website) from the font dropdown and click Publish:
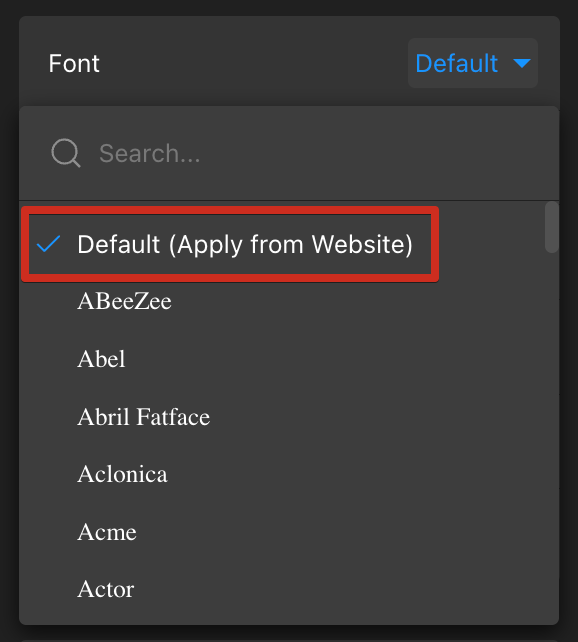
The widget will inherit the font used in the area where it is installed. If that area doesn’t have its own font, the website’s default body font will usually apply.
Some widgets don’t include a Font setting and use your website font by default. To apply a different font, use custom CSS as described below.
Adding a Font with Custom CSS
If the required font isn’t available in the built-in settings, you can add it manually with custom CSS. This may be useful when:
- Your widget doesn’t have a Font setting.
- The font you need isn’t available in the list.
To add a font, go to the Custom CSS section. Depending on the widget, you can usually find it on the Settings, Style, or Appearance tab:
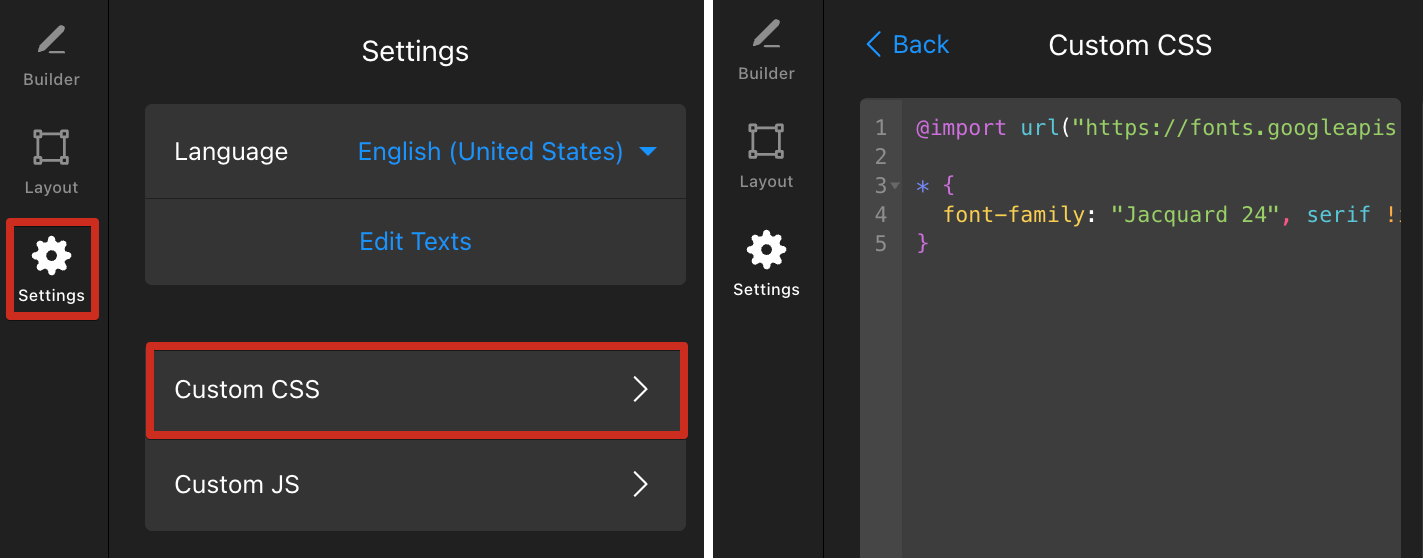
If the font is already available in your website’s theme, add the following code and replace FONT NAME with the exact font family name:
* {
  font-family: "FONT NAME";
}
If the font isn’t available in your website styles, import its stylesheet first. Replace FONT URL with the font stylesheet URL and FONT NAME with the font family name:
@import url("FONT URL");

* {
  font-family: "FONT NAME";
}
Make sure the @import rule is placed at the top of the Custom CSS section. Then click Publish to apply the font.
If you use a custom or paid font, make sure its license allows web embedding and use the stylesheet URL provided by the font service.
If Your Widget and Website Fonts Don't Match
Having trouble getting your widget font to match your website? Go through the following checks to identify and resolve the issue:
- 1
-
Check the Font setting
If your widget has a Font setting, make sure that Default (Apply from Website) is selected and Publish the changes.If your website uses several fonts, the widget inherits the font applied to the section where it is installed. To use a different font, select it in the Font setting or use Custom CSS. - 2
-
Check the Custom CSS section
A previously added CSS rule may override the Font setting. Check the Custom CSS section for code containingfont-family: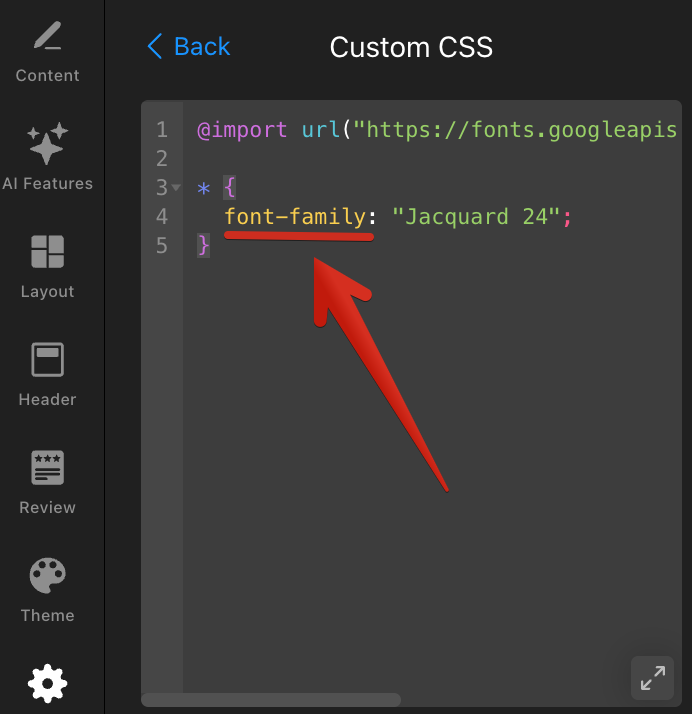
Remove the rule or replace the font name, then Publish the widget.
- 3
-
Check whether the widget is installed inside an iframe
An iframe prevents the widget from accessing your website styles, so the widget cannot inherit the website font. This is common on platforms like Wix, Hostinger, or GoDaddy.
If the widget is otherwise working correctly, select the matching font from the list in the Font setting or use Custom CSS.
When possible, we recommend installing the widget outside an iframe to enable font inheritance and avoid other iframe limitations. Use our dedicated guides:
Instructions for Hostinger Instructions for GoDaddy Custom Сomponent for Framer Wix via Custom Code (any Wix Premium plan + connected custom domain) Wix via Custom Element (any Wix Premium plan + custom domain + no Wix ads) Some platforms, like Google Sites or Canva, support iframe-based widget installation only. In this case, select the matching font in the widget editor or apply it with Custom CSS.
Still having trouble with your widget font? Contact our Support Team and share the link to the page with the widget. We'll be happy to help! 🙌
FAQ
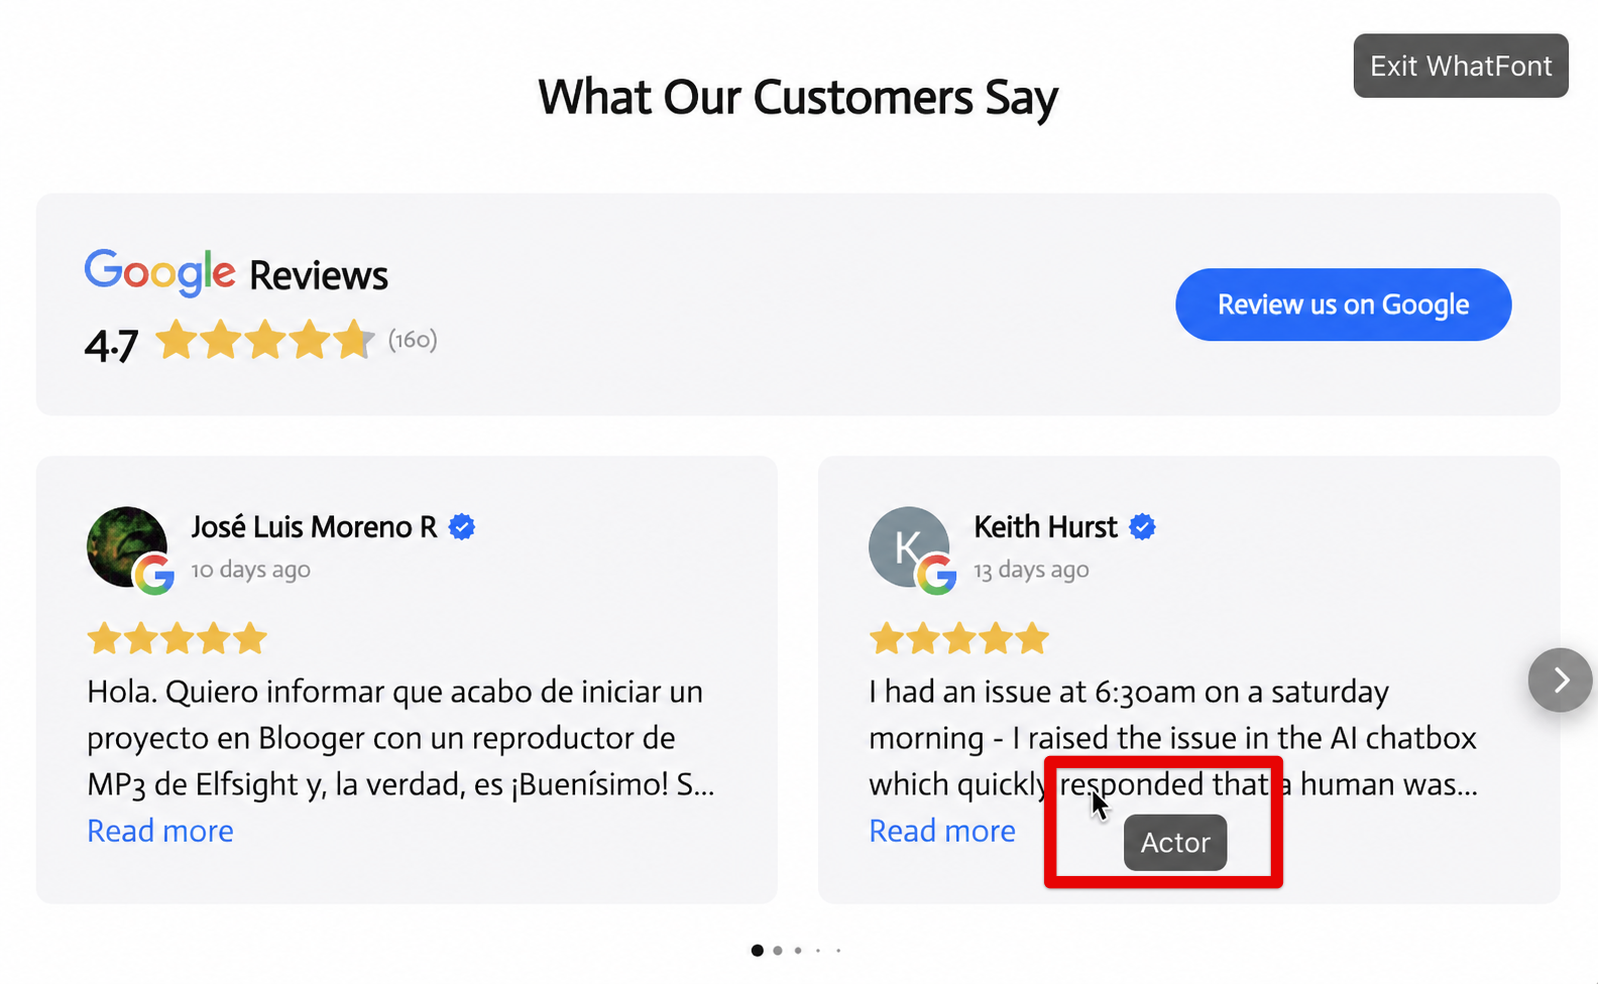
How do I check which font my website is using?
You can use a font-identification browser extension, such as WhatFont, or any similar tool. Activate the extension and hover over the website text to see the rendered font family:
How do I use the same font as in the widget editor?
The widget editor doesn’t use one specific font. It uses a system font stack, so the exact font varies depending on the device—for example, SF Pro on Apple devices or Segoe UI on Windows.
The closest ready-to-use option is Arial, which you can select from the widget’s font list. It will look similar to the font shown in the editor, but it may not be an exact match.
To give your widget the same device-native appearance, add the following code to the Custom CSS section:
* {
  font-family: system-ui, -apple-system, BlinkMacSystemFont, "Segoe UI", Roboto, Helvetica, Arial, sans-serif, "Apple Color Emoji", "Segoe UI Emoji", "Segoe UI Symbol";
}
What if my widget doesn't have a Font setting?
Some widgets don't currently include a font dropdown. This is expected and doesn't prevent you from changing the font. Follow the instructions in Adding a Font with Custom CSS to apply the font you need.
What if the font I need isn't available in the font list?
If the font is already used on your website, follow the instructions in Using Your Website Font. Otherwise, add it using Custom CSS.