Installing Elfsight widget on Wix avoiding iFrame via Custom Element
When adding third-party elements like widgets, Wix wraps them in iframes by default. This can sometimes lead to issues like unwanted scrollbars, limited responsiveness, or SEO limitations.
To get around this, you can use a Custom Element to install your Elfsight widgets without an iframe. Follow the steps below to set this up!
Installation steps
1. Create a Custom Element
- 1
-
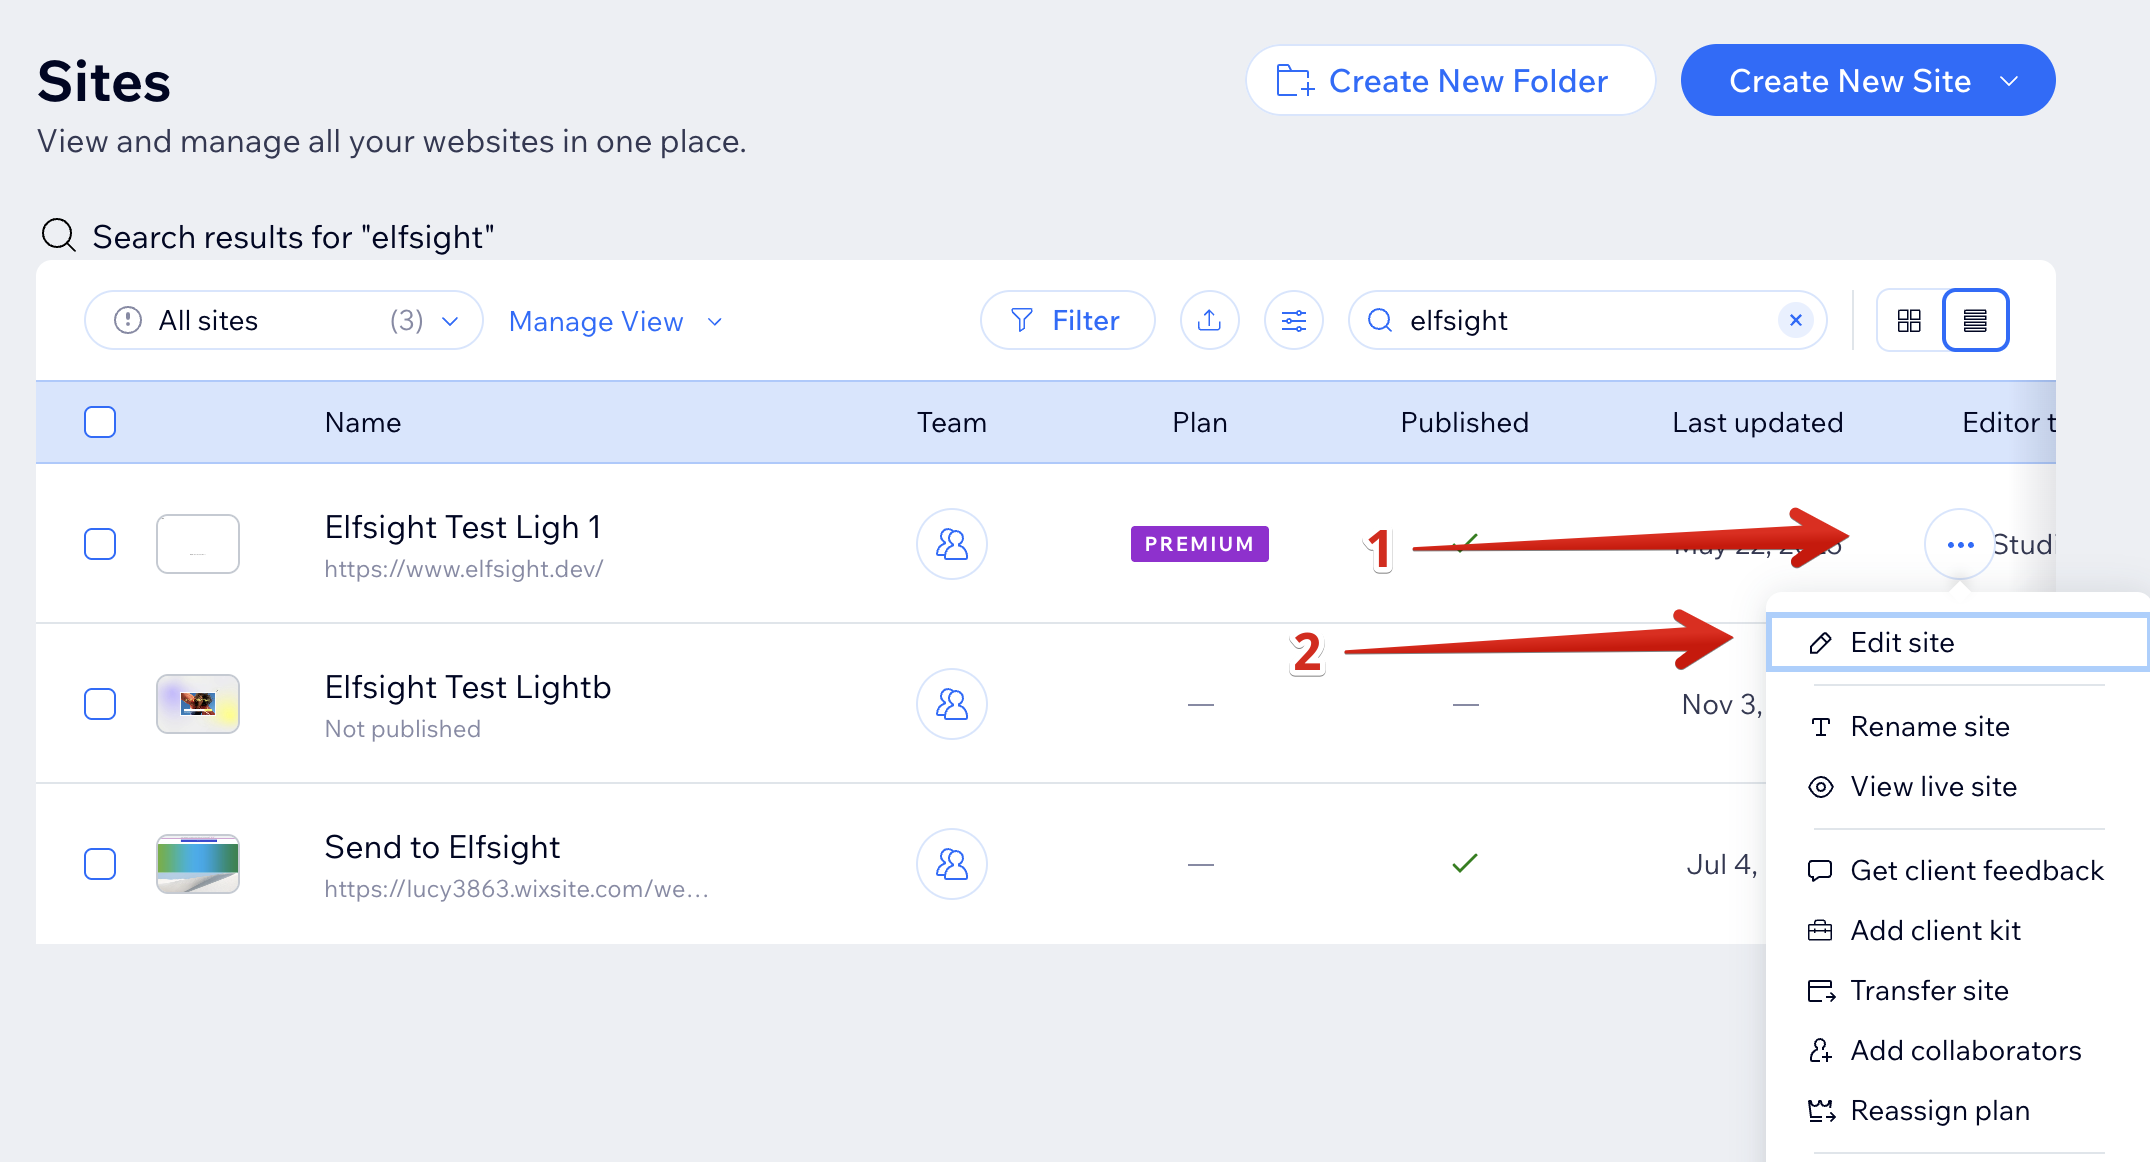
Open Wix Editor
Log in to your Wix account, locate your website, click the three-dot menu, and select Edit Site:
- 2
-
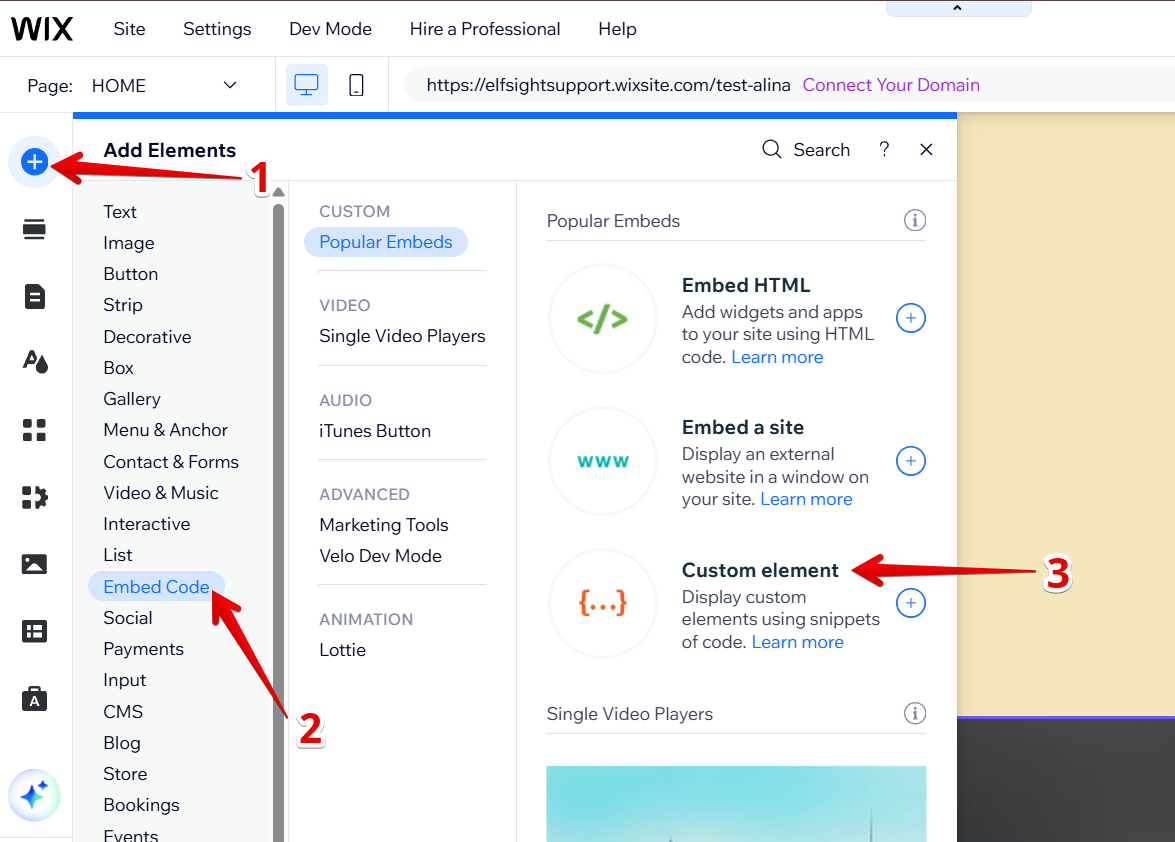
Add a Custom Element
Click the Plus icon, go to the Embed Code section, and select Custom Element:


2. Add a JS File
- 1
-
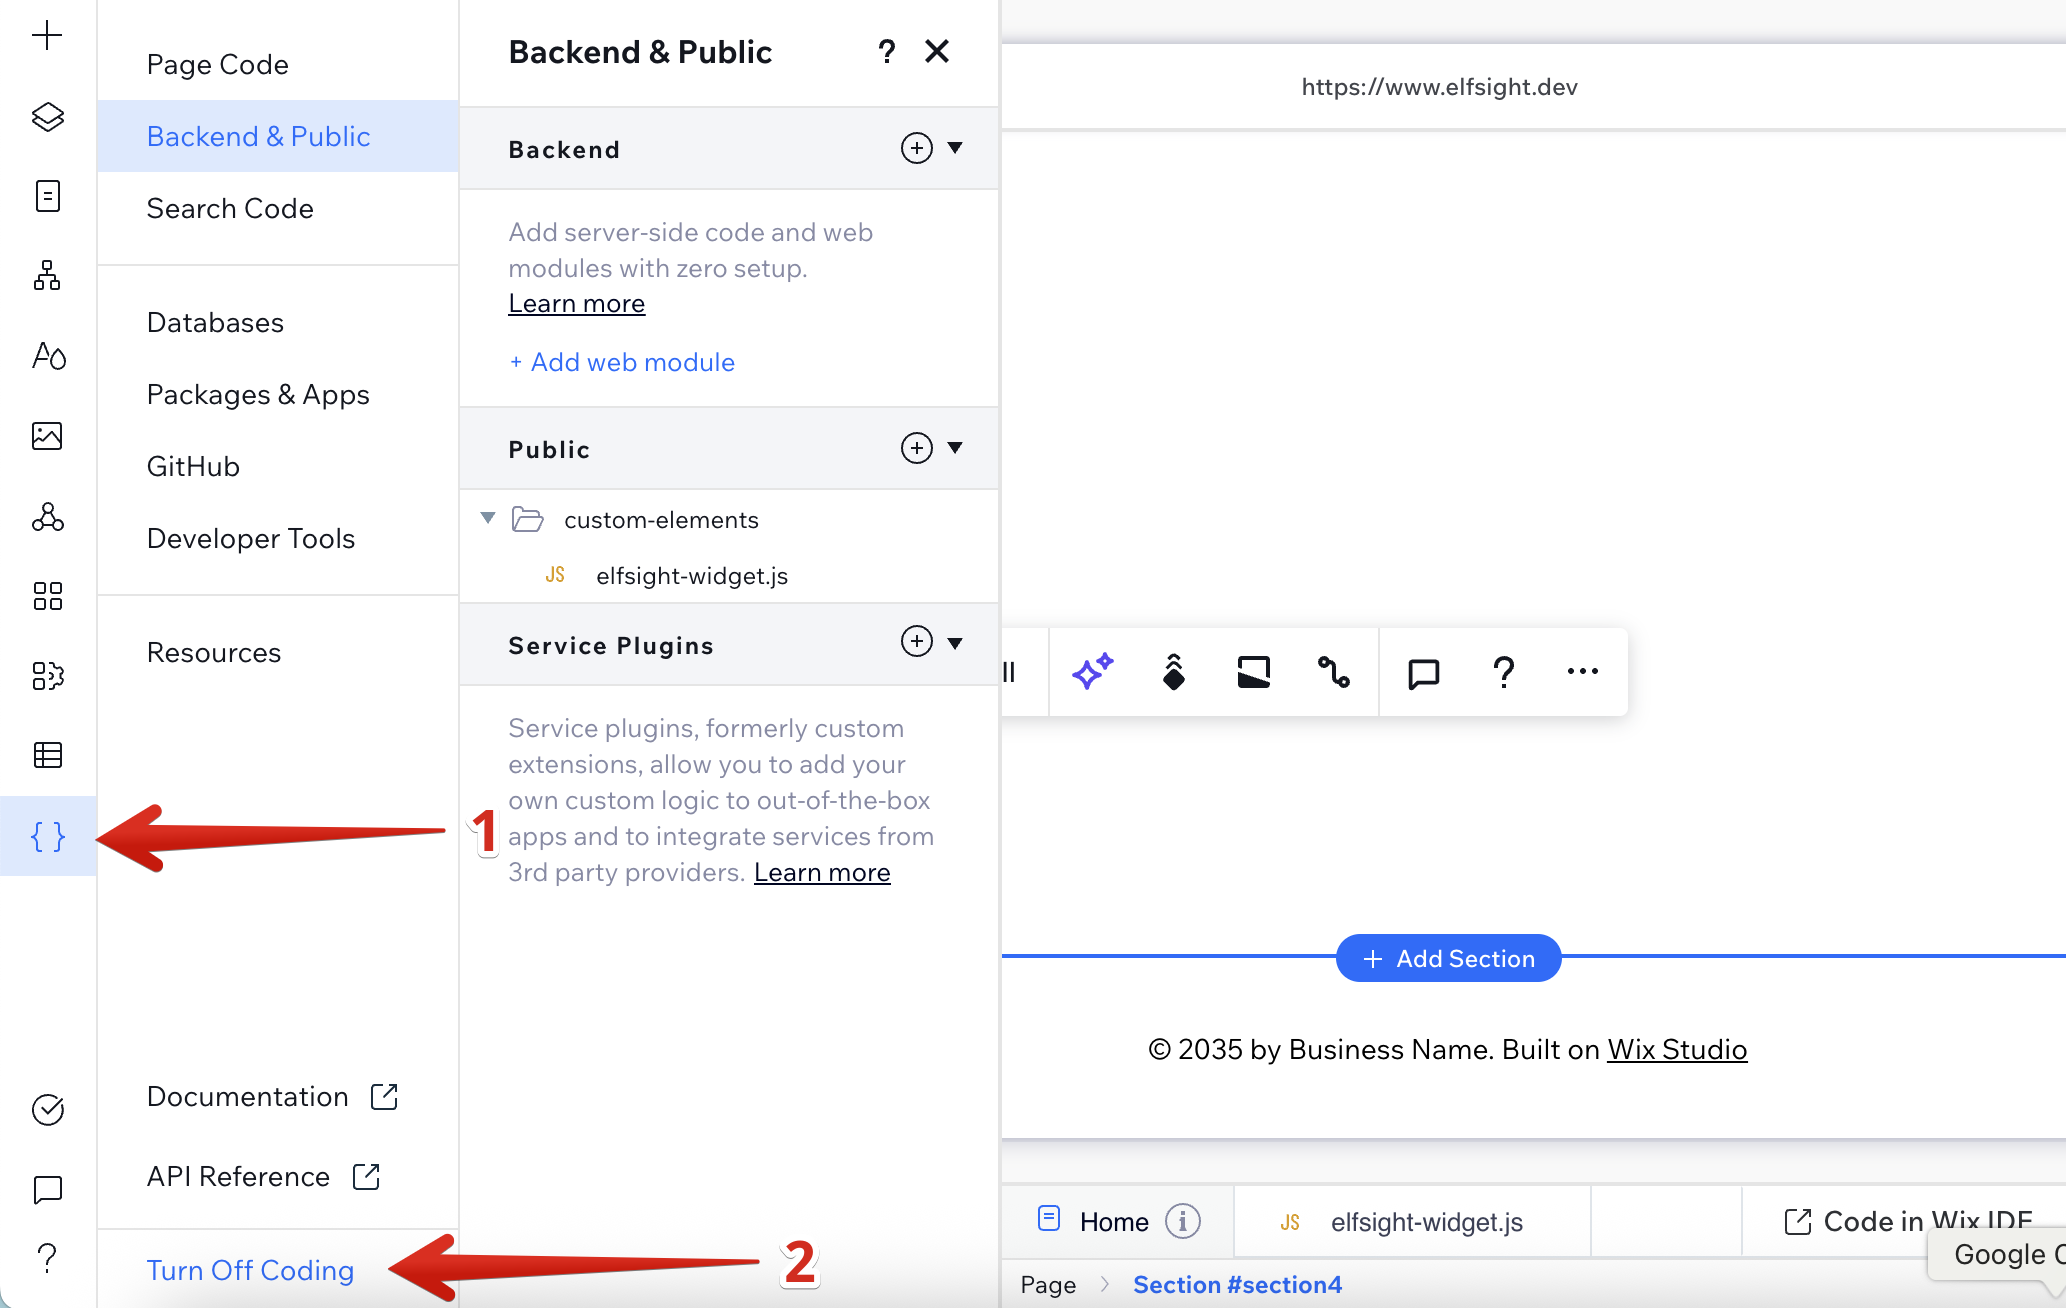
Enable Dev Mode
In Wix Editor, click Dev Mode → Turn on Dev Mode at the top:
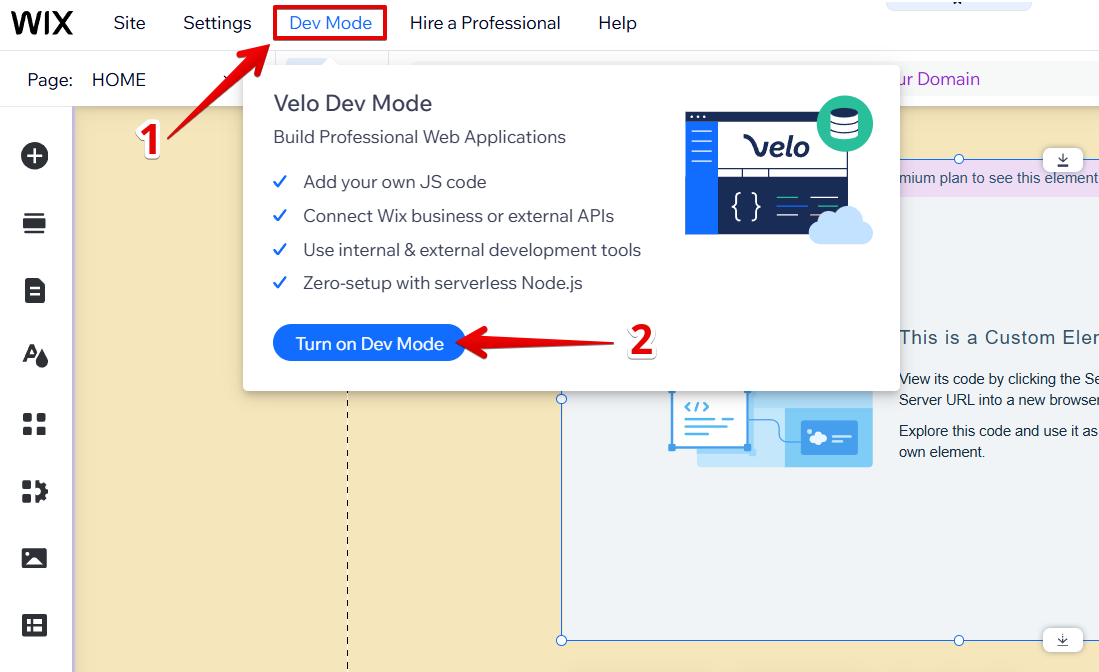
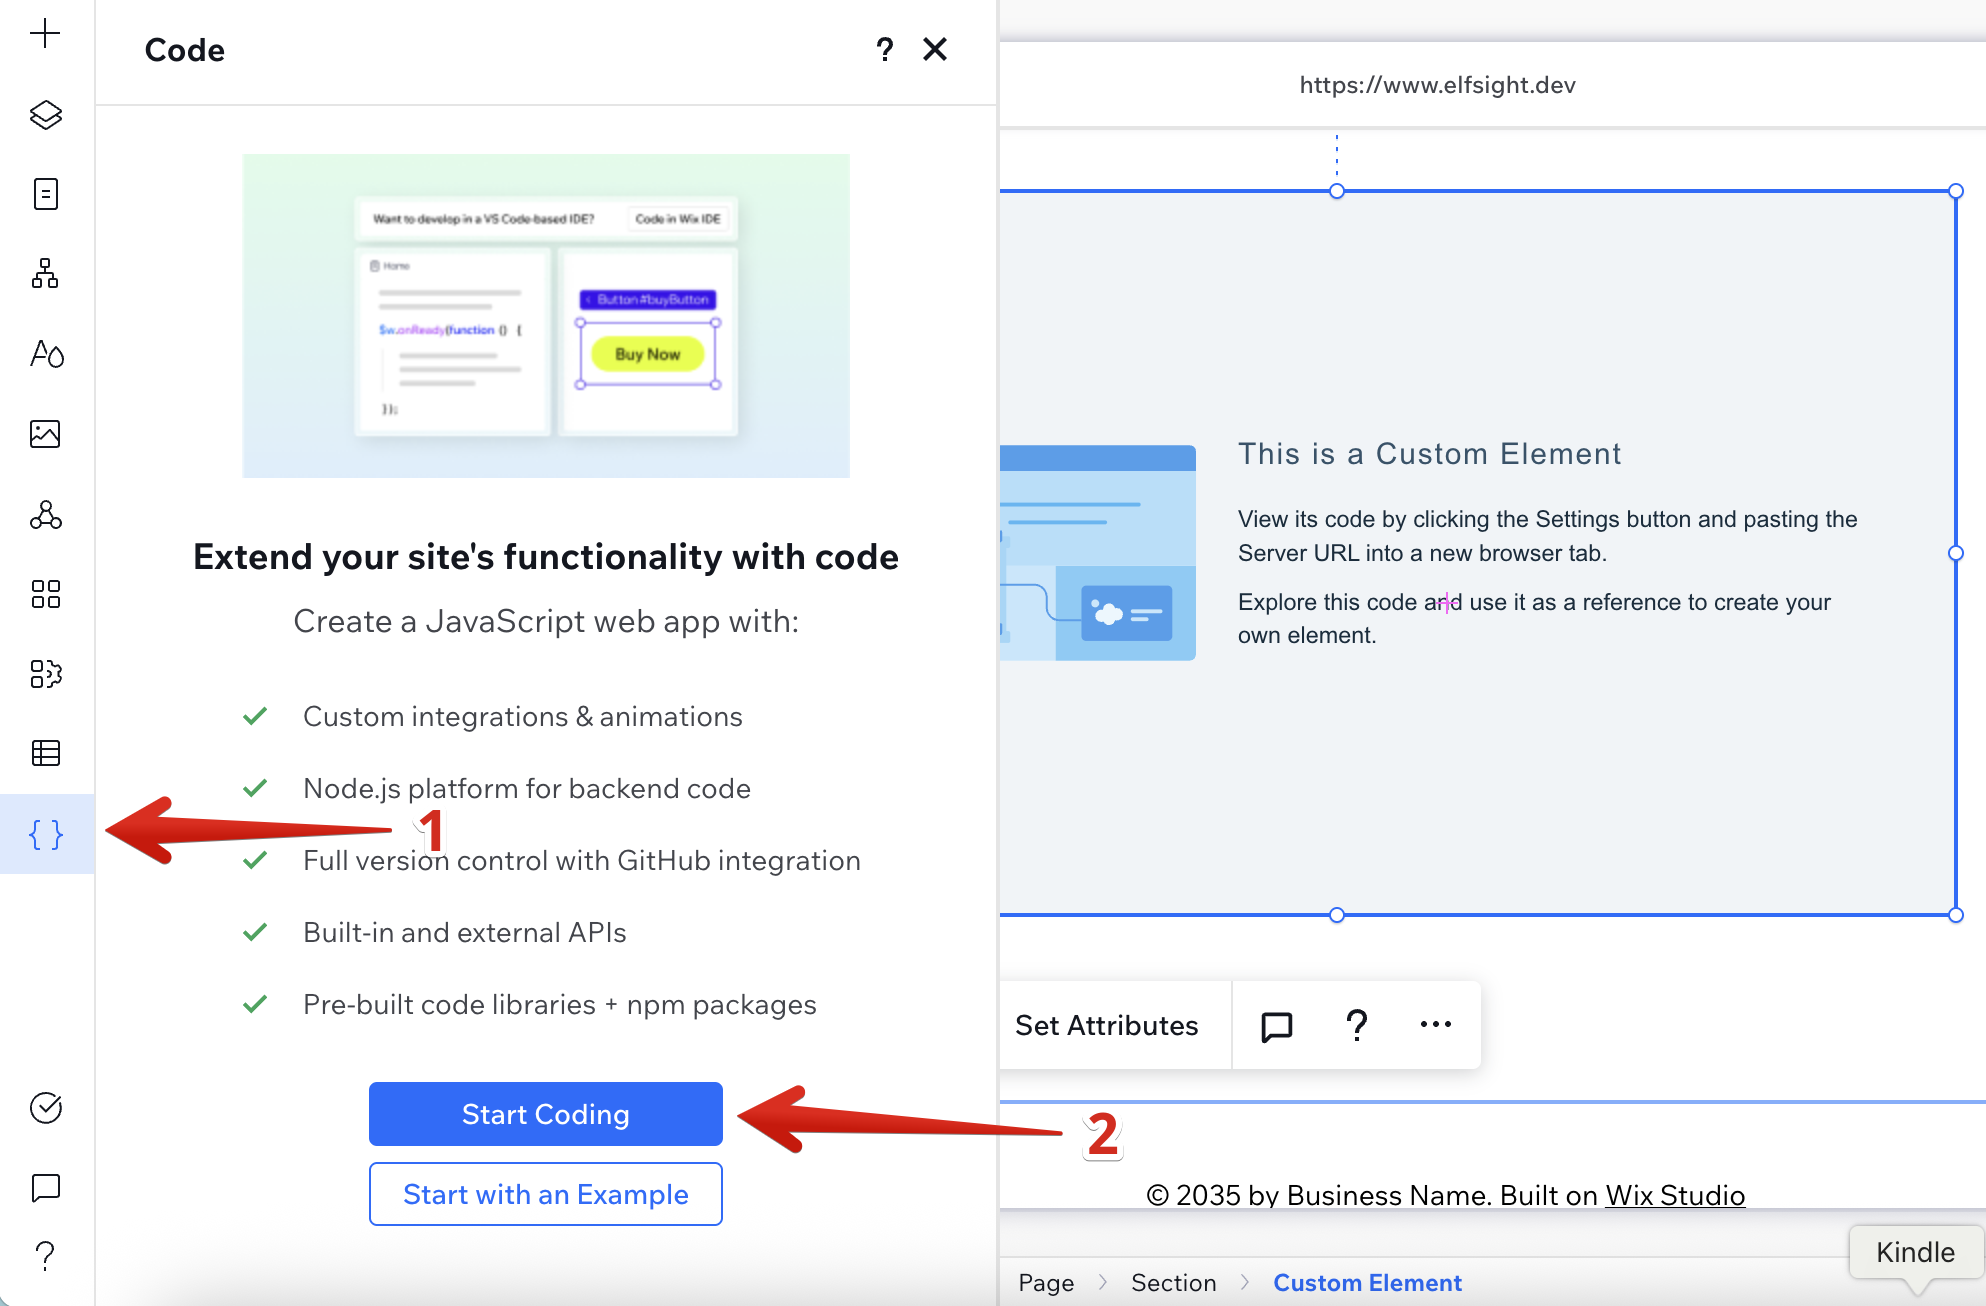
If you're using Wix Studio, click the curly braces icon and hit Start Coding:
- 2
-
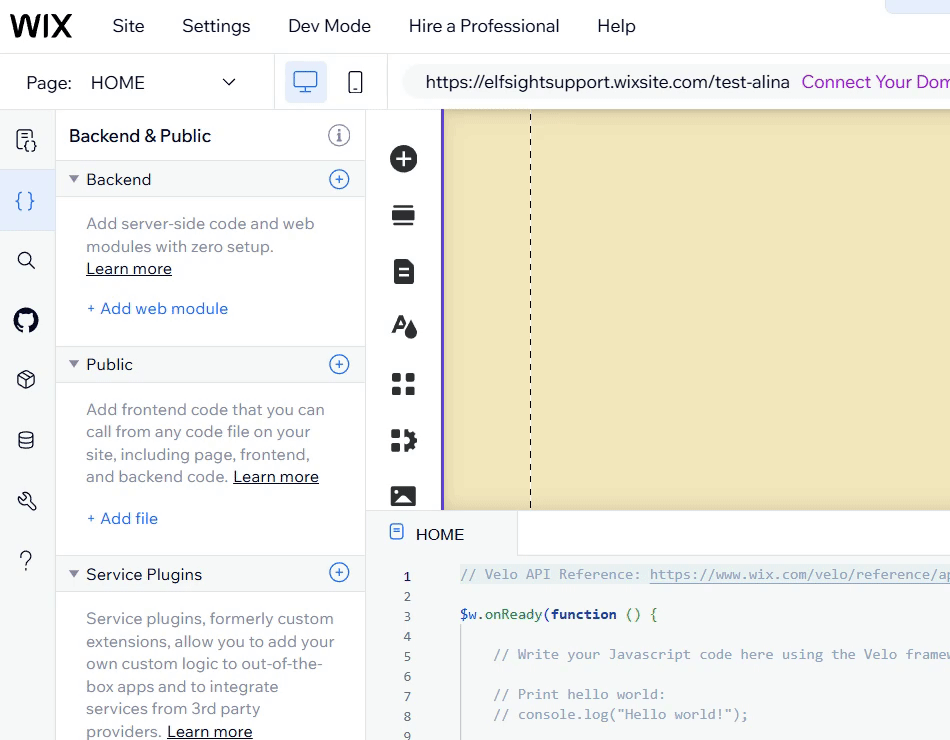
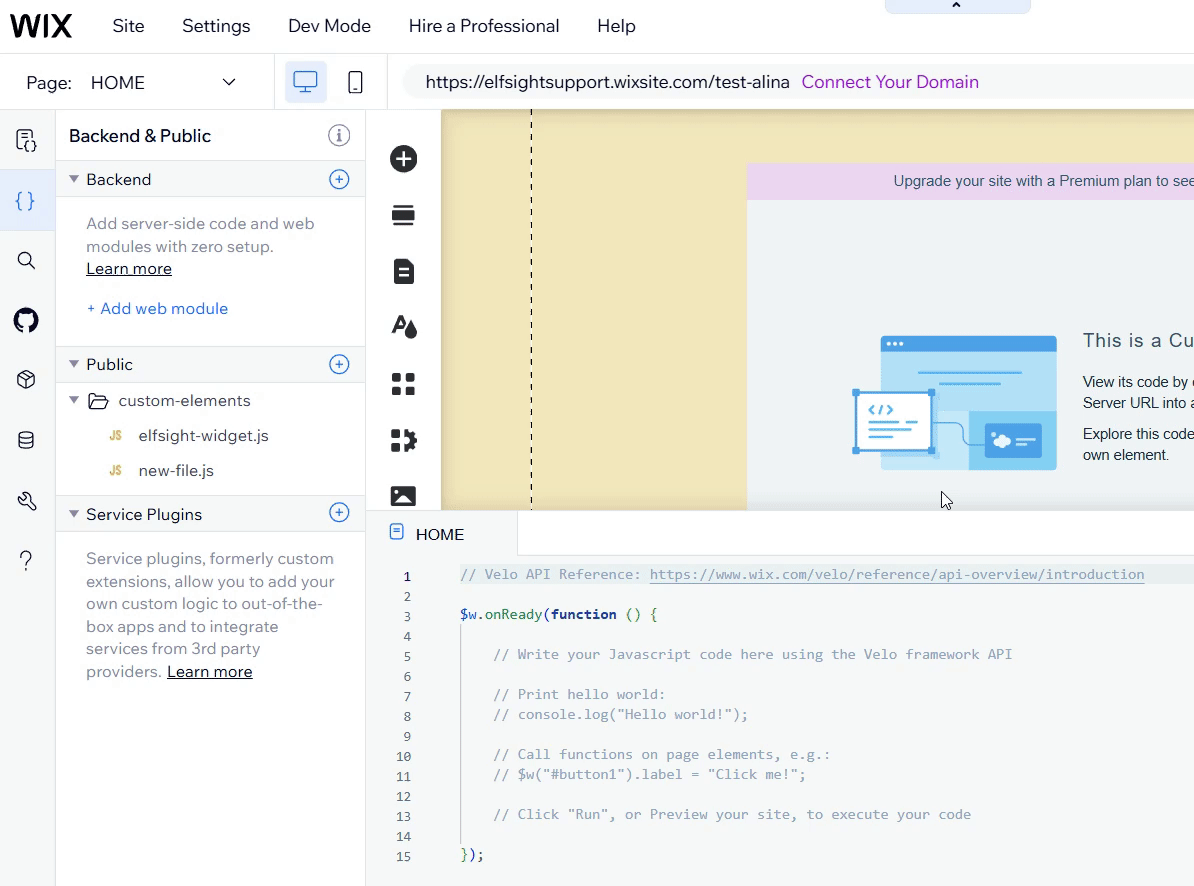
Add a new JS file
In the left sidebar, go to Backend & Public → Public → Custom Elements, then select Add JS File from the three-dots menu. Name the file
elfsight-widget.js: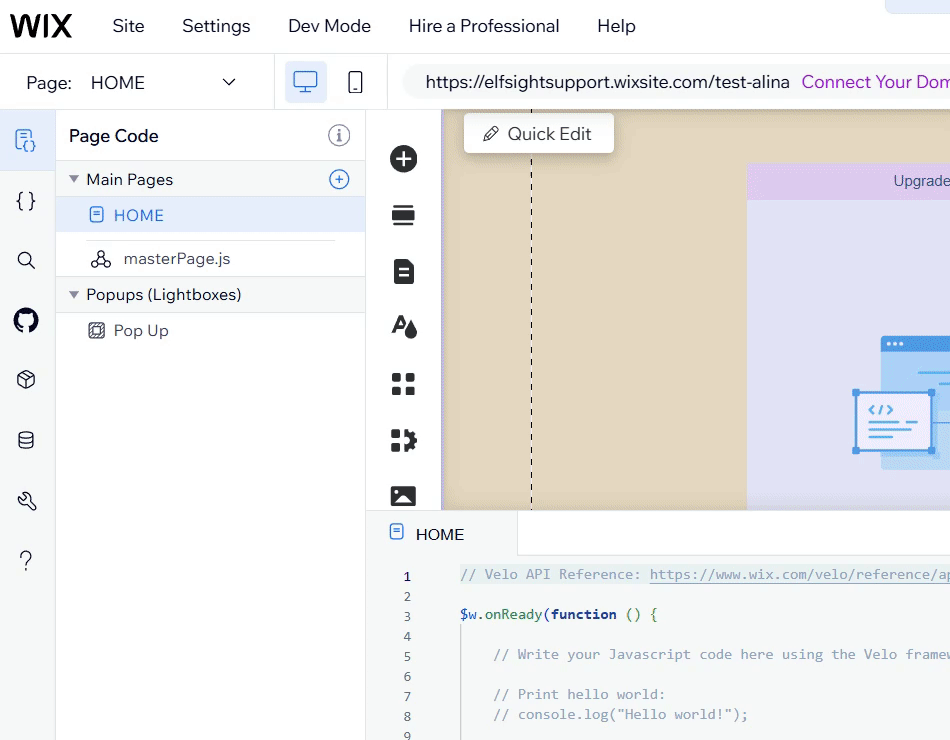
❗Important: Make sure your elfsight-widget.jsfile is placed inside thecustom-elementsfolder.If you don't see the Custom Elements folder, you need to create it manually. To do this, please click the Plus sign (+) next to the Public section and choose Add Folder. Name the folder
custom-elements:
- 3
-
Paste the widget loader code
Open the
elfsight-widget.jsfile, delete all existing code, and paste the following:class ElfsightWidget extends HTMLElement { connectedCallback() { const platform = document.createElement('script'); platform.src = 'https://elfsightcdn.com/platform.js'; platform.setAttribute('async', true); this.append(platform); this.insertAdjacentHTML('beforeend', `<div class="elfsight-app-${this.getAttribute('id')}" data-elfsight-app-lazy></div>`); } } customElements.define('elfsight-widget', ElfsightWidget);Here's what this looks like in Wix Editor:
- 4
-
Link the Custom Element to the file
Click on the Custom Element you added earlier → Choose Source → Velo file → select
elfsight-widget.jsfrom the dropdown. Under Tag Name, enterelfsight-widget:
- 5
-
Disable Dev Mode
For Wix Editor, click Dev Mode → Turn off Dev Mode:

For Wix Studio, click the curly braces icon → Turn Off Coding:


3. Connect the Custom Element to the Widget
- 1
-
Find your widget ID in the Elfsight Dashboard
Your widget ID is the numeric part of the widget's installation code: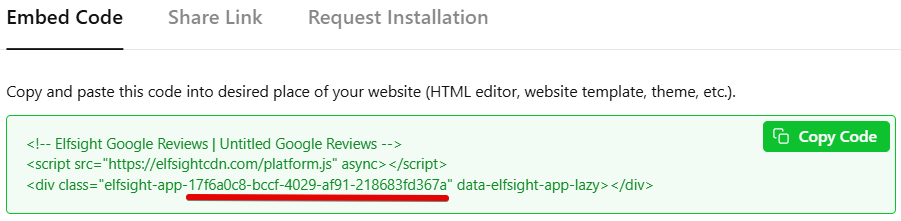
For more details, please refer to this guide: Where to get your widget ID
- 2
-
Set Attributes
In your Wix editor, click the Custom Element again → Set Attributes → Set Attributes. In the popup, enter:
- Attribute name:
id - Value: your widget ID
Then click Set:

- Attribute name:


That's it! Don't forget to adjust the Custom Element container size for both desktop and mobile, and publish the changes.
Still having trouble after following these steps? Just contact our Support Team for help. We will be delighted to assist! 🙌