Accepting Payments with Your Calculator Widget
Want customers to calculate a price and pay quickly and securely right inside your widget? Great news — our Calculator widget can do that! This guide will help you get started with payments in no time. Let’s dive in! 🚀
In this article
Important Notes Before You Begin
💳 Payment Types
The Calculator widget supports one-time payments and subscription payments. Other Stripe payment options, like "Buy now, pay later", are not available.
💰 How Payments Work
Once Stripe is connected, you’ll need to select a Price Source (a calculation that defines the total price). After that, payment will be required to submit the form.
💵 Supported Currencies
Payments are available only in currencies and minimum amounts supported by Stripe. For details, see Stripe Docs: Supported Currencies.
How to Set Up Payments
Integrating payments involves two steps: connecting your Stripe account and configuring the checkout settings.
Connecting Stripe
Follow these steps to connect Stripe to your Calculator widget:
- 1
-
In the widget editor, open the Action tab and make sure Lead Form is selected. Then scroll down and click Payment:
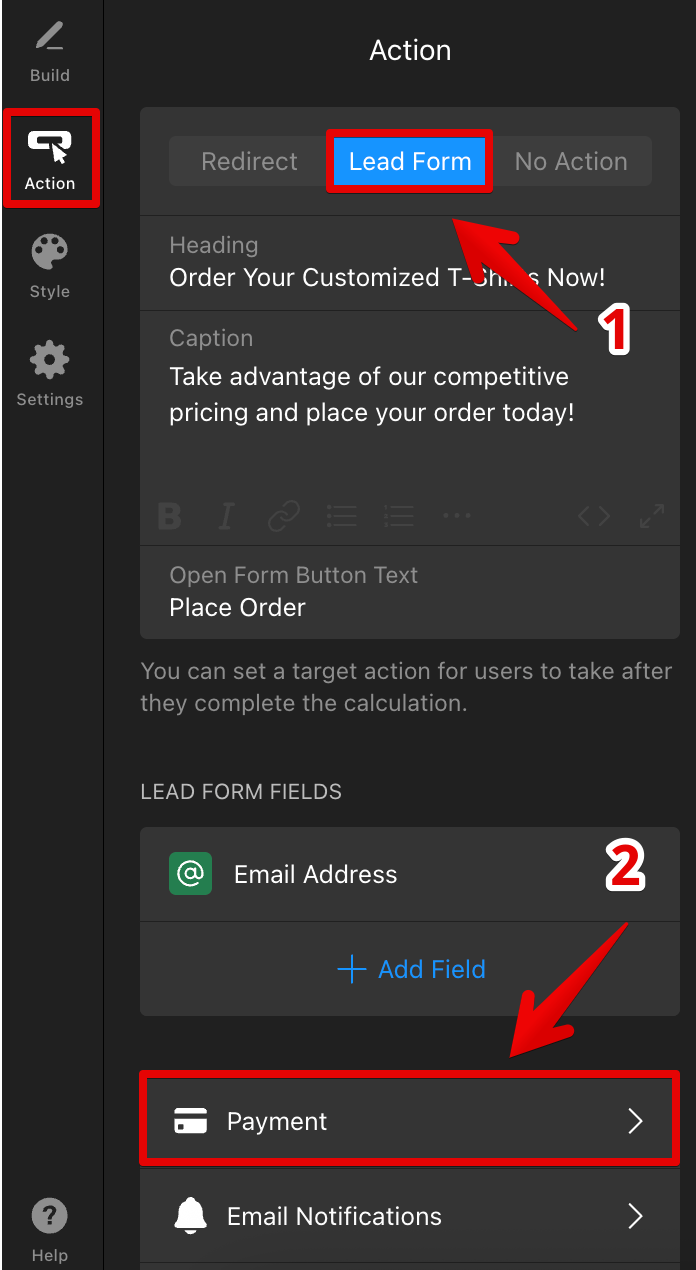
Payments are available only when the Lead Form action is enabled. To learn how to build and customize your form, see How to Collect Submissions Using the Calculator Widget. - 2
-
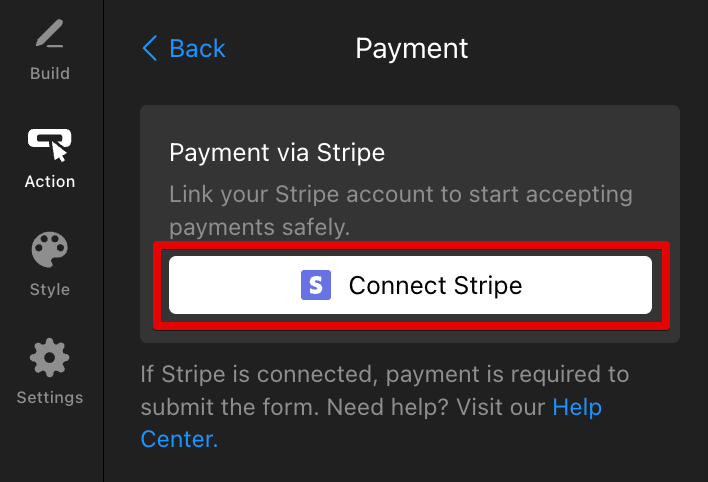
Click Connect Stripe:
- 3
-
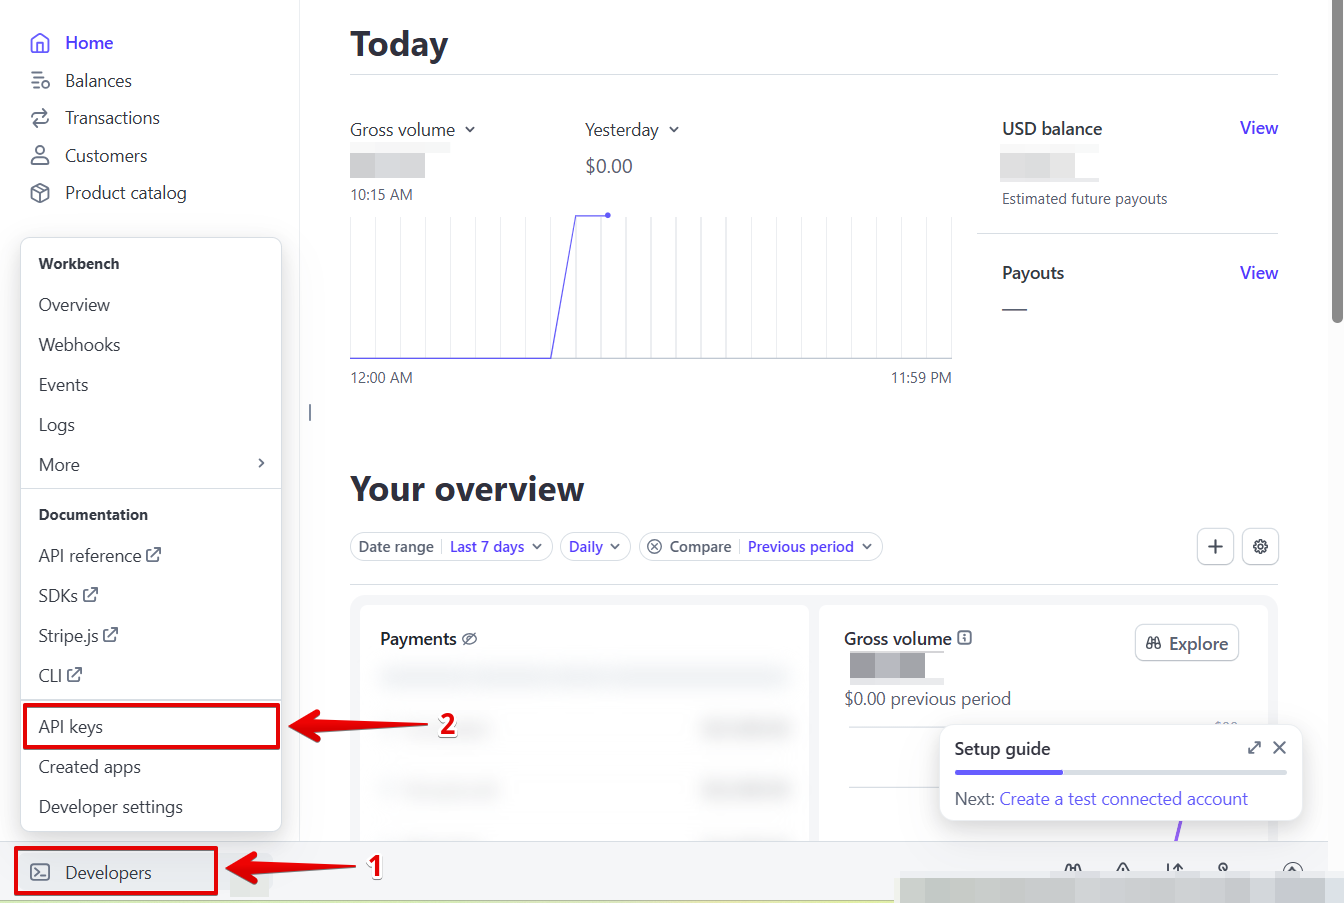
In your Stripe Dashboard, go to Developers → API keys or follow this direct link:
Copy the Publishable and Secret keys:
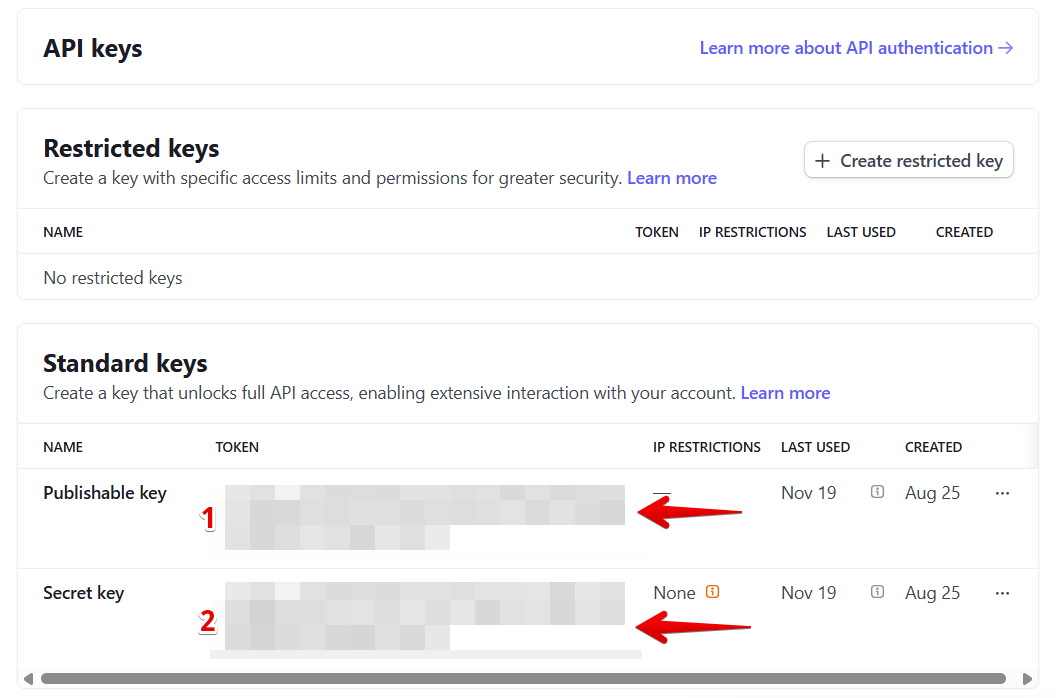
Stripe provides two types of keys: Sandbox for testing and Live for real payments. Make sure you’re viewing the correct environment in your Stripe Dashboard, as each has its own set of keys. Learn more: Stripe API Keys Explained. - 4
-
Return to the widget editor, paste both keys into the fields, and click Connect:
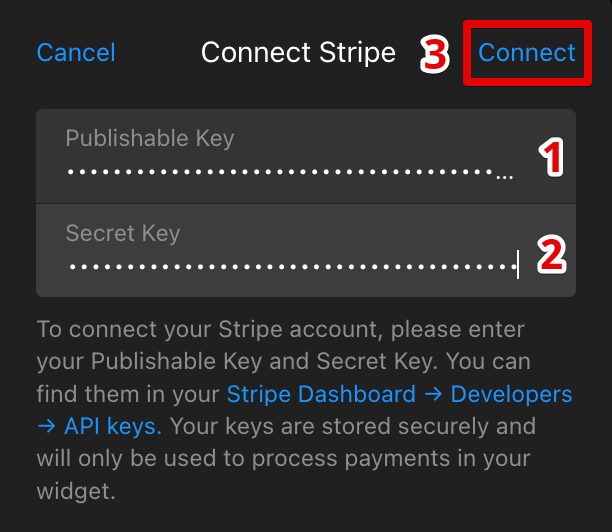


Success! 🎉 Stripe is now connected. To start accepting payments, select a Price Source and configure the checkout settings below.
Completing Your Payment Setup
Choose the Payment Model your customers will use: One-Time or Subscription. If you select Subscription, you’ll also need to choose a Billing Interval (e.g., weekly, monthly, quarterly, or yearly):
Next, select the Price Source — the calculation that defines the final amount your customers will pay at checkout:

Other Checkout Settings
These optional settings help you customize the checkout experience by adding product details, a refund policy, and a confirmation message for your customers: 
- Product Details — add a product name, description, and optional image shown in the order summary.
- Terms & Refund Policy — display your policy during checkout before the customer completes payment.
- Success Message — customize the confirmation message shown after a successful payment.
Nicely done! 🙌 Your widget is now ready to accept payments. Here's how the payment form will appear to your customers:

Viewing Payment Information in Your Submissions
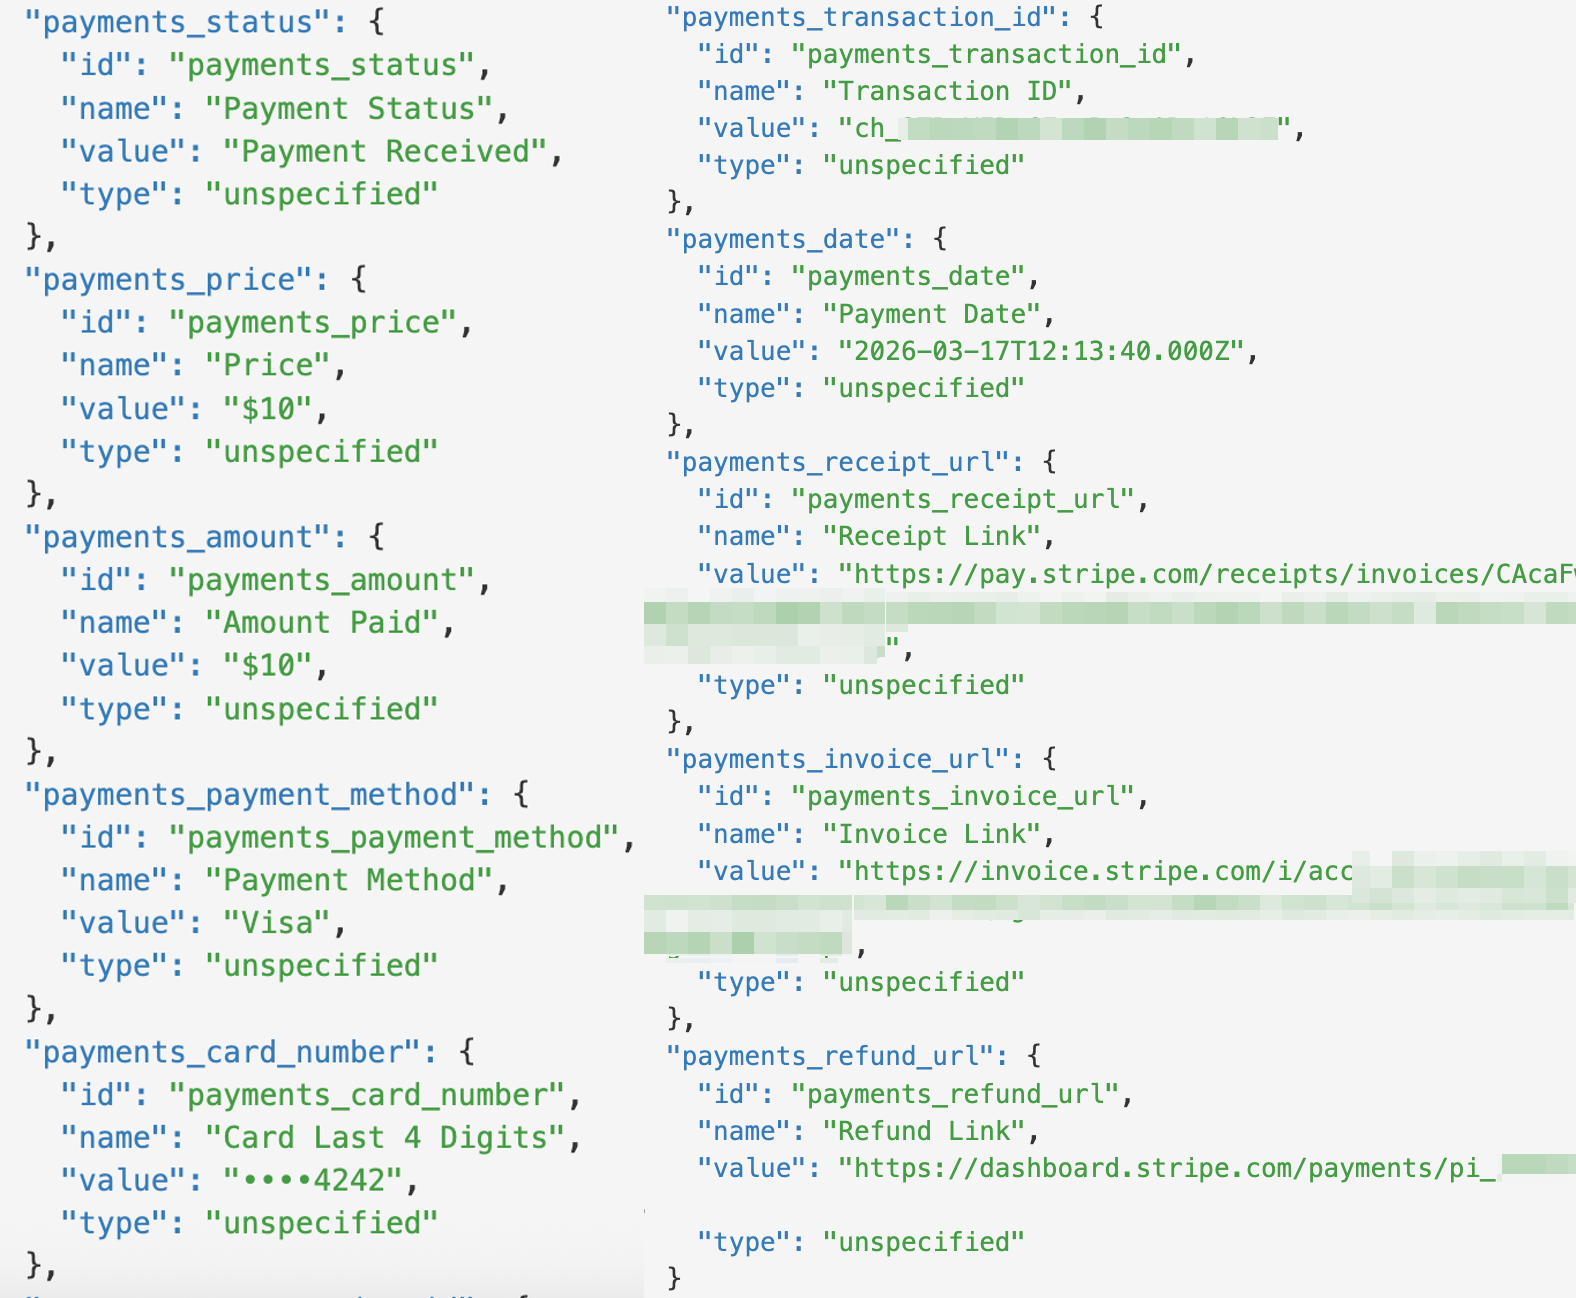
Once payments are enabled, you can access the payment data in your Stripe Dashboard and your submission notifications. The following payment details will be transferred:
| Payment Status | Price |
| Amount Paid | Payment Method |
| Card Last 4 Digits | Transaction ID |
| Payment Date | Receipt Link |
| Invoice Link | Refund Link |
Check the toggles below to see how the information will appear in your submissions.
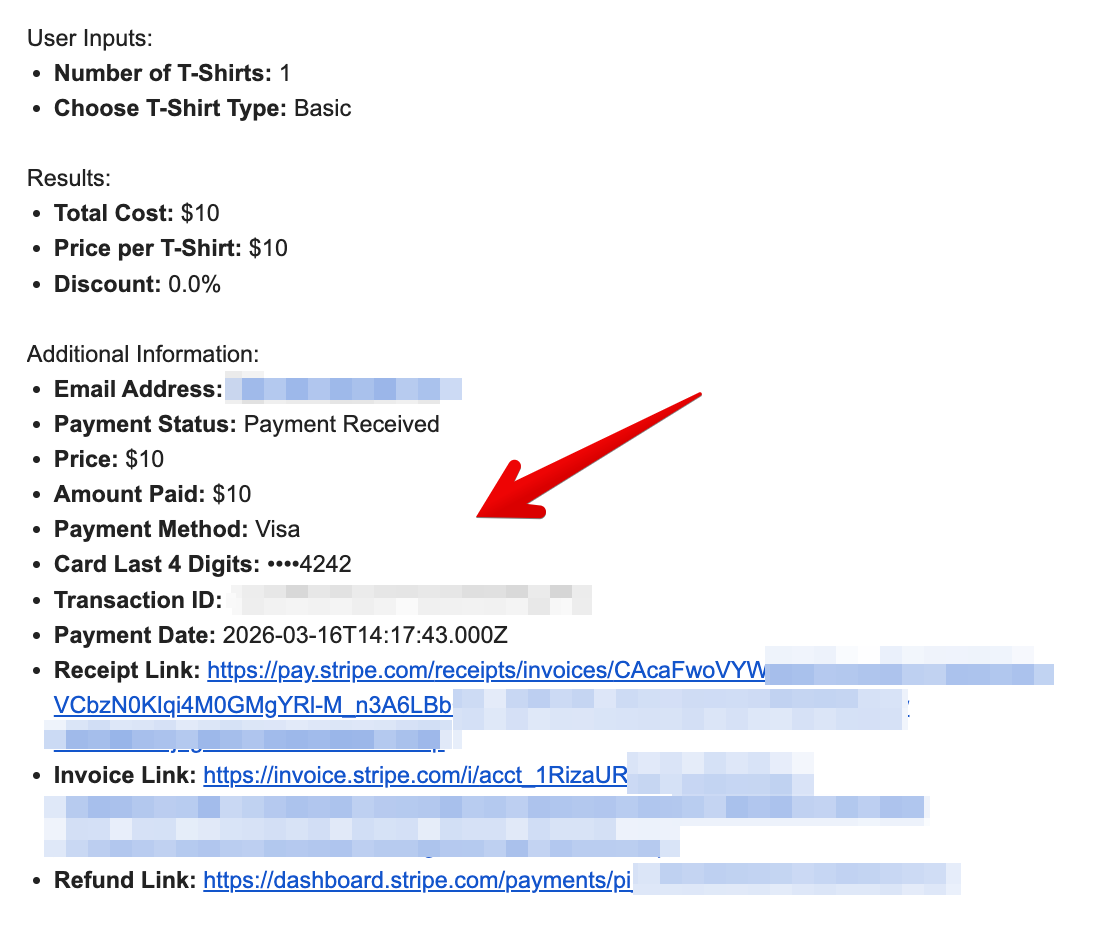
Email Notifications
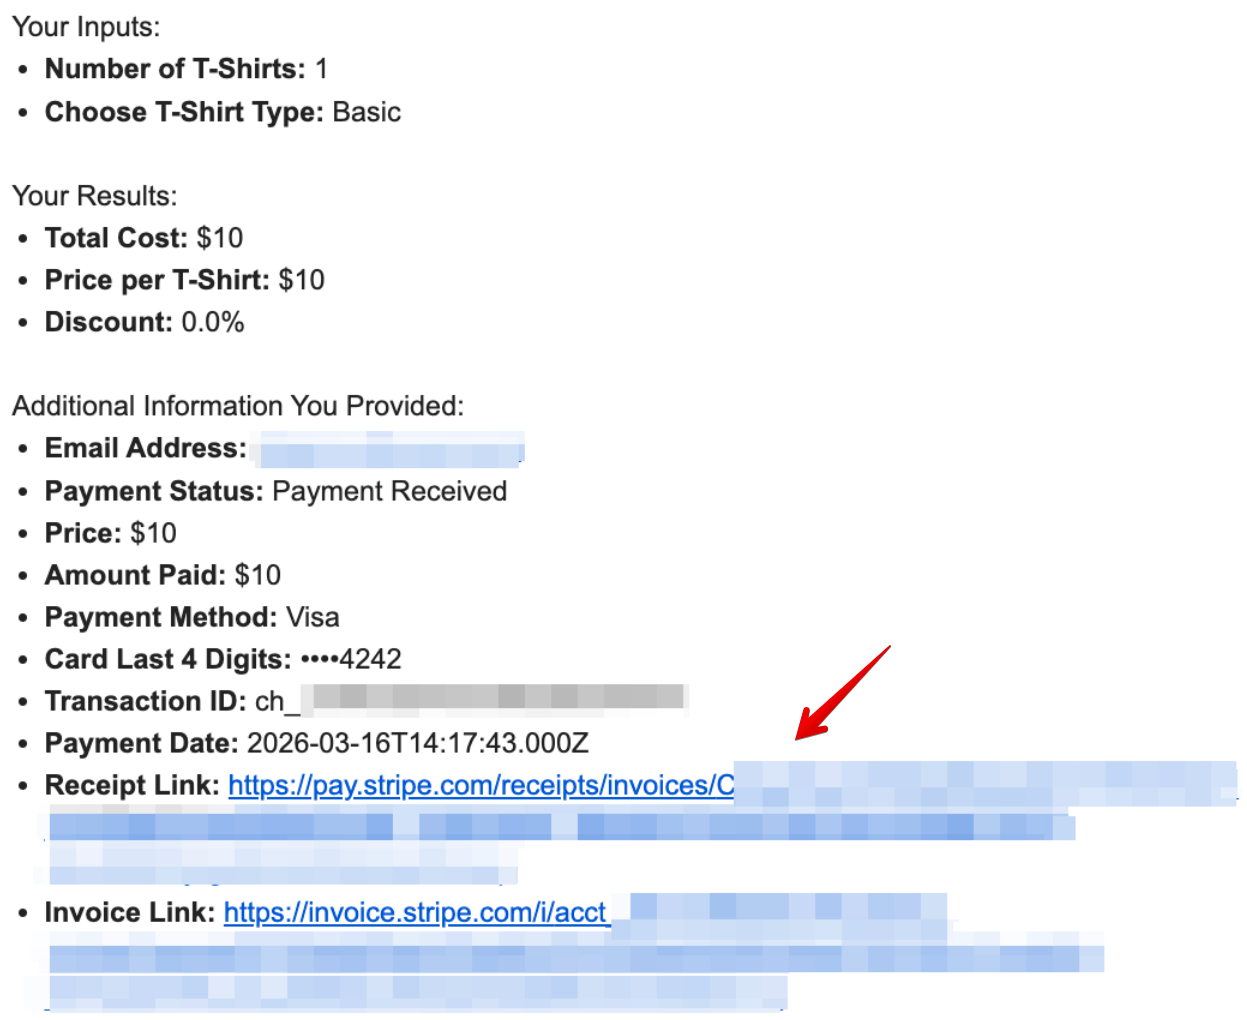
When you receive a new submission email, the payment information will appear like this:
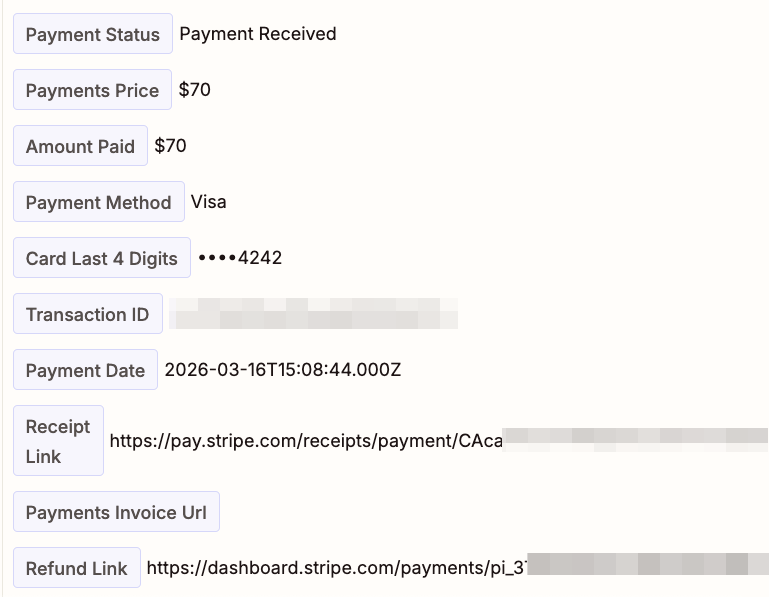
Google Sheets Integration
Here's how the payment details will appear in your spreadsheet:

Zapier Integration
Here's how the payment data will appear in your Zap:
Webhooks Integration
Here's how the payment information will appear in the webhook payload sent with your submission:
Payments are now easy to accept with your Calculator widget! 🙌 If you need any help along the way, feel free to contact our Support team. We're happy to assist!
FAQ
Can I test the integration before accepting real payments?
Yes! Use the API keys from your Stripe Sandbox environment and test payments with Stripe Test Cards.
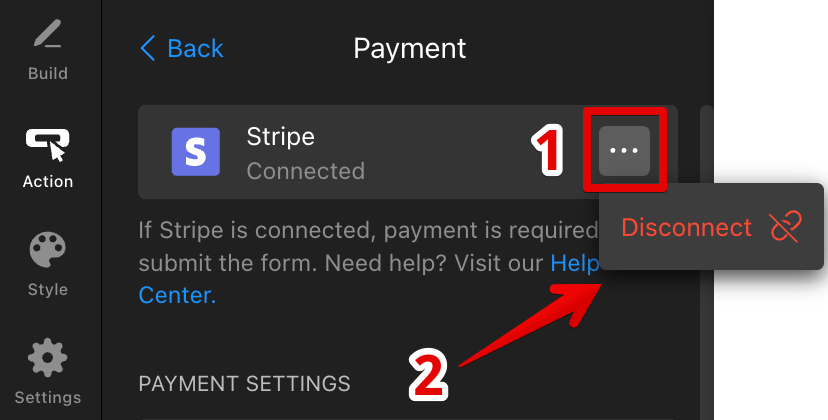
When you're ready to switch to Live mode, in the widget editor, click the three dots next to the integration → Disconnect, and replace the keys with your Live ones:
Can I use a restricted Stripe key in the widget?
Yes. Although your standard Secret Key is secured and used only to process payments, you can use a restricted key instead. Make sure it has the following permissions:
- Checkout Sessions (Write)
- Customers (Write)
- Payment Intents (Write)
- Balance (Read)
- Invoices (Read)
- Subscriptions (Write) for subscription payments
To create a restricted key, follow this guide: Stripe API Keys.
Will my customers get a receipt after payment?
Customers can access their receipt in the email sent after submission:
To send confirmation emails, toggle on Autoresponder Email on the Action tab → Email Notifications → Notify Respondents. For a step-by-step guide, see Send Confirmation Emails.