Step 1: Create and Manage Events
The Event Calendar widget lets you manage and showcase events on your website, helping you organize appointments, special occasions, and other events in a clear, attractive way.
You can add events to your Event Calendar widget in two ways — manually or by importing them from your Google Calendar. Below, we’ll show you both methods so you can pick the one that works best for you.
- 👉 Step 1 – Create and Manage Events
- Step 2 – Customizе Calendar Layout & Filters
- Step 3 – Adjust Style & Advanced Settings
In this article
Adding Events Manually
Adding events manually gives you full control over how your events appear. Сustomize everything — name, time, description, images, tags, colors, and more:
Once added, you can easily manage your events: tweak active events, hide or delete past ones, and find anything in seconds. Organize them with Event Types, set locations via Venues, and assign Hosts to keep your calendar clear and organized.
Follow the guide below to create and manage your events step by step! 🚀
Event Setup Guide
Click the ➕ Add Event button to open the editor where you can fill out the event details: 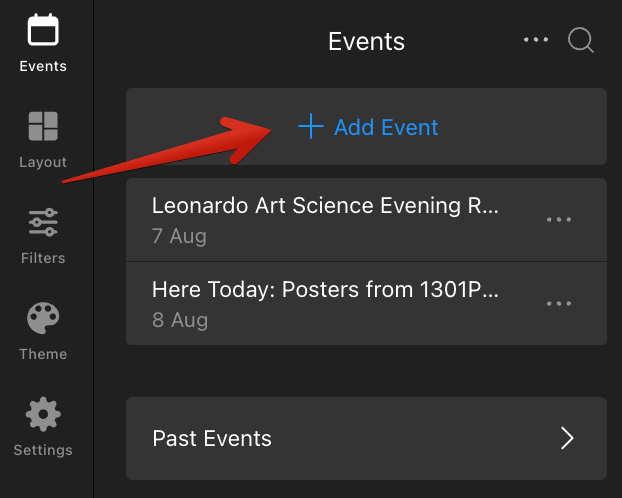 Here’s a breakdown of the options you can customize:
Add Basic Event Information

- 1
-
Event Title — Enter the event name displayed on the calendar.
- 2
-
Start and End Date/Time — Select the event’s start and end dates and times.
- 3
-
All Day — Enable this option for an all-day event, running from midnight to 11:59 PM.
- 4
-
Time Zone — Select the event’s time zone to display the correct time across locations. Learn more in our article on Time Zone Settings.
- 5
-
Repeat — Set how often the event repeats. Learn more about Recurring Events.
- 6
-
Description — Add a detailed description for your event. Use text formatting (bold, italic, etc.) to highlight important details.
- 7
-
Cover Image — Upload the thumbnail displayed next to the event on the calendar.
Customize Event Details

- 1
-
Event Type — Choose an event type from the dropdown. More details below.
- 2
-
Venue — Select the event location. See the Venues section for more info.
- 3
-
Host — Specify the event organizer. See the Hosts section for more details.
- 4
-
Tags — Use tags to categorize events for easy searching and filtering.
- 5
-
Images — Add images to display inside the event popup.
- 6
-
Video — Add a YouTube or Vimeo video link to make the event more engaging.
- 7
-
Actions — Create buttons linking to an external page or form, such as a payment link.
- 8
-
Attachment — Upload PDFs, DOCXs, XLSXs, or images such as JPGs and PNGs.
- 9
-
Custom Event Color — Choose a color to make the event stand out on the calendar.
Managing Events
If you've already created events and need to edit them, you can easily access your events without having to search through the left-side menu.
Simply click on the event you want to edit, and then find the Edit Event button. You’ll be redirected to the event editor, where you can update your event details:

Alternatively, you can use the Search feature to quickly find events by name or description:

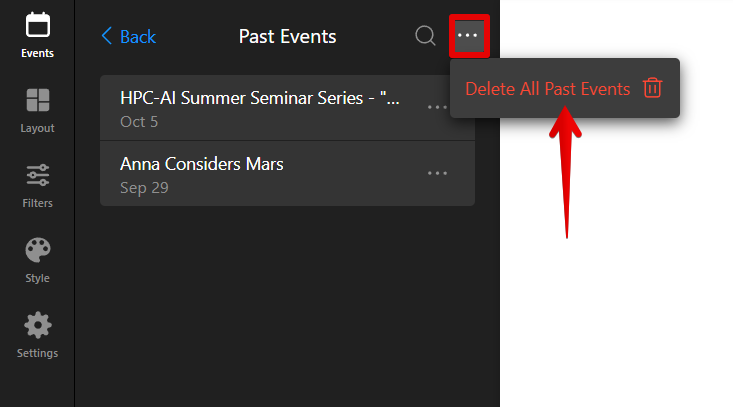
Additionally, you can manage your past events directly from the Events tab. Just click on the Past Events section:
 Here, you can take actions such as:
- Delete All Past Events — Remove all past events at once if you no longer need them:
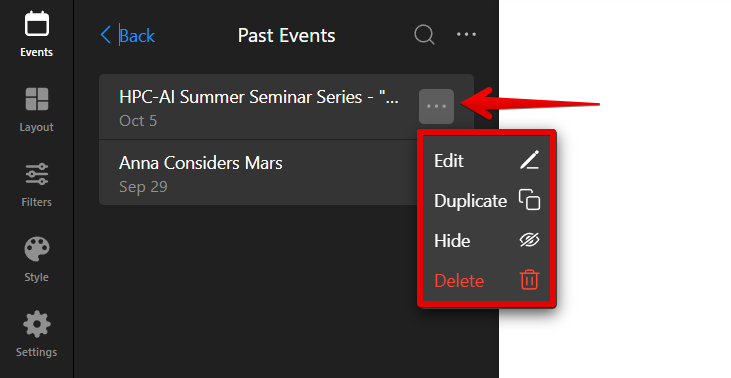
- Edit Past Events — You can also edit individual past events. Click the three dots next to the event you wish to modify, and you’ll have the option to Edit, Duplicate, Hide or Delete the event using the dropdown menu:
These actions can be applied to any event — whether it’s past, active, or upcoming — giving you full flexibility to manage all your events.


Event Types, Venues, and Host
Now, let's set up Event Types, Venues, and Hosts for your events. Each of these can be configured in separate sections: 
Let's explore each of these in detail:
Event Types
Create event types to better organize and filter your events. Here’s how to set them up:
- Go to the Event Types section and click ➕Add Event Type.
- Enter a name for the event type.
- Optionally, add the icon or assign a color to distinguish event types visually.
- Click Done to save.

Venues
Use this feature to define the location of each event, whether physical or virtual. Follow these steps to configure venues:
- Click on the Venues section and select ➕Add Venue.
- Enter the venue name.
- Optionally, add an address or website URL for virtual events.
- Click Done to save.

Hosts
Specify the host of the event, whether an individual, team, or organization (e.g., company). Here’s how to add hosts:
- Click on the Host section and click ➕Add Host.
- Enter the host’s name.
- Optionally, add phone, email, website, or logo.
- Click Done to save.

Once you've added Event Types, Venues, and Hosts, you can now apply them to individual events or set up filters in the Filters tab for easier sorting:
- Assign a type, venue, or host to specific events during creation or editing.
- Enable filters to help visitors sort events by type, venue, or host:

Adding Events via Google Calendar Integration
To manage everything in one place, our widget seamlessly integrates with Google Calendar. Simply add and configure your events in Google Calendar, and they will automatically sync with the widget. Voilà!
To set up this integration, select Connect to Google Calendar here:
 Alternatively, if you’ve already added events manually, you can easily import them from Google Calendar by going to the Google Calendar Integration section:

A new popup window will appear, allowing you to connect your Google Calendar. For more details, see our guide on Importing Events from Google Calendar.
That’s it! 🎉 Your events are now added and displayed on your calendar. Now, let's move on to customizing your widget’s layout to match your website’s style and tone.