Time Zone Support in Event Calendar Widget
Elfsight Event Calendar offers flexible time zone settings, so your visitors always see the correct event time. You can set a specific time zone or display events in the visitor’s local time. This article explains all available options.
In this article
Displaying Events in Your Chosen Time Zone
By default, Event Calendar displays events in the time zone set for each event. This helps visitors from other regions understand when the event takes place in their local time.
Here is how you can configure a specific time zone for an event:
- 1
-
Go to the Events tab, open an event, and select the desired time zone from the dropdown:
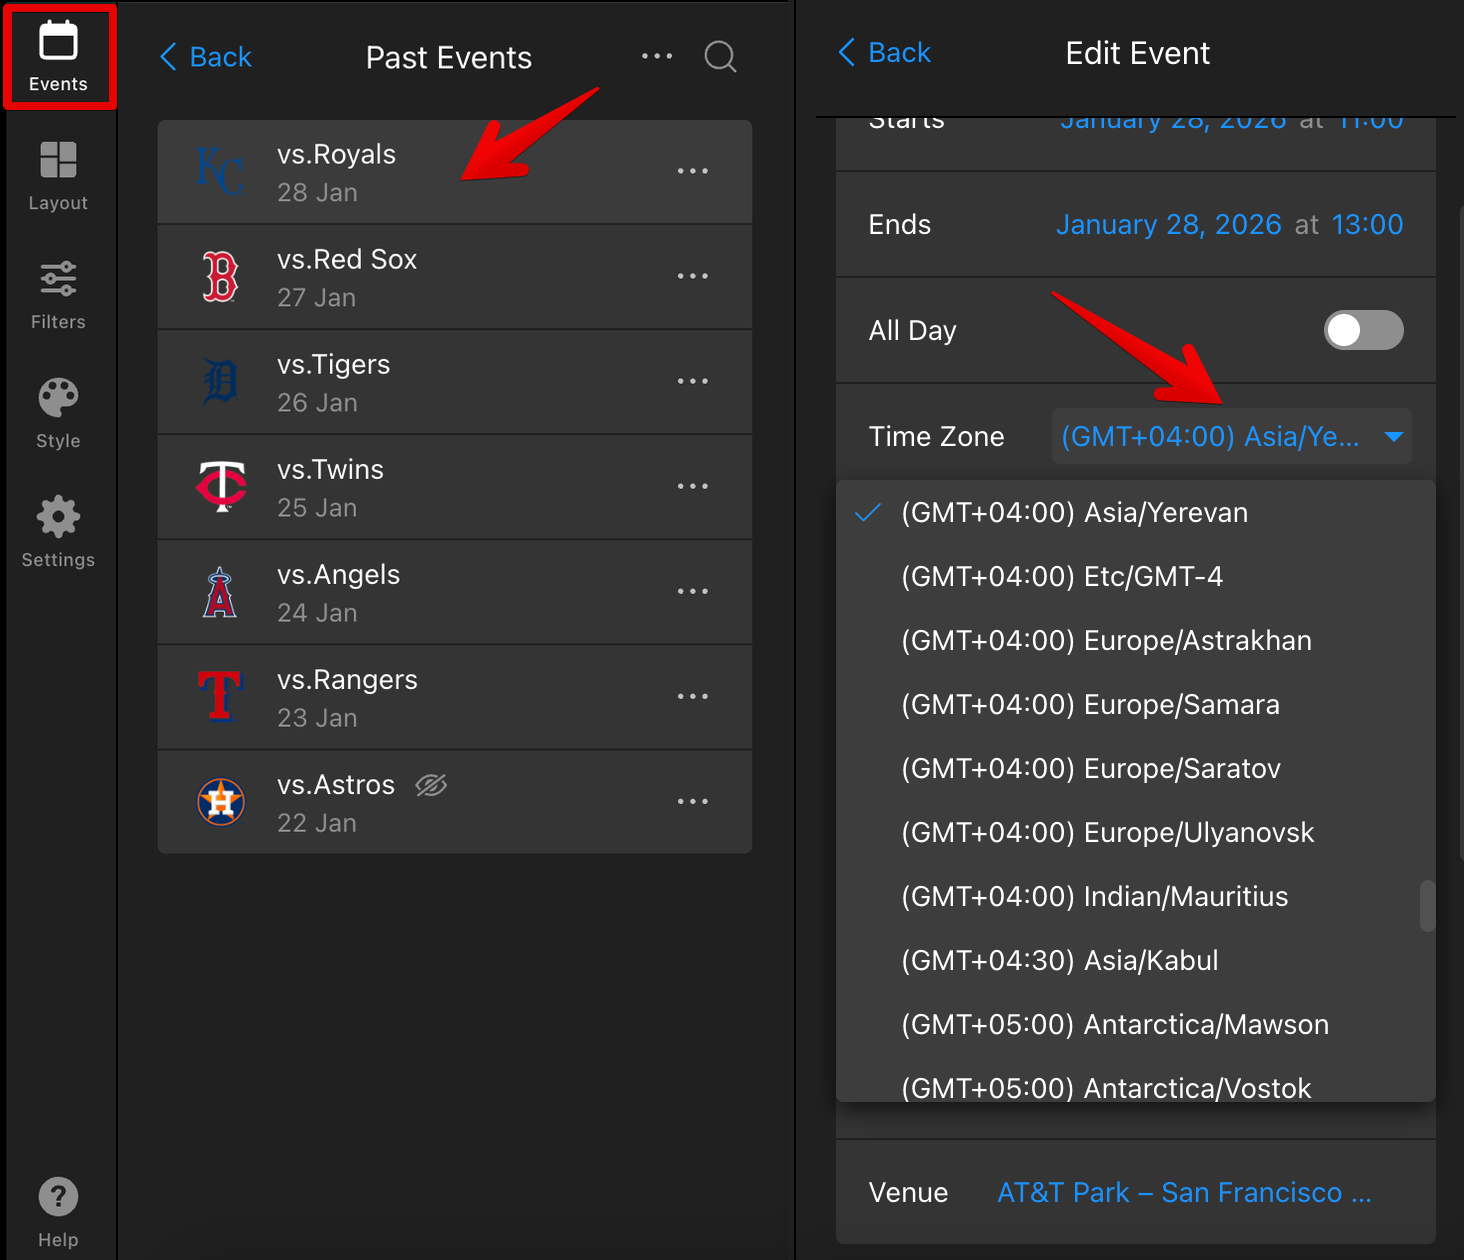
When adding a new event, the widget will automatically detect your time zone. To ensure accurate time zone detection, please refrain from using a VPN while working with the widget. - 2
-
Make sure to keep the Events in Visitors Local Time Zone toggle switched off on the Settings tab:


Great! Your events are now displayed in the selected time zone. For visitors in other regions, the time zone label will appear next to the event time: 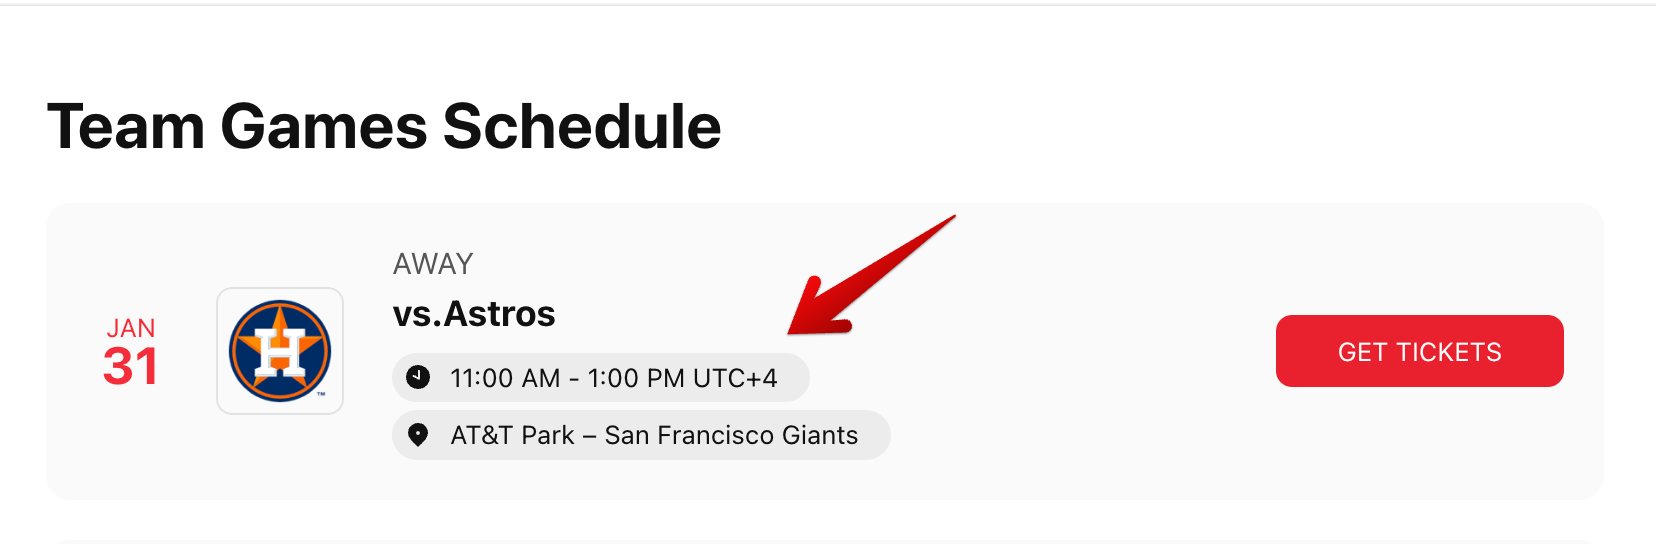
Displaying Events in Visitors' Local Time Zone
This option may come in handy for online events. When Events in Visitor Local Time Zone is enabled, the time zone is automatically adjusted for each user, and events are displayed in their local time.
For example, if you're in Toronto and your customers are in Paris, set the event time according to your local time zone. If an event starts at 3:00 PM Toronto time, it will be displayed as 9:00 PM for your customers in Paris.
To achieve this, simply enable the Events in Visitors Local Time Zone option on the Settings tab:
Well done! Now your customers definitely won't miss your events.
Time Zone Settings for Google Calendar Events
When Google Calendar integration is enabled, the widget displays events according to the time zone set for each event in the connected Google Calendar.
To configure the time zone for your event in Google Calendar, follow these steps:
- 1
-
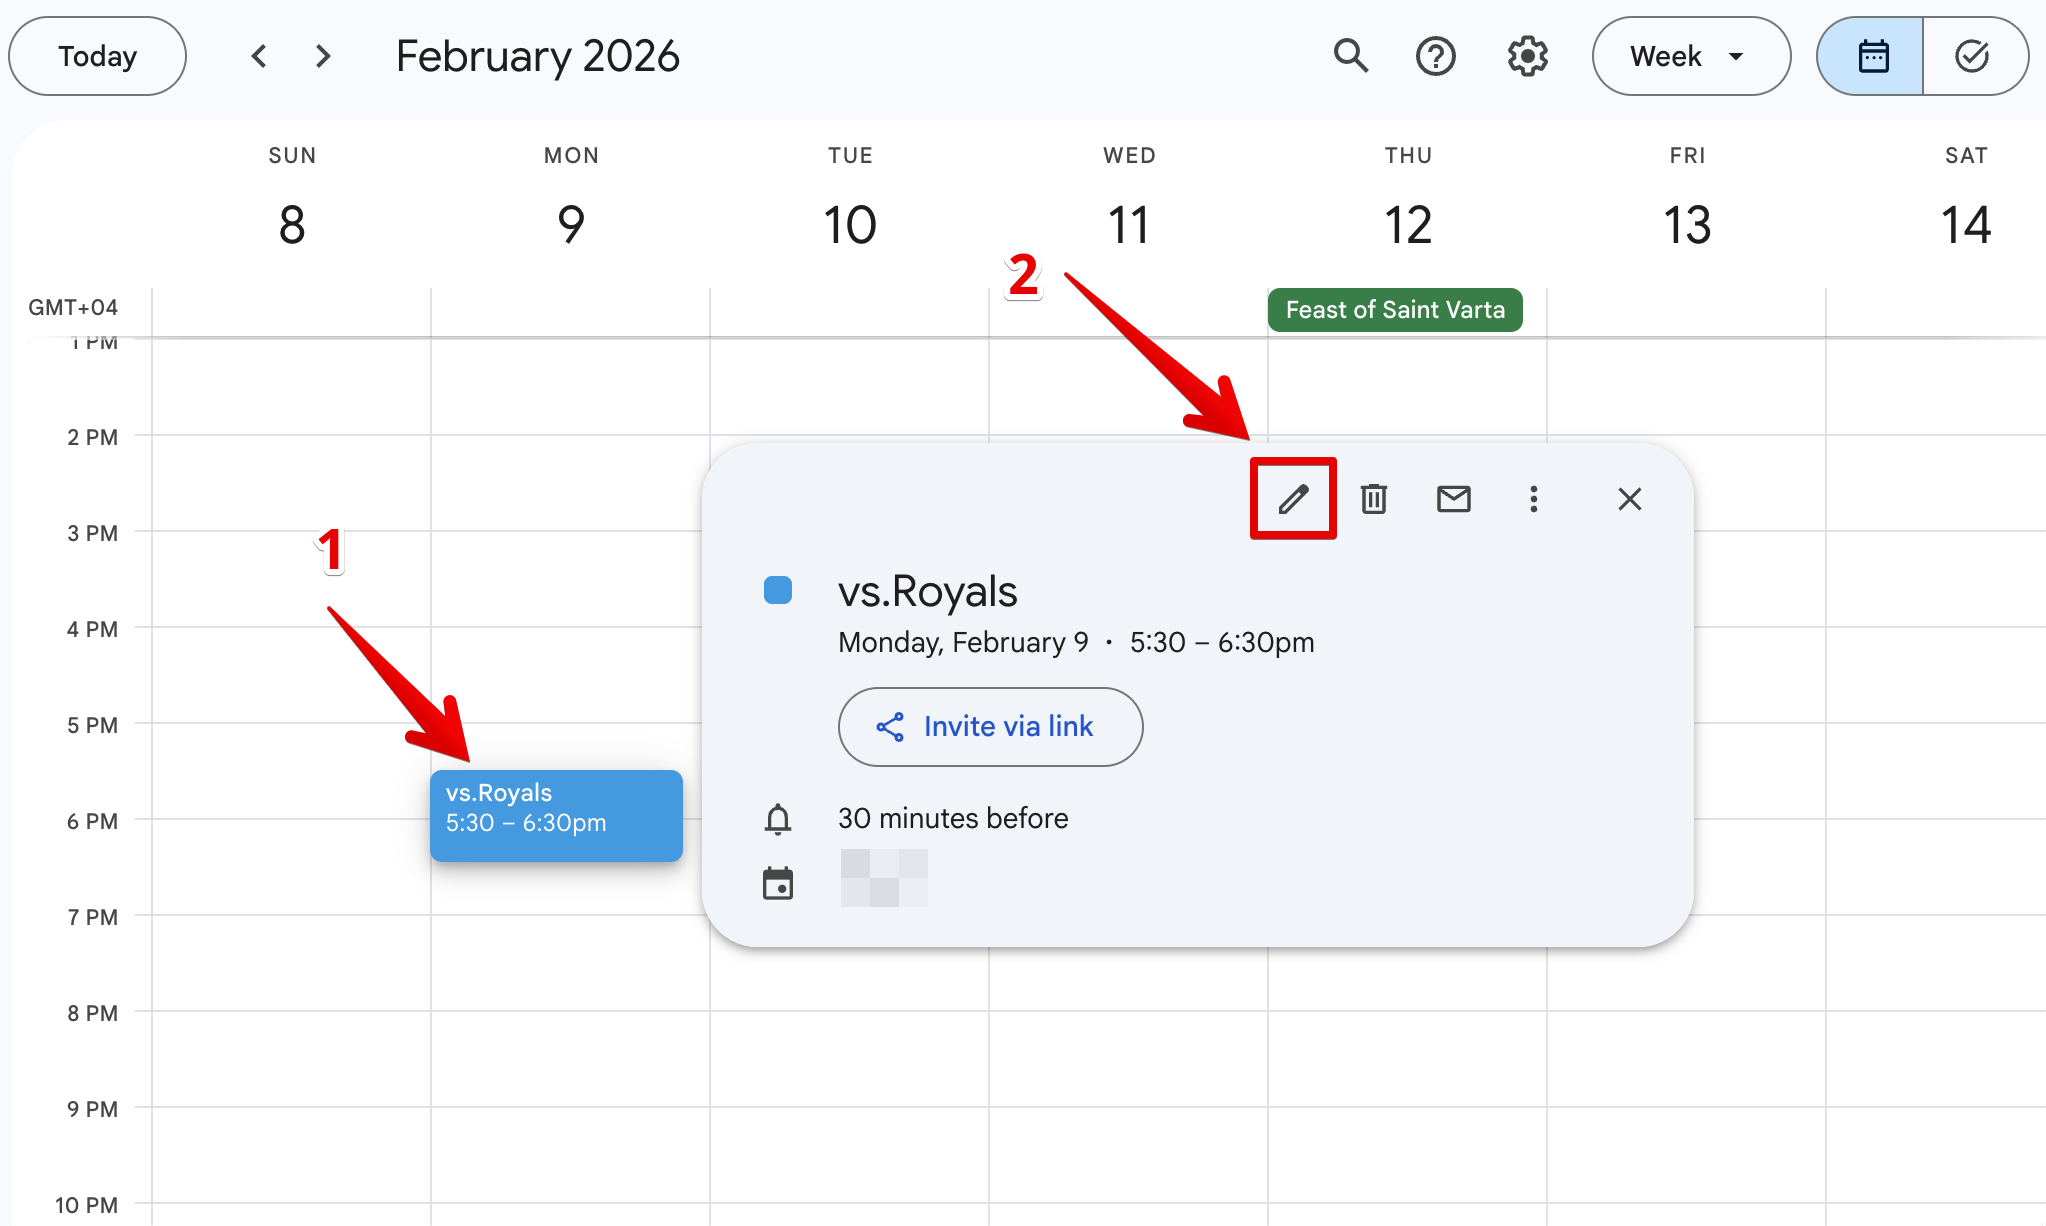
Open the Google Calendar connected to your widget, select the event, and click the Pencil (Edit event) icon:
- 2
-
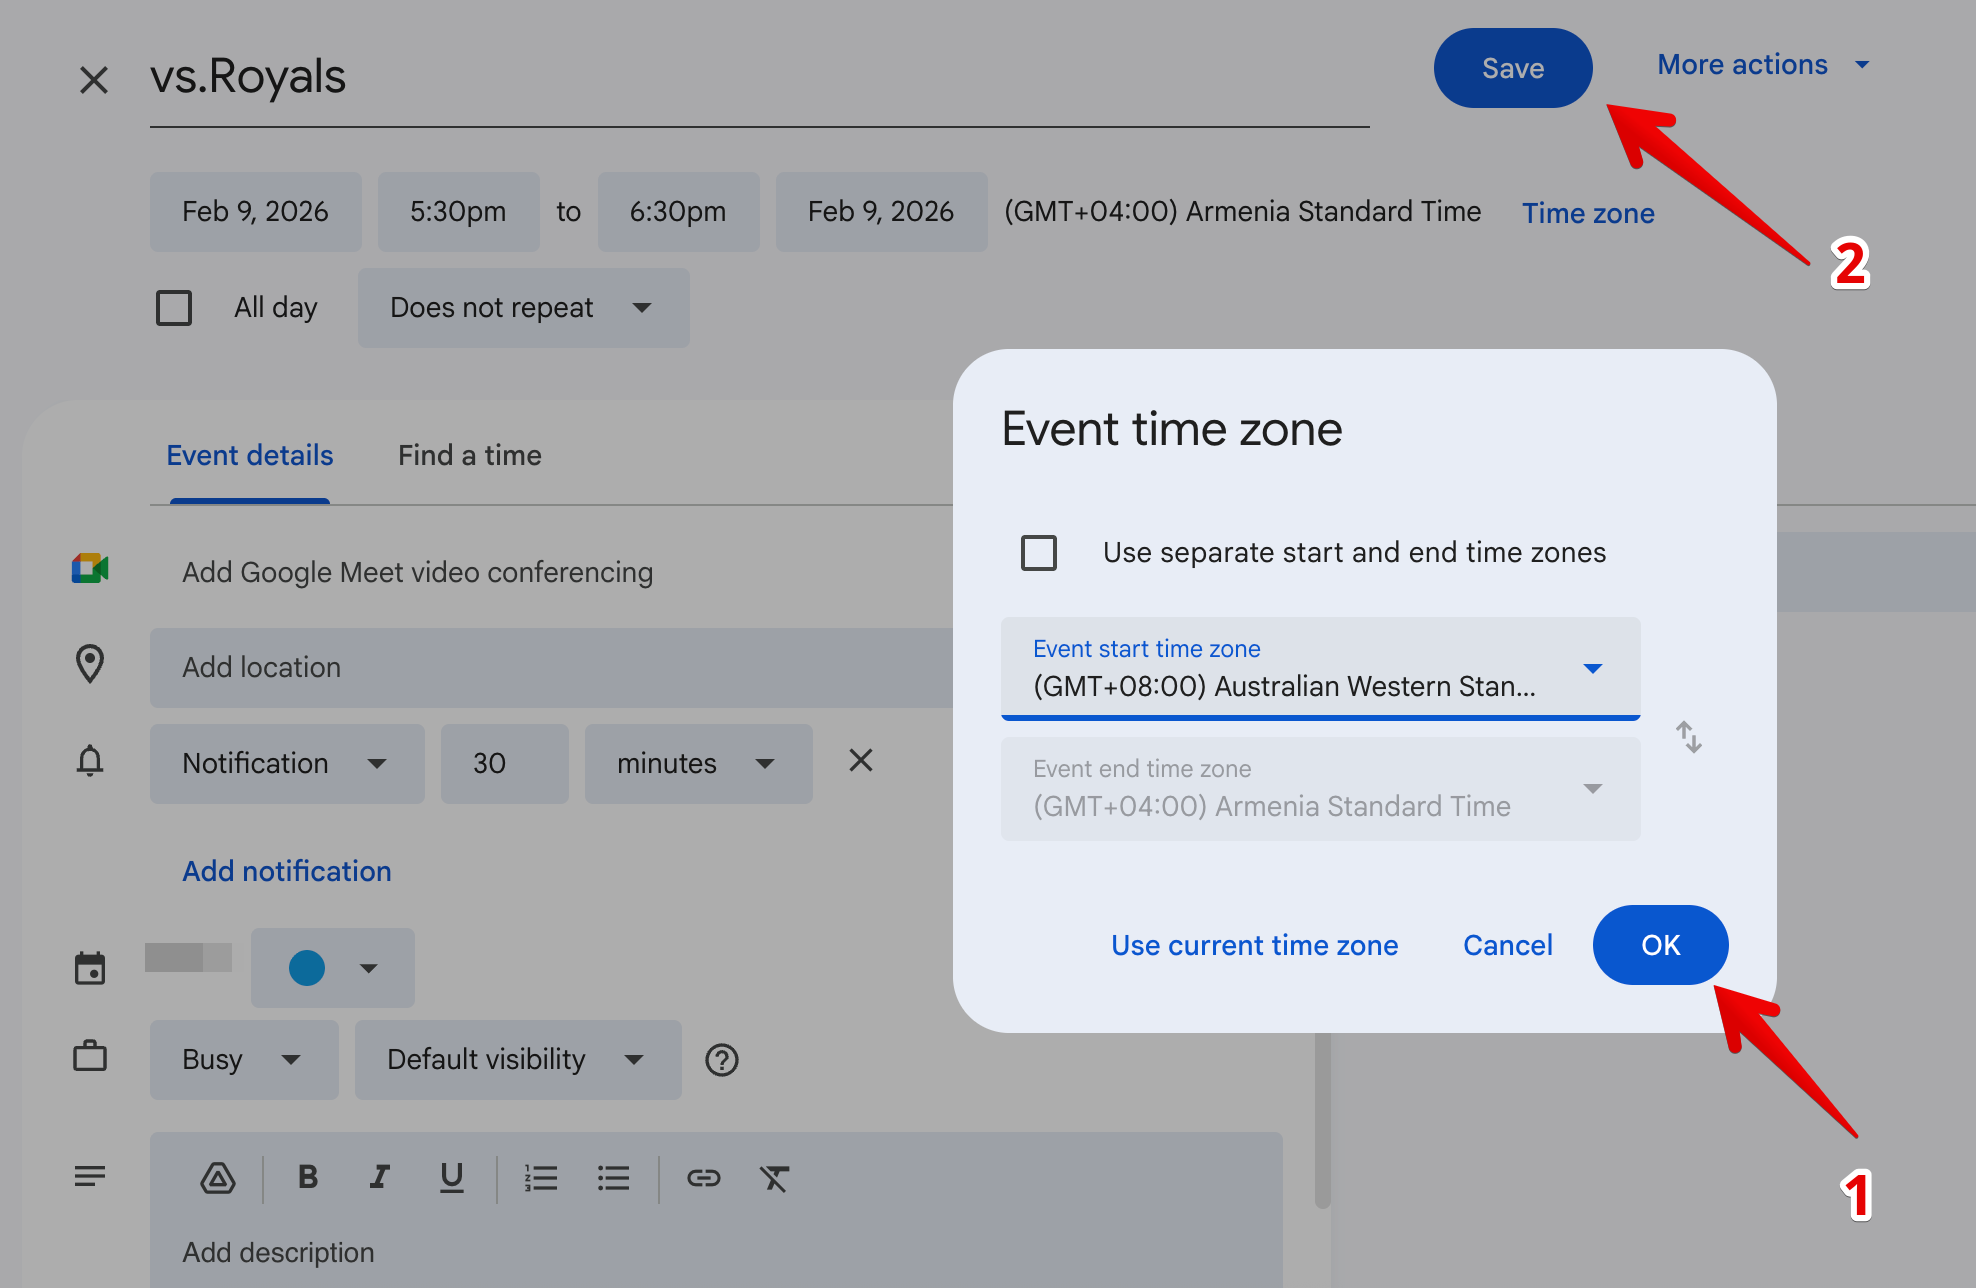
On the event edit page, click Time Zone and set your event time zone:
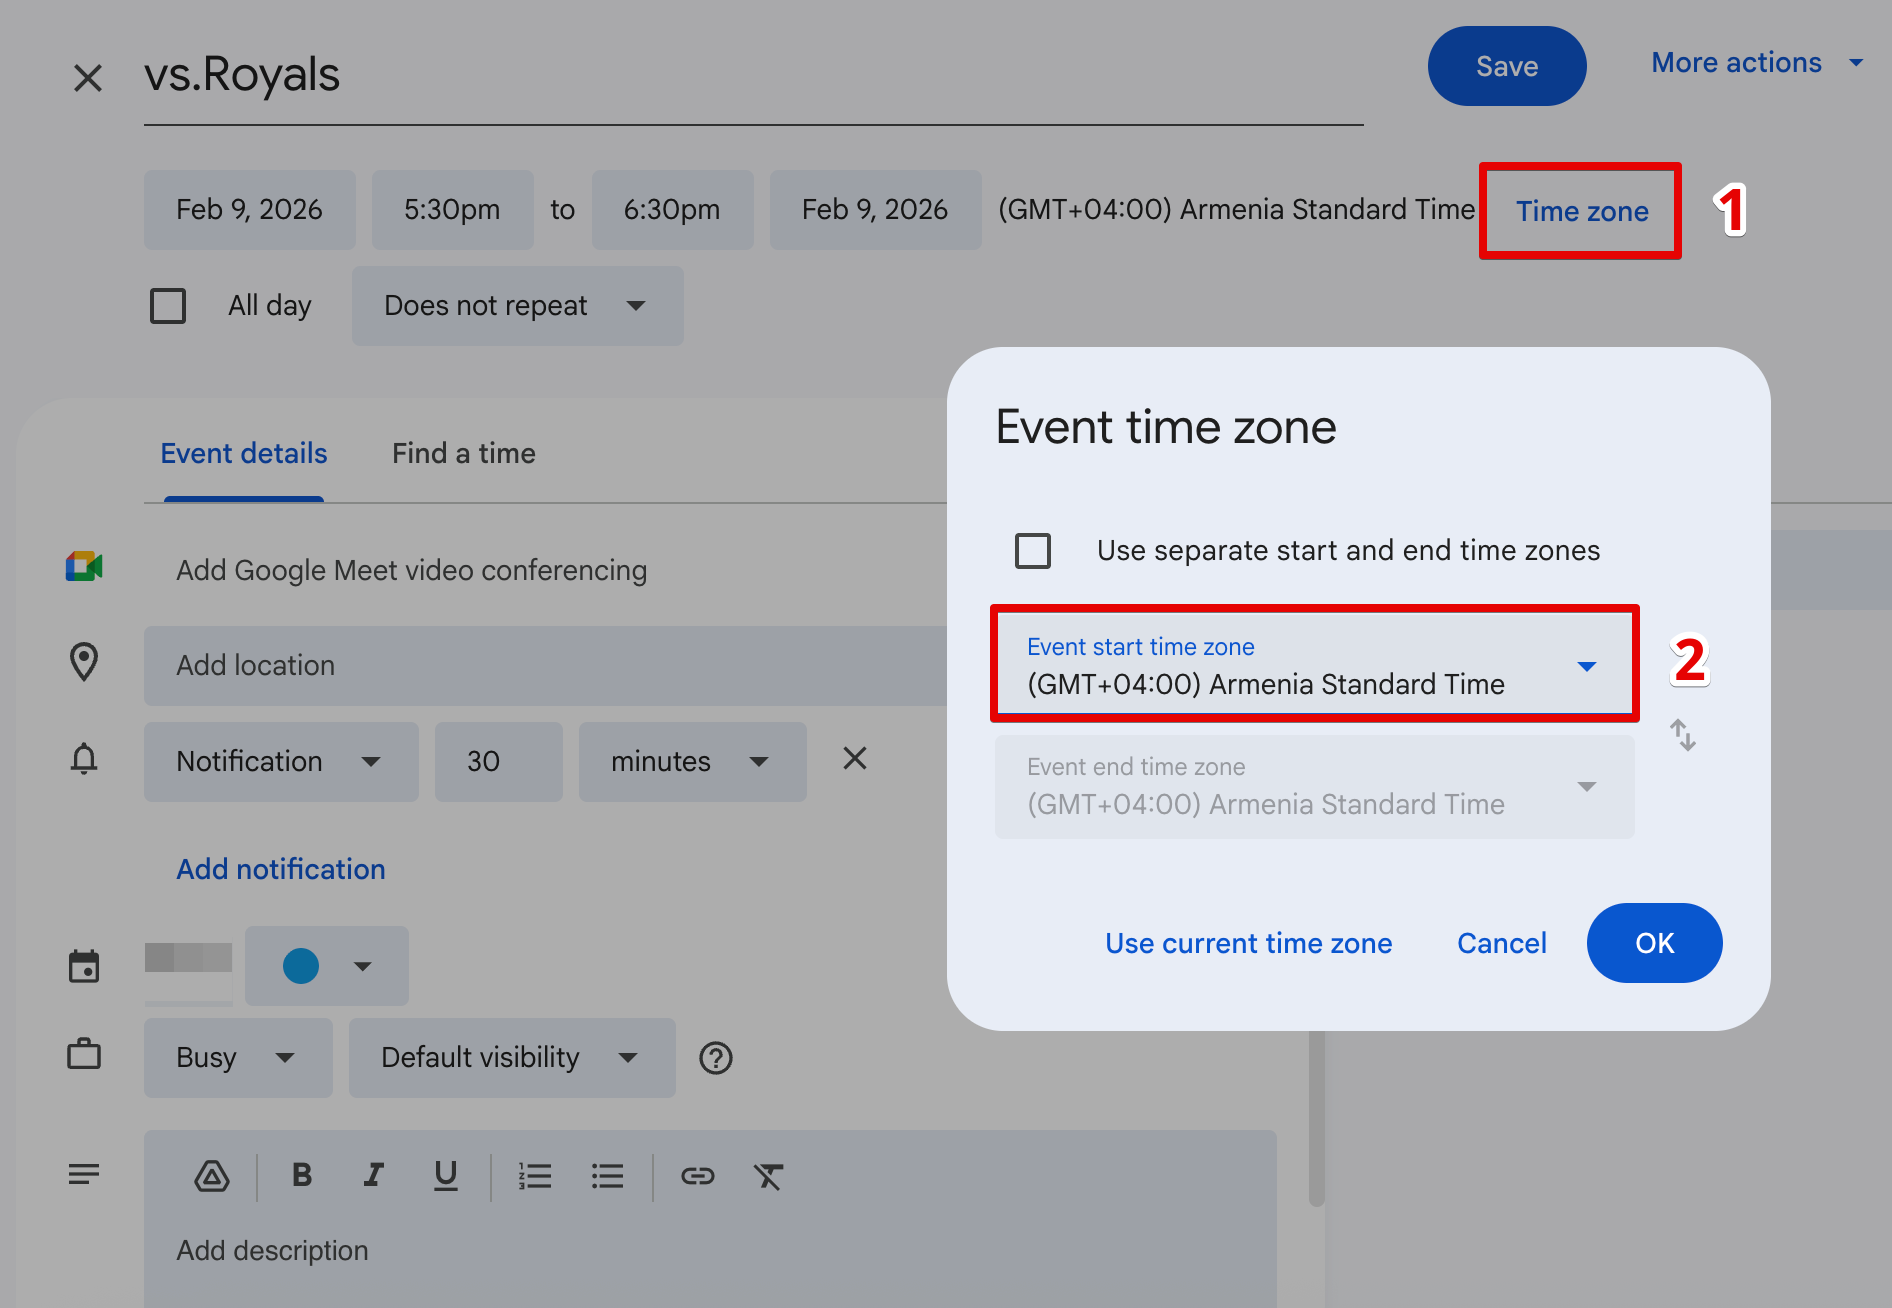
If needed, you can set different time zones for the event’s start and end times. However, please note that only the start time zone will be displayed in the widget.
- 3
-
Click OK and Save:
- 4
-
In the widget editor, make sure the Events in Visitors Local Time Zone option in the Settings tab is disabled:


Done! Your event will now be displayed in the time zone you set in Google Calendar.
If you have questions about time zone settings or need help configuring your events, feel free to contact our Support team — we’ll be happy to assist. 🙌