Importing events from Google Calendar to Event Calendar
Sync Google Calendar with your Elfsight Event Calendar widget to manage events in Google and display them automatically in the widget. This keeps your calendar up to date with minimal effort. Let’s dive in! 🚀
In this article
Connecting Google Calendar
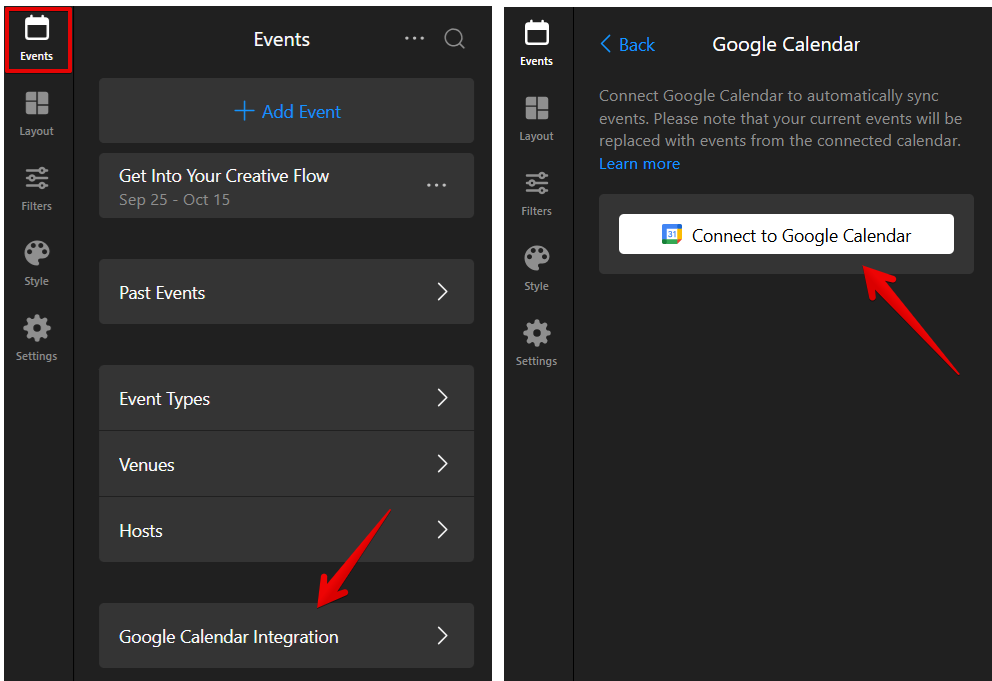
Follow these steps to connect Google Calendar to your Event Calendar app, whether you're starting from scratch or already have manually created events.
- 1
-
In the Events tab, click Connect to Google Calendar:
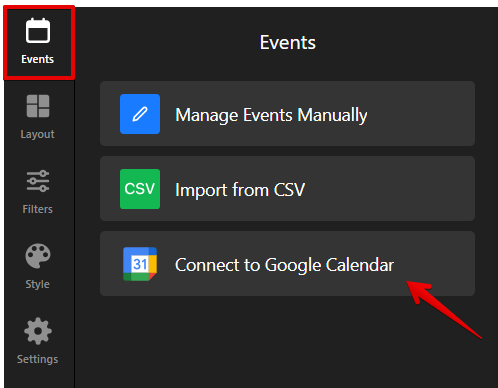
If you already have manually created events, the button will appear under the Google Calendar Integration section:
- 2
-
In the pop-up window, choose the Google account you want to connect:

Next, click Continue:

Finally, allow Elfsight the required permissions:

- 3
-
Once connected, choose the calendar you wish to sync:

If no calendars are found, check your available Google calendars and ensure all permissions are granted during the reconnect.


That's it! Your Google Calendar is now successfully synced with the widget. ✨
Managing Synced Events
To manage synced events, click Open Google Calendar. This will open the Google Calendar connected to your widget, where you can edit your events:

The widget automatically syncs basic event details from standard Google Calendar fields. You can also add extra event details using special tags.
Basic Fields Mapping
The table below shows how standard Google Calendar fields are transferred to Elfsight Event Calendar:
| Google Calendar Field | Event Calendar Field | |
|---|---|---|
| 1 | Title | Event Name |
| 2 | Schedule
|
Start & End Date and Time |
| 3 | Location | Venue / Address |
| 4 | Description | Event Description |
Here’s how these fields appear in Google Calendar: 
Using Tags for Event Details
Some Event Calendar details, such as hosts, images, buttons, and files, are not available as basic Google Calendar fields. To display them in the widget, you can add special tags to the Google Calendar event’s Description field.
Open the toggles below to find the tags for each event detail:
Add Organizer & Venue
| Tag | Description / Format |
|---|---|
| Venue |
Use this tag to add venue details. Alternatively, you can use the Google Calendar Location field. [venue] name=LOCATION NAME address=LOCATION ADDRESS website=WEBSITE LINK [/venue] |
| Host |
Use this tag for adding organizer details. [host] name=HOST NAME email=test@example.com phone=HOST PHONE NUMBER website=HOST WEBSITE LINK logo=DIRECT IMAGE LINK [/host] |
Add Tag, Event Type & Color
| Tag | Description / Format |
|---|---|
| Event Type |
Use this tag to define the event type. You can also specify the color using hex values (e.g., [event-type] name=EVENT TYPE NAME icon=DIRECT IMAGE LINK color=rgb(17, 255, 0) [/event-type] |
| Event Color |
Use this tag to assign a color to the event. Hex color values (e.g., [event-color] color=rgb(17, 17, 17) [/event-color] |
| Tag |
Use this simple code to add a tag to your event. You can add the code multiple times to assign several tags. [tag] name=TAG NAME [/tag] |
Add Image & Video
| Tag | Description / Format |
|---|---|
| Image |
Attach an image to the Description field or use this tag to include an image directly in the event. [image] url=DIRECT IMAGE LINK alt=ALT TEXT [/image] |
| Video |
Use this tag to add a Vimeo or YouTube link to your event. [video] url=YOUTUBE LINK [/video] |
Add File & Button
| Tag | Description / Format |
|---|---|
| File |
Use this tag to add a downloadable file to your event description. [file] url=FILE DIRECT LINK caption=YOUR TEXT [/file] |
| Button |
Use this tag to add a clickable button to your event. [button] text=BUTTON TEXT caption=ADDITIONAL TEXT IF NEEDED link=WEBSITE FOR REDIRECT target=_blank [/button] |
Formatting Rules
- To ensure correct syncing, edit the tags in a text editor (like Notepad or Sublime) and then paste them into your event description.
- Add the tags below the main text in the Description field for successful sync.
- Put each property on a separate line, following the
key=valueformat. - If you don't need a specific value, simply remove the line from the tag.
Here’s an example of a Google Calendar event description field with tags added: 
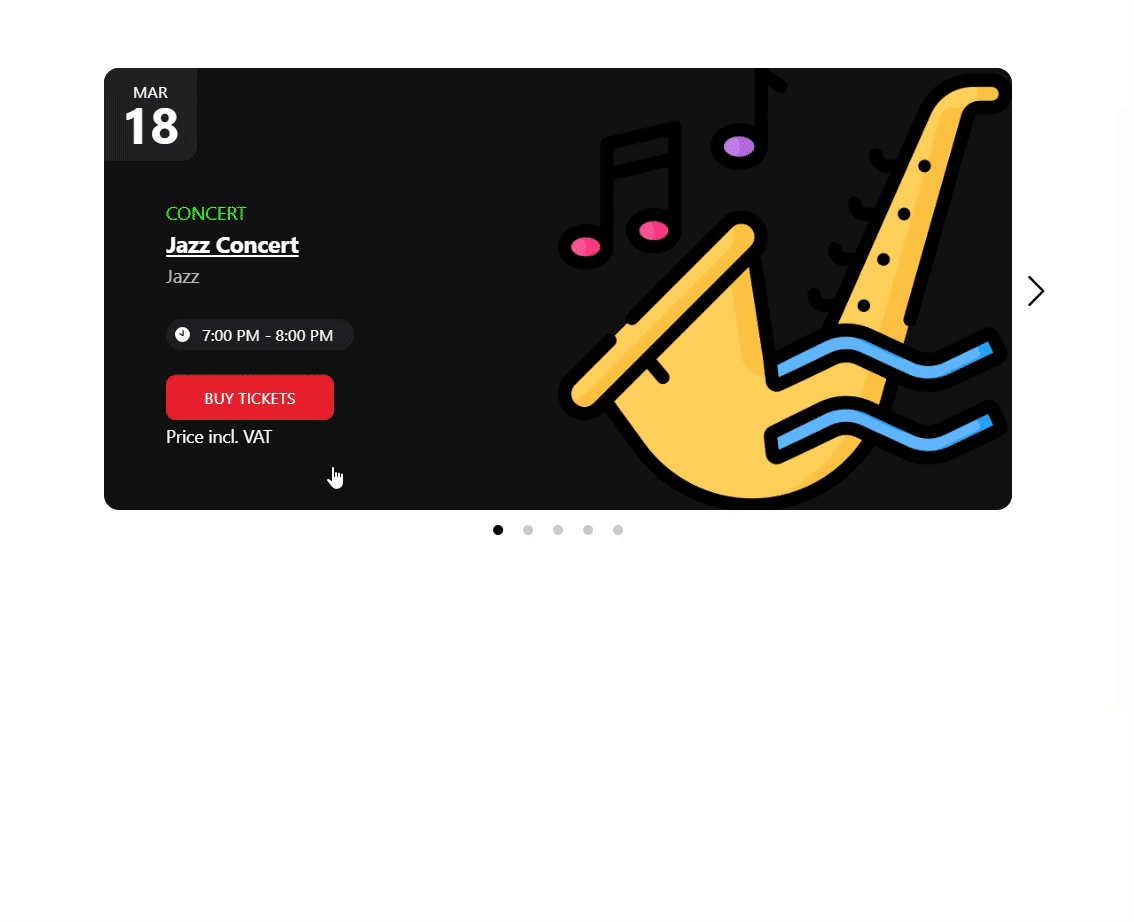
And here's how the synced tags appear in the Event Calendar widget:
Switching Between Google Calendars
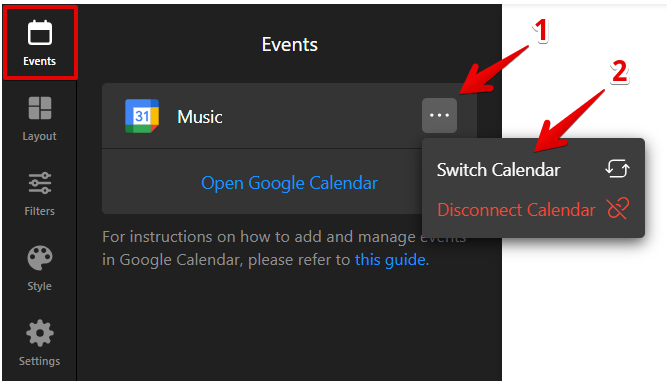
If you use multiple Google Calendars and want to display a different one in the widget, follow the steps below.
- 1
-
In the Events tab, click the three-dots menu and select Switch Calendar:
- 2
-
Choose a new calendar from the list:


Done! Your widget is now synced with a new Google Calendar.
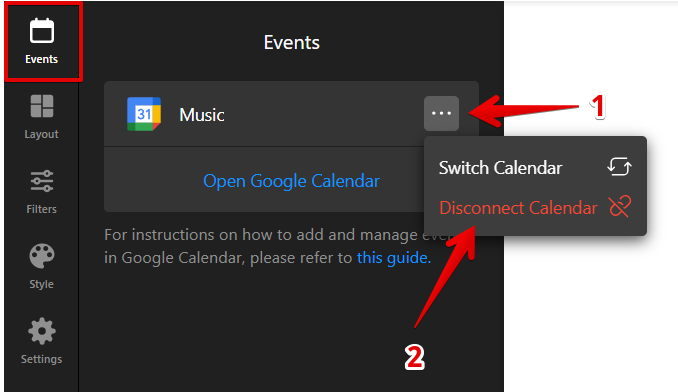
Disconnecting Google Calendar
If you'd like to remove the Google Calendar integration from your widget, here's how to do it:
- 1
-
In the Events tab, click the three-dots menu icon and select Disconnect Calendar:
- 2
-
Confirm by clicking Disconnect in the next window:

- 3
-
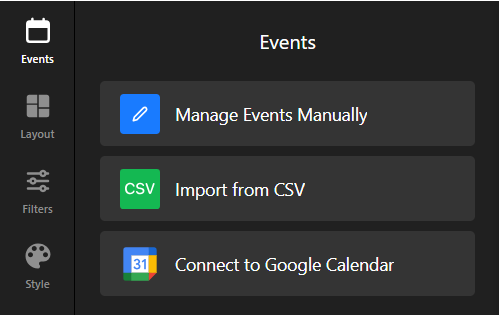
Choose between the available connection options. If you select Manage Events Manually, any previously added events will reappear:


You're all set! Now you know how to sync and manage Google Calendar in your Elfsight Event Calendar widget. Happy planning!
FAQ
Can I edit my Google Calendar events using Elfsight Event Calendar?
No, the synchronization is one-way. The Event Calendar widget can display events from Google Calendar but cannot modify them.
How soon will changes in Google Calendar appear in the widget?
Changes made in Google Calendar, such as creating, editing, or deleting events, appear in the widget almost instantly. Simply refresh the page with your widget to see the changes.
How many Google Calendars can I sync with the widget at the same time?
Currently, you can sync only one Google Calendar with the widget at a time.
How many events will be synced?
At this time, the widget typically displays around 100 recent events, but can show up to 200 depending on the selected layout and filters.