Step 2: Set Up Email Notifications & Integrations
Once you've built your form, it's time to make sure you receive submissions and connect your form with your favorite tools. In this step, we'll cover how to set up Email Notifications and Integrations in your Elfsight Form Builder widget.
- Step 1 – Build Out Your Form
- 👉 Step 2 – Set Up Email Notifications & Integrations
- Step 3 – Choose Form Layout & Customize Appearance
- Step 4 – Adjust Display & Advanced Settings
In this article
Receive Email Alerts
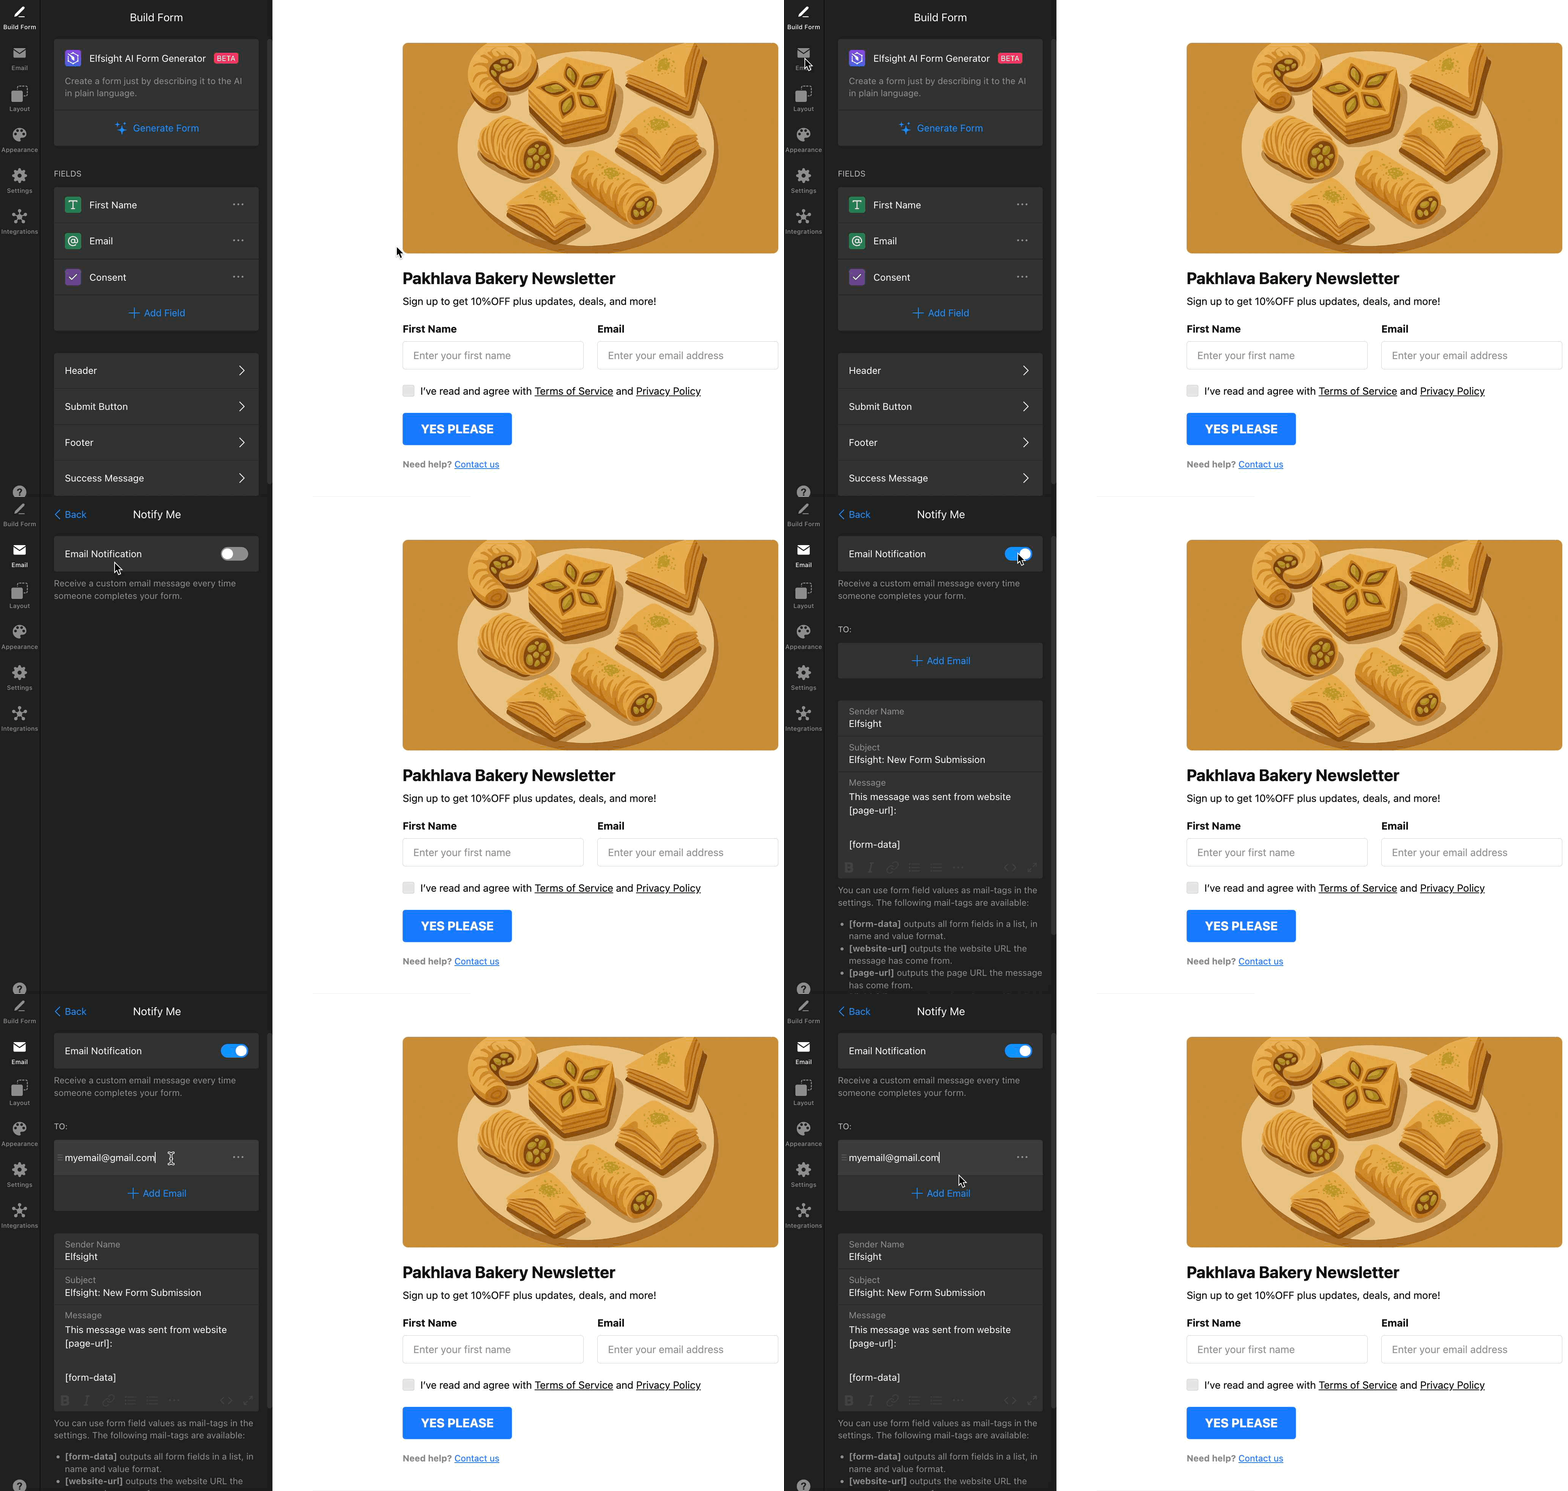
Use the Notify Me feature to receive an email notification whenever someone completes your form. To set it up, go to the Email tab → Notify Me → toggle on Email Notification and enter your email address: 
You can customize the Message content using mail-tags like [form-data], [website-url], and [page-url] to add context to your email: 
Here's an example of the email you'll receive when someone submits your form:

For more information on how to manage your form submissions, check out our guide: Where to find your Form Builder submissions.
Send Confirmation Emails
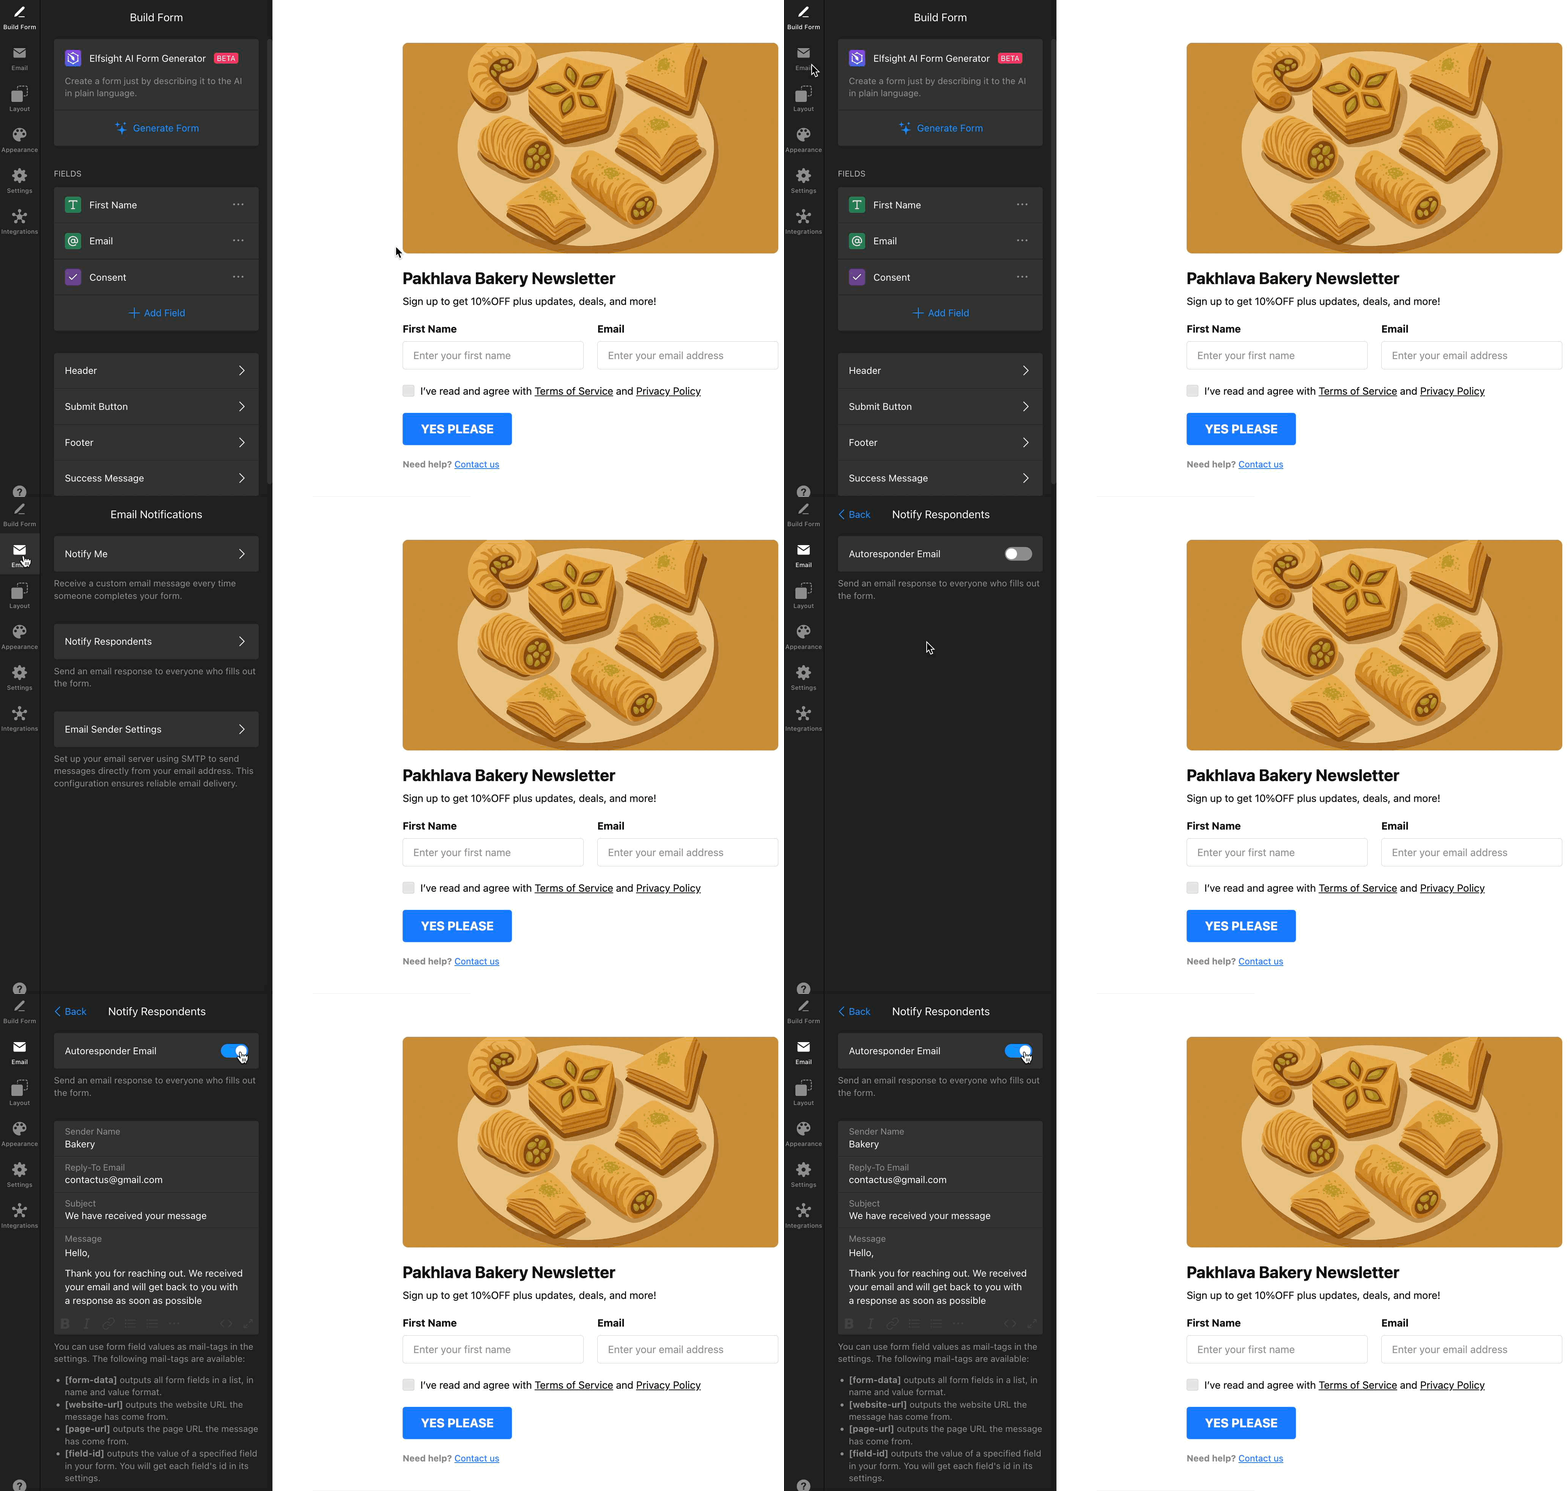
You can set up an automatic confirmation email for every user who submits a form. To do that, go to the Email tab → Notify Respondents → toggle on Autoresponder Email:
 You can fully customize the Sender Name, Reply-To Email address, Subject, and Message content to match your brand and communication style:
Looking to send notifications from your own domain for a more professional touch? Set up your SMTP details to use your custom email address for all notifications. Head to the Email tab and click Email Sender Settings to configure: 
For a detailed walkthrough on setting up your SMTP server, check out this community forum post.
Connect Your Form To External Tools
Effortlessly connect your Form Builder widget with popular tools and automate your workflow. Available integrations include:
- Mailchimp: Automatically send new form results to your Mailchimp lists. See our guide on enabling Mailchimp integration for setup steps.
- Google Sheets: Instantly send form data to a Google Sheet for easy processing. Instructions are available in our Google Sheets integration setup guide.
- Zapier: Integrate your form with thousands of apps, from CRMs to messaging platforms, using Zapier. For a complete integration guide, visit How to integrate your Form widget with Zapier.
You can set up all our currently available integrations on the Integrations tab:  If you need a different integration, just click Request Integration in this tab and let us know what you need!
That’s it for setting up your email notifications and integrations! Your form is ready to send submissions to your inbox and favorite tools automatically.
Next, let’s move on to customizing your form to match your site’s style!
