
Adding Your Elfsight Widget to Magento 2
In this article, we'll show you how to add your Elfsight widget to your Magento 2 website. Just copy your widget installation code and let’s get started! 😊
Note: These instructions have been tested on Magento 2.4.7. The installation process may differ in other versions.
Choose how to install your widget
Floating widgets stay in a fixed position on the screen as visitors scroll, while embedded/static widgets appear directly within your page's content. Learn more here: Floating and Static Widgets.
Add a Widget to a Specific Page
Follow these steps to add a floating or embedded/static Elfsight widget to a specific page of your Magento 2 website:
- 1
-
Create and configure a block
Open your Magento admin panel and navigate to Content → Blocks → Add New Block: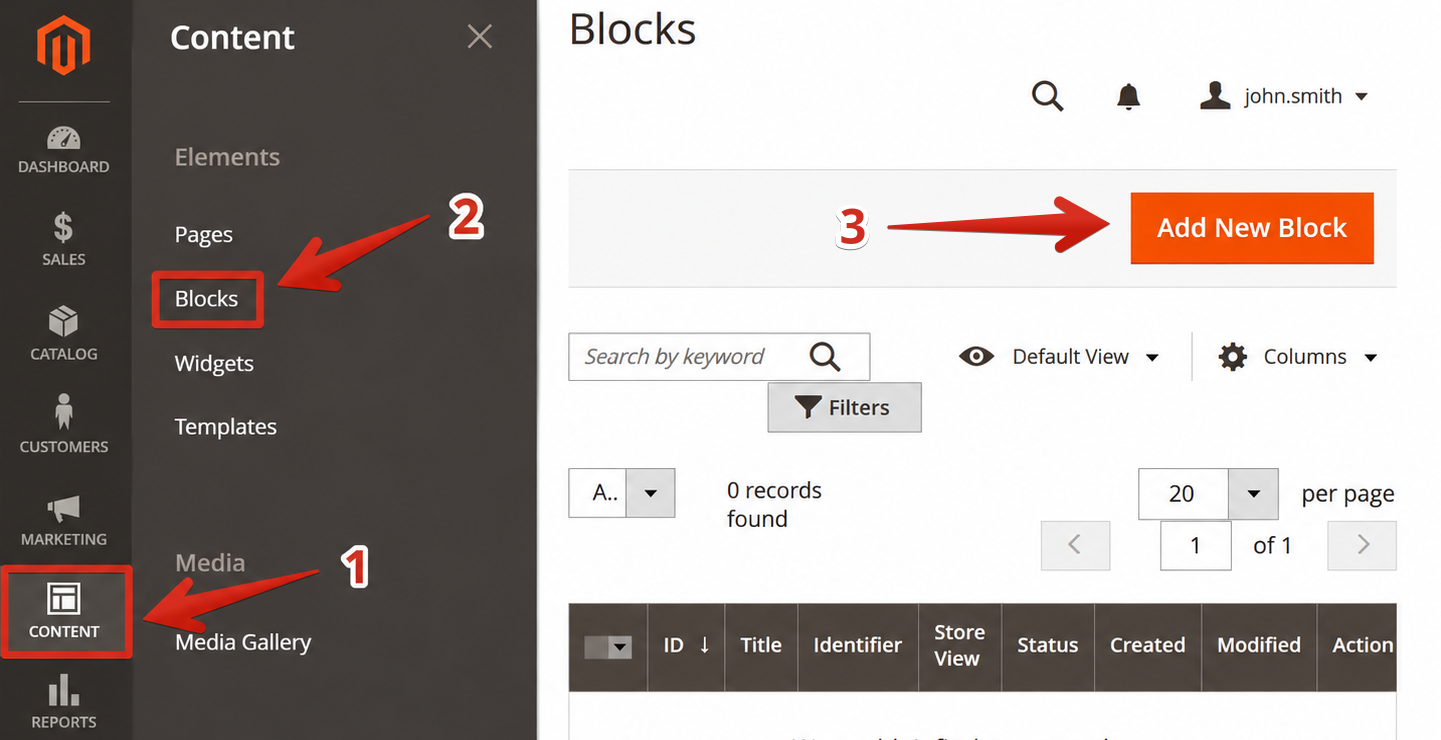
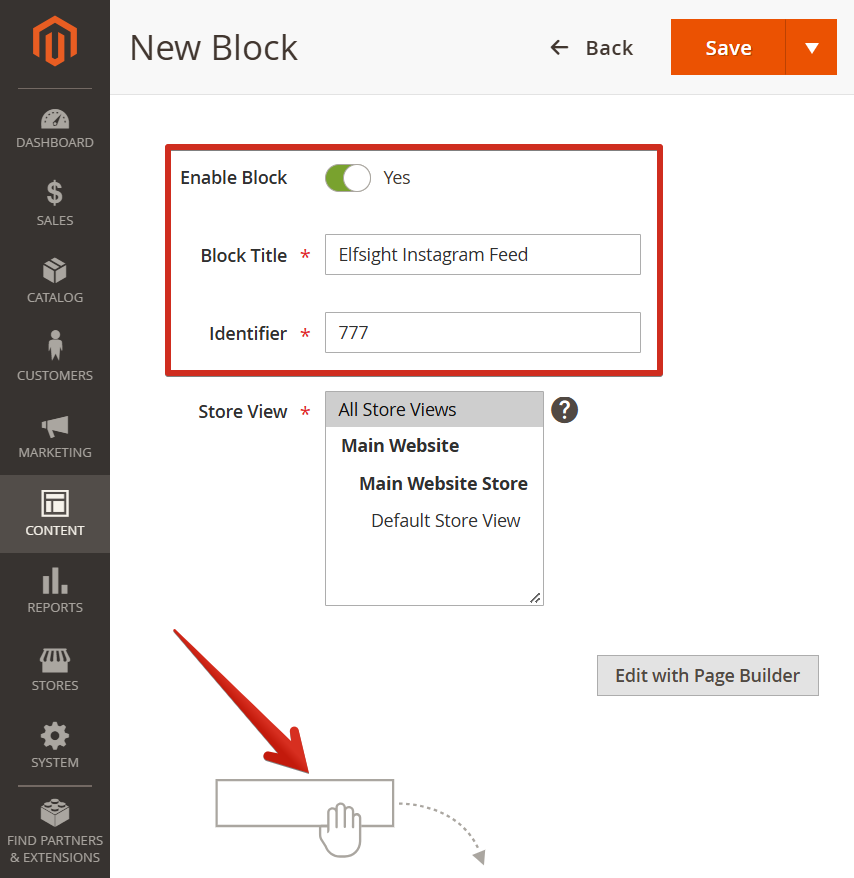
Enter a Block Title, a unique Identifier, and make sure the block is enabled. Then, click on the Drag & Drop area below:
- 2
-
Add the widget HTML to the block
Expand the Elements section on the left and drag the HTML Code element into the content area. Hover over the element and click the gear icon to open its settings: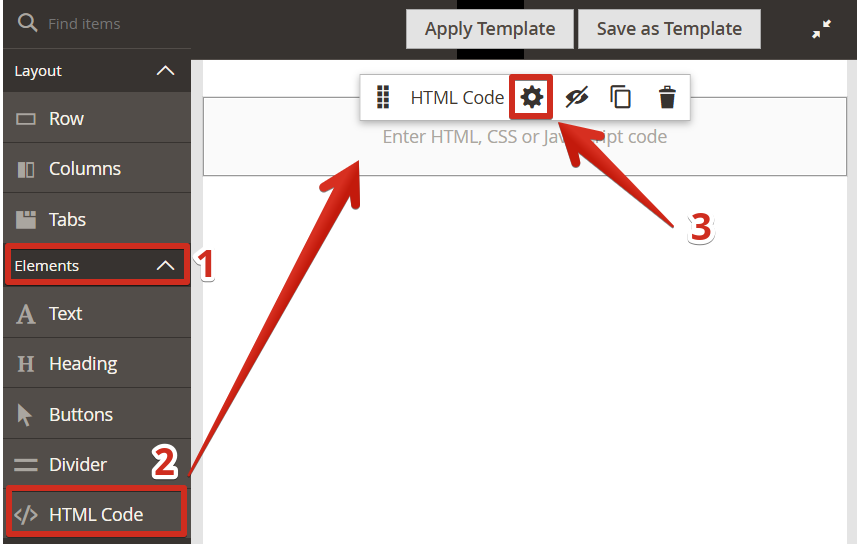
From your Elfsight installation code, copy only the widget's HTML element (the
<div class="elfsight-app-..."></div>part, not the<script>tag). Paste it into the editor, then click Save: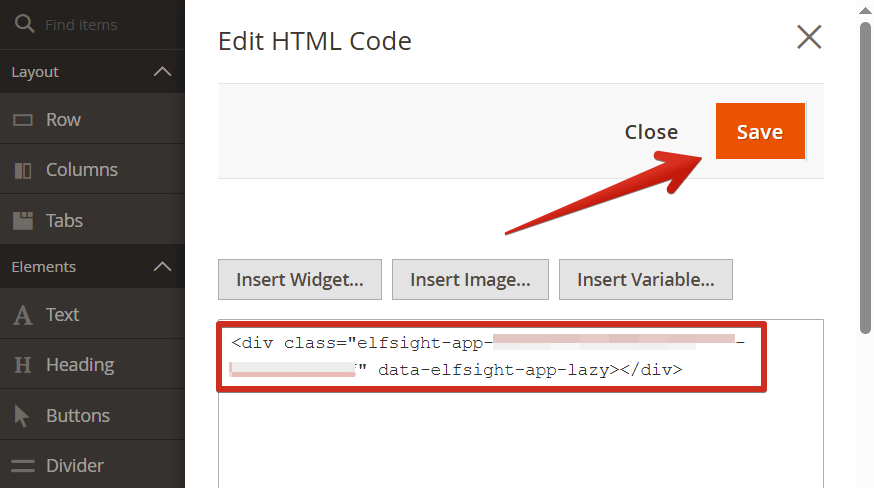
Close the popup using the icon in the upper-right corner, then click Save to save your new block.
Note: Magento may remove the widget's HTML element when saving. If this happens, remove the
data-elfsight-app-lazyattribute from the widget code and save the block again. - 3
-
Open the target page in Page Builder
Navigate to Content → Pages. Find the page where you'd like to display the widget and click Select → Edit: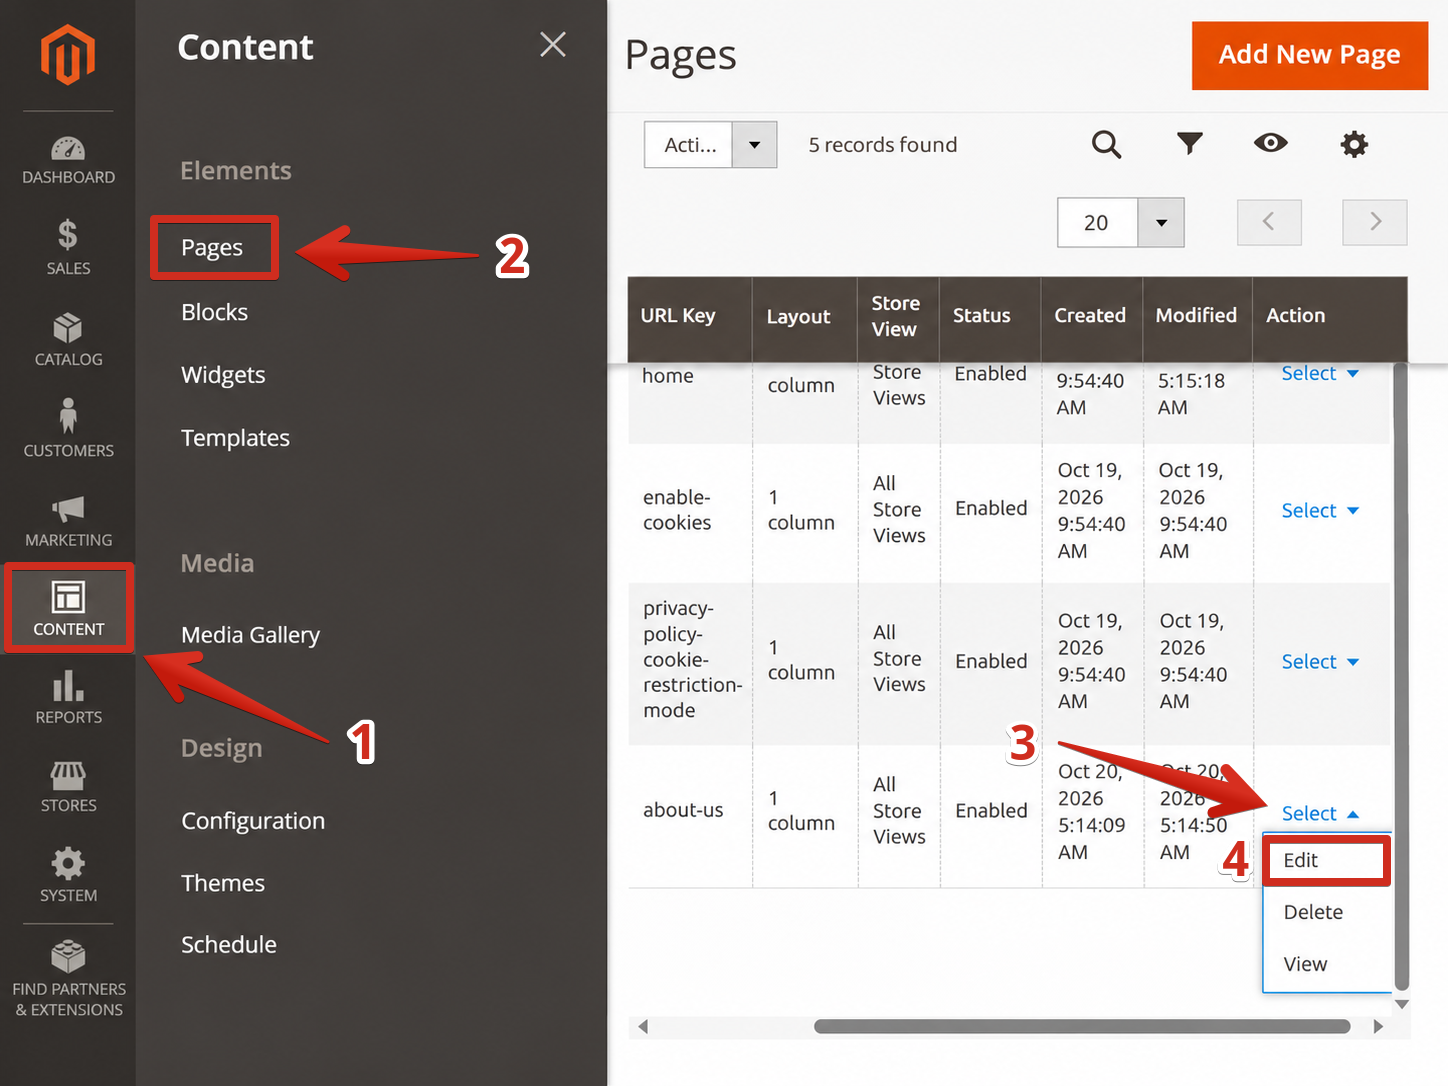
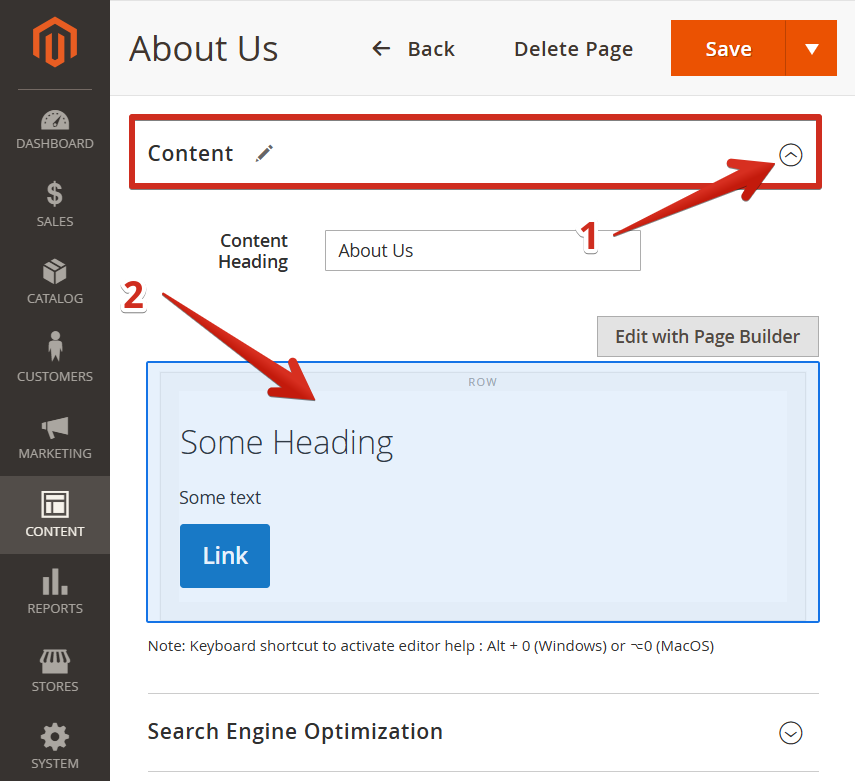
Expand the Content section. Click Edit with Page Builder or the page content area:
- 4
-
Place the block on the page
Expand Add Content and drag the Block element into the desired position on your page. Hover over the new Block element and click the gear icon: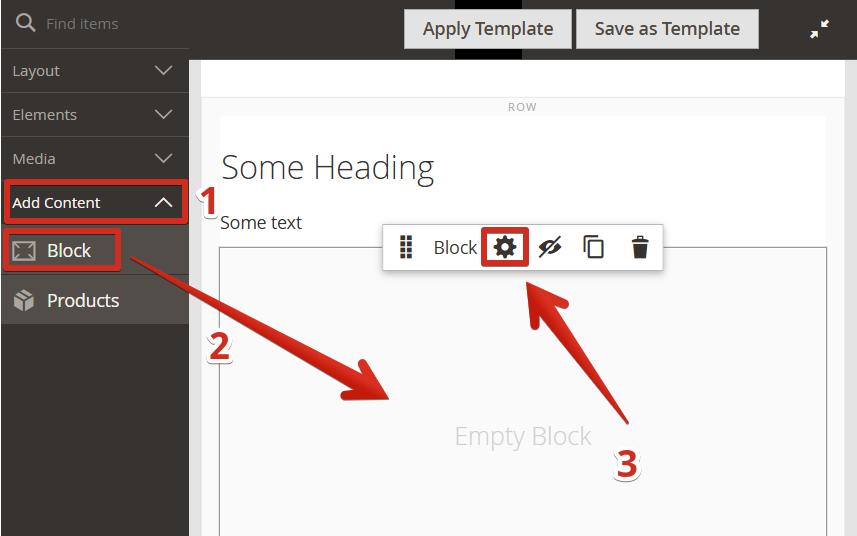
Installing a floating widget?
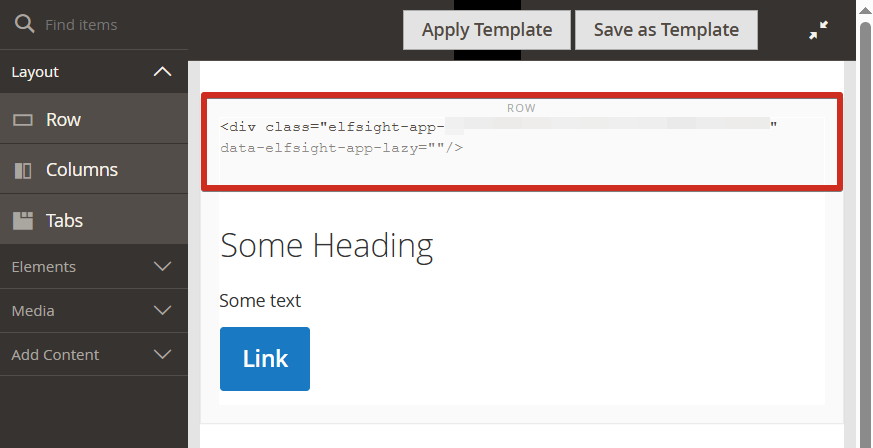
For floating widgets, place the Block element at the very top of your page's content area, as shown below:
Click Select Block and choose the block you created earlier by clicking Select:
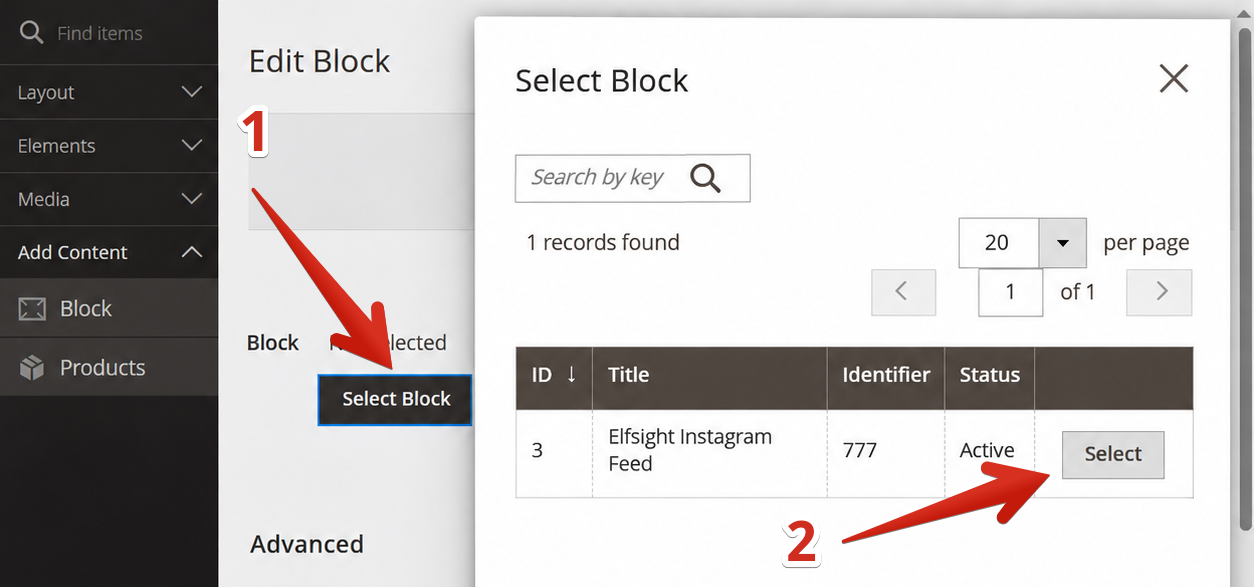
Click Save, close the Page Builder popup, and click Save again to update the page.
- 5
-
Add the platform script
Navigate to Content → Configuration: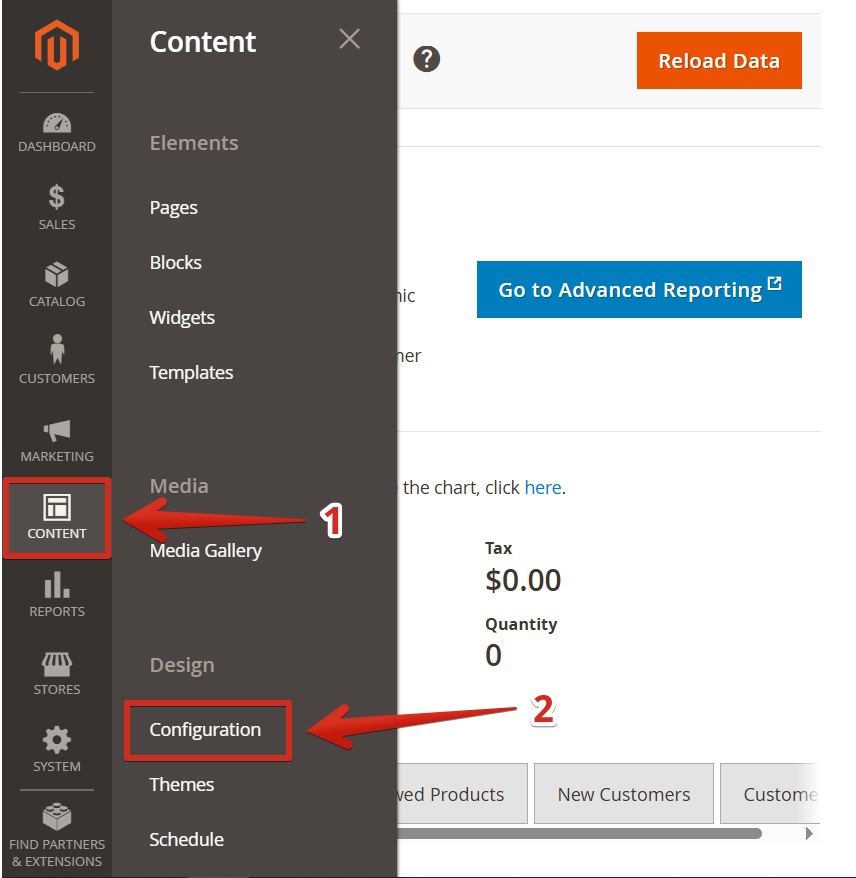
Find the store view where you'd like to install your widget and click Edit:
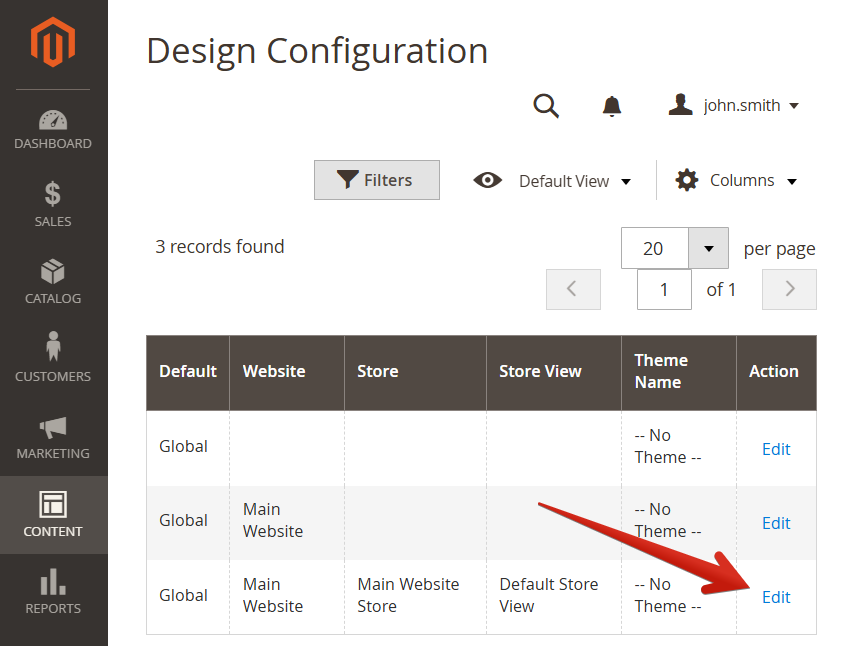
Scroll down and expand the HTML Head section. In the Scripts and Style Sheets field, paste the following code:
<script src="https://elfsightcdn.com/platform.js" async></script>
Once done, click Save Configuration in the upper-right corner to apply your changes:
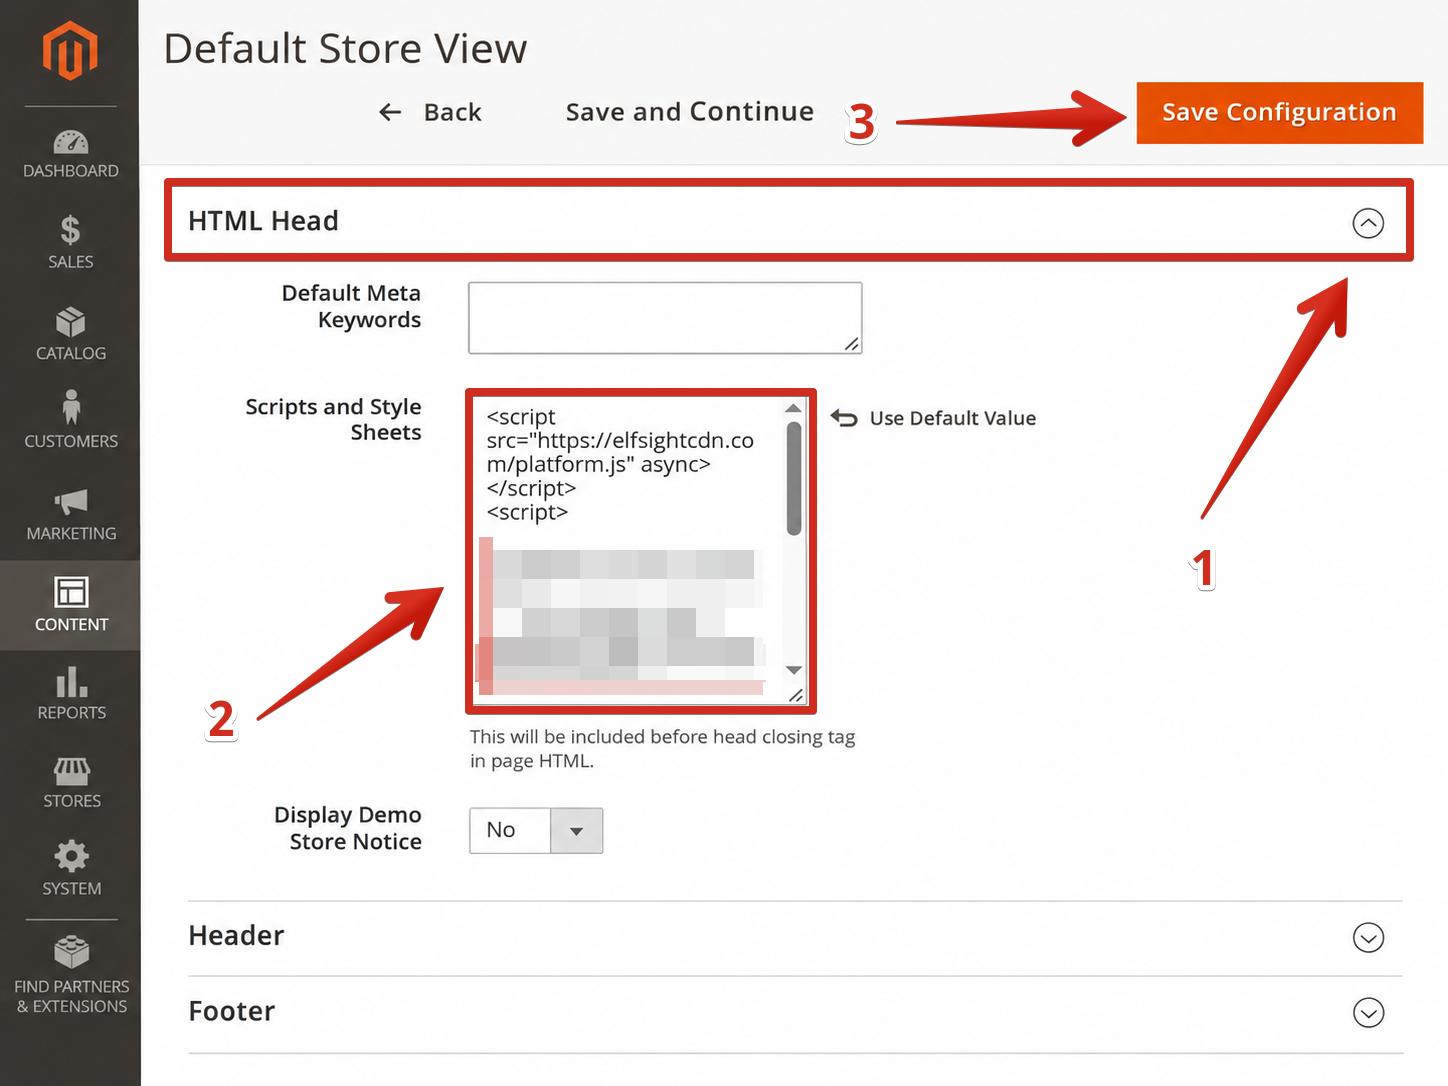
That's it! Your Elfsight widget should now appear on the selected page.
Add a Floating Widget to All Pages
Follow these steps to display your floating Elfsight widget across all pages of your Magento 2 website:
- 1
-
Open the store view configuration
In your Magento admin panel, navigate to Content → Configuration:Find the store view where you'd like to install your widget and click Edit:
- 2
-
Add the floating widget code
Scroll down and expand the HTML Head section. In the Scripts and Style Sheets field, paste the following code:<script src="https://elfsightcdn.com/platform.js" async></script> <script> document.addEventListener('DOMContentLoaded', () => { const WIDGET_ID = 'YOUR_WIDGET_ID'; const widget = document.createElement('div'); widget.className = `elfsight-app-${WIDGET_ID}`; widget.setAttribute('data-elfsight-app-lazy', ''); document.body.prepend(widget); }); </script>Replace
YOUR_WIDGET_IDwith your own Elfsight widget ID from your installation code.Once done, click Save Configuration in the upper-right corner to apply your changes:
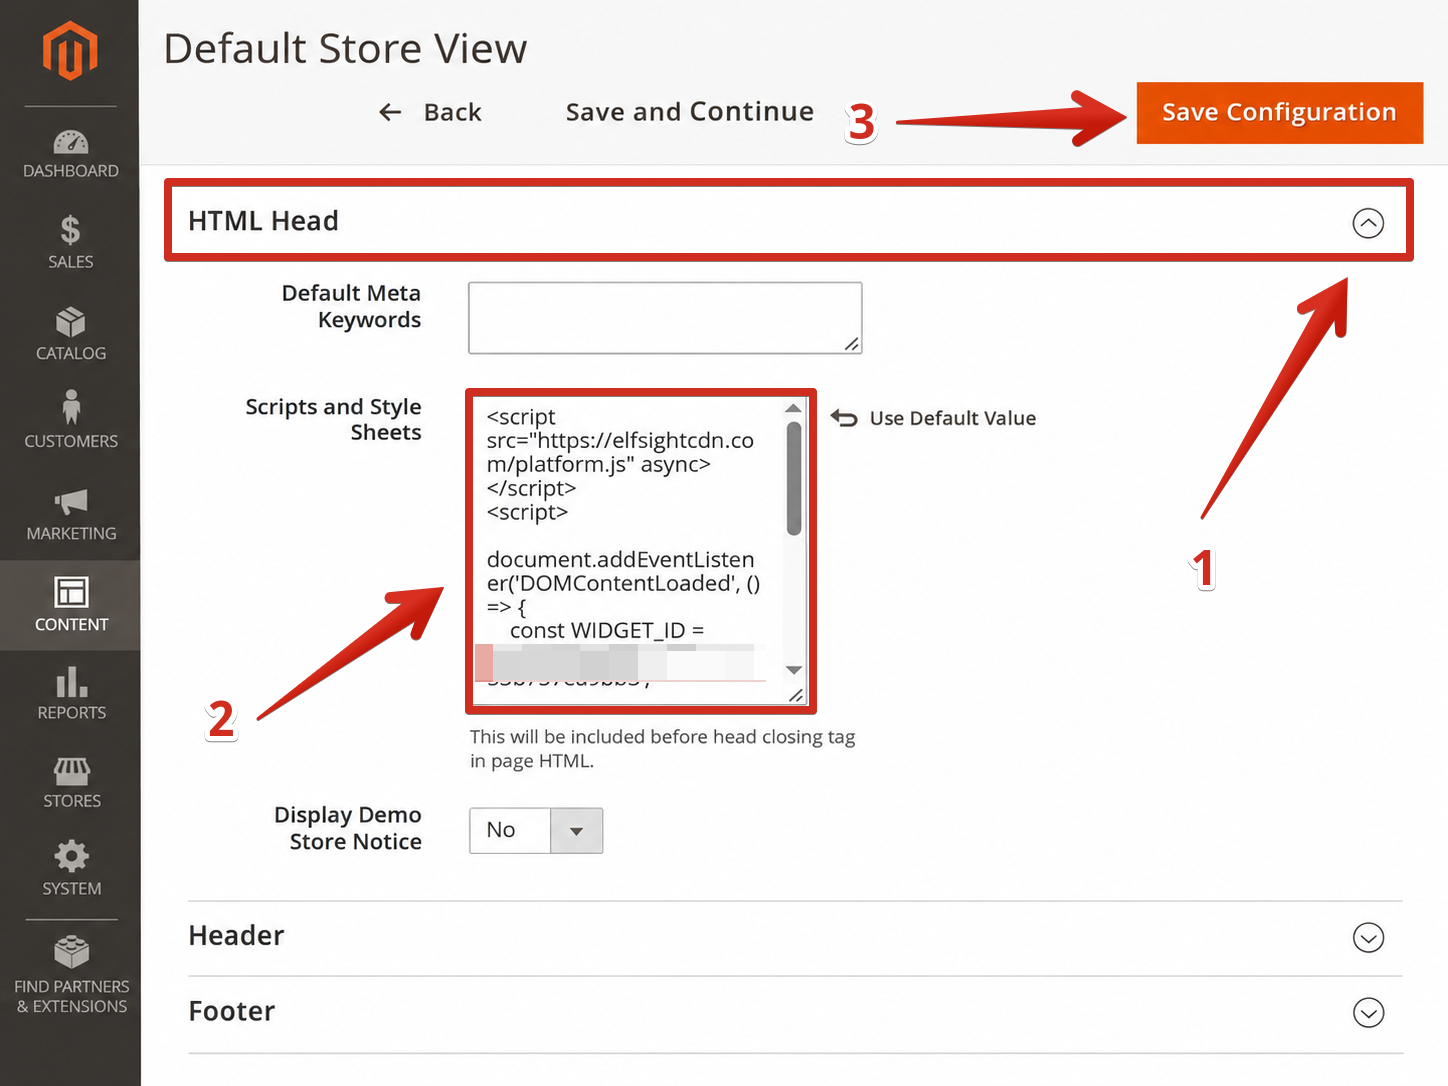
That's it! Your floating widget should now appear across the pages associated with the selected store view.
Add an Embedded Widget Above the Footer on All Pages
Follow these steps to display your embedded/static Elfsight widget at the bottom of the main content area, above the footer, across your Magento 2 website:
- 1
-
Open the store view configuration
In your Magento admin panel, navigate to Content → Configuration:Find the store view where you'd like to install your widget and click Edit:
- 2
-
Add the embedded/static widget code
Scroll down and expand the HTML Head section. In the Scripts and Style Sheets field, paste the following code:<script src="https://elfsightcdn.com/platform.js" async></script> <script> document.addEventListener('DOMContentLoaded', () => { const WIDGET_ID = 'YOUR_WIDGET_ID'; const MARGIN_Y = 16; const main = document.querySelector('#maincontent') || document.querySelector('.page-main') || document.querySelector('main'); if (!main) return; const widget = document.createElement('div'); widget.className = `elfsight-app-${WIDGET_ID}`; widget.setAttribute('data-elfsight-app-lazy', ''); widget.style.margin = `${MARGIN_Y}px 0`; main.append(widget); }); </script>Replace
YOUR_WIDGET_IDwith your own Elfsight widget ID from your installation code.Once done, click Save Configuration in the upper-right corner to apply your changes:
That's it! Your embedded widget should now appear at the bottom of the main content area, above the footer, on pages using the selected store view.
Having trouble with the installation? We’ve got you covered! 🙌 Request our help, and we'll take care of the setup for you.