
Using the Elfsight AI Chatbot App from Webflow Marketplace
Want to install an AI chatbot on your Webflow website? The Elfsight AI Chatbot App lets you add your chatbot to Webflow, choose how it appears on your site, manage it, and replace it whenever needed.
With the Elfsight AI Chatbot App, You Can:
Add Your AI Chatbot to Webflow
Adding an Elfsight AI Chatbot to your Webflow website is quick and easy. Follow the steps below to connect your chatbot, place it on your site, and publish the changes.
1. Connect Your AI Chatbot to Webflow
To begin, open your Webflow Designer:
- 1
-
Launch the Elfsight AI Chatbot App
In your Webflow Designer, open the Apps Panel from the left sidebar, find Elfsight AI Chatbot, and launch the app: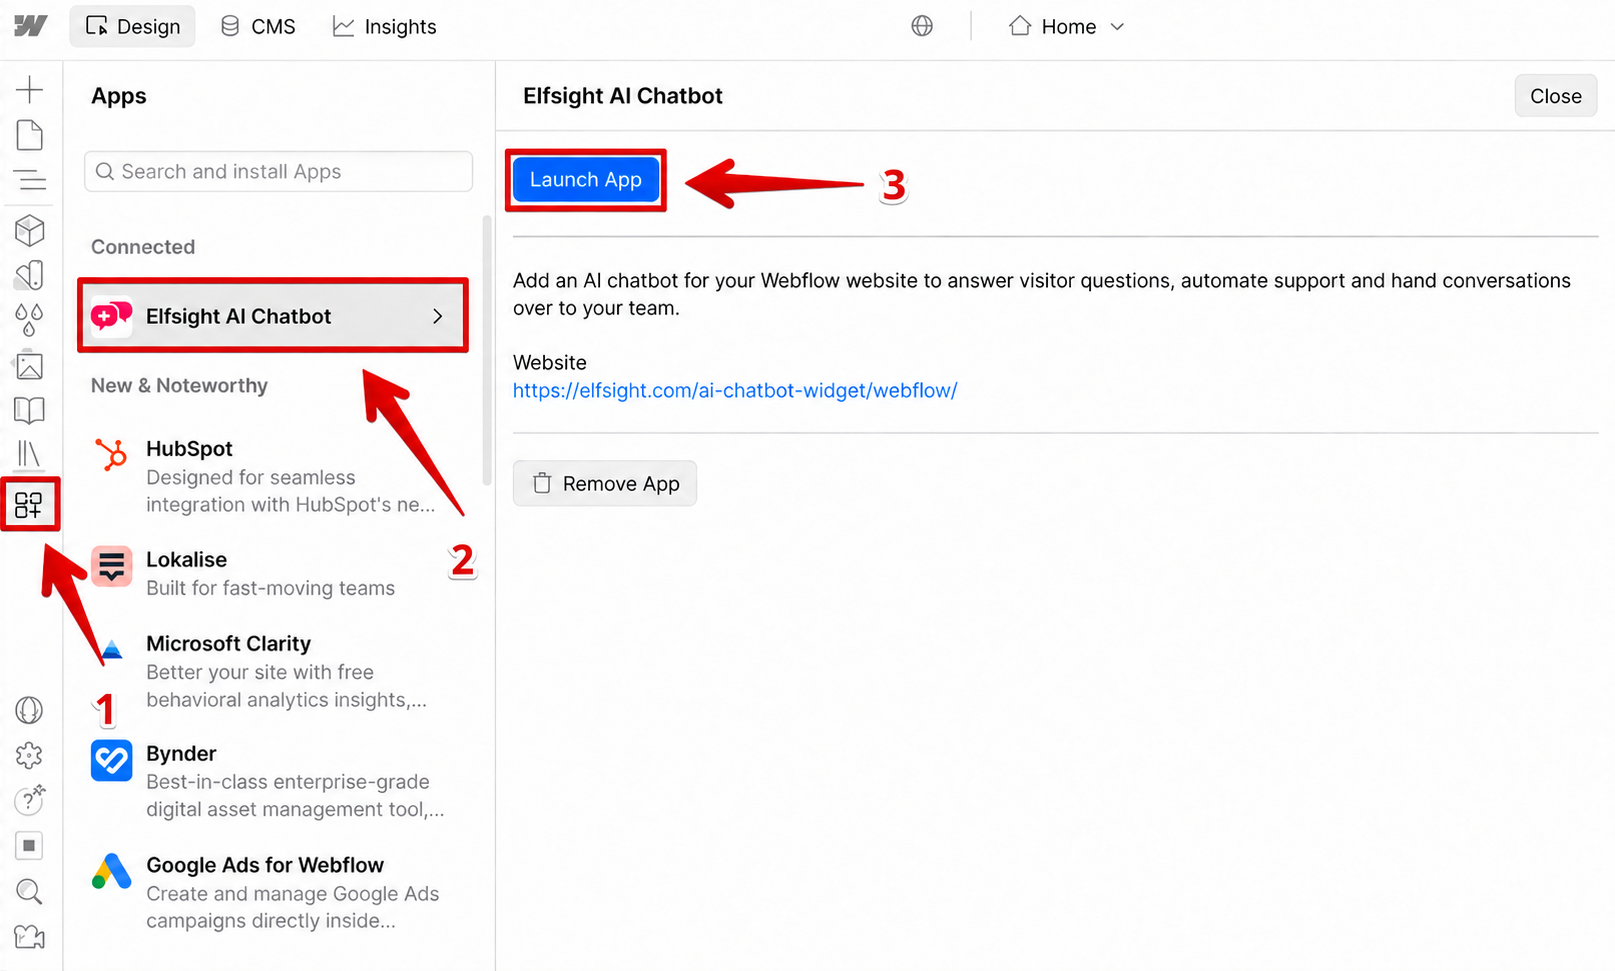
- 2
-
Create Your AI Chatbot
In the window that appears, click Create AI Chatbot Widget to create a new chatbot:
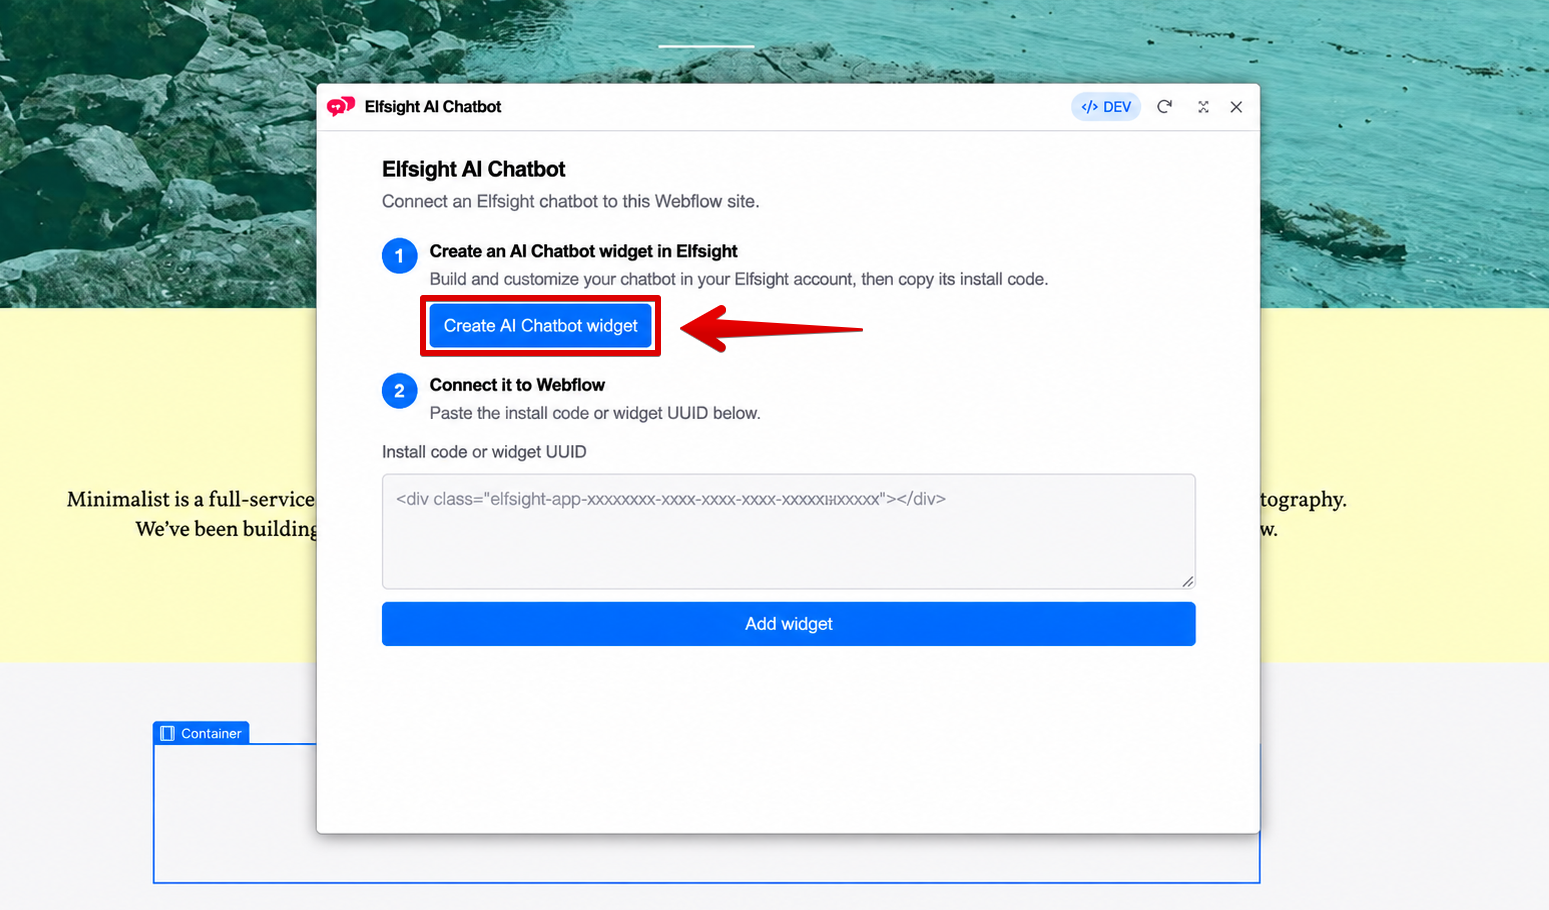
You'll be redirected to a page where you can create a new AI agent. If you don't have an Elfsight account yet, you'll be prompted to create one when you save the widget:

Need help setting up your widget? Follow our guide on Creating Your AI Agent. If you've created a new AI Chatbot, make sure to publish it by clicking Publish in the top-right corner of the Elfsight editor before continuing. If you already have a chatbot you'd like to use, you can open it directly from your Elfsight dashboard instead.
- 3
-
Copy the Widget Installation Code
Open your Elfsight dashboard, find the AI Chatbot you'd like to install, click Install, and then click Copy code: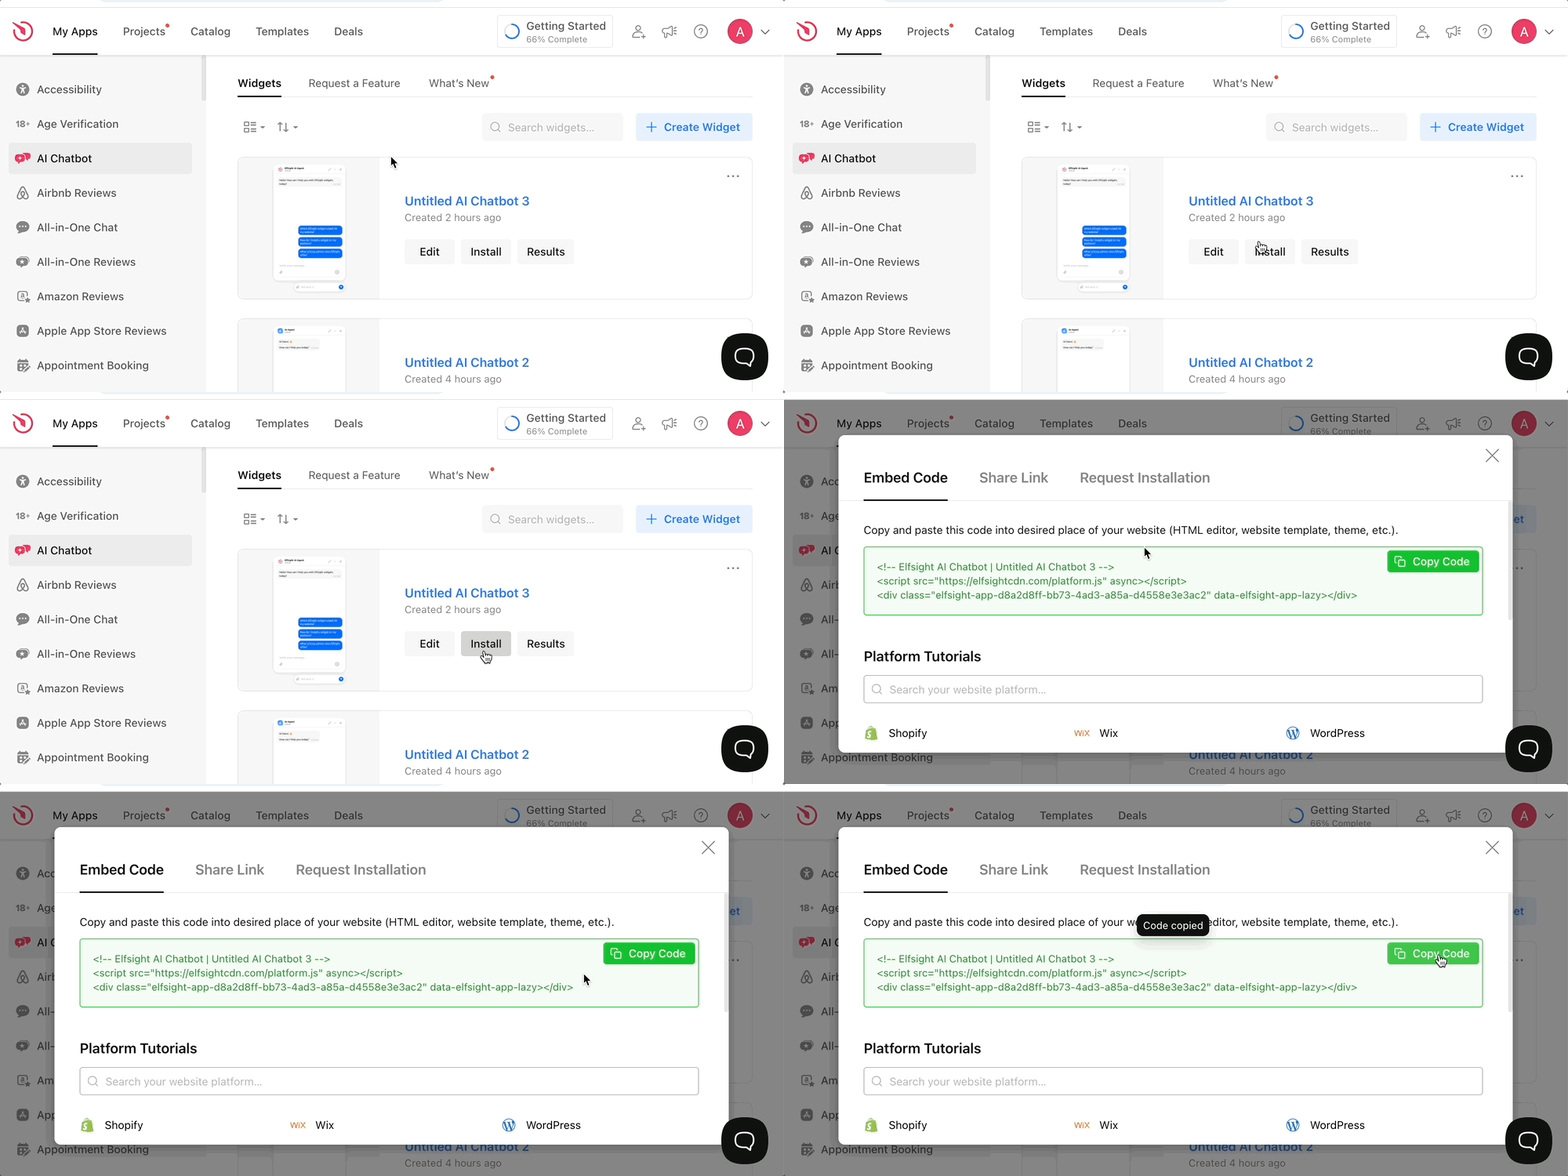
Not sure where to find the code? See Where to Get Your Elfsight Widget Installation Code. - 4
-
Add the Widget to Webflow
Return to the Elfsight AI Chatbot app in Webflow, paste the copied installation code into the field, and click Add widget: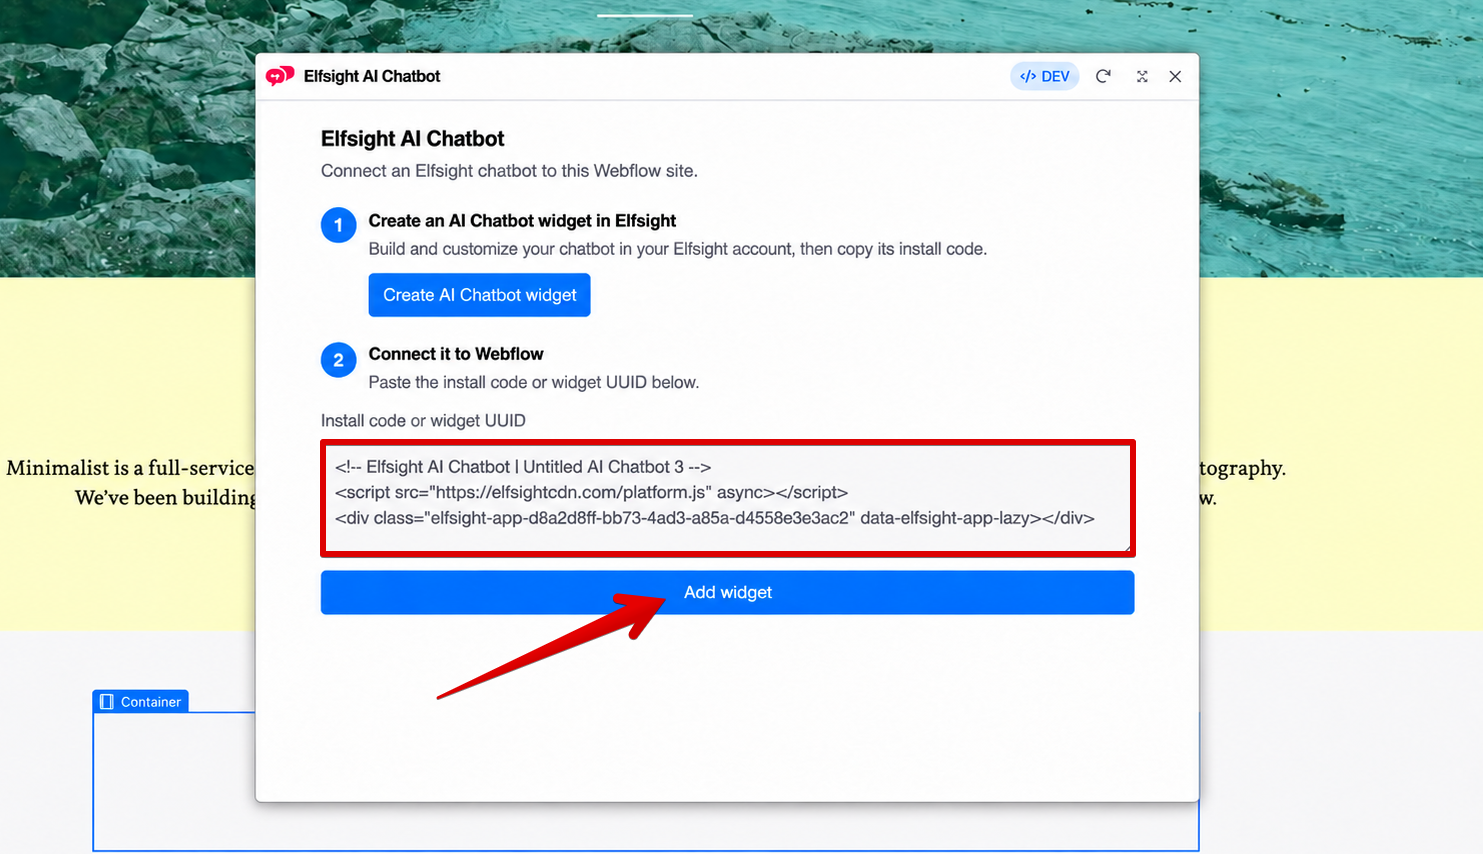
Great! Your AI Chatbot is now connected. Continue to the next step to finish the installation.
2. Place Your AI Chatbot
The next step depends on whether your chatbot uses a floating or embedded layout. If you're unsure which one you're using, open the widget editor and go to the Settings tab → Placement and layout → Chat placement:
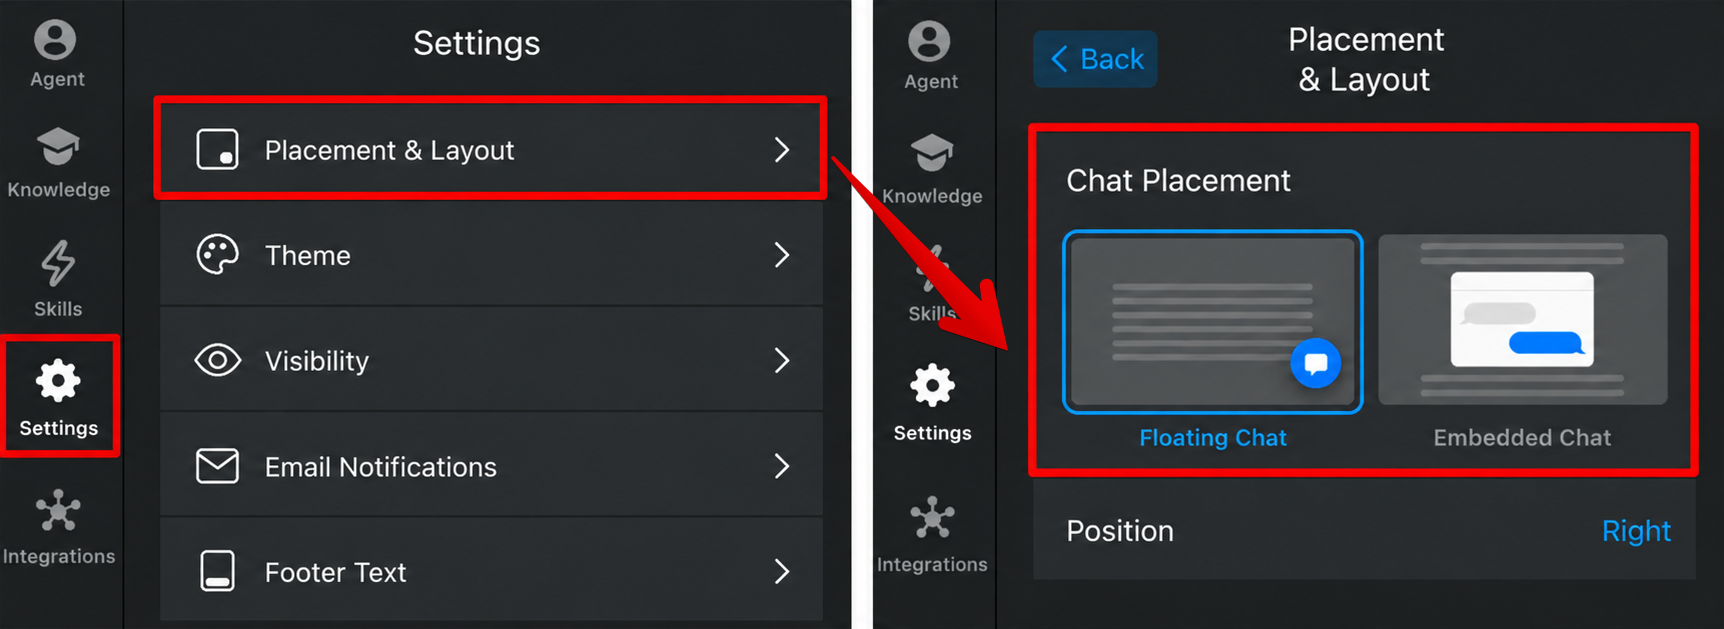
Floating AI Chatbot
If you're using a floating layout, no additional placement is required. Once connected, your AI Chatbot is automatically added to your Webflow website, so you can proceed to the next step.
Embedded AI Chatbot
If you're using an embedded layout, you'll need to choose where the chatbot should appear on the page.
Select the container where you'd like to place the widget. Then, in the Elfsight AI Chatbot app window, click Insert on canvas:
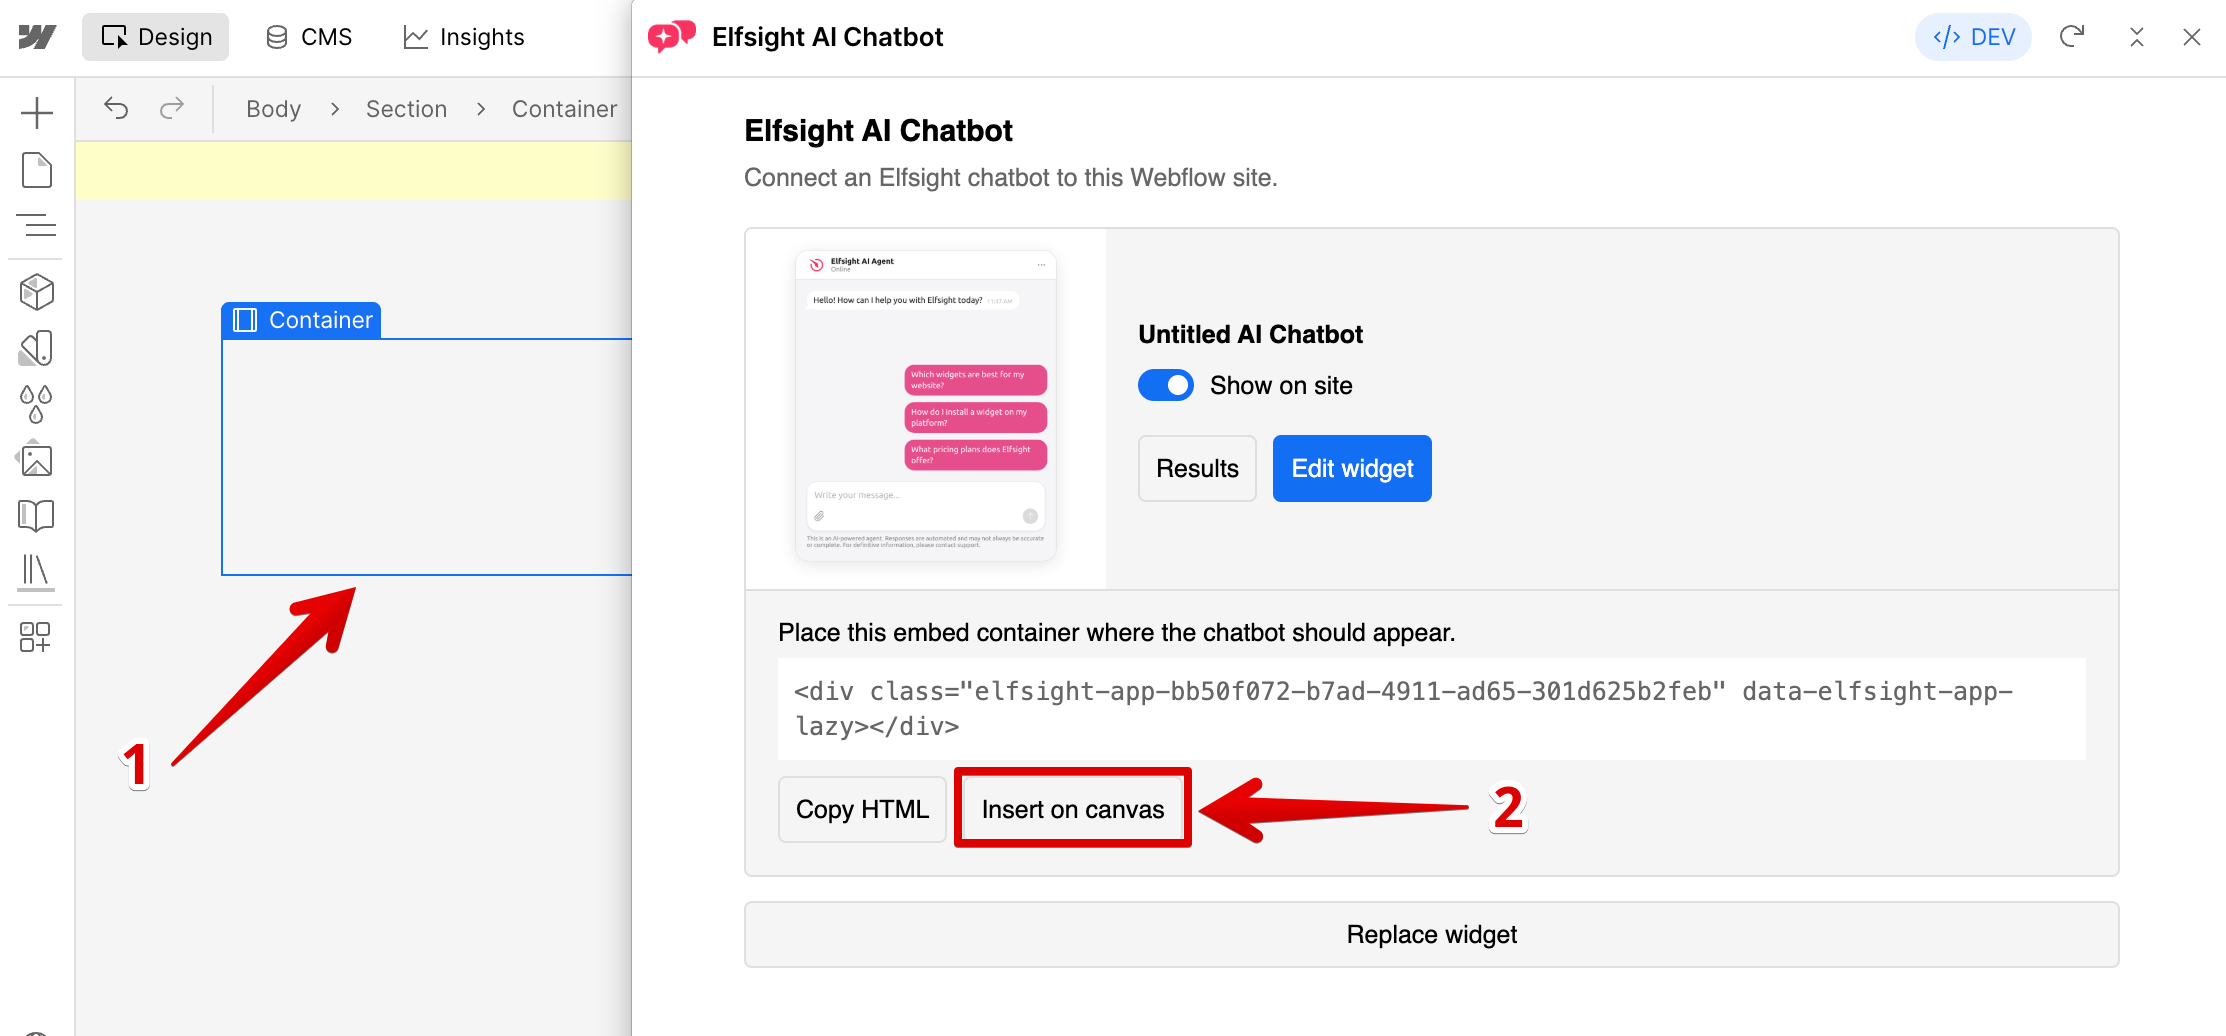
Webflow will add the chatbot container to the selected location on your page.
3. Publish Your Webflow Site
Once everything is set up, publish your Webflow website to make the AI Chatbot available to your visitors. In the top-right corner, click Publish, then click Publish to selected domain:
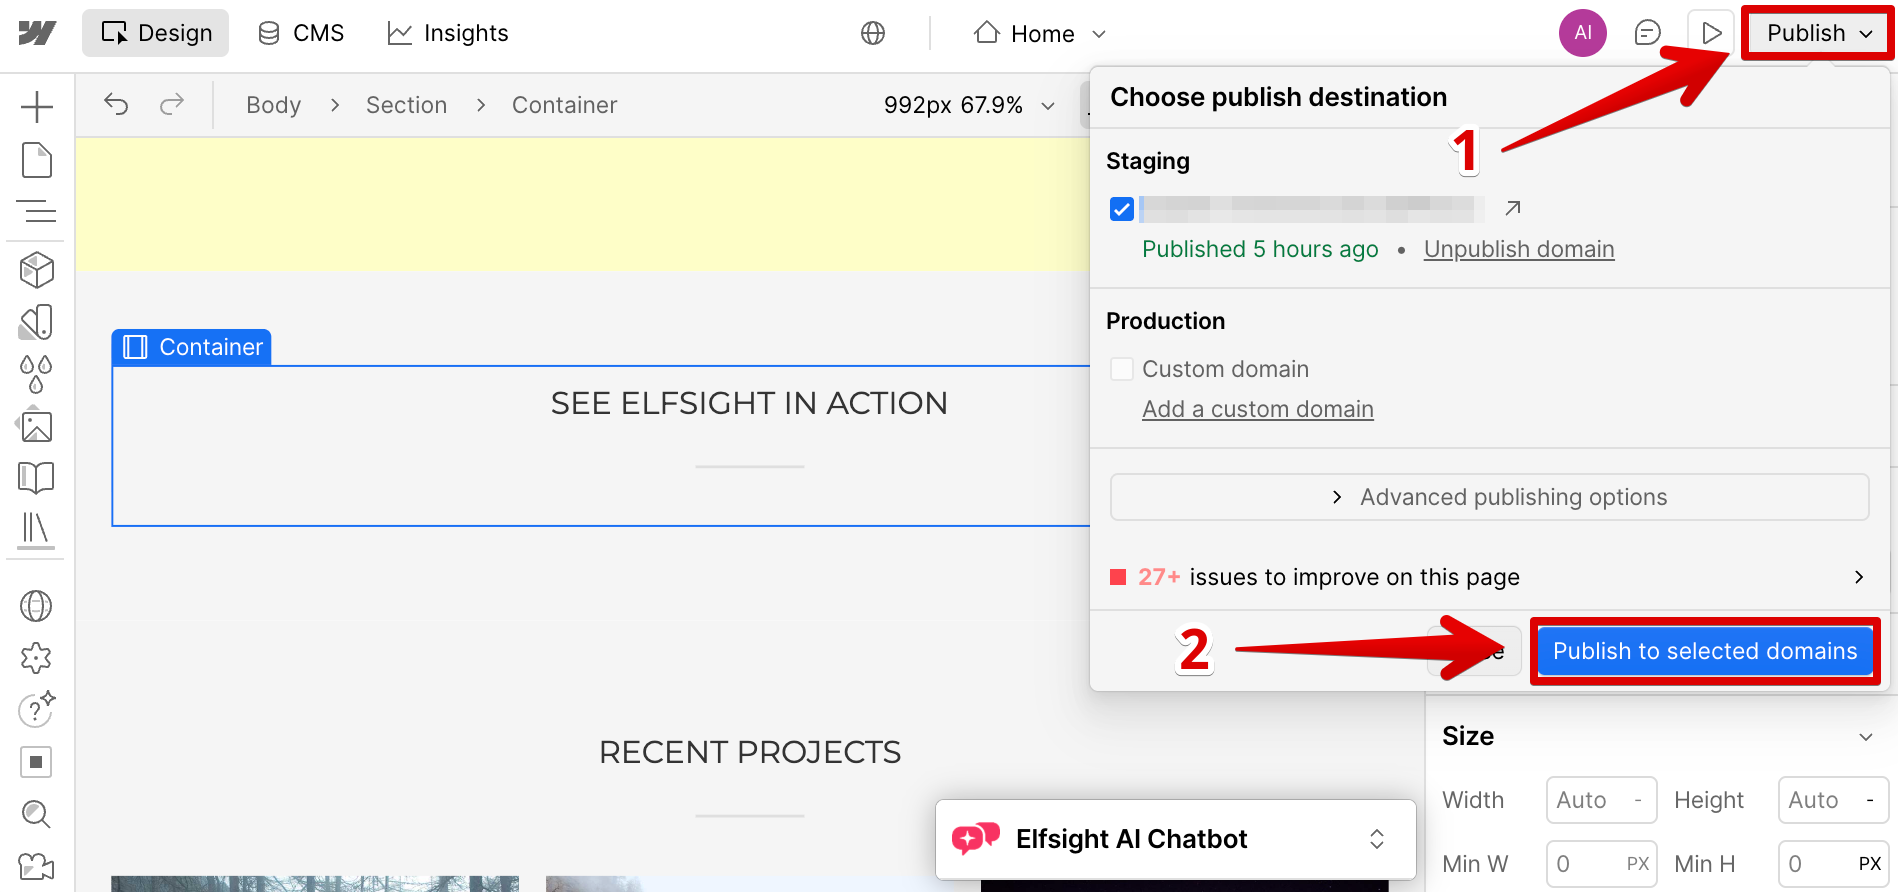
That's it! Your Elfsight AI Chatbot is now live on your Webflow website.
Manage Your AI Chatbot
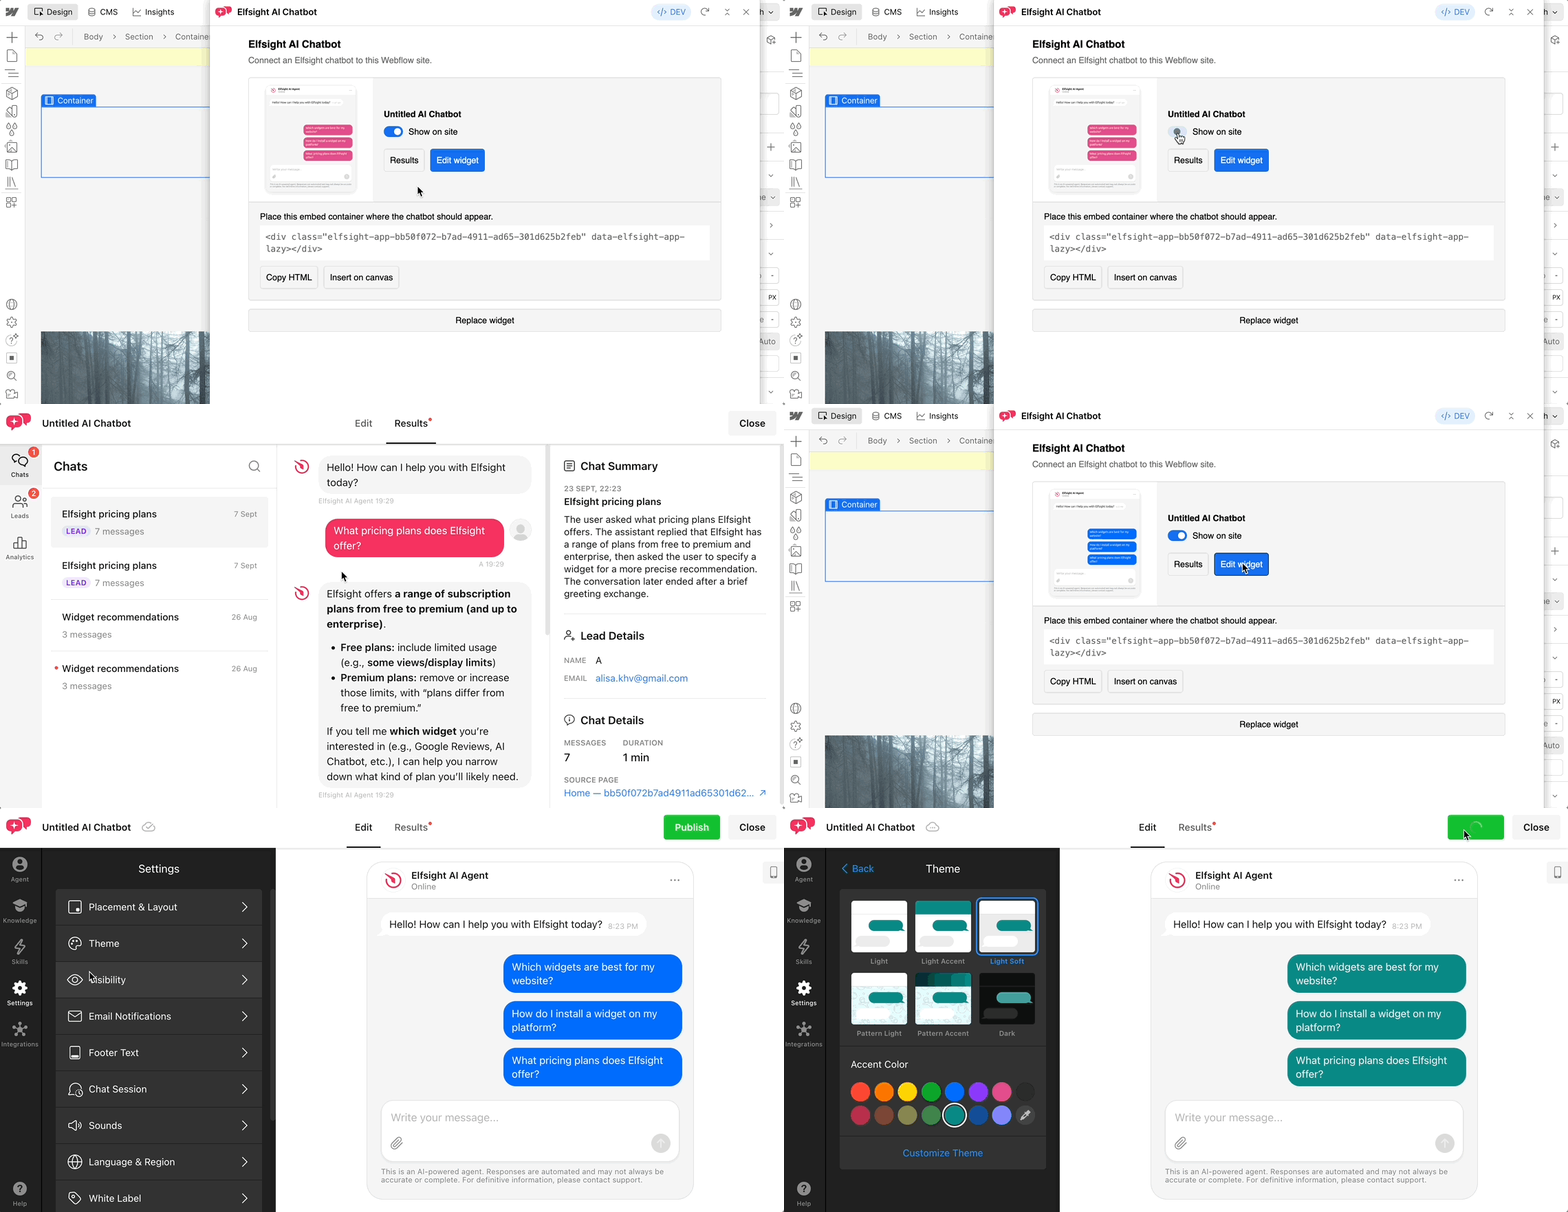
Once your chatbot is connected, you can manage it directly from the Elfsight AI Chatbot app in Webflow:
- Show on site — show or hide the AI agent on your website.
- Results — open your AI agent's conversations, leads, and analytics. Learn more in Managing Your AI Chatbot Conversations, Leads, and Analytics.
- Edit widget — open the chatbot in the Elfsight editor to update its content, style, and settings. See our Getting Started with AI Chatbot guides to learn more about customizing your widget.
Here's where you can find these controls:
Replace Your AI Chatbot
If you'd like to use a different Elfsight AI Chatbot on your Webflow website, you can easily replace the connected widget without reinstalling the app:
- 1
-
Open the AI Chatbot App
In your Webflow Designer, open the Elfsight AI Chatbot app and click Replace Widget: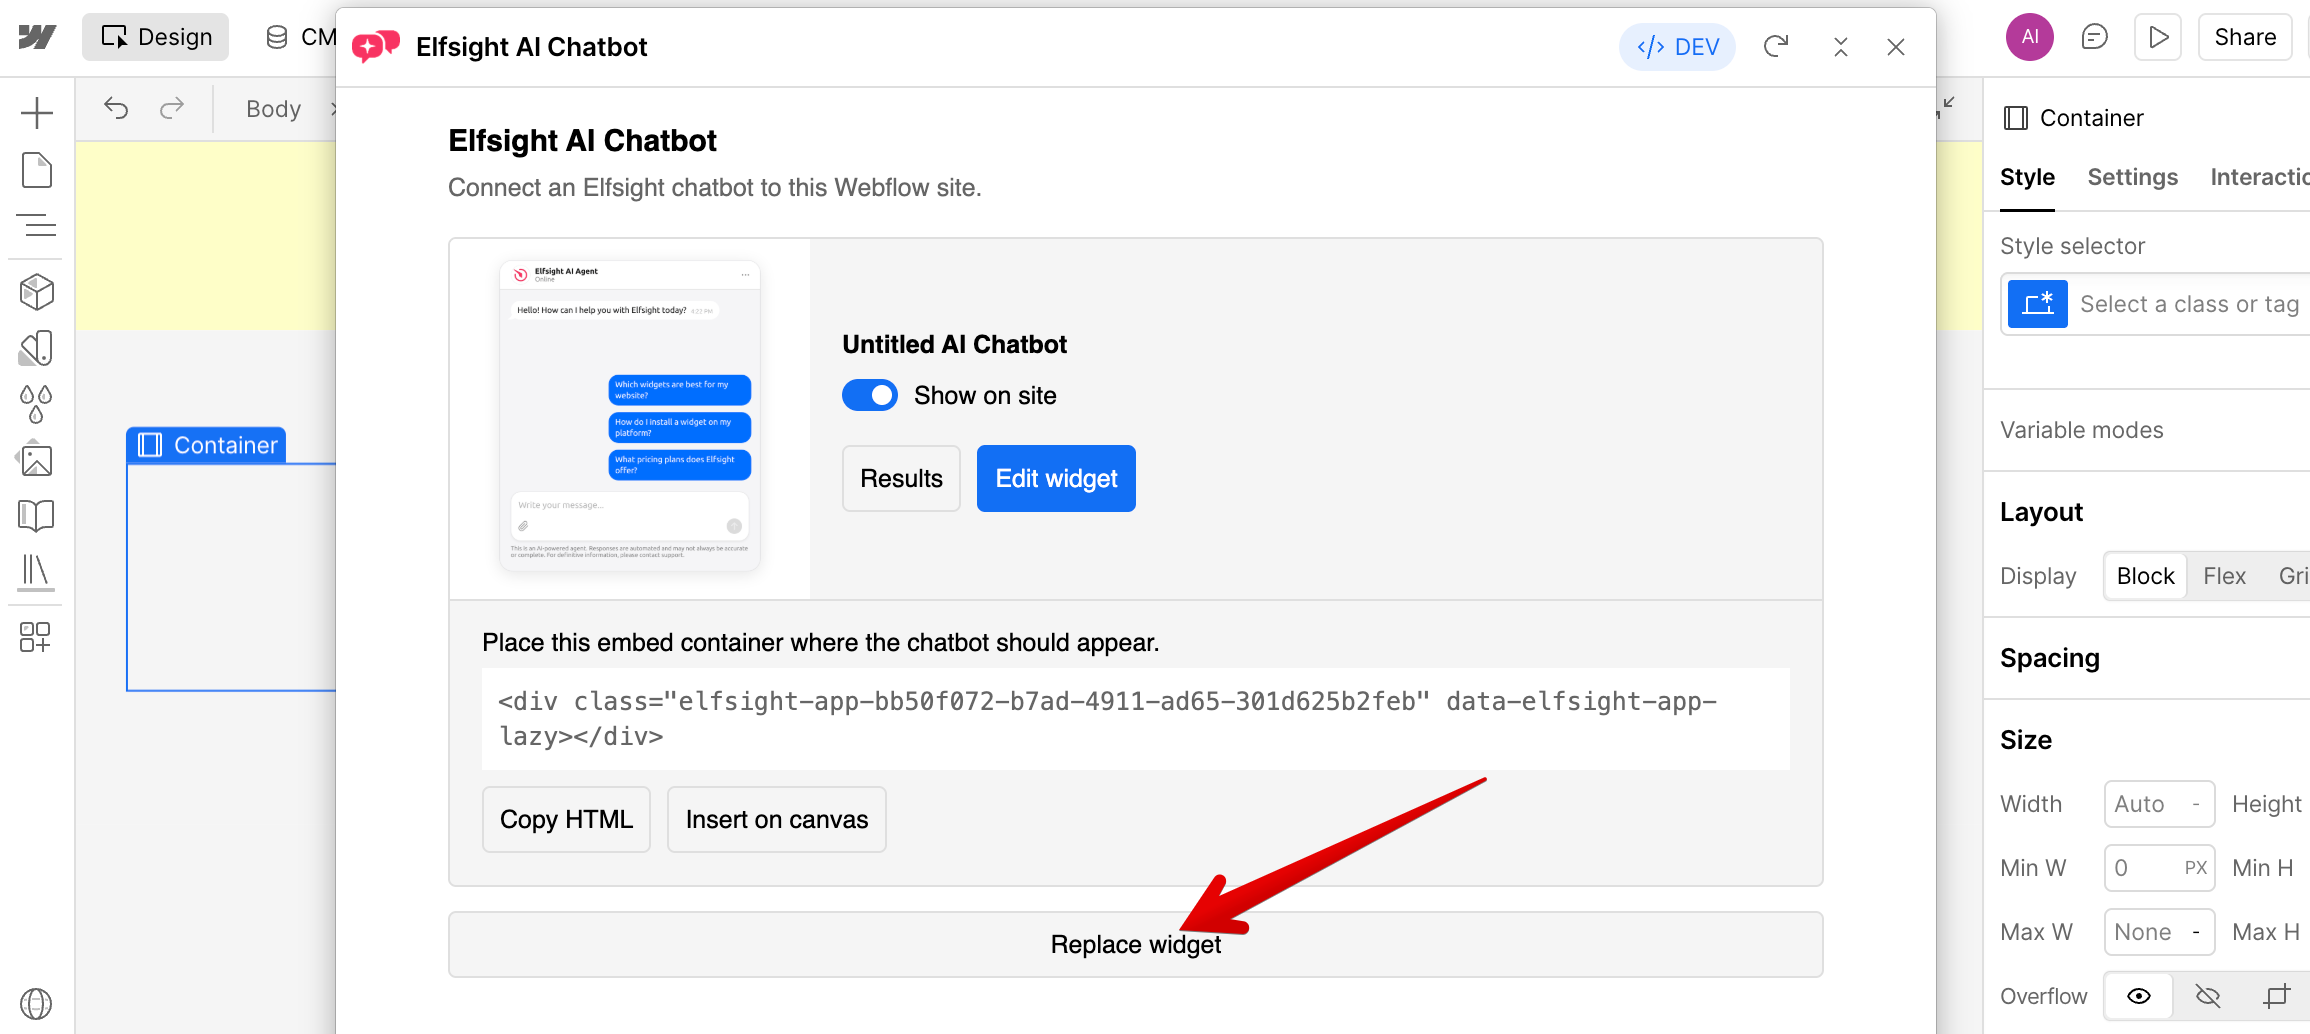
Replacing an embedded chatbot? Before connecting the new widget, remove the current chatbot's embed container from the canvas. If the new chatbot is also embedded, you'll insert it again after connecting it. - 2
-
Connect the New Chatbot
Copy the installation code of the new chatbot from your Elfsight dashboard, then paste it into the field and click Add widget: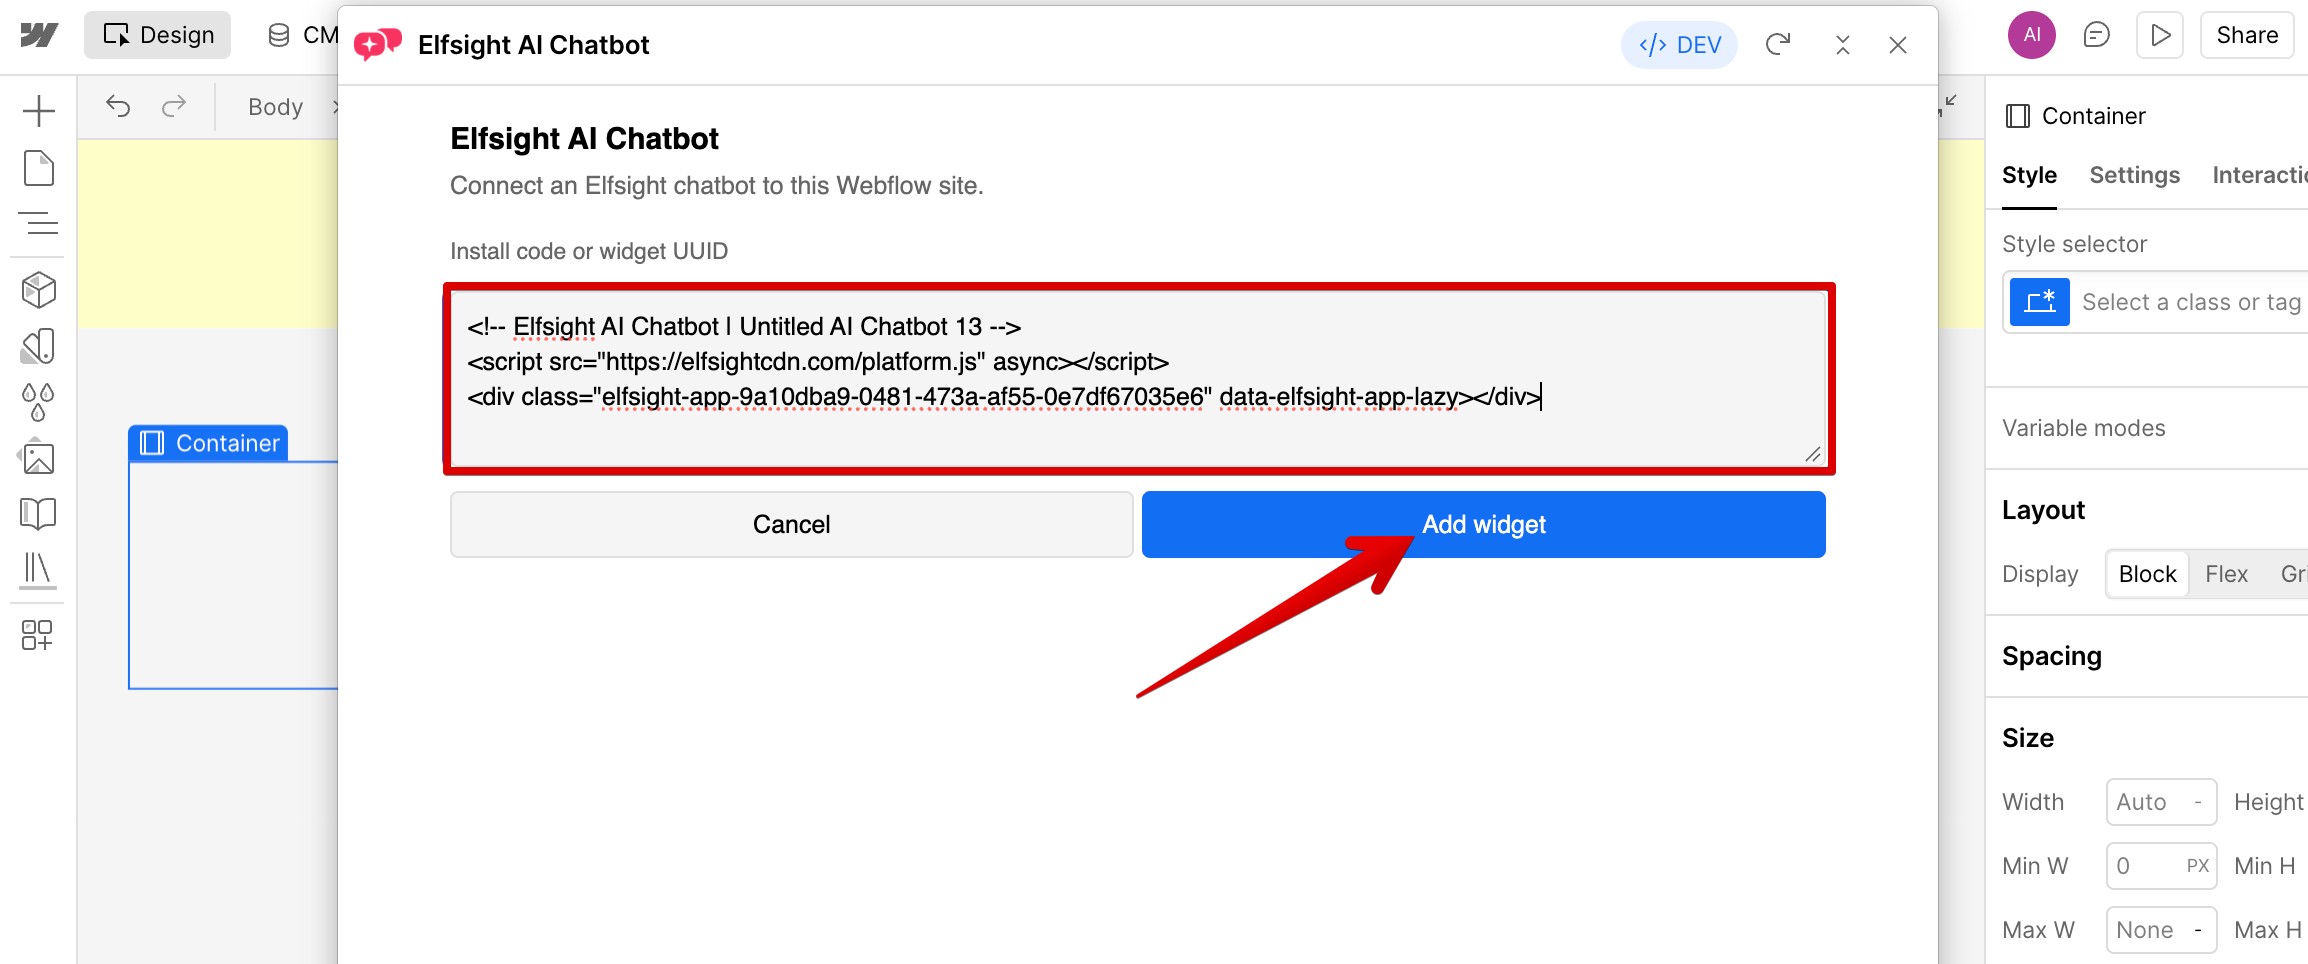
If your new chatbot uses a floating layout, no further action is needed. If it uses an embedded layout, follow the embedded AI Chatbot steps to place it in your desired spot.
Publish your website to apply the changes and you're all done! Your new AI agent is now live on your Webflow website.
Stuck with installation or have other questions? Let us help! 🙌 Contact our Support Team, and we'll be happy to assist you.