
Managing Your AI Chatbot Conversations, Leads, and Analytics
Looking to understand how visitors interact with your Elfsight AI Chatbot? The Results dashboard lets you easily review conversations, access collected leads, and monitor key performance metrics in one place.
In this article
Accessing Your Chatbot Data
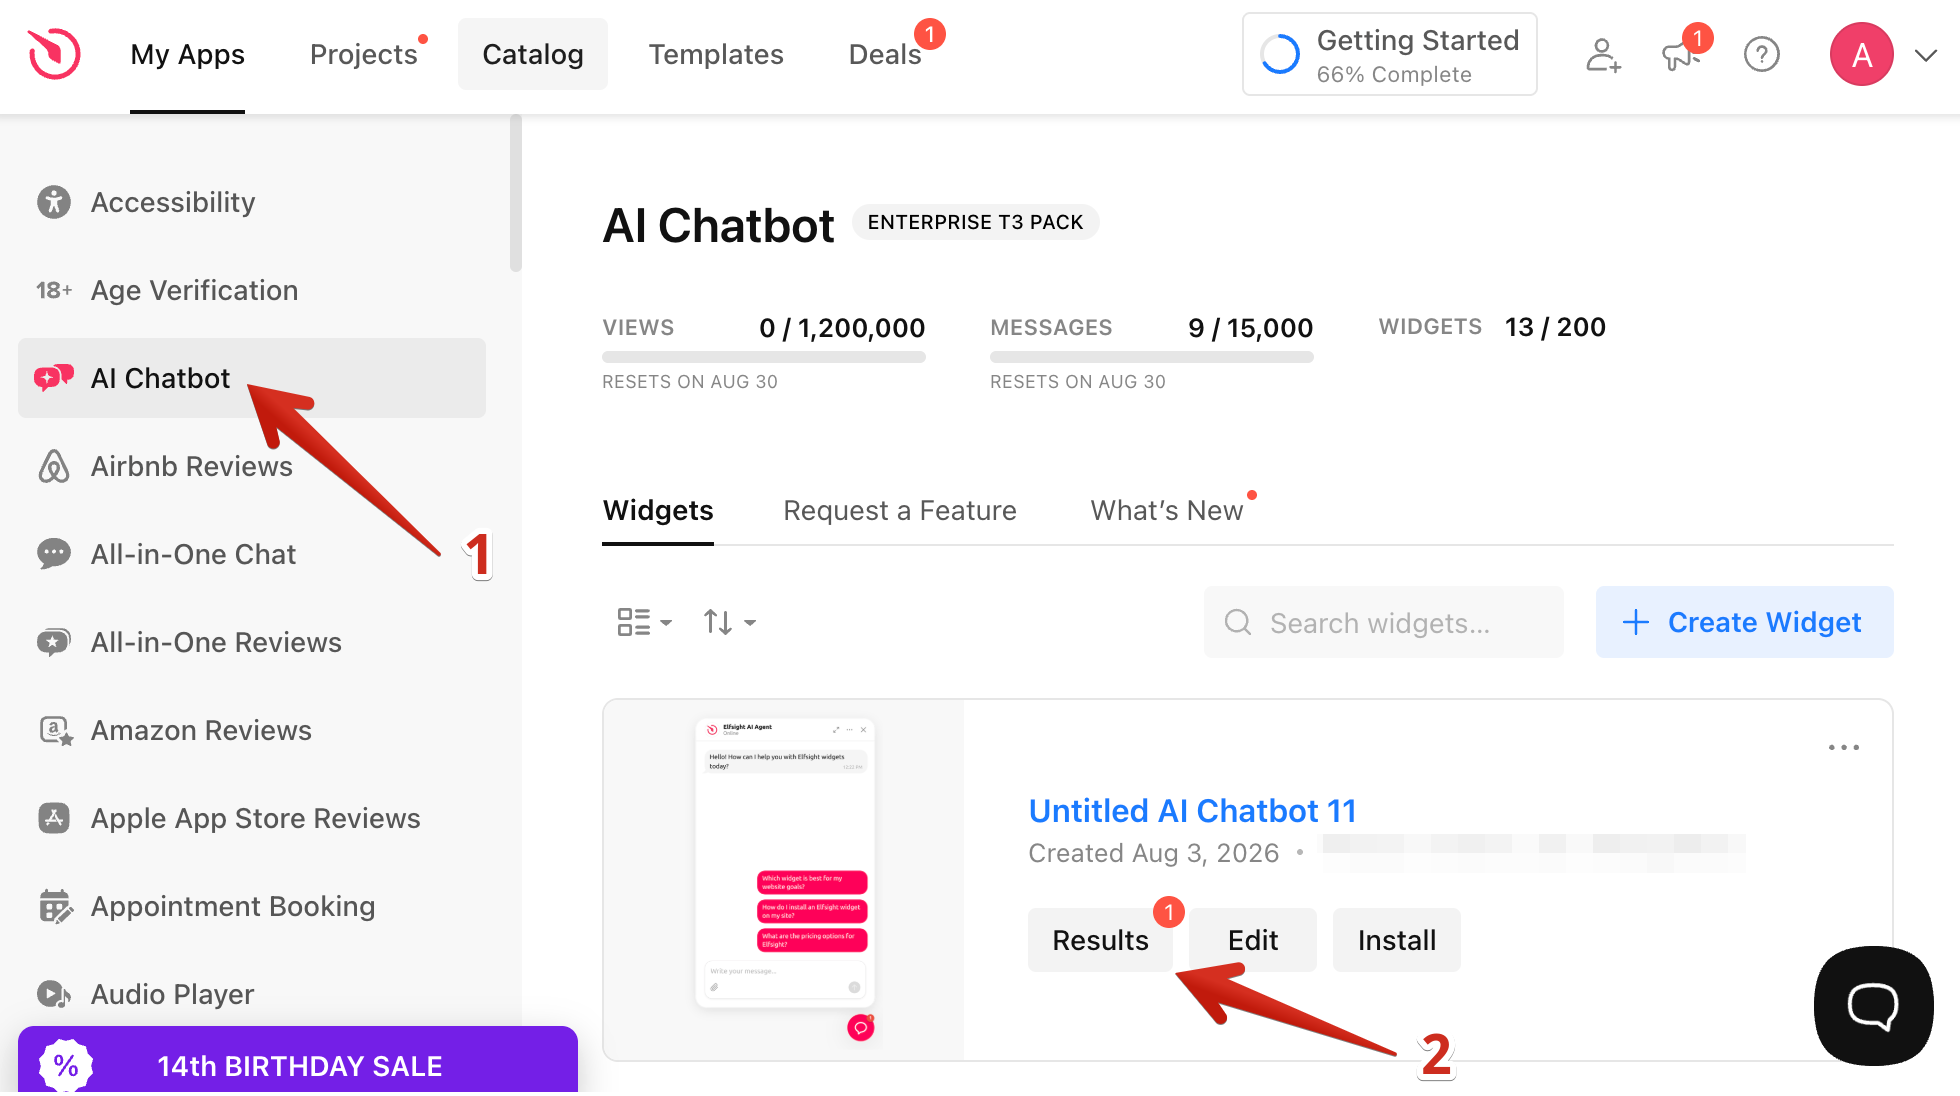
To access the data collected by your AI Chatbot, open your Elfsight dashboard, select AI Chatbot, find your widget, and click Results next to it:
After publishing your widget, you can also access the Results tab directly from the widget editor. A red notification badge next to the tab or button indicates that new data is available for review:
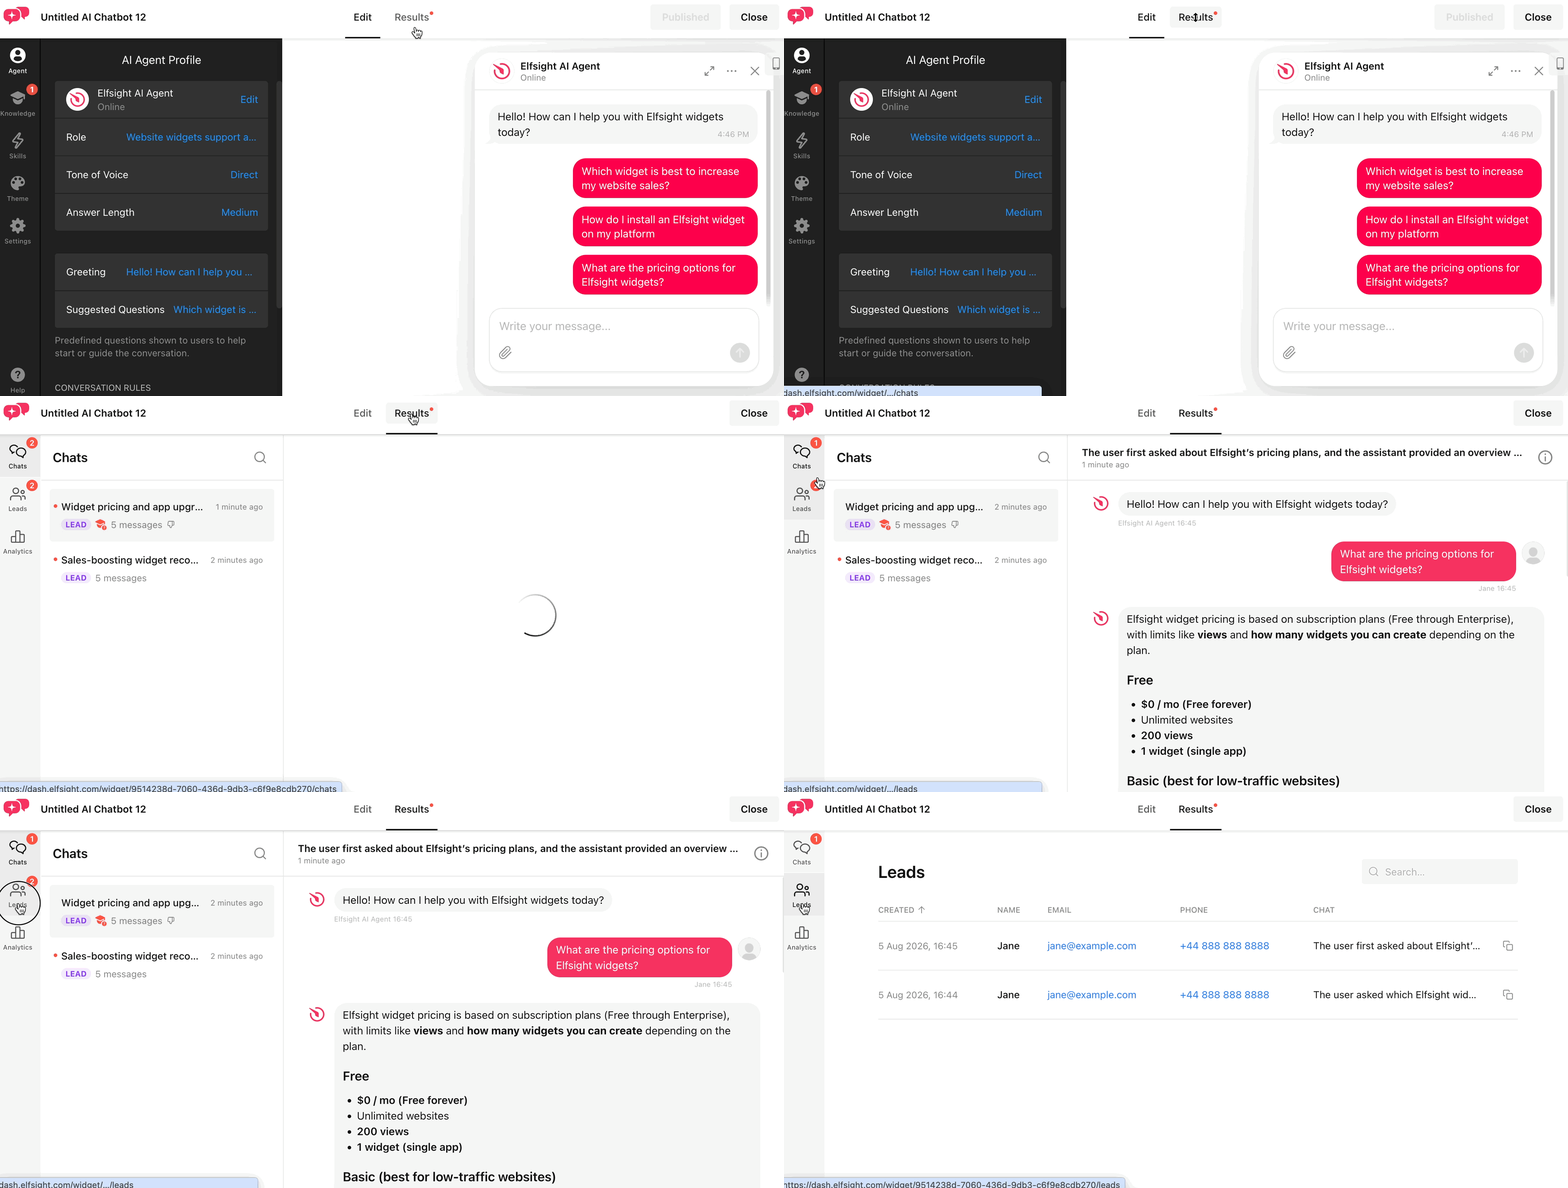
The Results dashboard contains three sections: Chats, Leads, and Analytics. Let’s look at each section in more detail.
Viewing Your Chats
The Chats tab lists all conversations with your AI Agent. Use the search to quickly find a specific conversation. Badges next to each chat highlight important information:
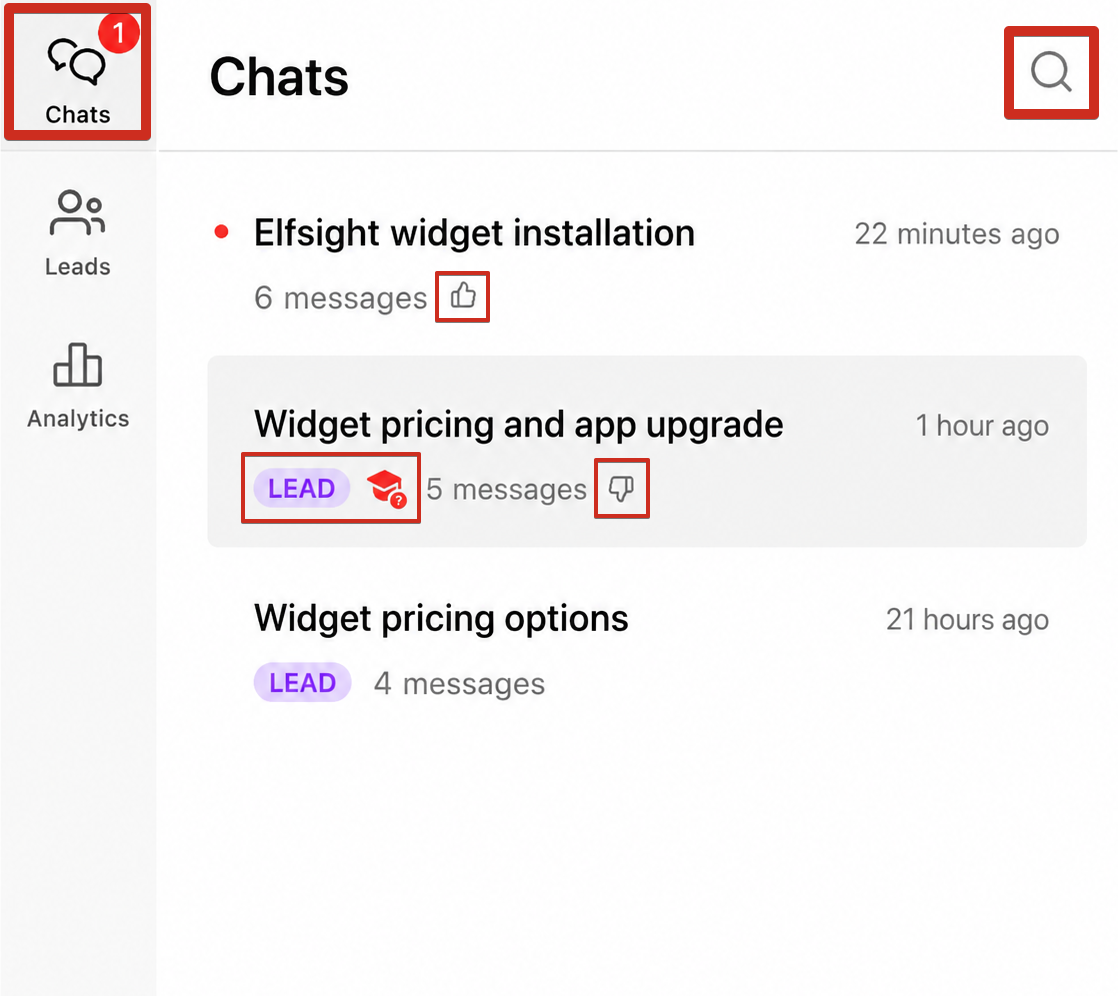
- Search — find a conversation by entering a relevant keyword.
- Lead — the visitor submitted their contact details through the form (see Collect Contacts).
- Knowledge gap — the AI Agent identified information missing from its Knowledge Base.
- Feedback — the visitor rated an AI reply positively or negatively.
Click any chat to open it. You will see the conversation as it appeared in the AI Chatbot, along with the following information:
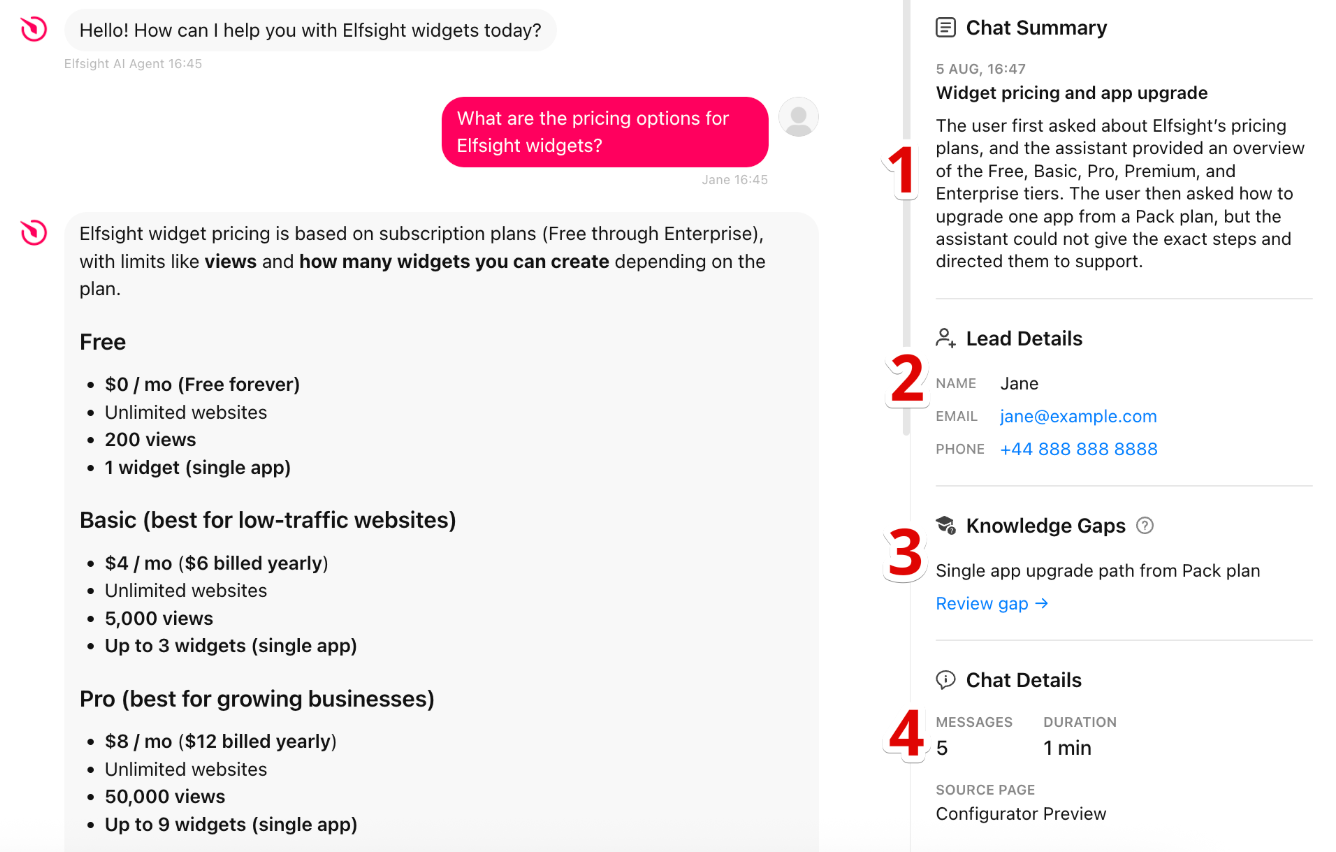
- Chat Summary — a brief AI-generated overview of the conversation.
- Lead Details — the visitor’s collected contact information.
- Knowledge Gaps — missing information identified in the conversation. Click Review Gap to open the Knowledge Gaps settings in the widget editor.
- Chat Details — the number of messages, chat duration, and the page where the conversation took place.
Next, let’s take a closer look at the leads collected during these conversations.
Reviewing Collected Leads
The Leads tab contains the contact information collected by your AI Agent through the Collect Contacts skill. Every contact form submission creates a new lead. The same visitor may appear more than once if they submit their details in different conversations:
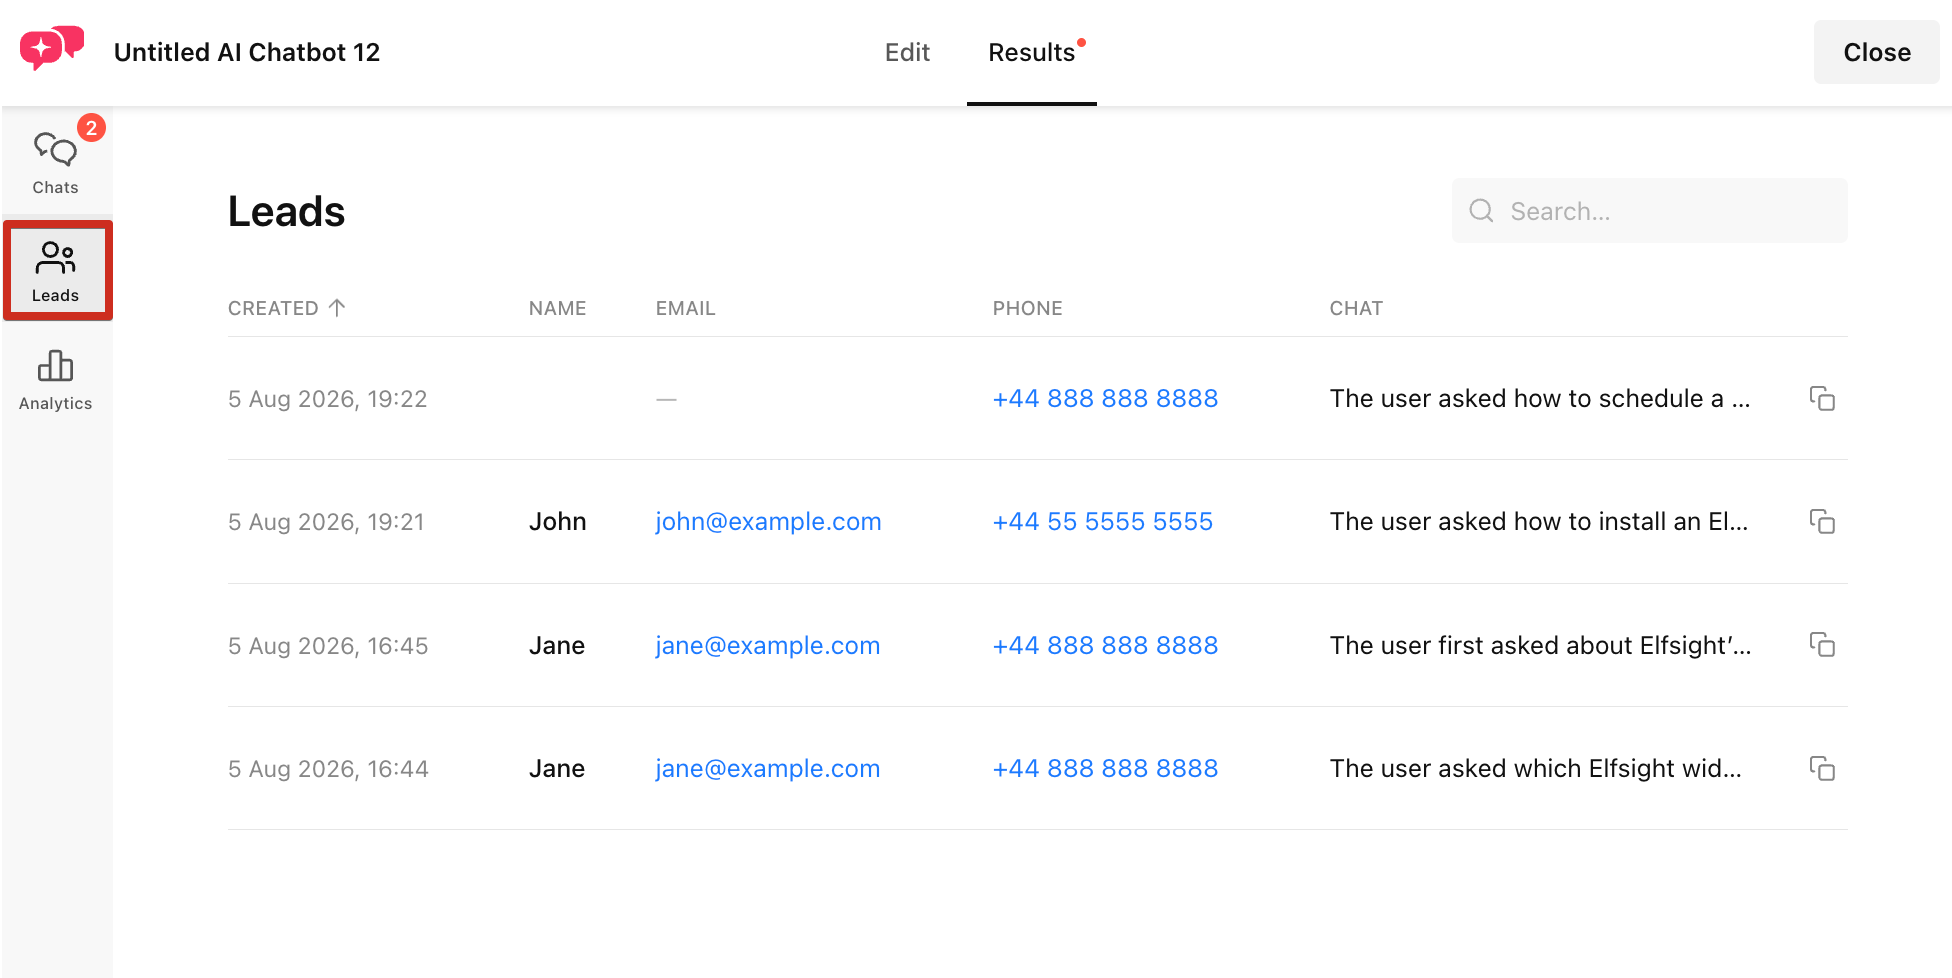
The information displayed for each lead depends on the fields enabled in your Collect Contacts settings. If an enabled field is blank, the visitor submitted the form without entering that information.
For each lead, you can see:
- when the lead was collected;
- the visitor’s name, email address, and phone number;
- a link to the conversation summary:
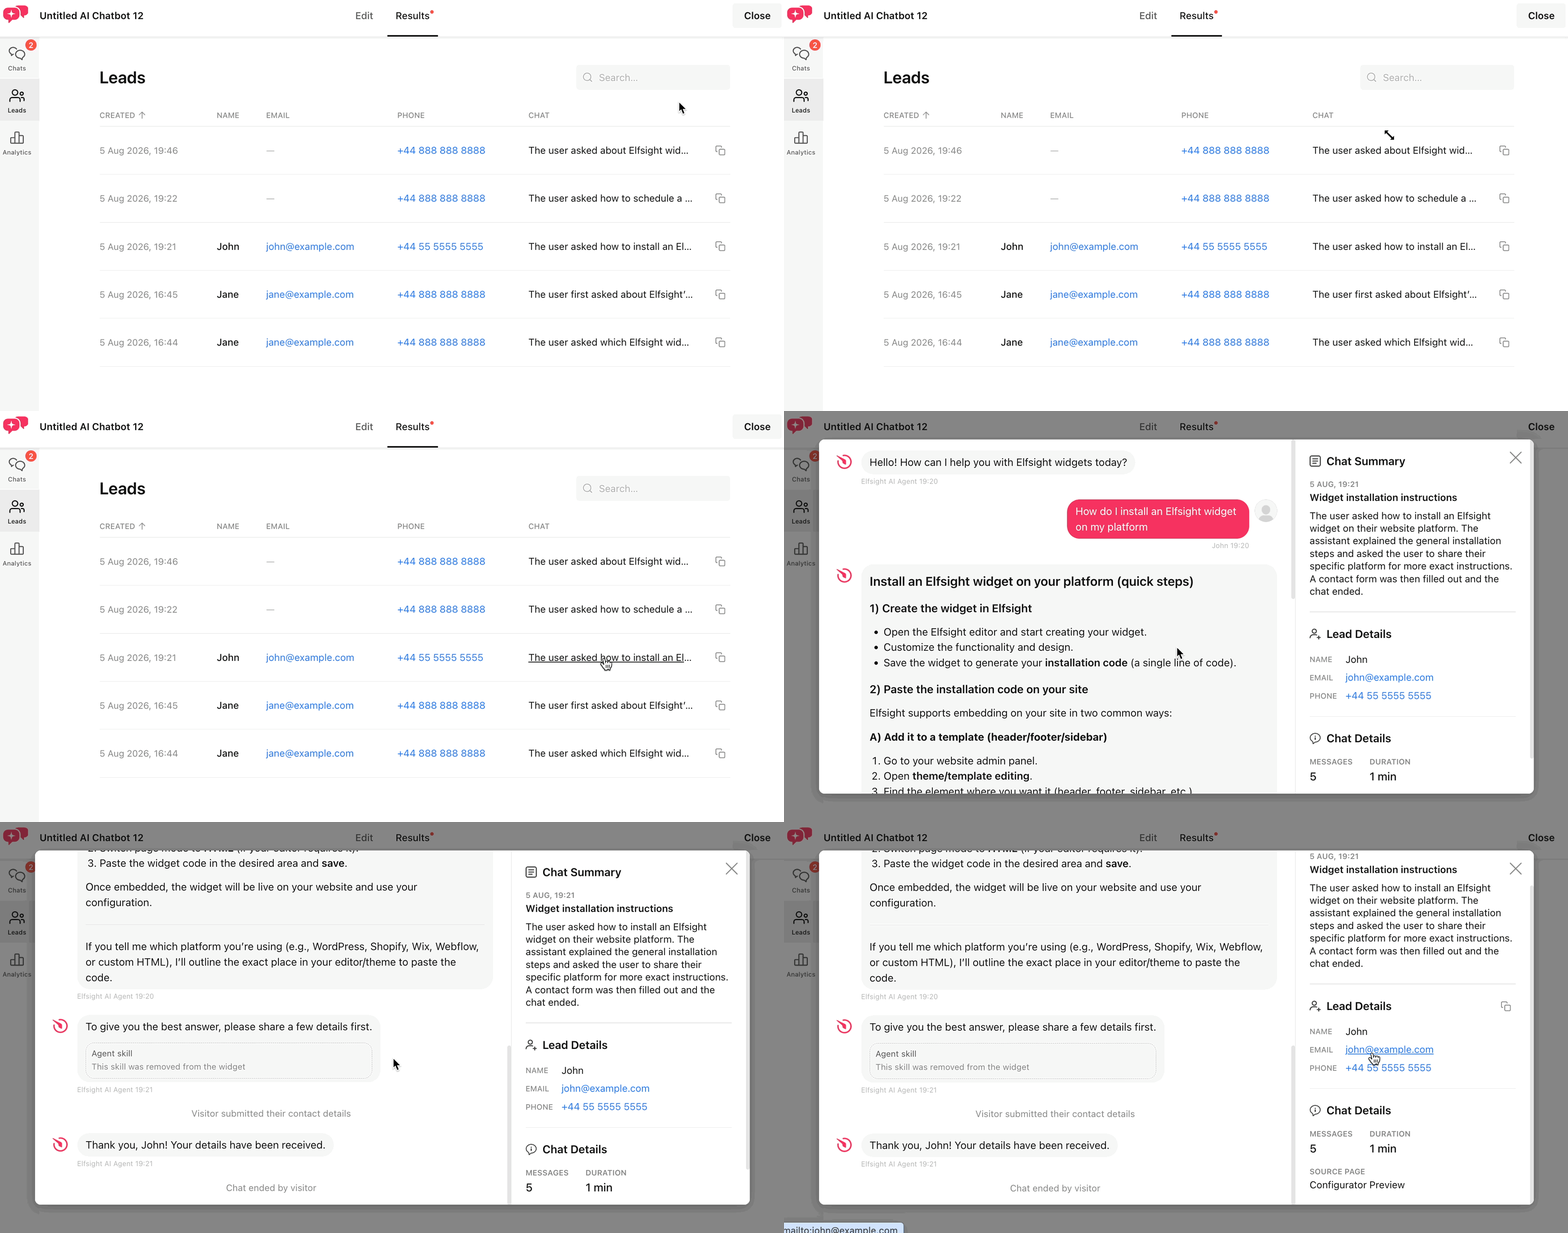
Use the search field and available lead details to find, review, and manage the contacts collected through your AI Chatbot. Next, we'll look at the analytics available for these interactions.
Checking Your Analytics
The Analytics tab provides a quick overview of your AI Agent’s activity and results. Use the period dropdown to view the data for all time or for the last 7, 30, or 90 days:
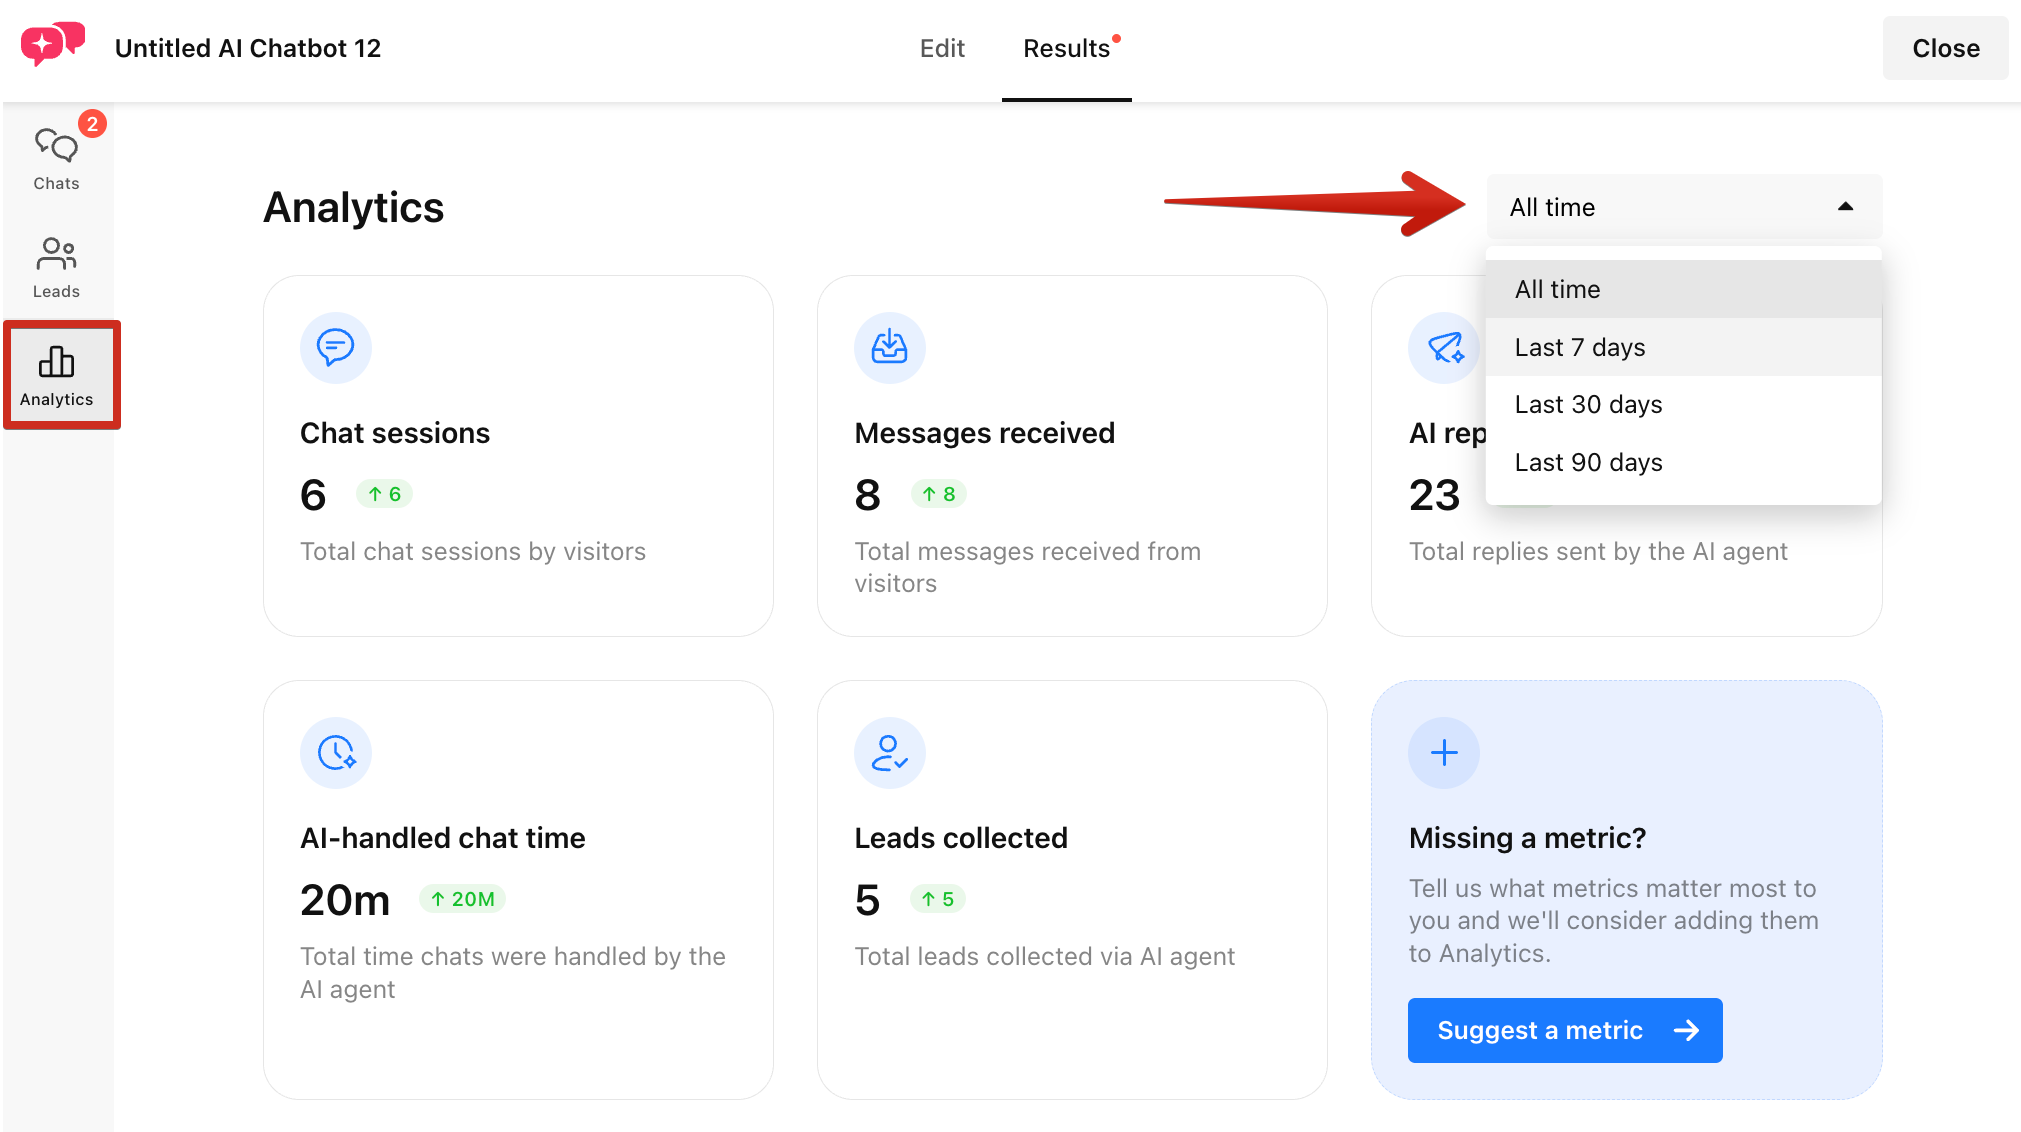
The metric cards show key insights such as chat activity, AI replies, chat time, and collected leads, along with changes compared to the previous 30-day period.
To request another metric, click Suggest a metric and let us know what you'd like to see. 🙌
Looking for more advanced tracking? Connect your AI Chatbot to Google Analytics to track additional events and analyze visitor interactions in greater detail. Learn more in our guides: Google Analytics Tracking.
We hope this article was helpful! 😊 If anything remains unclear or you need further assistance, please feel free to contact our Support Team.