Step 2: Adjust Your AI Chatbot Design & Skills
Once you've trained your AI Chatbot, it’s time to fine-tune its behavior and appearance. 🚀
In this article, you’ll learn how to manage chatbot skills and adjust the design to create a smoother experience for your visitors.
- Step 1 – Set Up Your AI Chatbot Knowledge Base
- 👉 Step 2 – Adjust Your AI Chatbot Design & Skills
- Step 3 – Configure Your AI Chatbot Settings
In this article
Manage Chatbot Skills
In the Skills tab, you can control how the chatbot interacts with visitors. Click ➕Add Skill and select the option you need: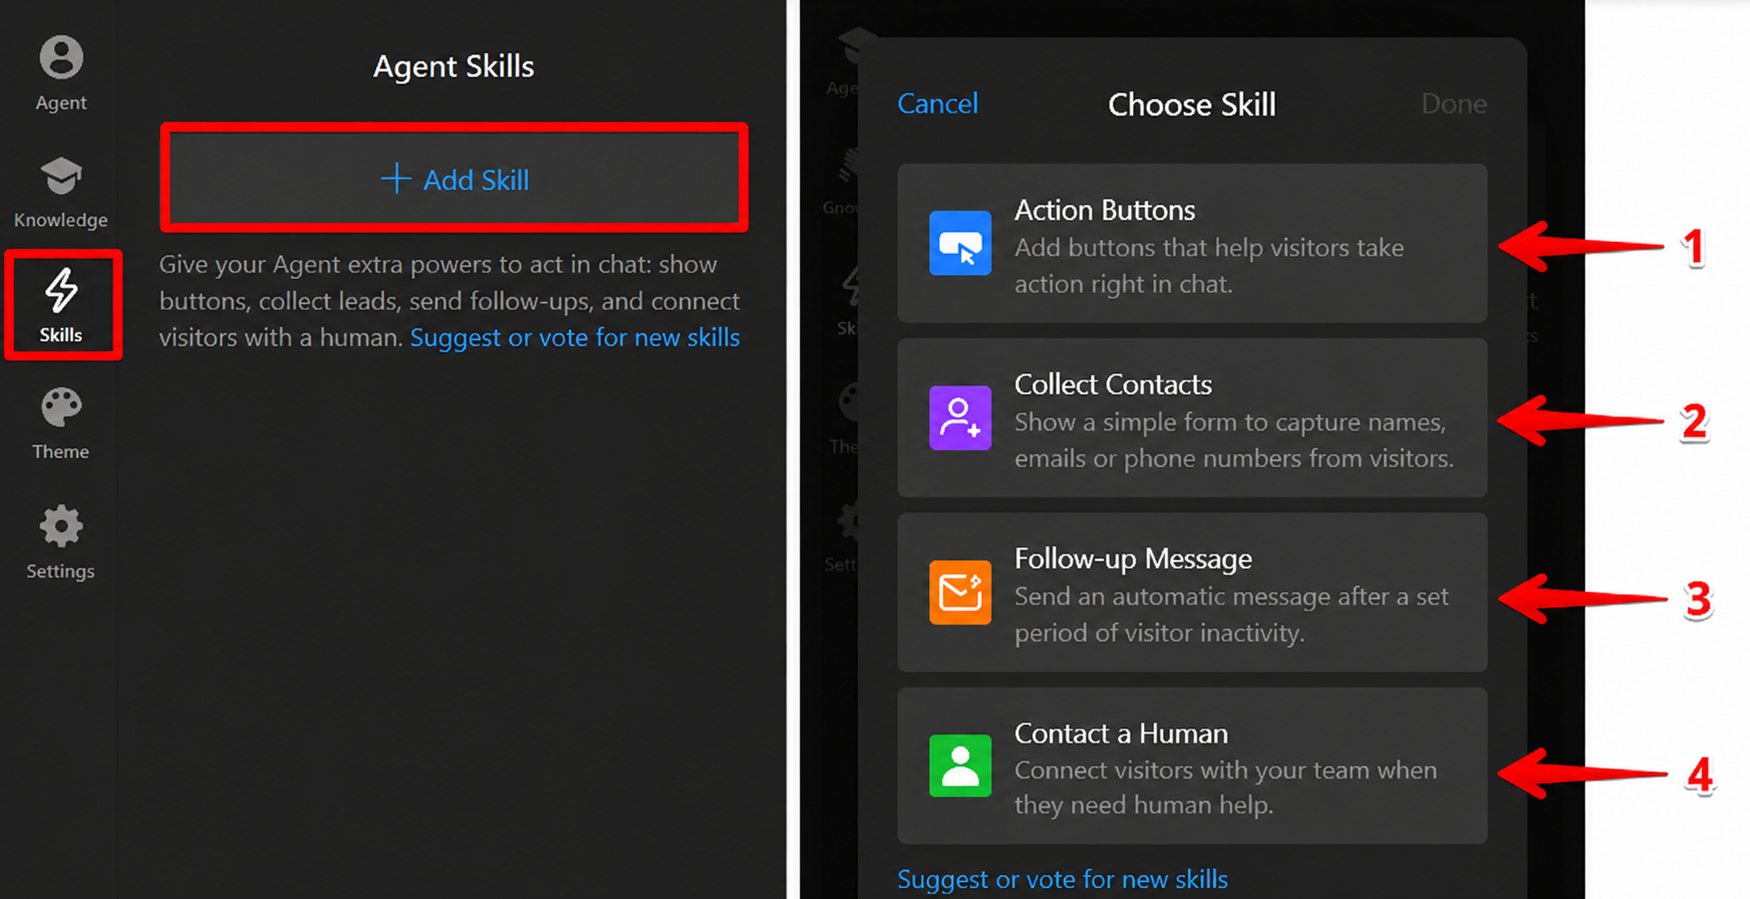
Action Buttons
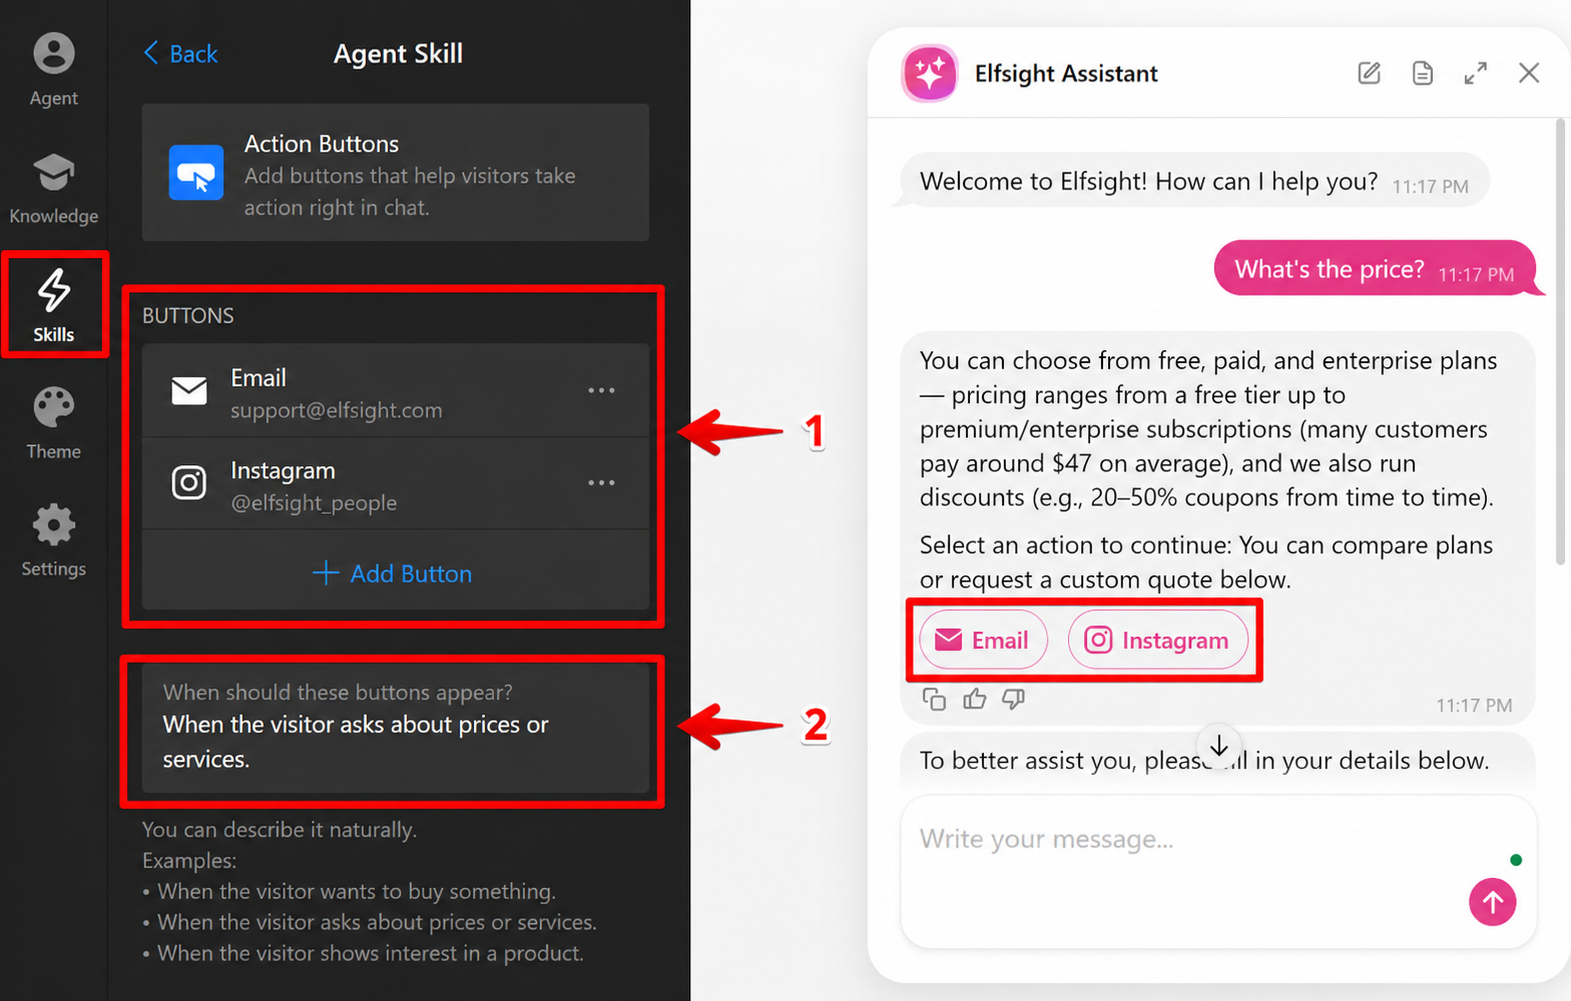
Add buttons to chatbot messages and choose when they should appear so visitors can take specific action directly in the chat:
- 1
-
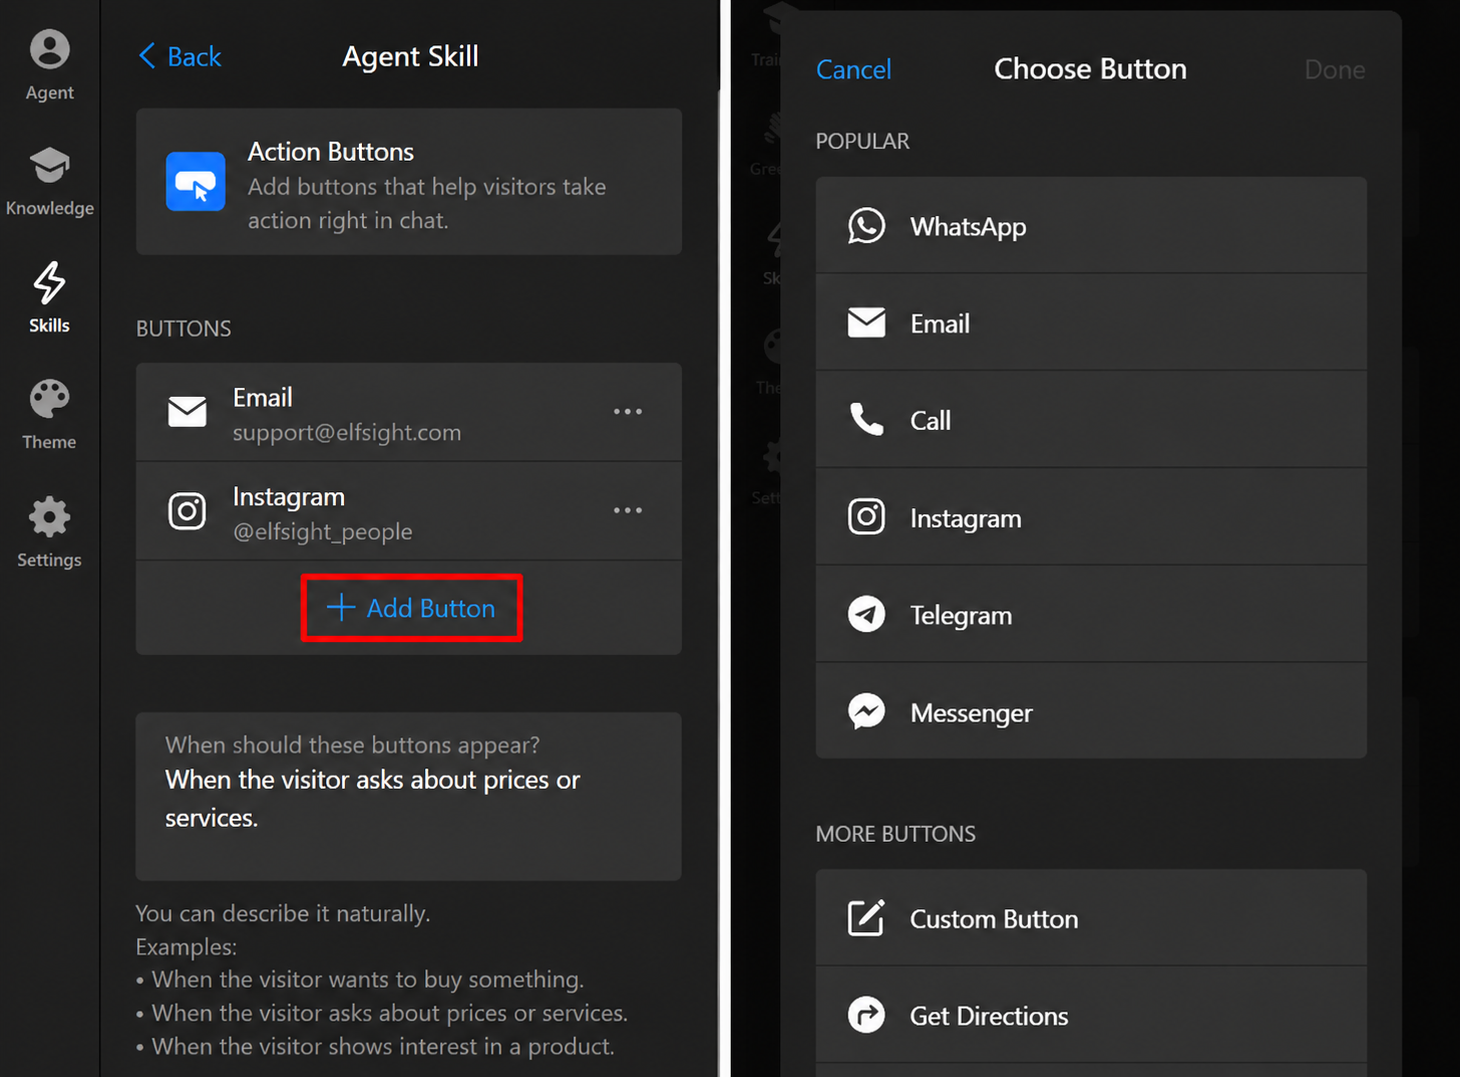
Buttons — Set up buttons that redirect visitors when clicked. You can choose from the available options or create a custom button with your own link:
- 2
-
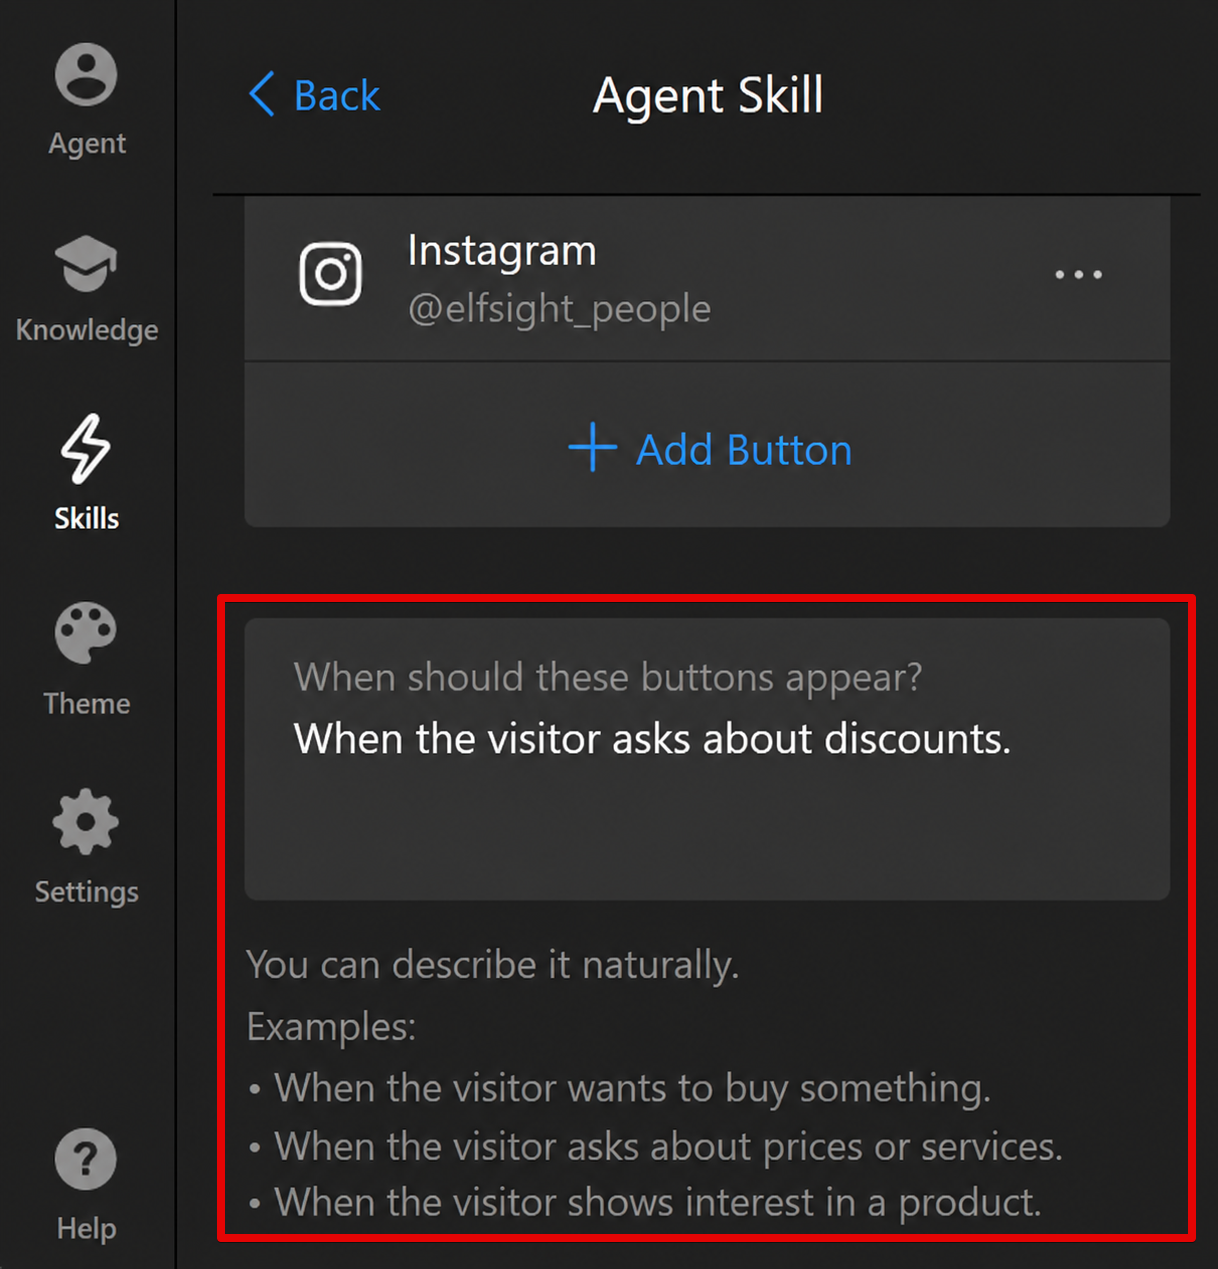
Description Field — Define when the buttons should appear in the conversation:
Collect Contacts
Use this skill to collect visitor details, such as an email address or phone number, for follow-ups or support requests:

- Form Display Options — Decide when the contact form should appear during the conversation.
- Form Fields — Select which fields to include in the form.
- Messages — Customize the request and success messages (with or without the visitor's name).
Follow-up Message
Set automatic follow-up messages to appear after a period of inactivity — perfect for sharing offers, contact details, or thank-you notes:
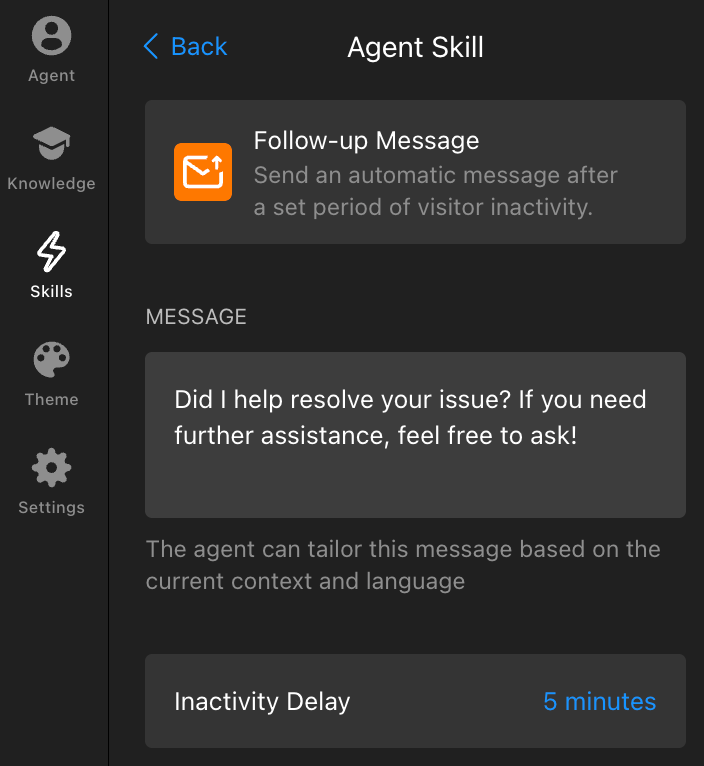
By default, Inactivity Delay is set to 5 minutes, but you can manually adjust it to your liking.
Contact a Human
Use this skill to offer visitors a way to reach a real person:
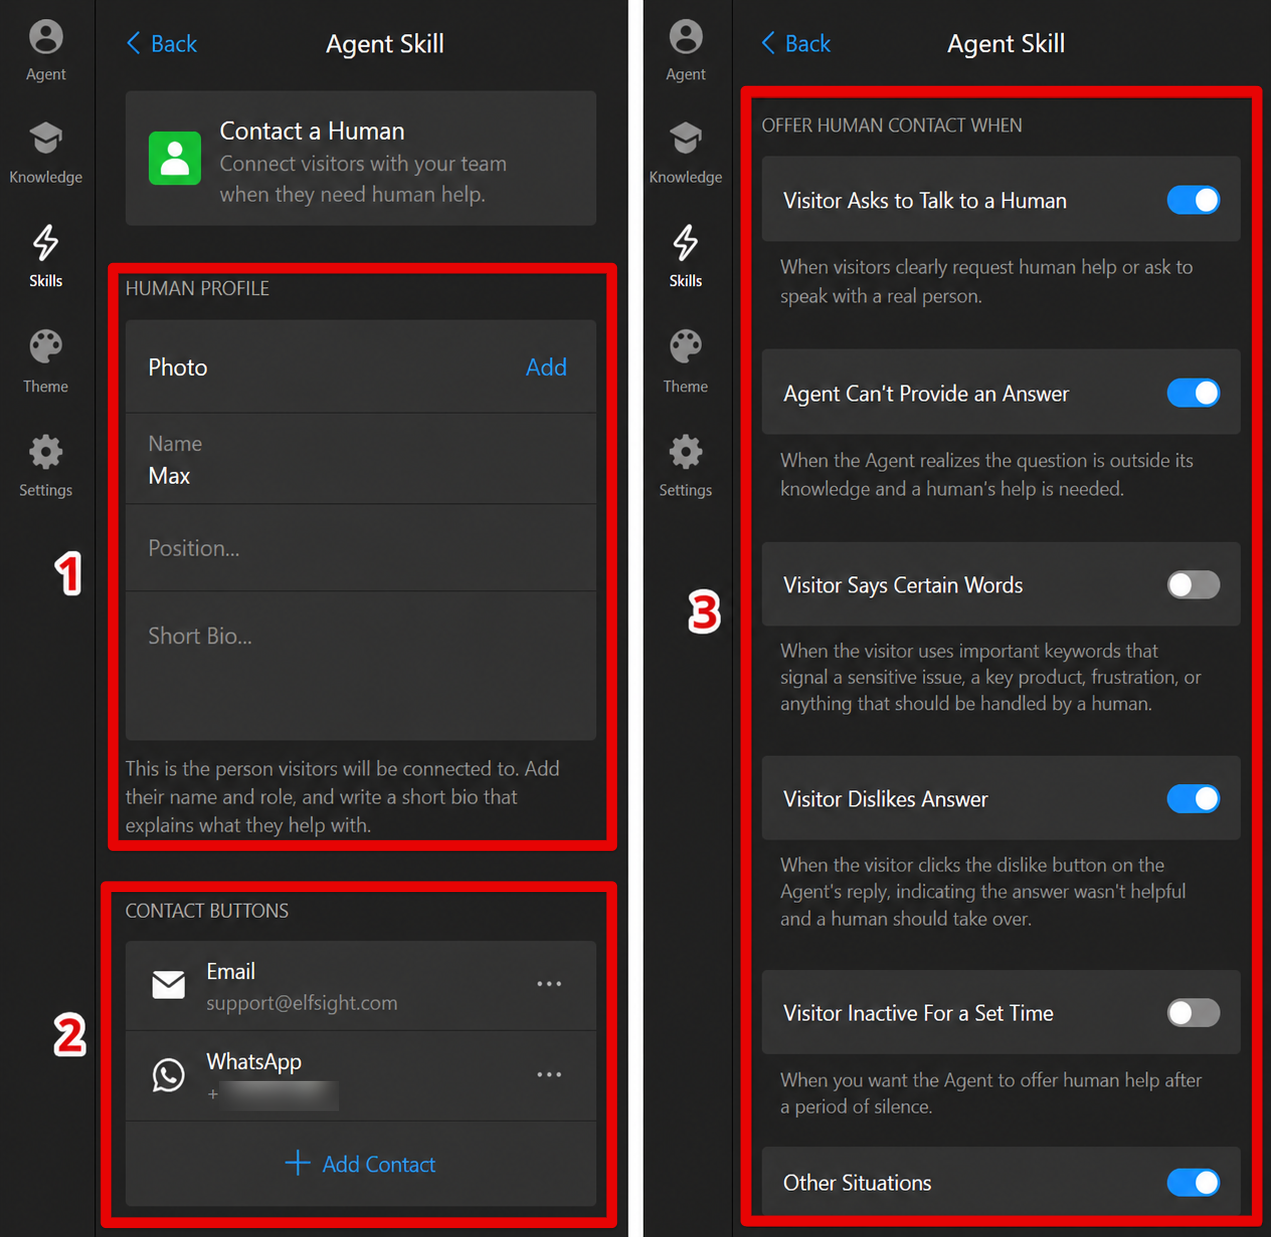
- Human Profile — Add a photo, name, position, and short bio for the person visitors will contact.
- Contact Buttons — Add buttons to the AI Agent's messages that will redirect the visitor to a real person.
- Options for Contacting a Human — Choose when the chatbot should offer a transfer to a real person. You can use the built-in options or describe your own scenarios in Other Situations.
Customize Chatbot Appearance
Now, let’s personalize the colors and overall design of your chatbot. In the Theme tab, you can select a preset theme and adjust accent colors to match your website's look.
If you need more control, click Customize Theme to configure specific parts of the chatbot interface:
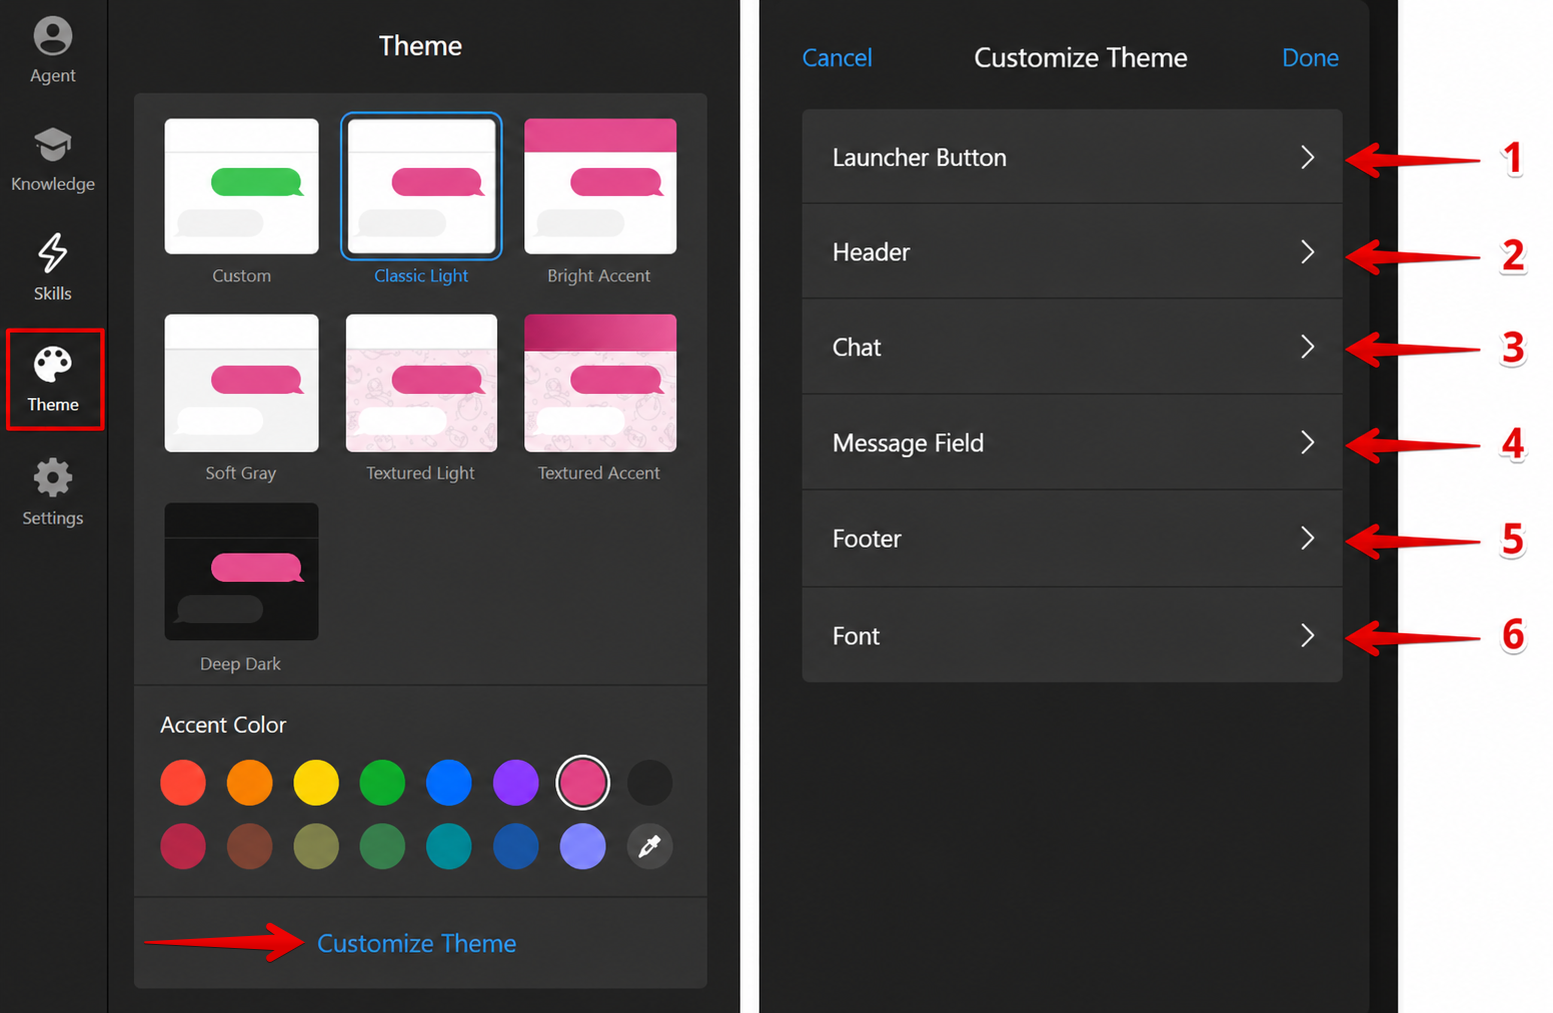
- Launcher Button — Change the launcher button color and size.
- Header — Set the colors for header elements.
- Chat — Adjust the chat window color and corner radius.
- Message Field — Customize the appearance of the message input field.
- Footer — Select the footer text color.
- Font — Choose the chatbot font.
Here is a visual demonstration of what you can change: 
Great job! You’ve successfully personalized your AI Chatbot. Next, let’s move on to configuring the advanced settings to finalize the setup and enhance its functionality. ✨