Step 1: Set Up Your AI Chatbot Knowledge Base
The AI Chatbot widget is an intelligent tool that helps you engage visitors and provide instant support on your website. The first step is training your chatbot with relevant data, ensuring it interacts effectively with your visitors.
This guide will show you how to create and train your AI Chatbot — from adding a Knowledge Base to fine-tuning the agent's behavior.
- 👉 Step 1 – Set Up Your AI Chatbot Knowledge Base
- Step 2 – Adjust Your AI Chatbot Design & Skills
- Step 3 – Configure Your AI Chatbot Settings
In this article
Create Your AI Agent
To create your AI Chatbot, enter your website URL and click Analyze. The chatbot will scan your site and generate a basic setup you can later customize. If you don’t have a website, click Enter details manually:
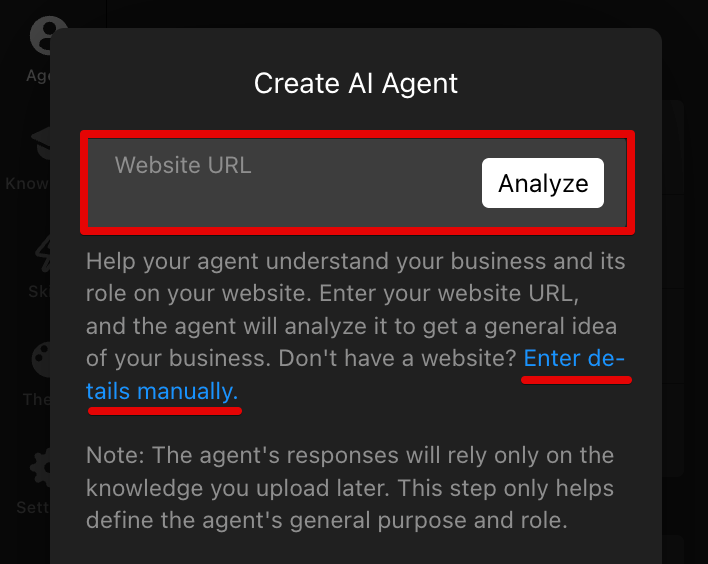
You’ll then be able to add your business information and choose the Agent's tone and role to match your brand and communication style.
Set Up AI Agent Profile
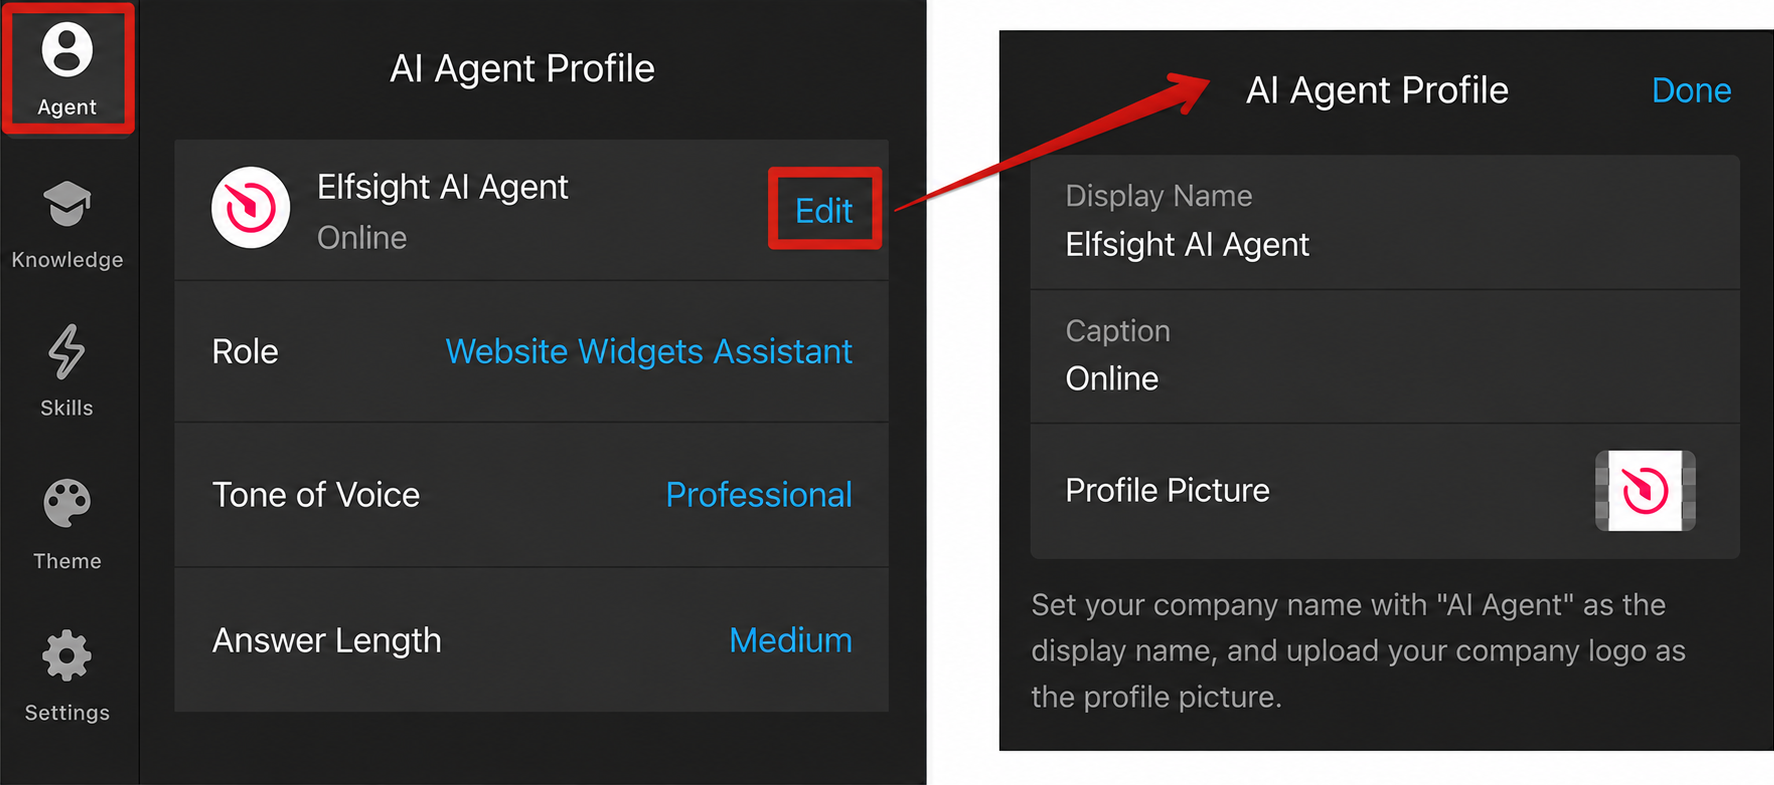
After your website is analyzed or your business details are added, you’ll see the Agent tab.
Click Edit next to the agent name to update its Display Name, Caption, and Profile Picture. You can also fine-tune how the AI communicates by adjusting settings like Tone of Voice, Answer Length and more:
Add Greeting and Suggested Questions
In the Agent tab, you can also customize the chatbot’s welcome message and suggested questions to help visitors start the conversation.
Click on the Greeting to edit the first message users will see when opening the chat. You can also manage Suggested Questions by adding your own prompts or removing the ones you don’t need:
Сonfigure Conversation Rules
On the same Agent tab, you can create conversation rules to guide how your chatbot behaves and responds in different situations.
Click ➕Add Rule to add a new instruction, optionally give it a title, then describe how the AI agent should respond:
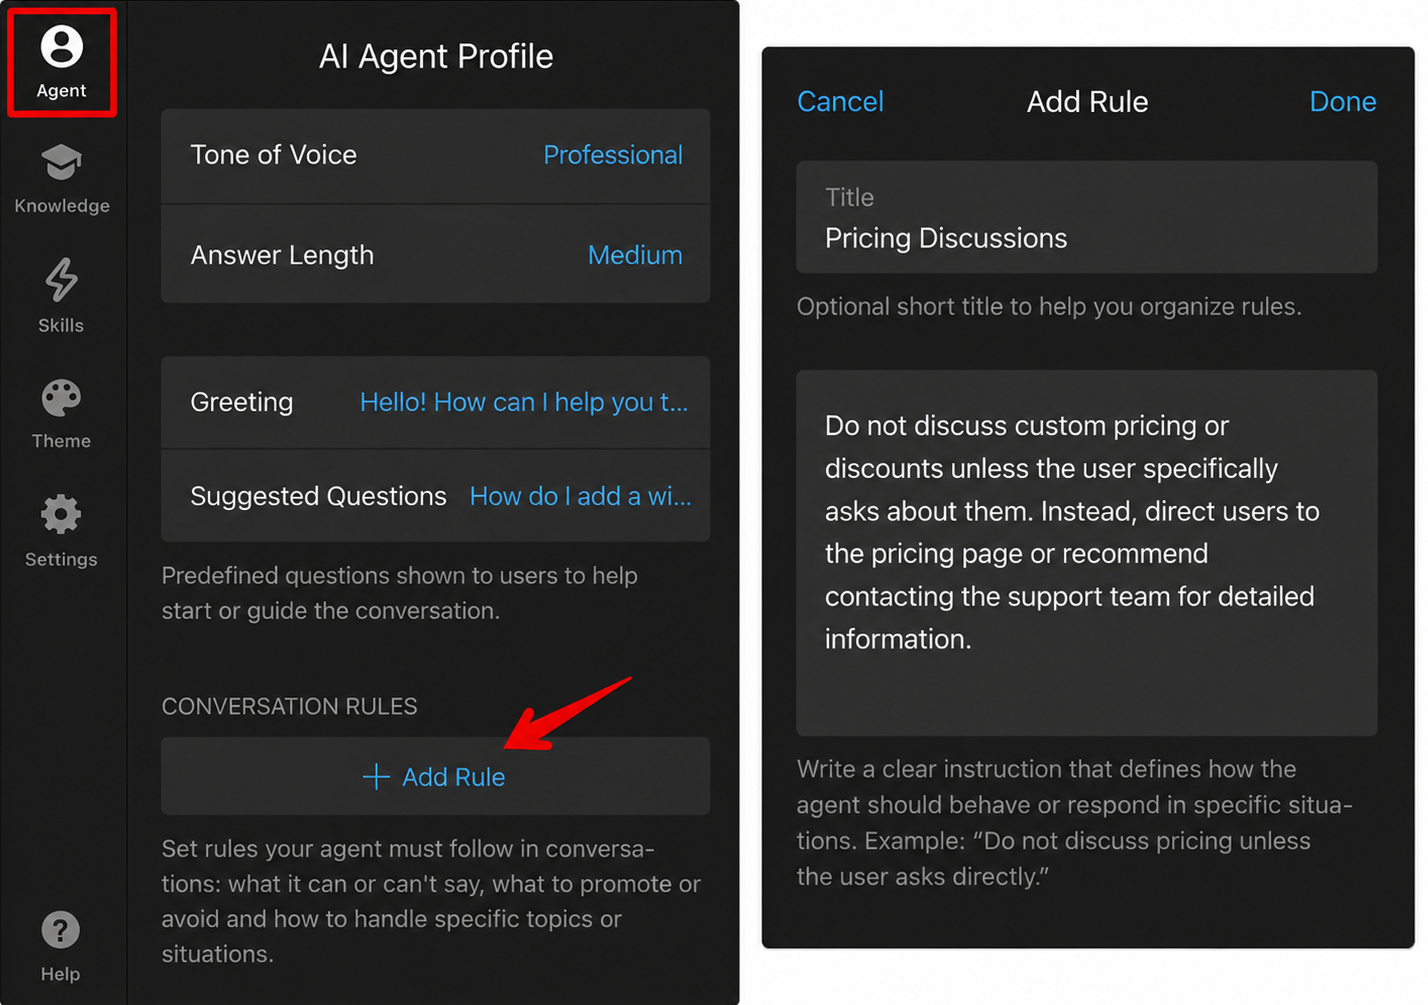
You can use rules to avoid unsupported topics, limit what the chatbot can promise, promote specific products or services, guide responses for sensitive questions, and more.
Set Up Knowledge Base
The Knowledge tab contains your chatbot’s Knowledge Base — the information your agent uses to respond to users. You can add data in several ways:
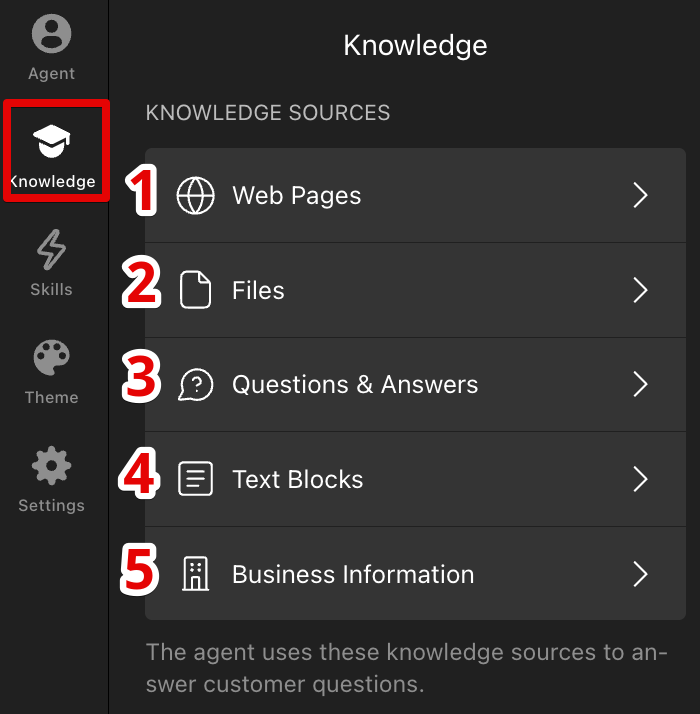
Web Pages
Add links to web pages with relevant information — the AI Chatbot will scan them and use their content to answer user questions:
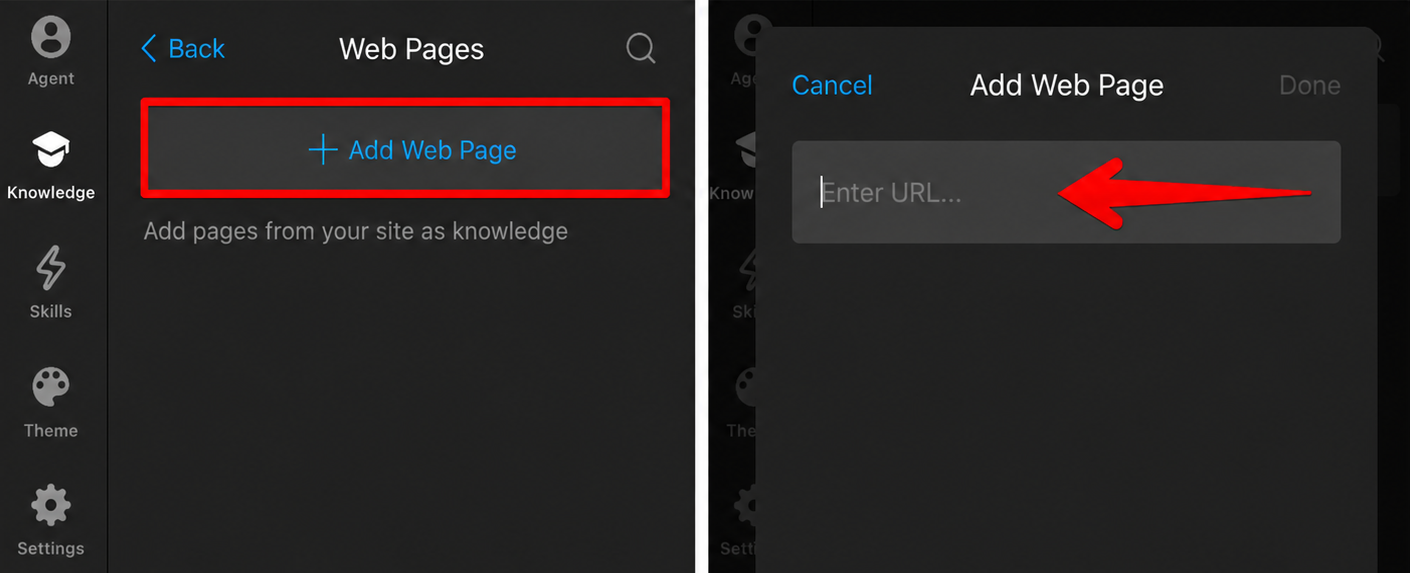
Here are some key details to keep in mind when using Web Pages:
- The chatbot automatically adds web pages to the Knowledge Base when analyzing your website URL during setup.
- You can add up to 200 web pages. The content will be processed and stored for the AI to use during conversations.
- Subpages aren’t crawled automatically — add each one separately to include all relevant content.
- The chatbot recognizes the page it’s on, helping it give more context-aware answers.
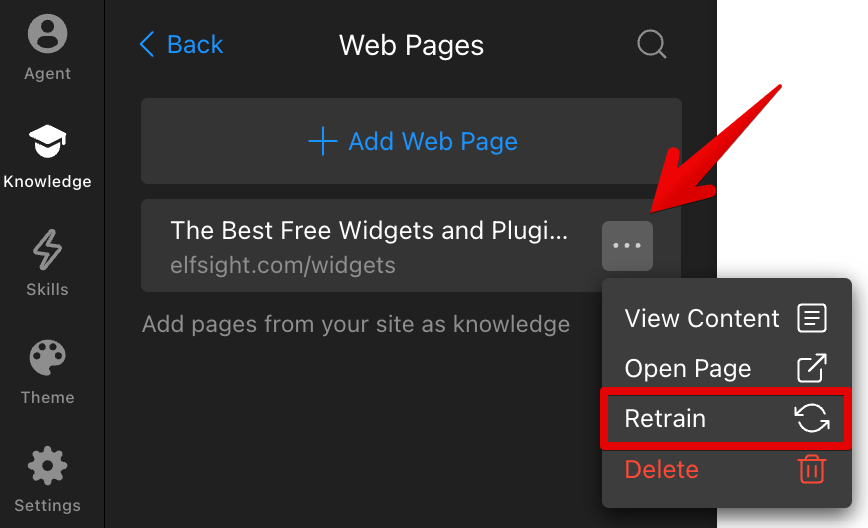
Please note that if you update your web page, the widget won't automatically update the data it previously pulled. To refresh the content, click Retrain to get the latest information:
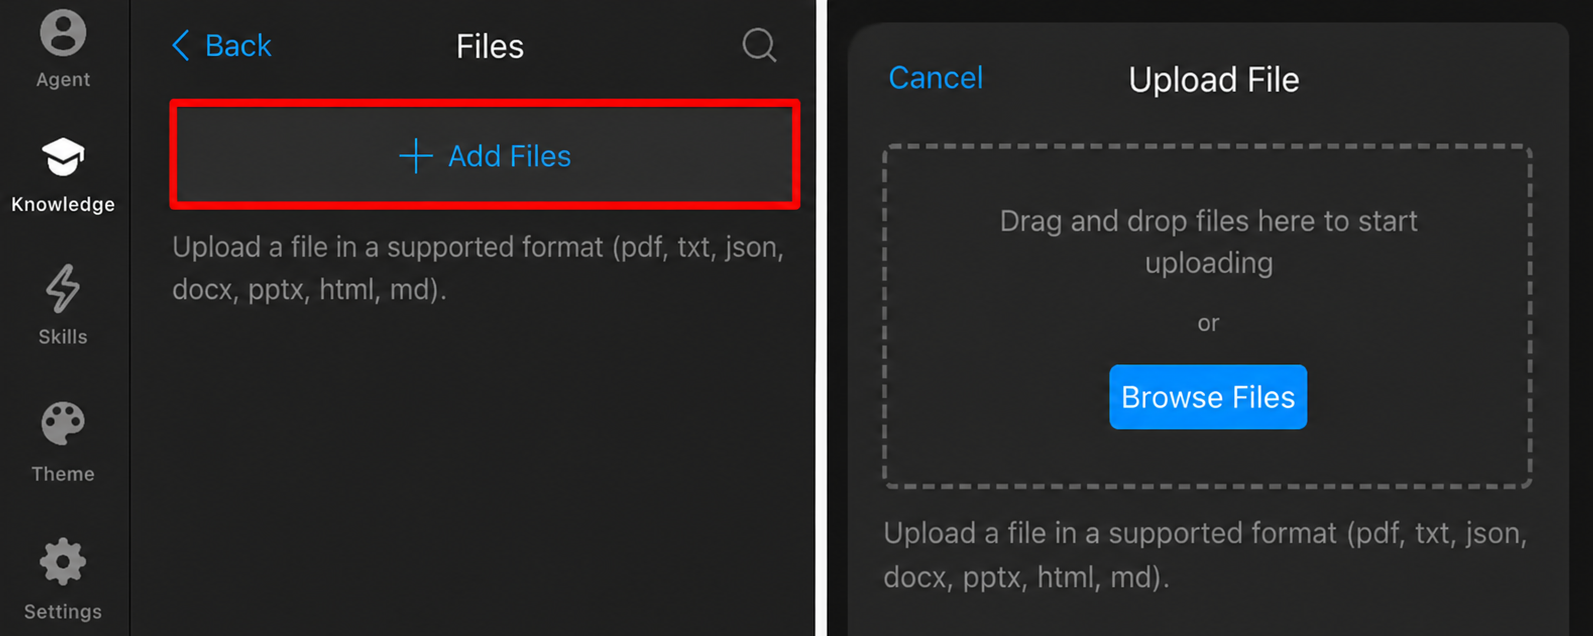
Files
Upload files such as PDFs or Word documents for your chatbot to learn from. Click ➕Add Files, then drag and drop your documents or click Browse Files:
Questions & Answers
Add common questions and answers to enhance the chatbot's learning by clicking the ➕Add Question button: 
Keep questions and answers short and clear to improve the chatbot’s accuracy. This helps the widget provide quick responses to frequently asked queries.
Text Blocks
Add predefined text blocks by clicking ➕Add Text Block:  They can include key business details, product info, FAQs, or instructions — anything that helps the chatbot respond accurately.
Business Information
The Business Information section contains basic details about your company, including the Business Name, Industry, and Overview:

If you analyzed your website during setup, this information will be filled in automatically. You can update it anytime to keep your chatbot responses accurate and up to date.
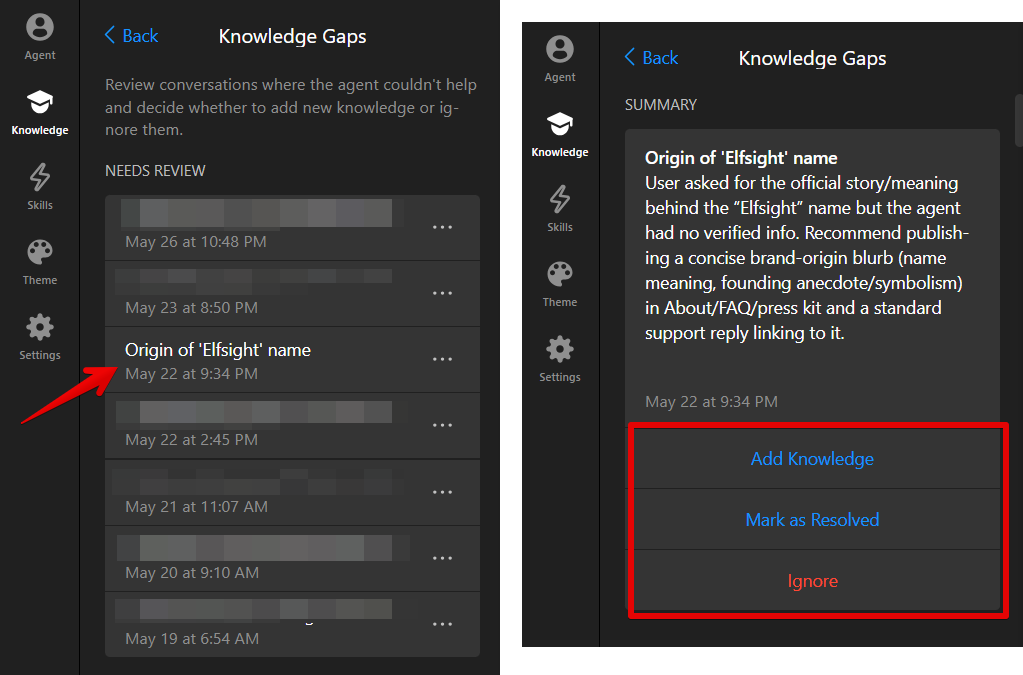
Knowledge Gaps
After using your widget for a while, a new section will appear in the editor:

This section shows conversations where the AI agent couldn’t answer users’ queries. You can review these gaps and decide whether to add new knowledge to improve the AI’s responses:
That’s it! 🎉 Your AI Chatbot is now ready to chat with your visitors. You’ve built an AI agent, configured its behavior, and created a Knowledge Base. Next, let’s adjust its interactive features and make it visually fit your website.
FAQ
What file types can I upload?
The widget supports PDF, Word, and text files. For best results, we recommend using JSON format for training.
Why is my chatbot responding slowly?
The typical AI response time is 5-10 seconds. If it’s slower, try shortening the instructions. Performance may also depend on:
- Current OpenAI server load
- Processing queue activity
What is the message limit per chat?
There is a limit of 100 messages in a single conversation thread.