Adding Elfsight Widget to Webflow Website
Add your Elfsight widget to your Webflow website in just a few steps with this guide. Copy your widget installation code, and let’s get started!
Watch the quick video tutorial or scroll down for step-by-step instructions 🚀
Choose how to install your widget
Add Your Widget to a Specific Page
- 1
-
Open the Webflow website editor
Log in to your Webflow dashboard and choose the website where you'd like to add the widget. Hover over it and click Open in Webflow: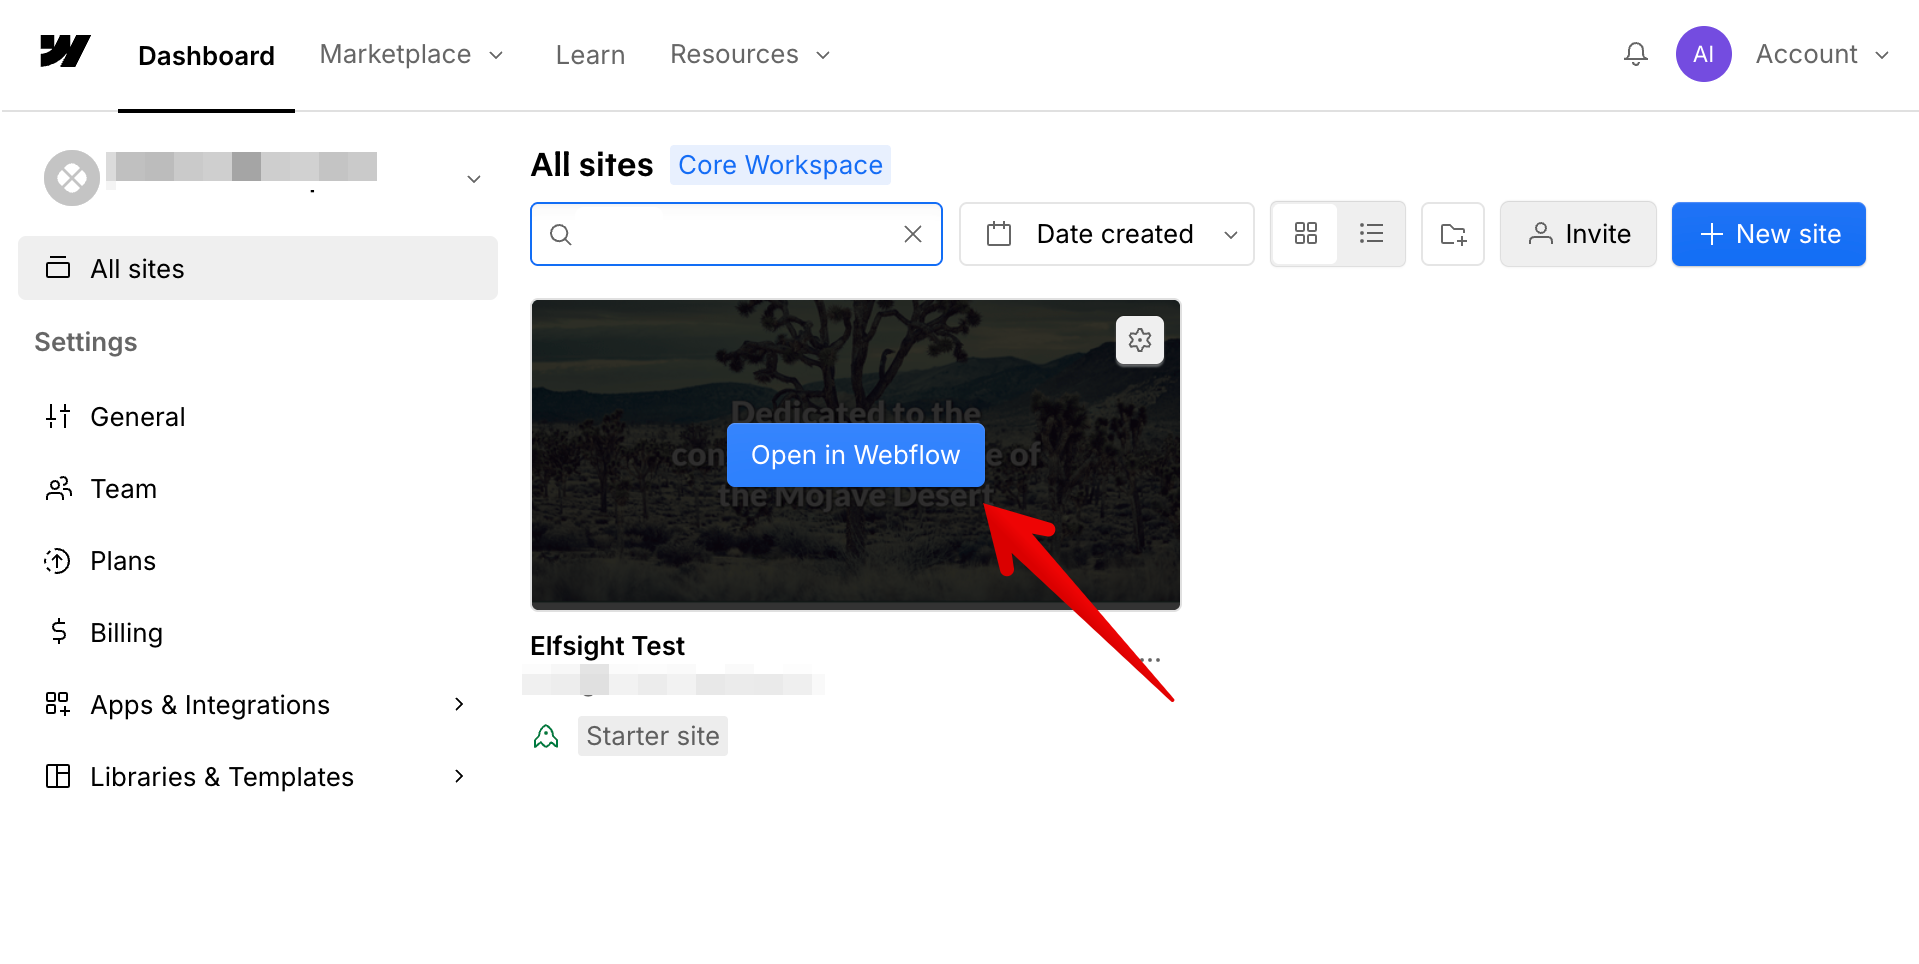
- 2
-
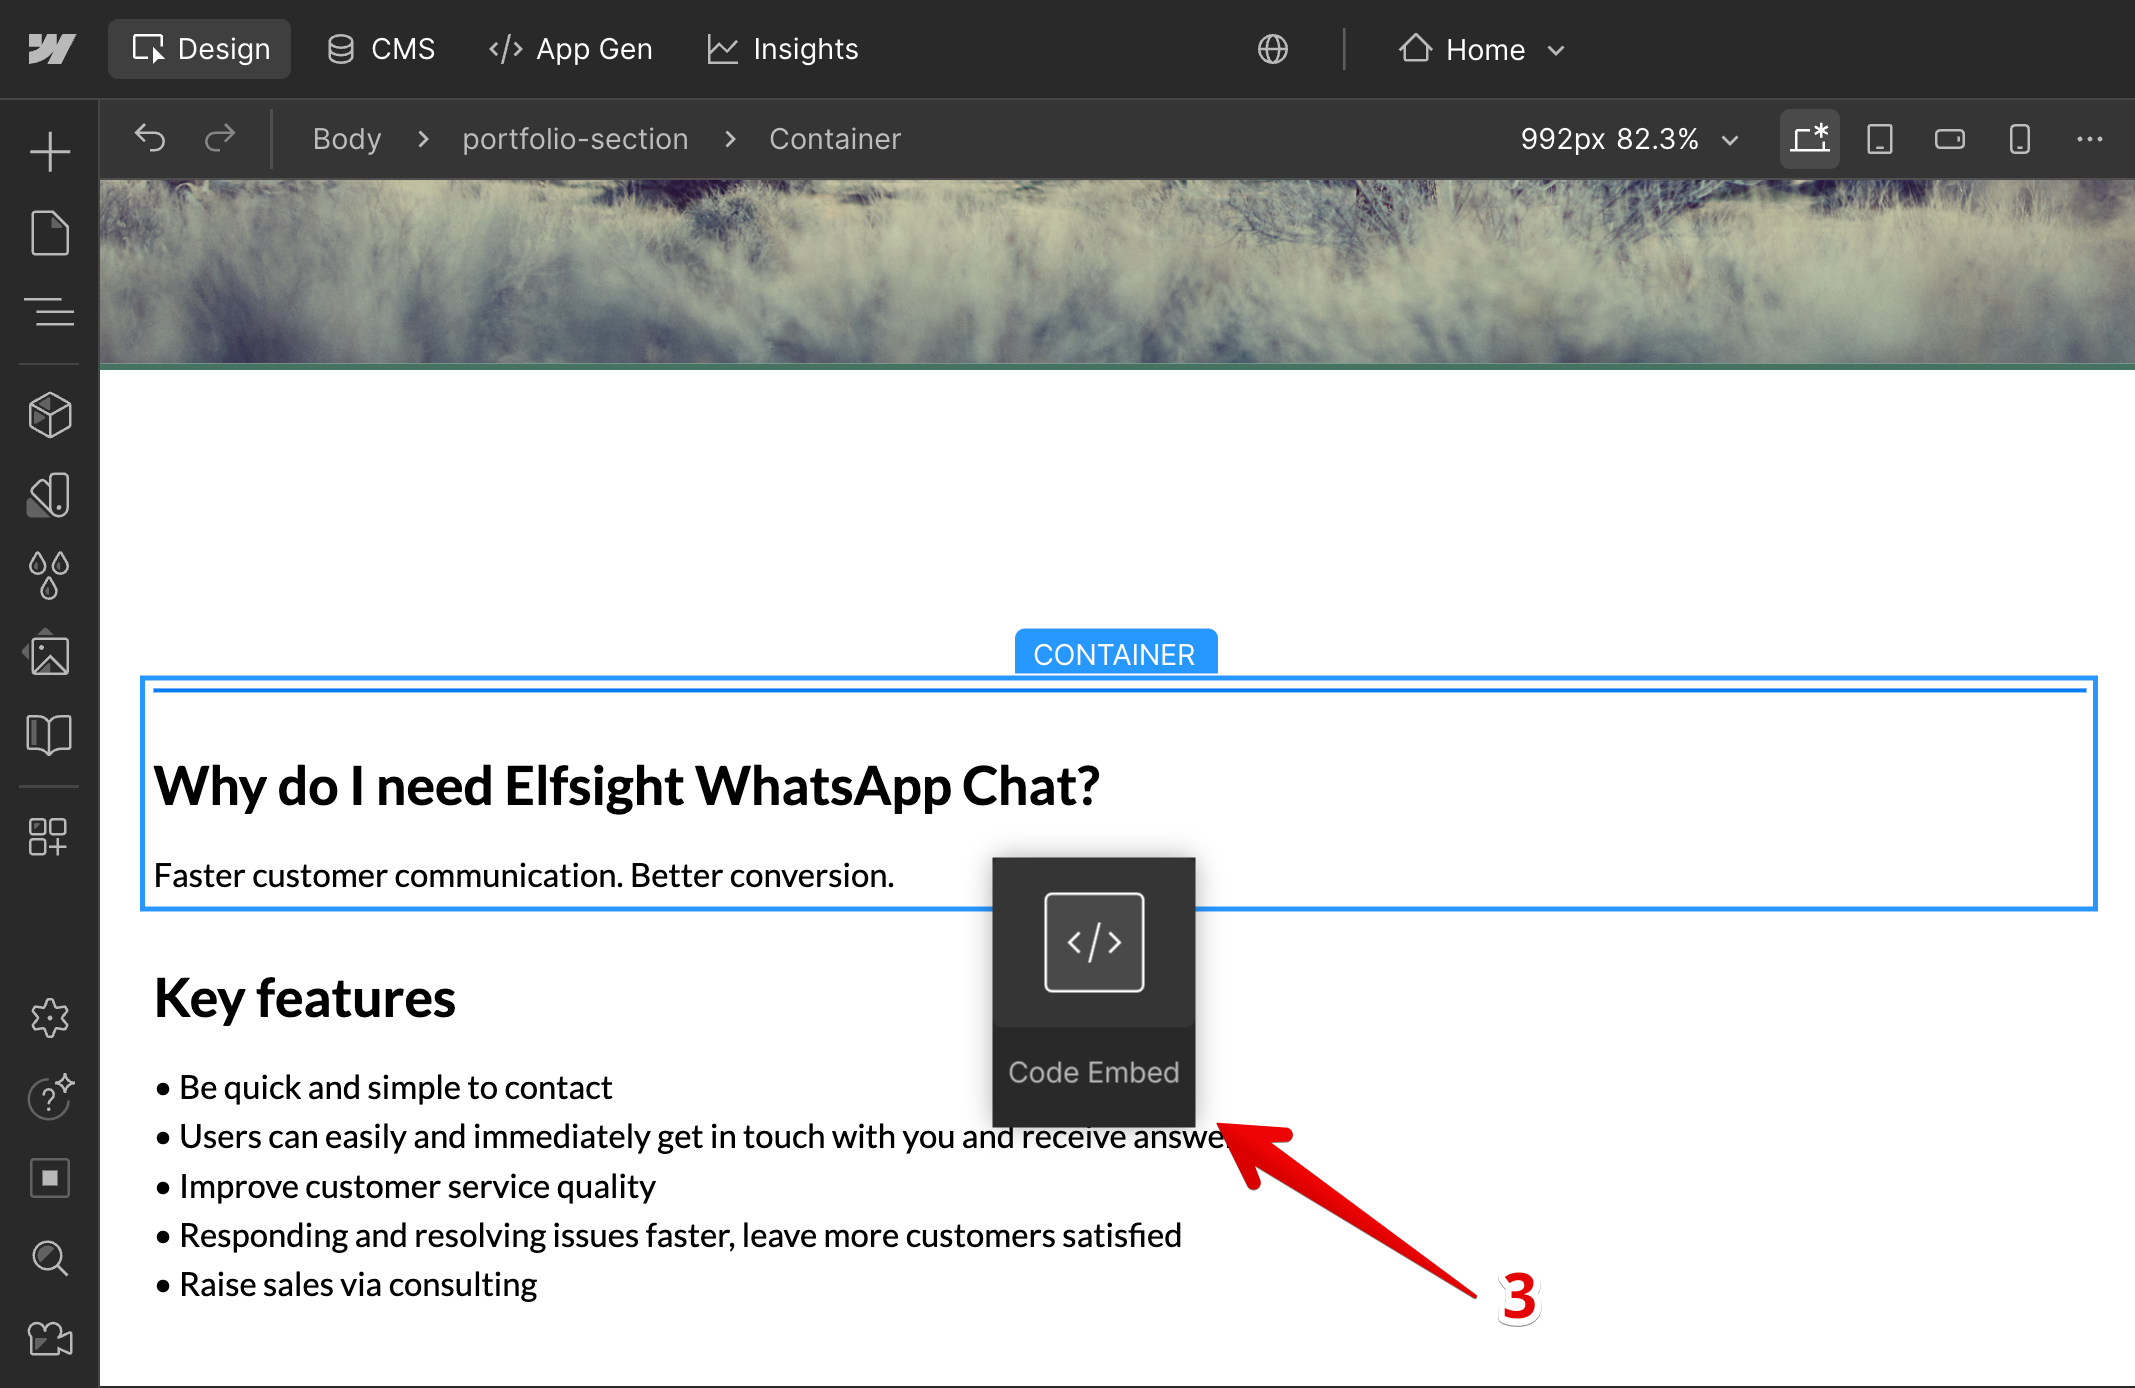
Add Code Embed element to the page
Click the ➕ icon and find the Code Embed element. Drag and drop it to the place where you'd like the widget to appear: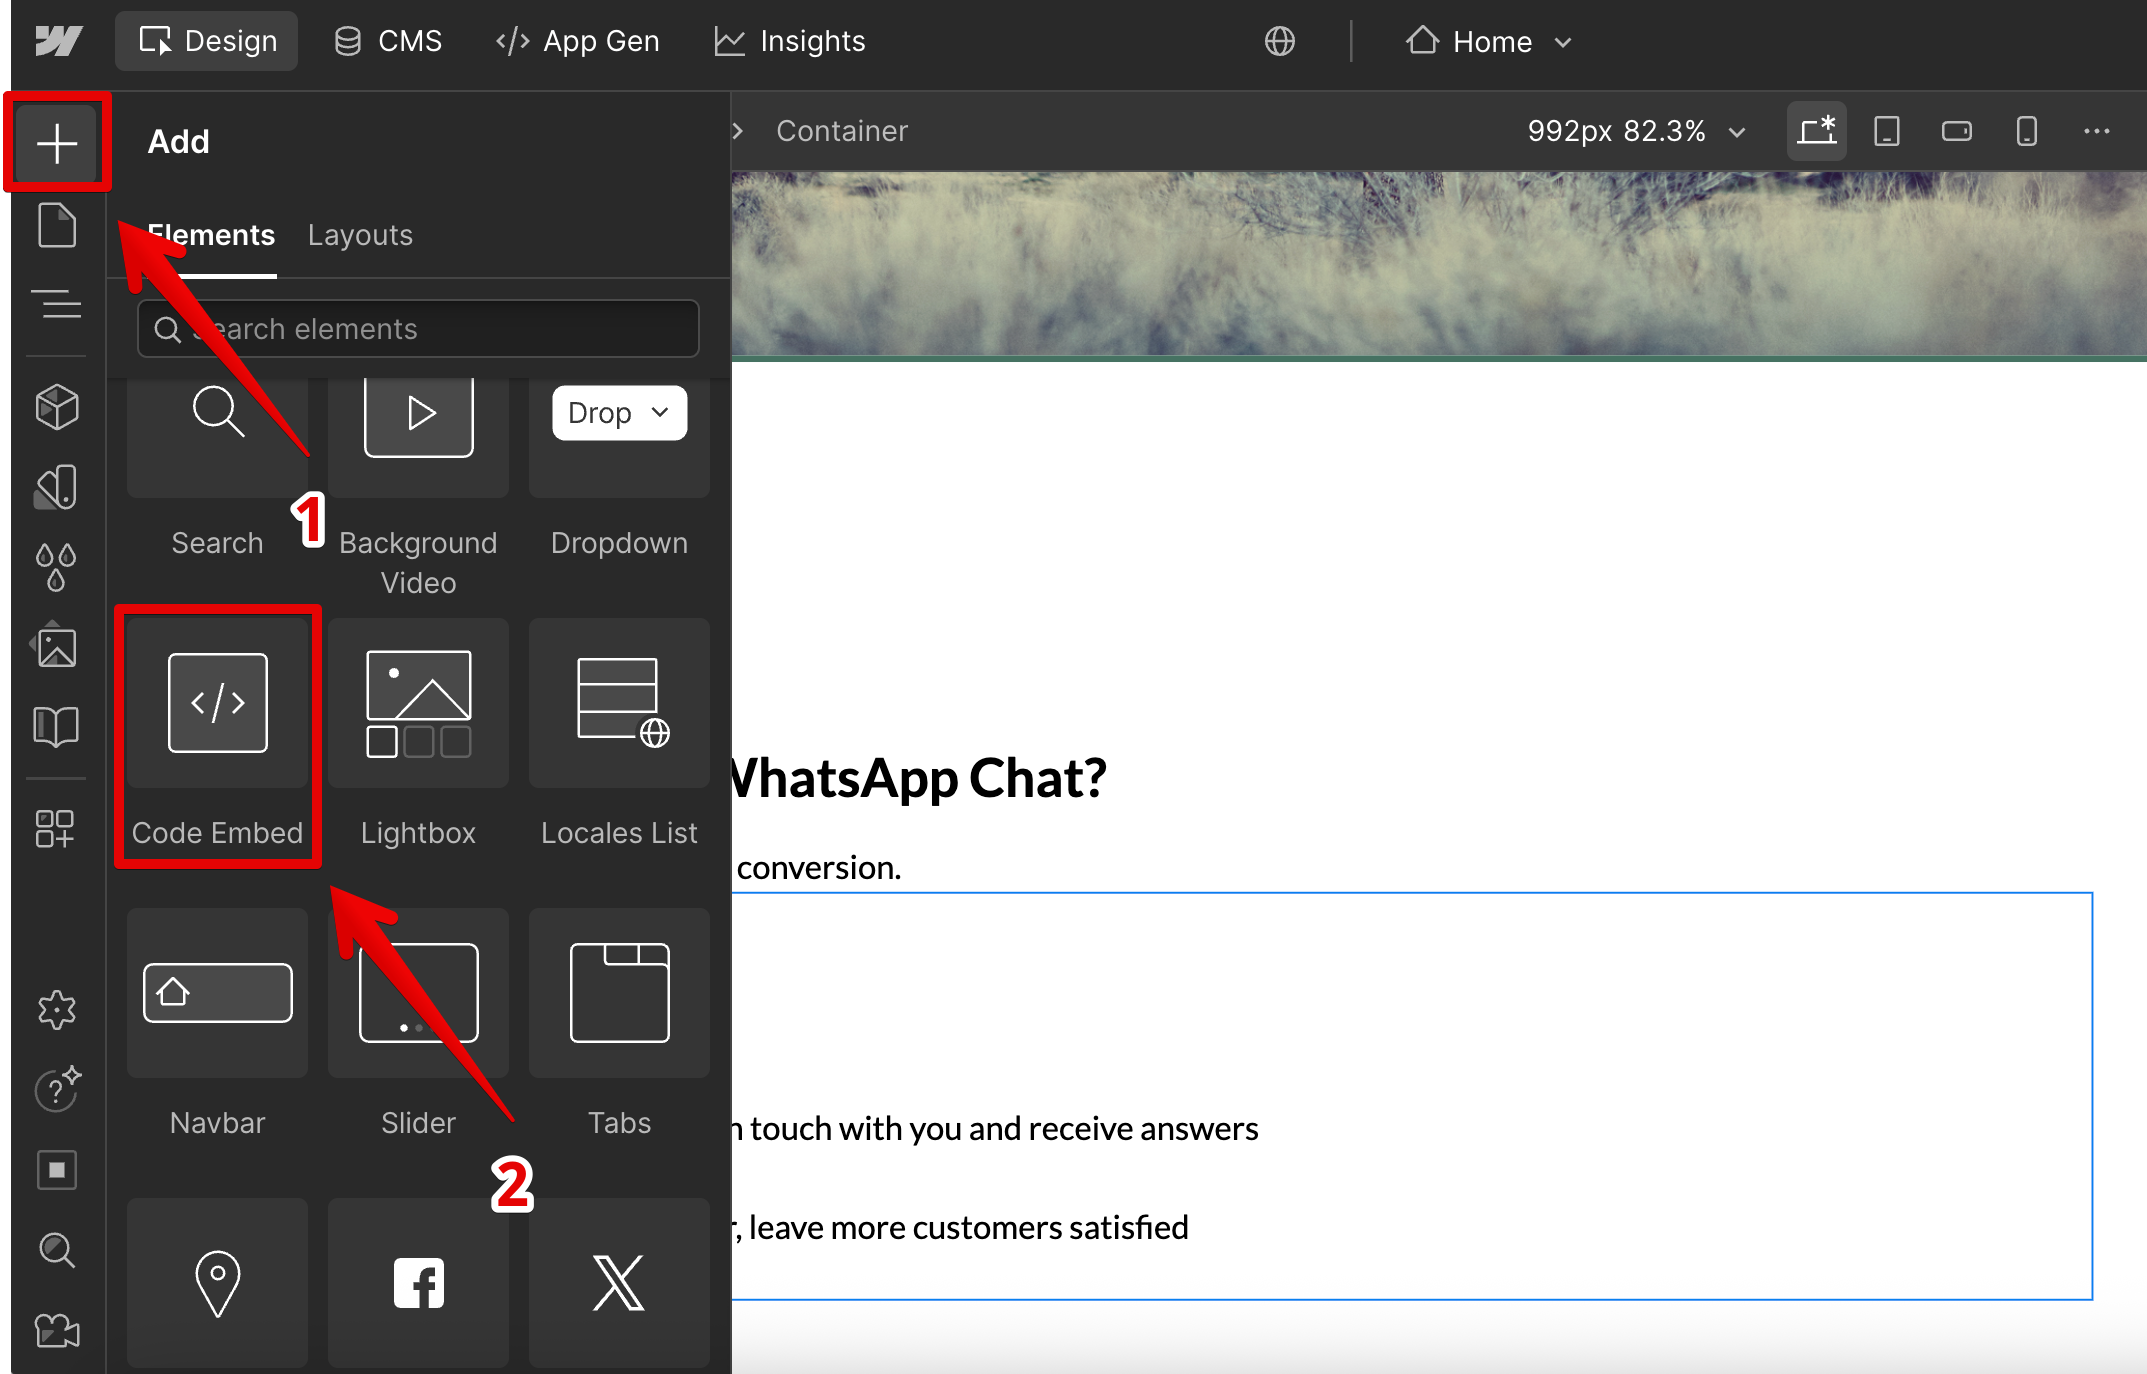
- 3
-
Paste the widget installation code
Paste your widget installation code into the Code Embed Editor window and click Save & Close: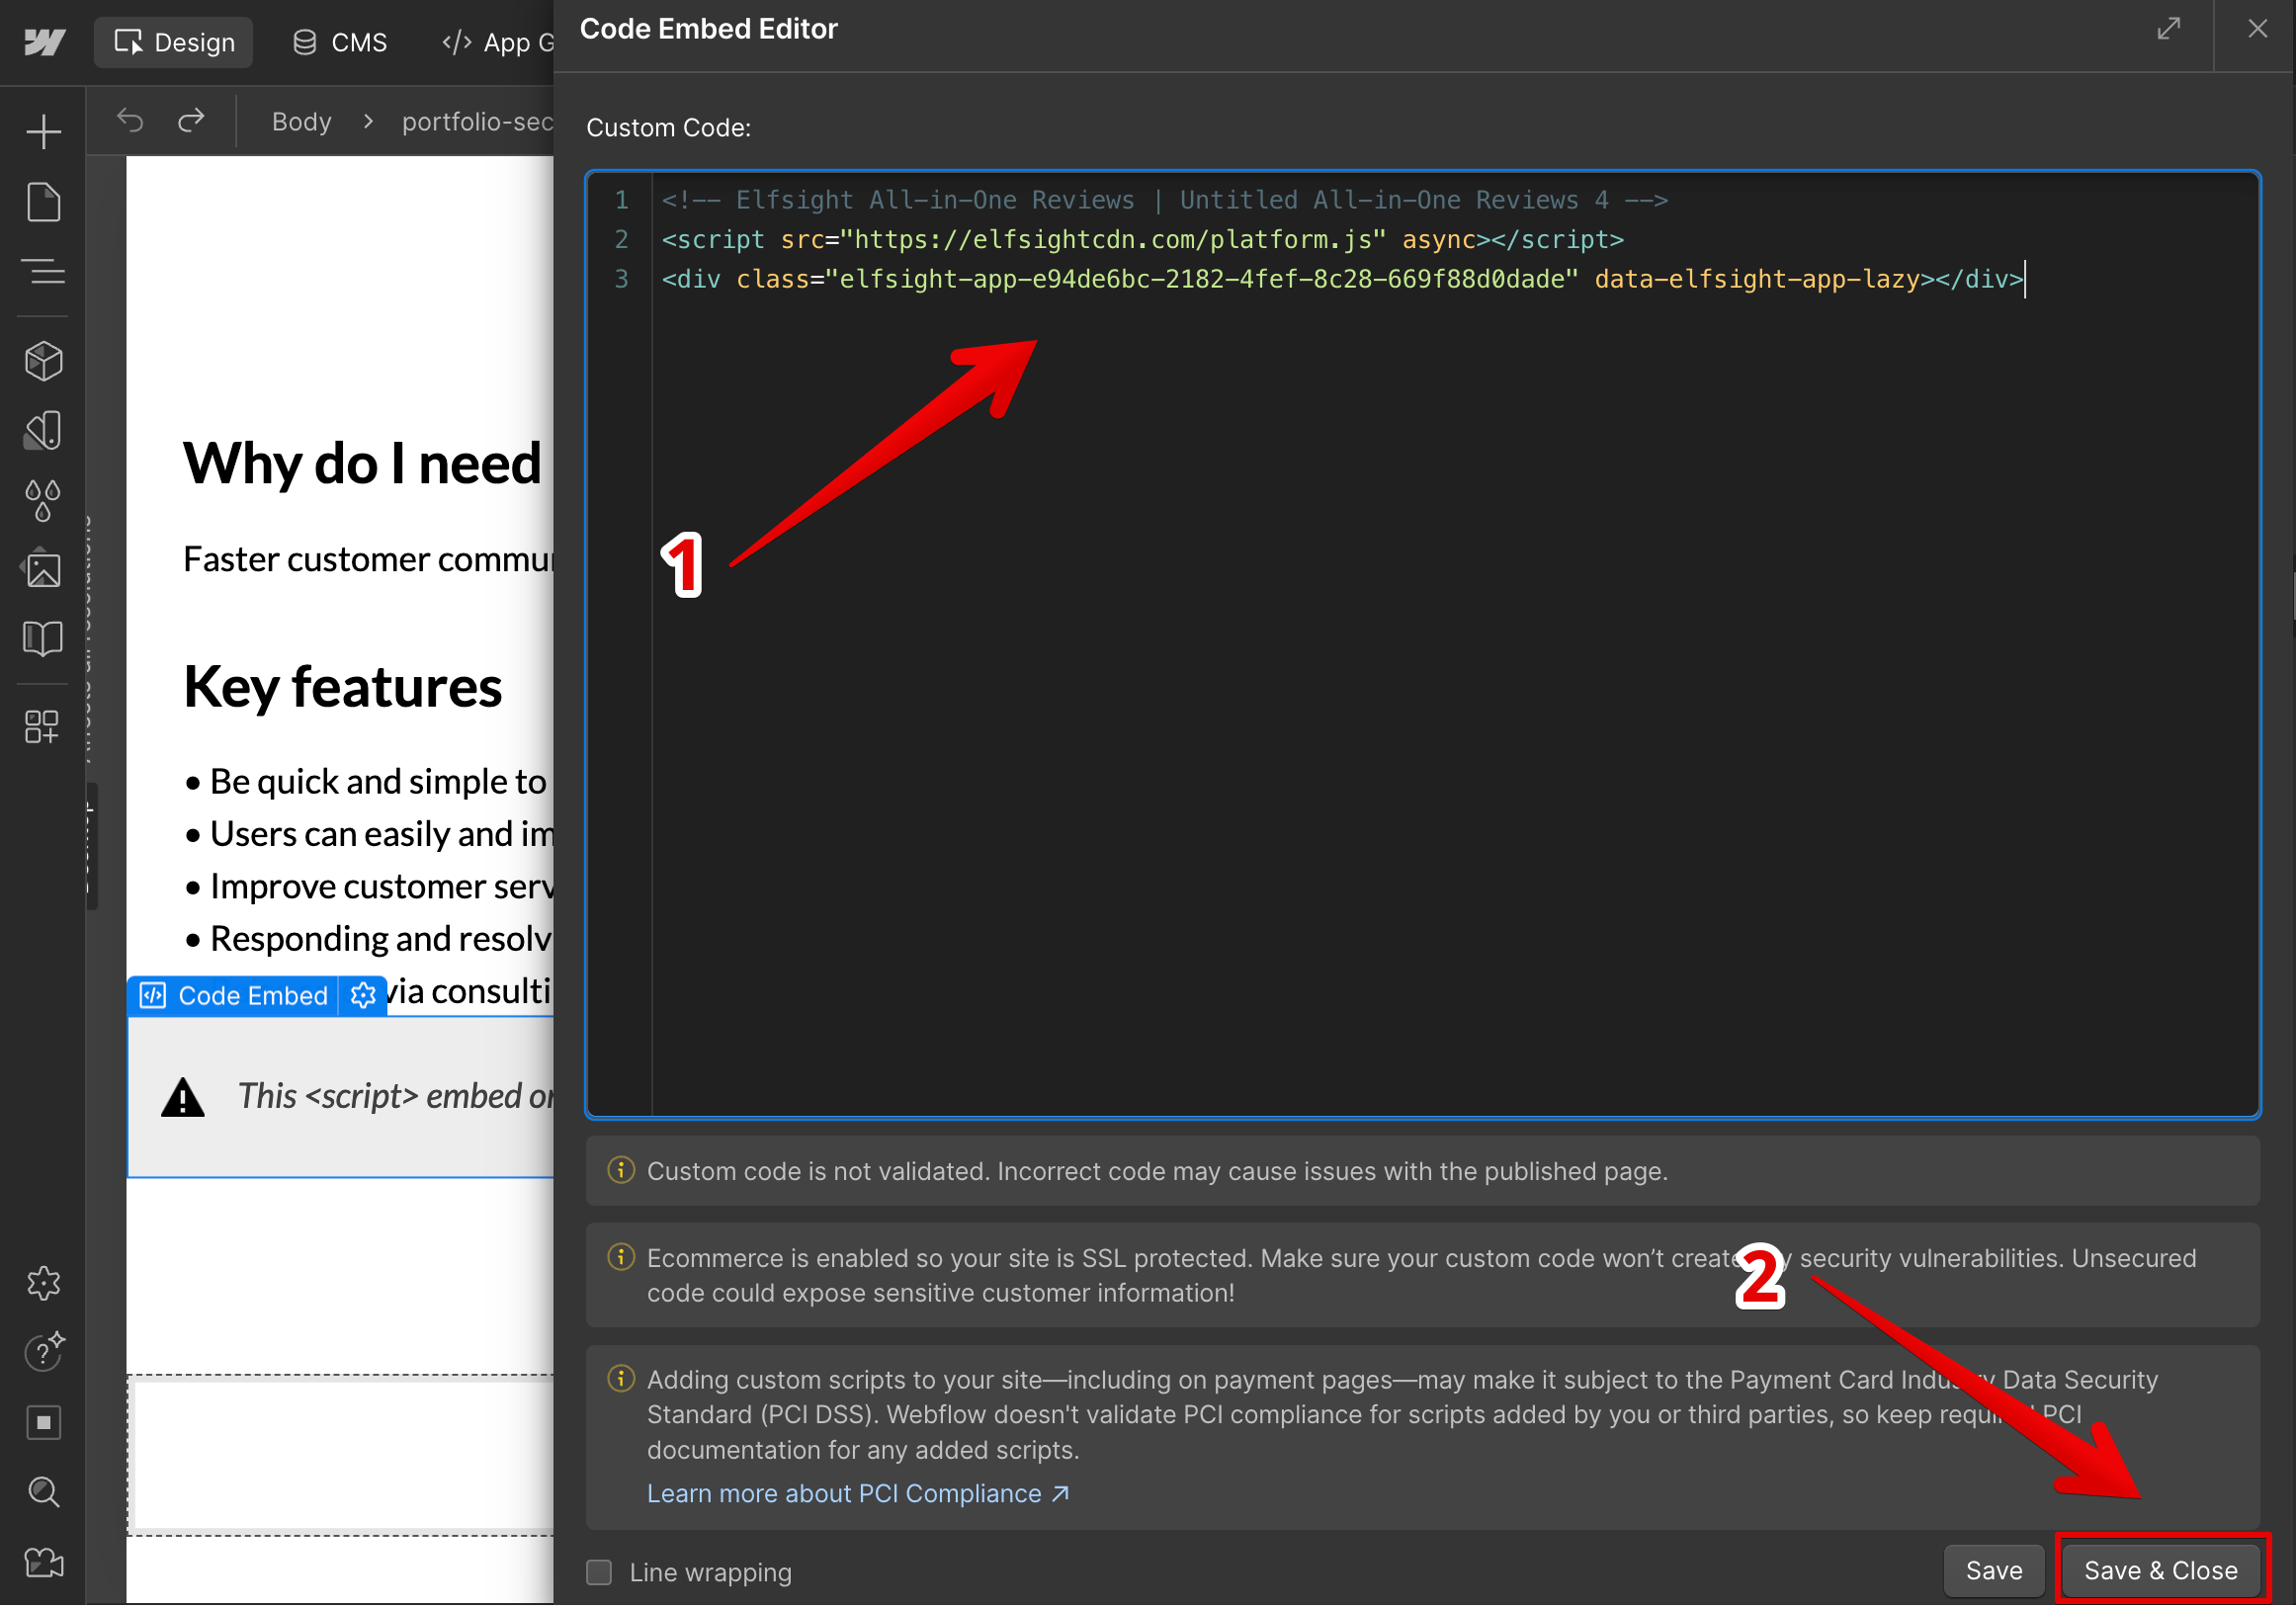 Please note that the embedded widget won’t be visible in the Webflow editor and will only appear in Preview mode (with custom code enabled) or on the published site:
- 4
-
Publish the changes
Adjust the required settings (width, height, etc.) in the right sidebar, then click Publish and select Publish to Selected Domains: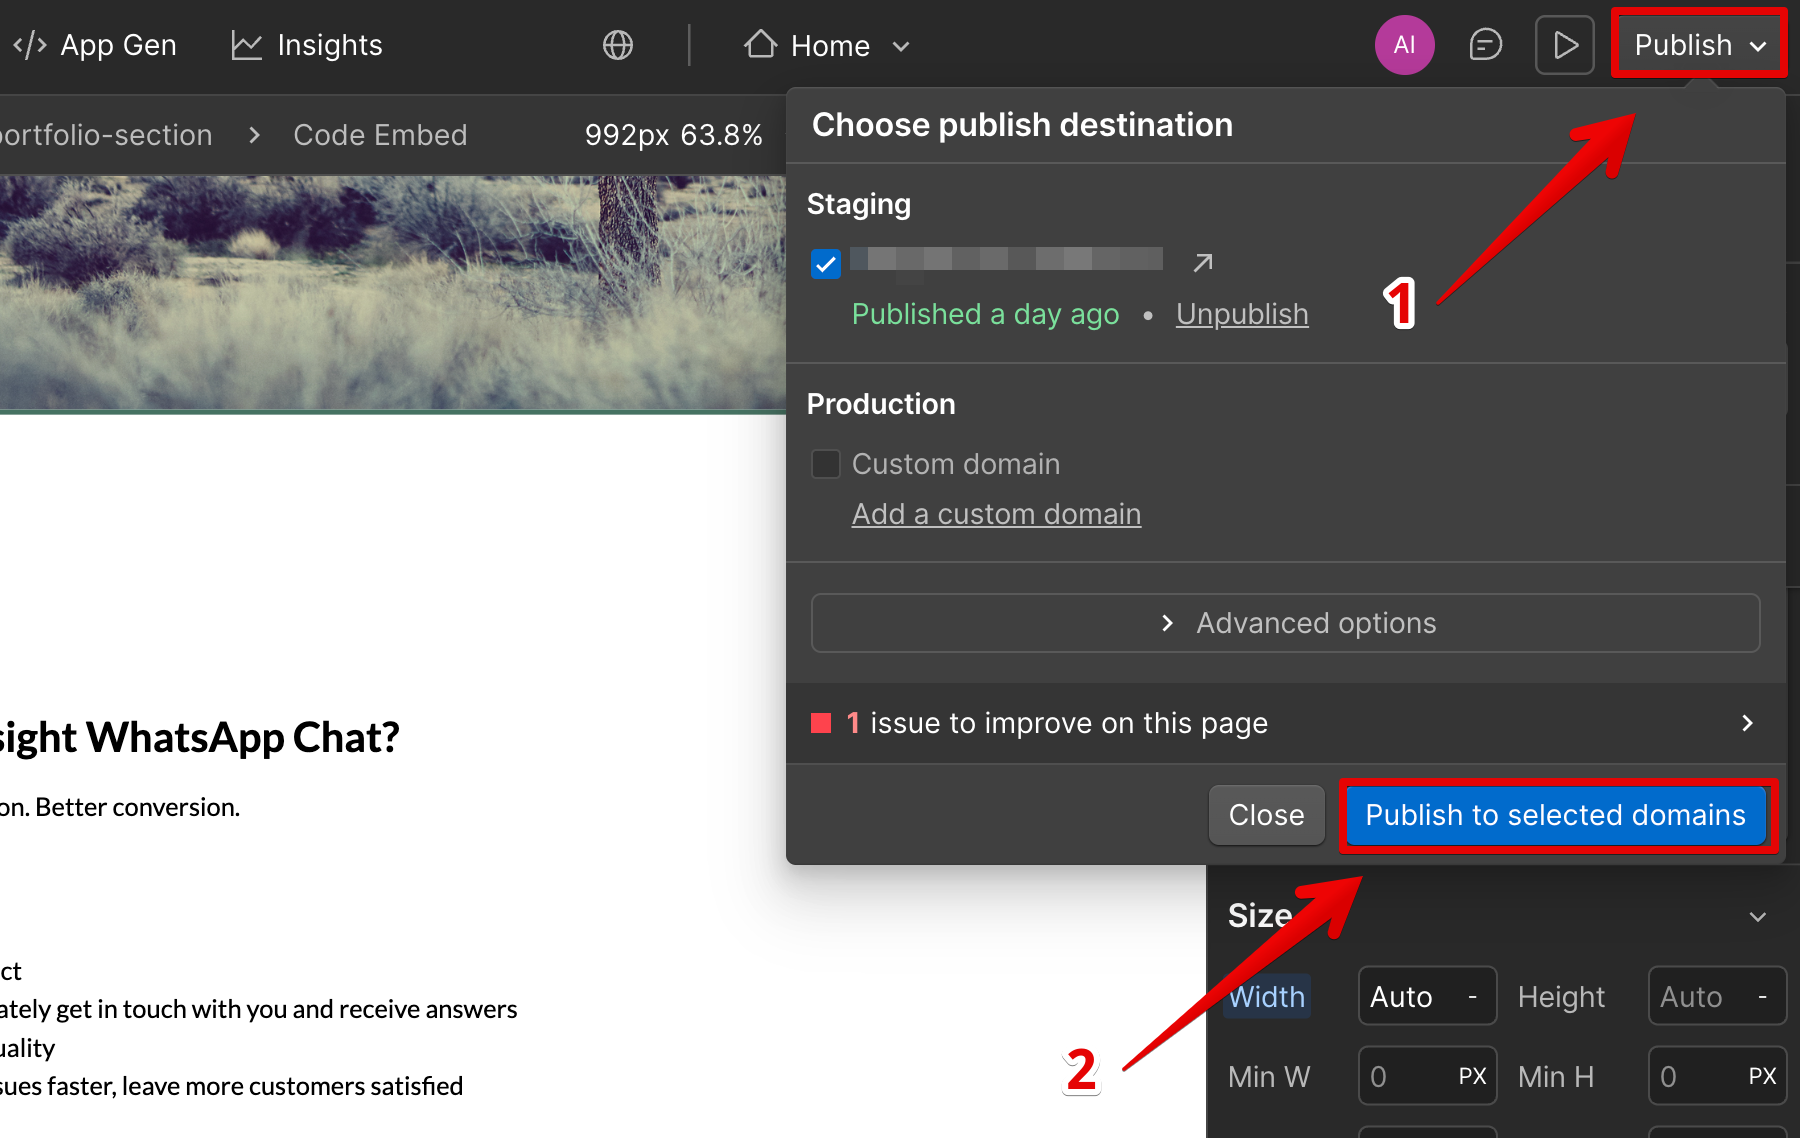


 Please note that the embedded widget won’t be visible in the Webflow editor and will only appear in Preview mode (with custom code enabled) or on the published site:

That’s it! You have successfully added the widget to a specific page of your Webflow website.
Add Your Widget to All Pages
- 1
-
Open your Webflow website settings
Log in to your Webflow dashboard and find the website where you'd like to add the widget. Click the three dots and choose Settings: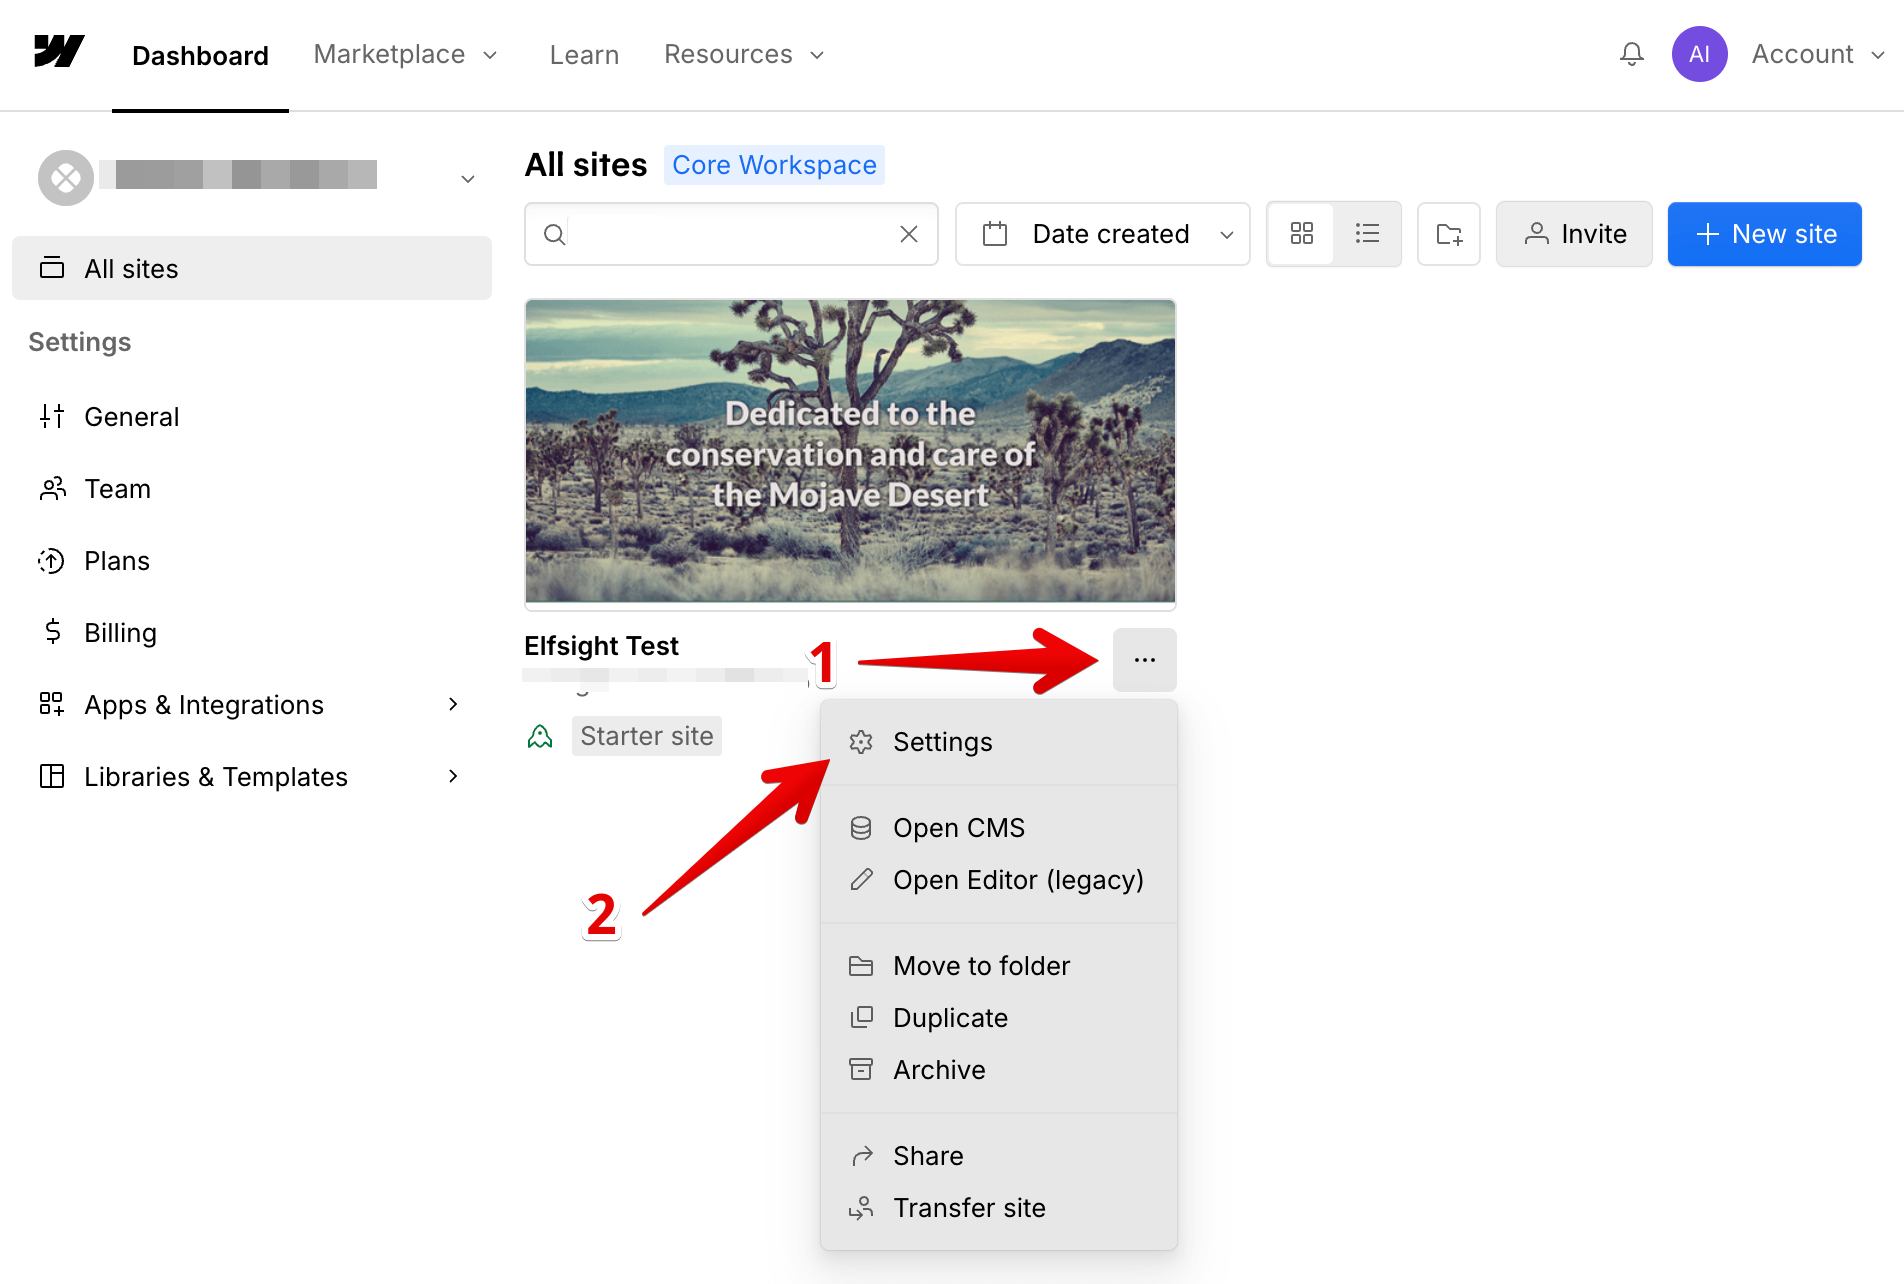
- 2
-
Paste the widget installation code
In the left sidebar, click Custom Code. Paste the widget installation code into Head Code and click Save: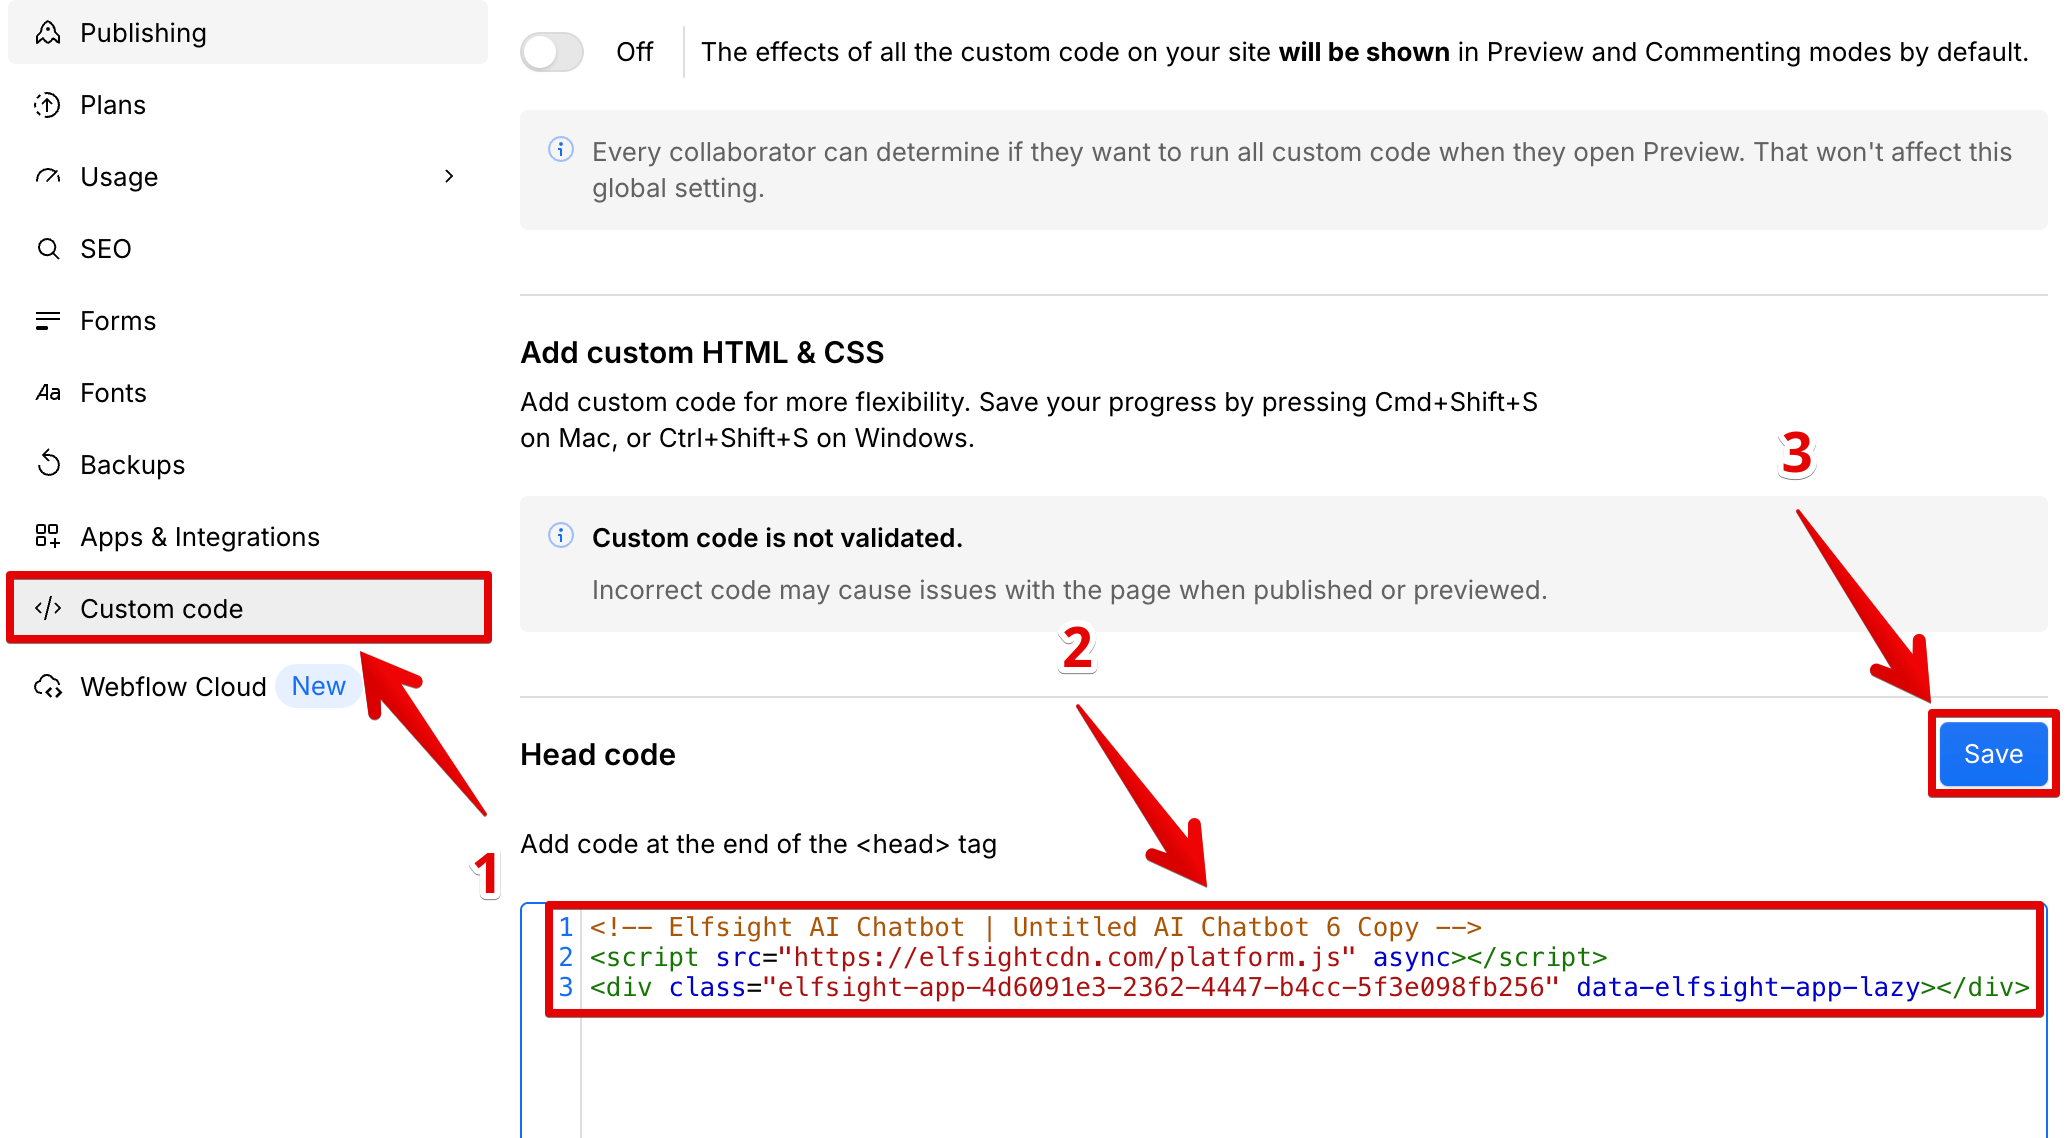
- 3
-
Publish the changes
Click Publish and then press Publish to Selected Domains: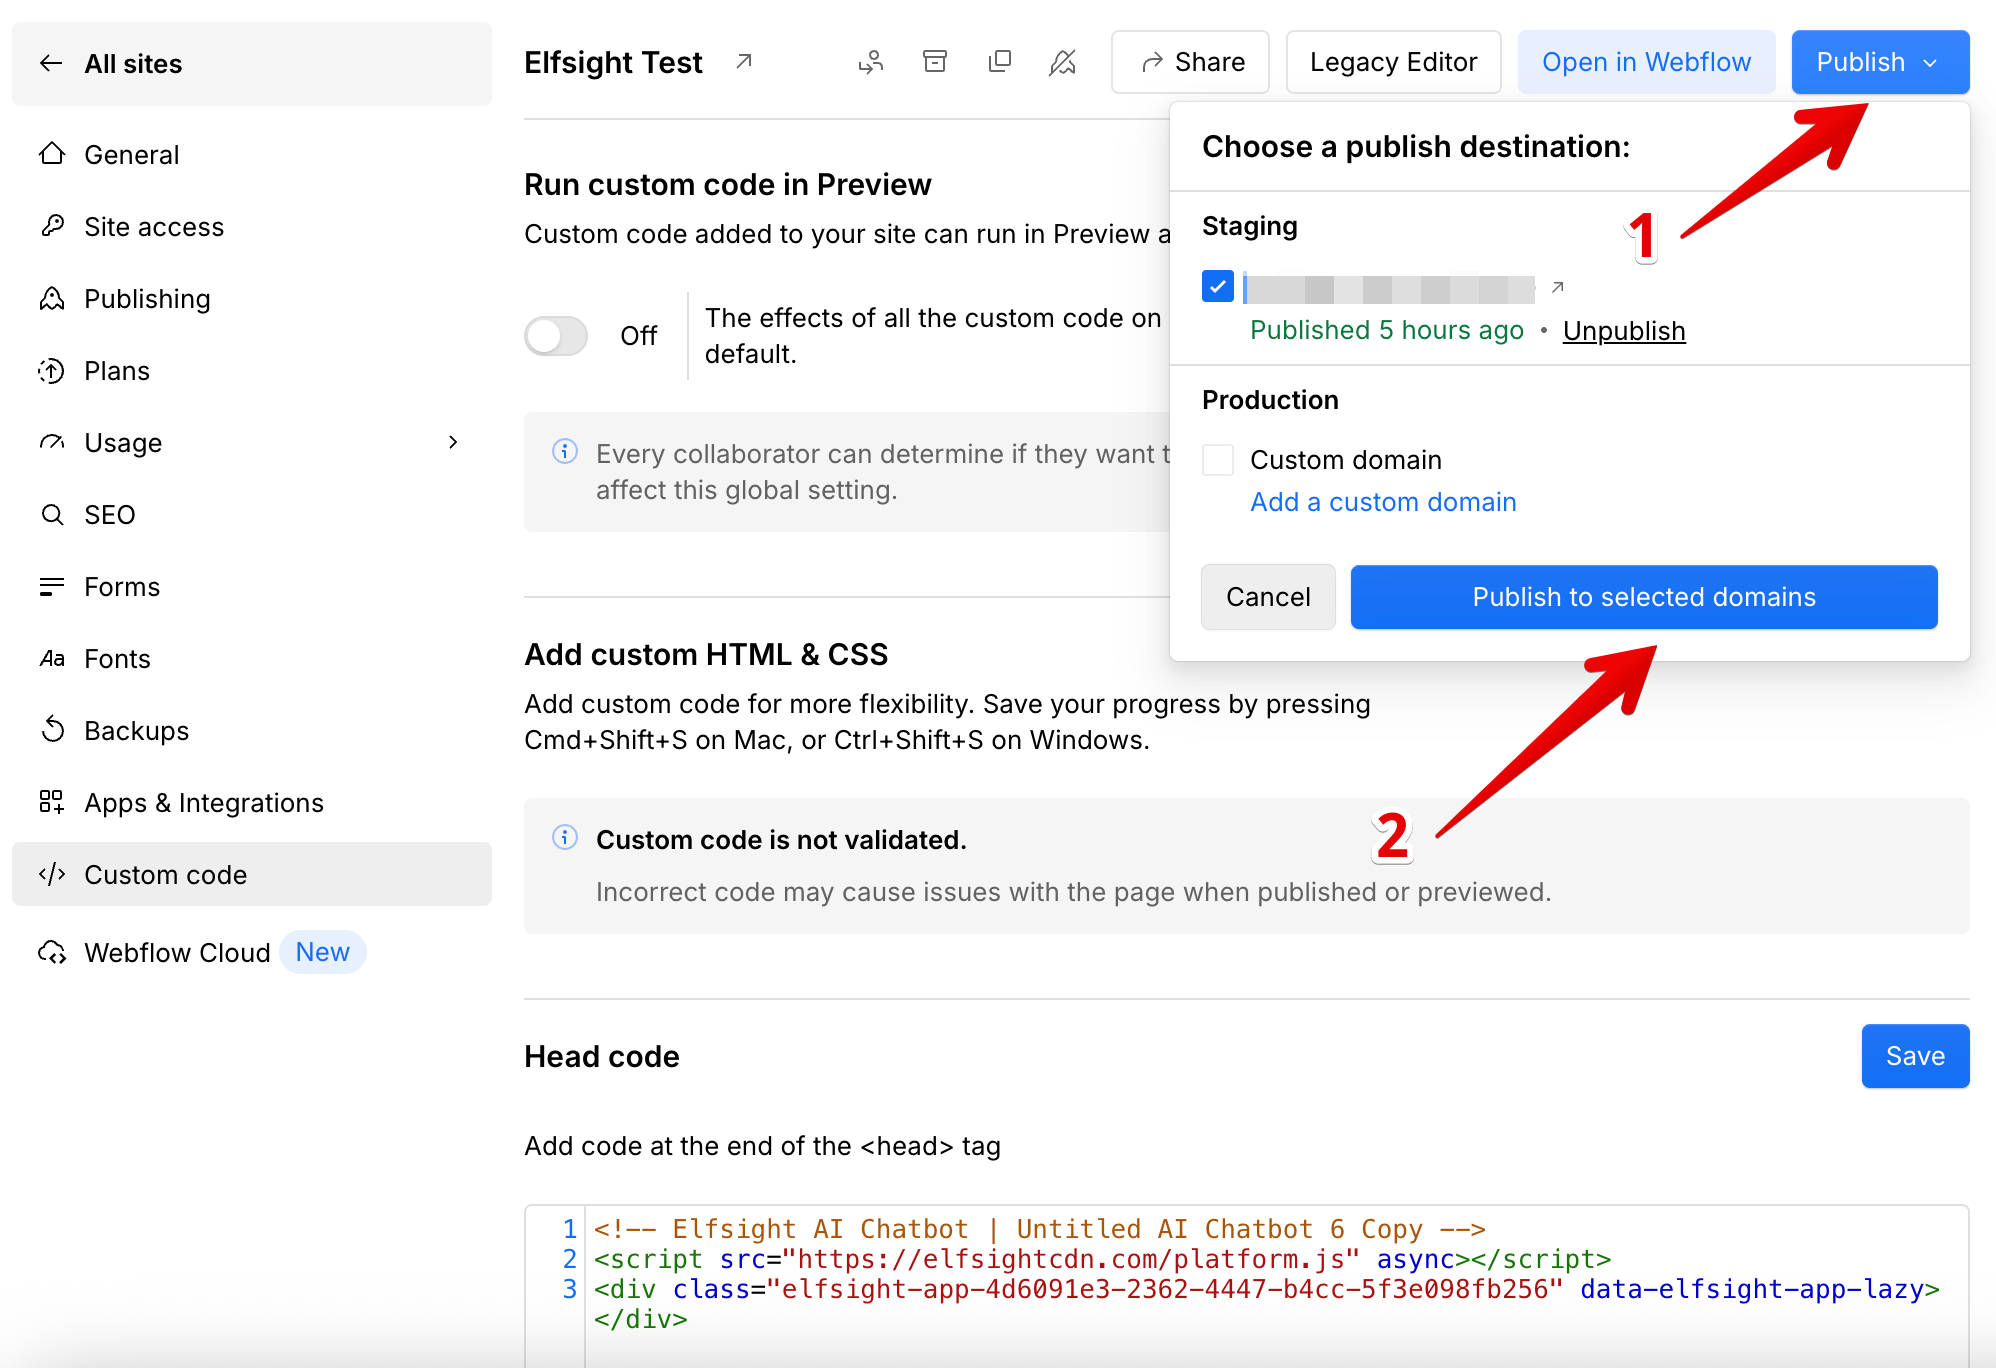


Great job! You have successfully added the widget to all pages of your Webflow website.
Stuck with installation? Let us help! 🙌 Send us a quick request, and we’ll handle the setup for you.