Installing Elfsight Widget on OpenCart with a Custom Module
In this guide, we’ll show you how to install your Elfsight widget on your OpenCart website using a custom module. It’s quick and easy, with the flexibility to add the widget to multiple pages. Let's get your widget up and running! 🚀
Steps to install your widget
1. Install Our Custom Module
We’ve created a custom module for easier installation. This works with OpenCart versions 2.x and 3.x. To get started, follow these steps:
- 1
-
Download the module archive from the links below:
- 2
-
In your OpenCart dashboard, go to Extensions → Installer. Click Upload and select the module file you just downloaded:
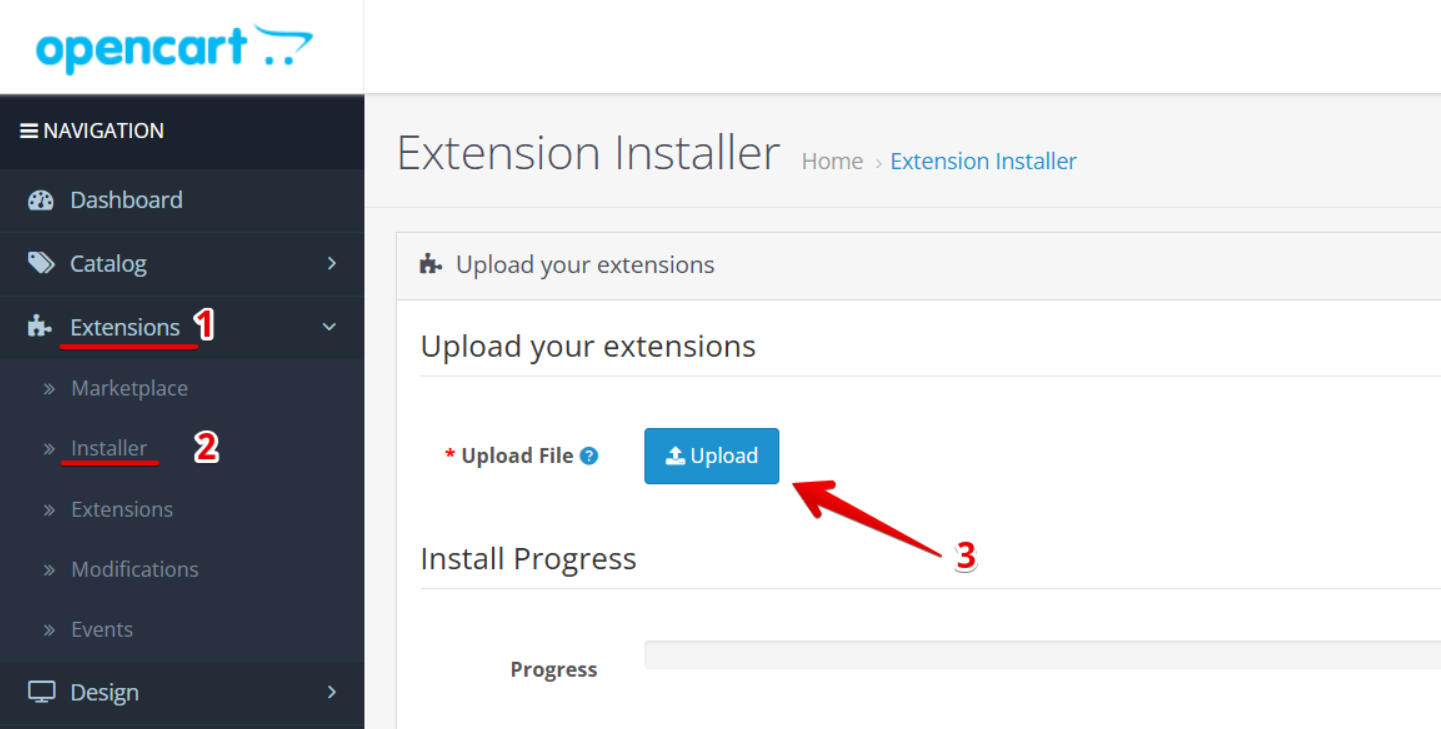
- 3
-
After the "Success" message appears, go to Extensions → Modifications:
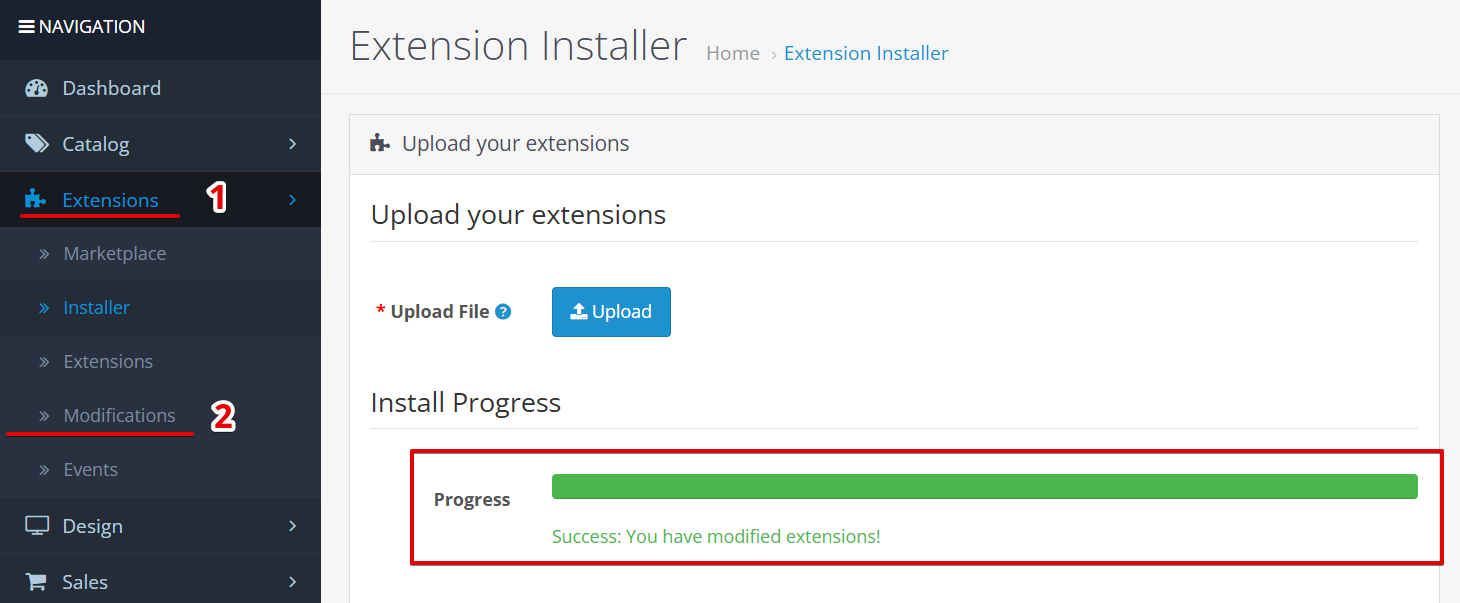
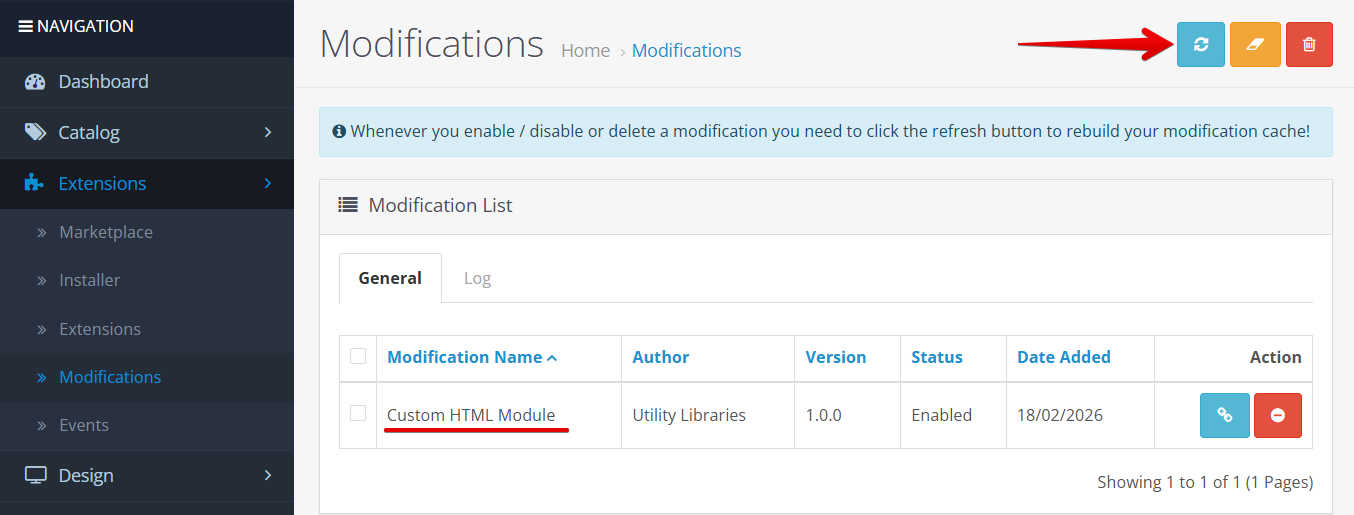
You should see the Custom HTML Module there. Click the Refresh button at the top to apply the module:

That's it! You've successfully installed the module!
2. Add the Widget to Your Website
Now that the module is installed, let's add the widget to your site:
- 1
-
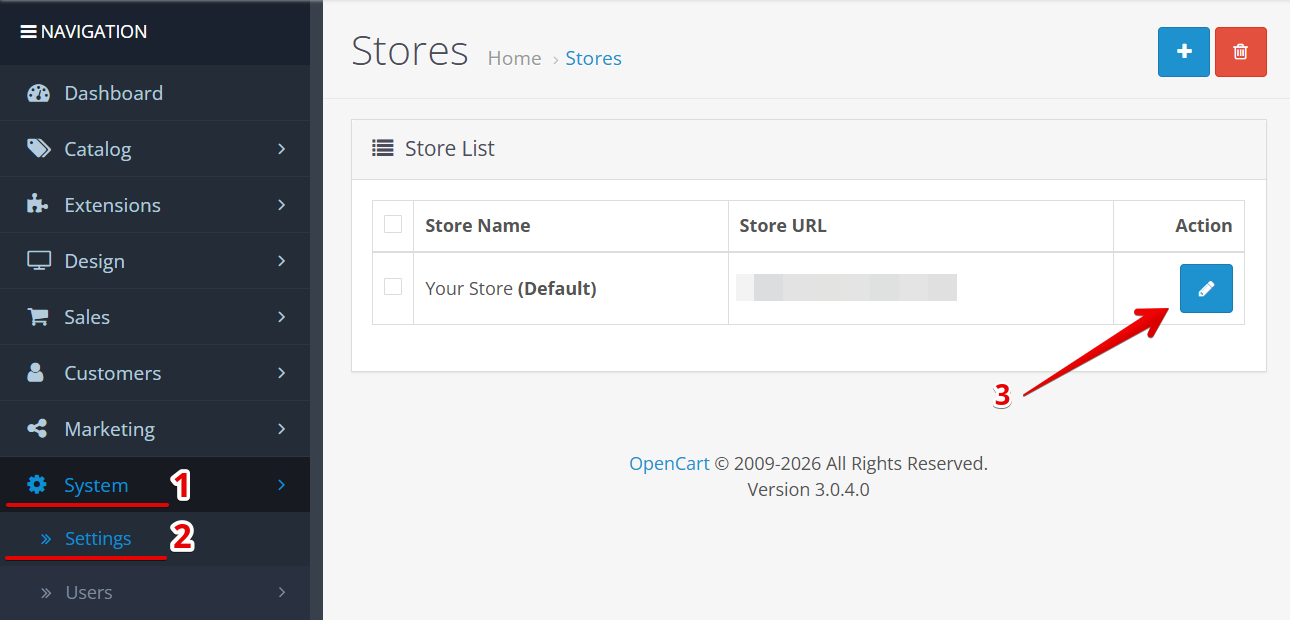
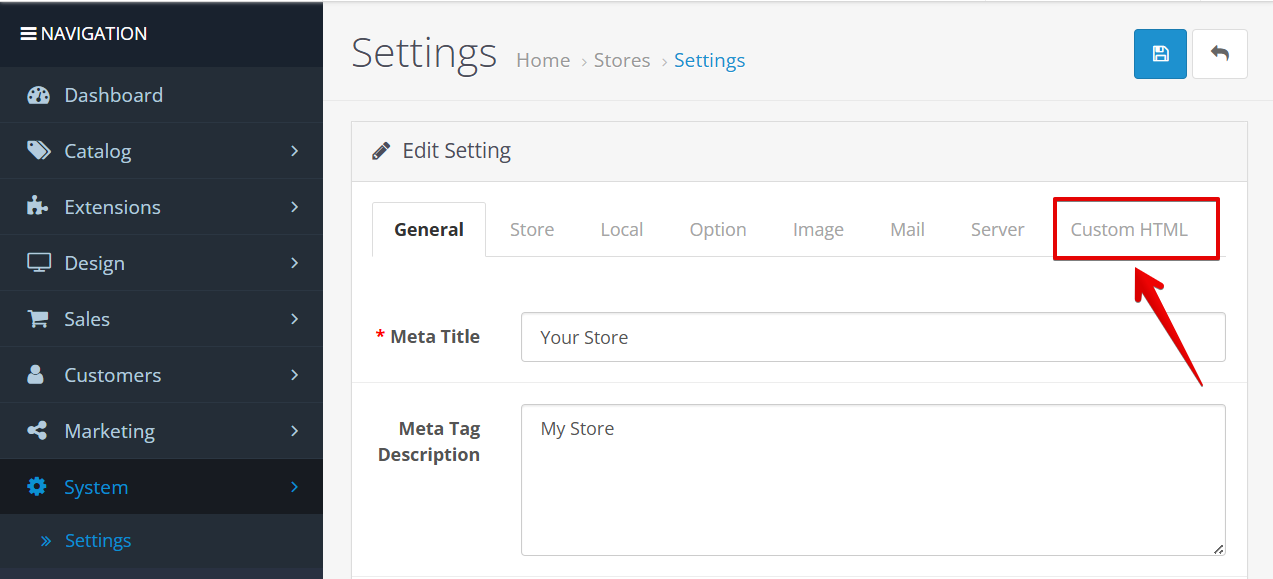
Go to System → Settings and select the store where you'd like to display the widget:
- 2
-
Click the new Custom HTML tab:
- 3
-
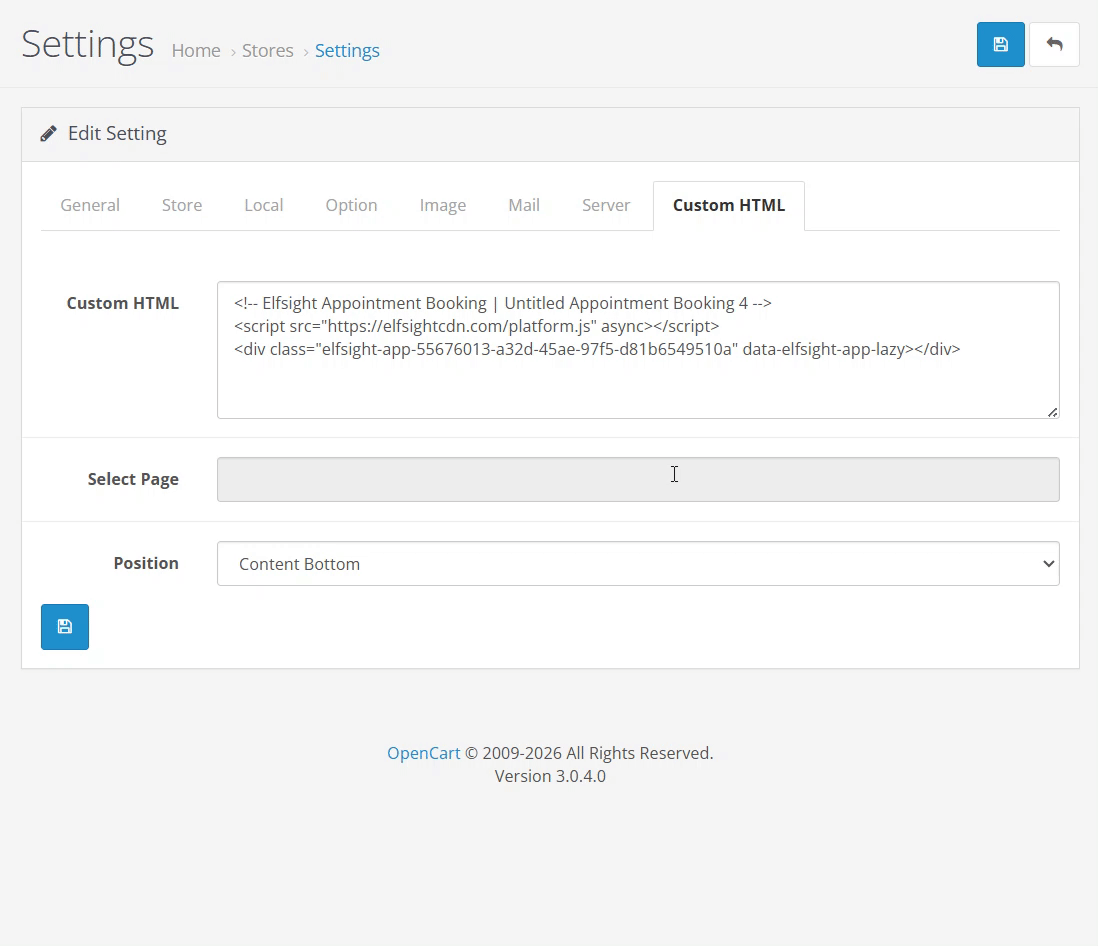
In the Custom HTML field, paste your widget installation code:

To find the widget code, refer to this guide: Where to get Elfsight widget installation code. - 4
-
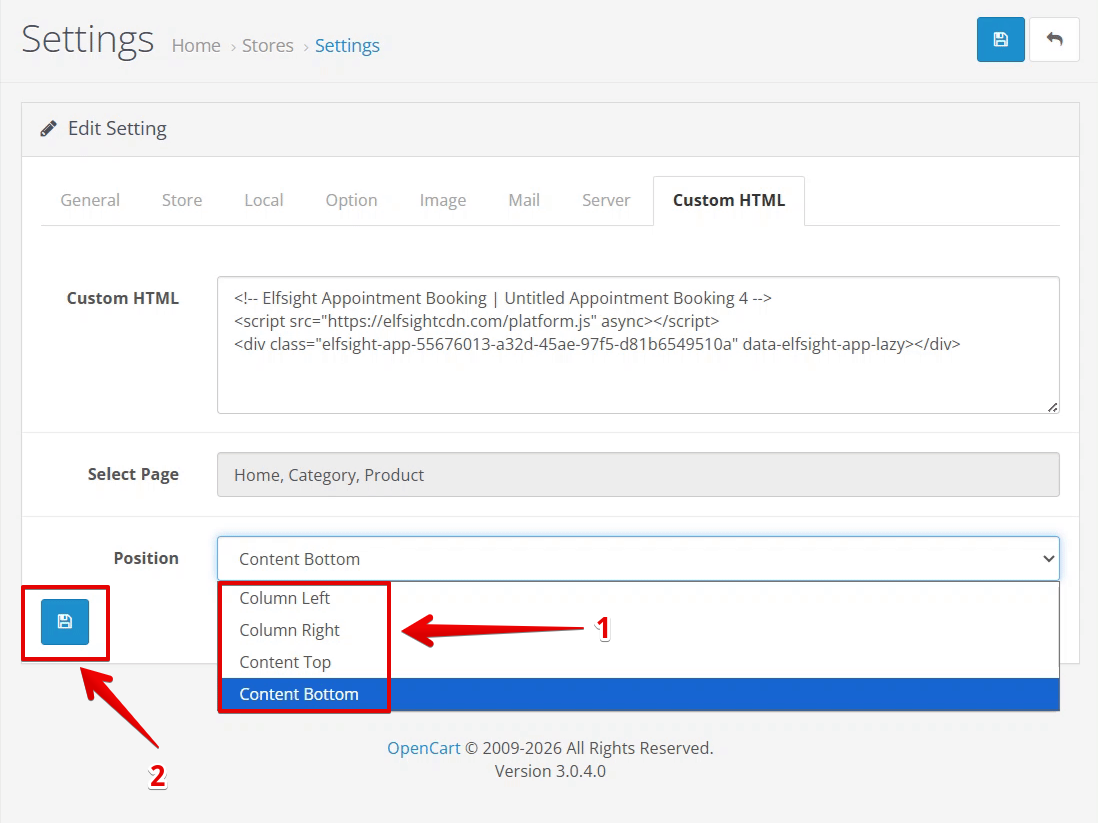
In the Select Page field, choose the pages where you’d like to show the widget:
If All Pages is selected, you won't be able to choose other pages. Uncheck All Pages to select individual pages. - 5
-
Pick the widget's Position from the dropdown menu and hit the 💾 button to save:


Congratulations! You've successfully installed your Elfsight widget!
Still having trouble after following these steps? Just contact our Support Team for help. We will be delighted to assist! 🙌