Choosing the Right Timer for Your Сountdown Timer Widget
When setting up your Countdown Timer, it's important to pick the right timer for your event. In this article, we’ll guide you through the different timers and explain how to set them up.
To begin, open the Timer tab in your widget editor.
Countdown modes
Countdown to Date
Best for: Sales campaigns with a fixed end date, webinars, product launches, or events where all visitors should see the same countdown.
The Countdown to Date counts down to a specific event or deadline that applies equally to all site visitors. To set it up, click Change and select Countdown to Date:
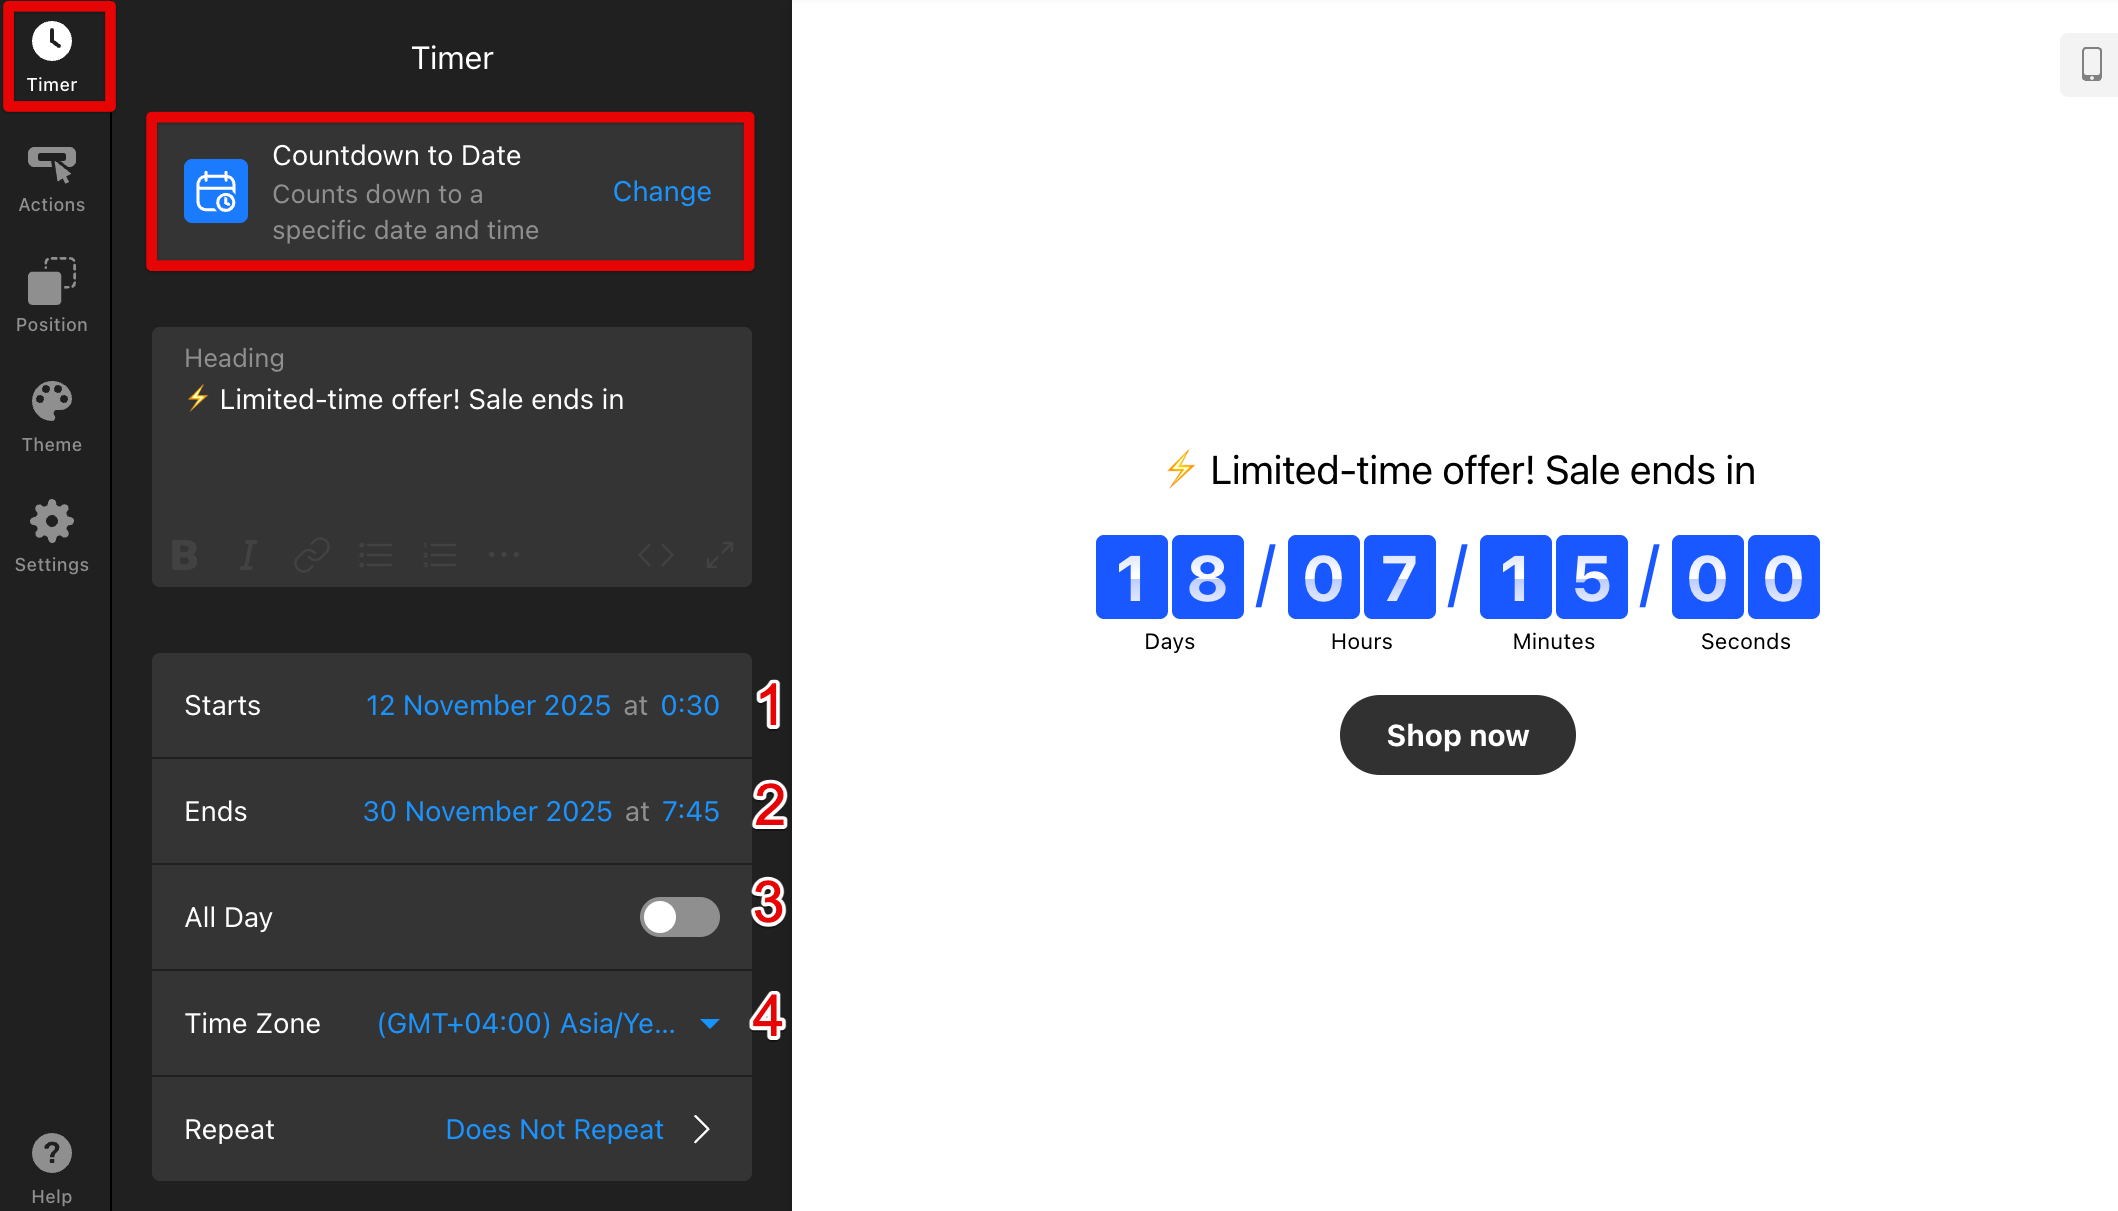
In the timer settings, specify the Starts (1) and Ends (2) dates. Turn on All Day (3) if you only need dates without specific times. Finally, use the Time Zone (4) option to adjust the required time zone manually.
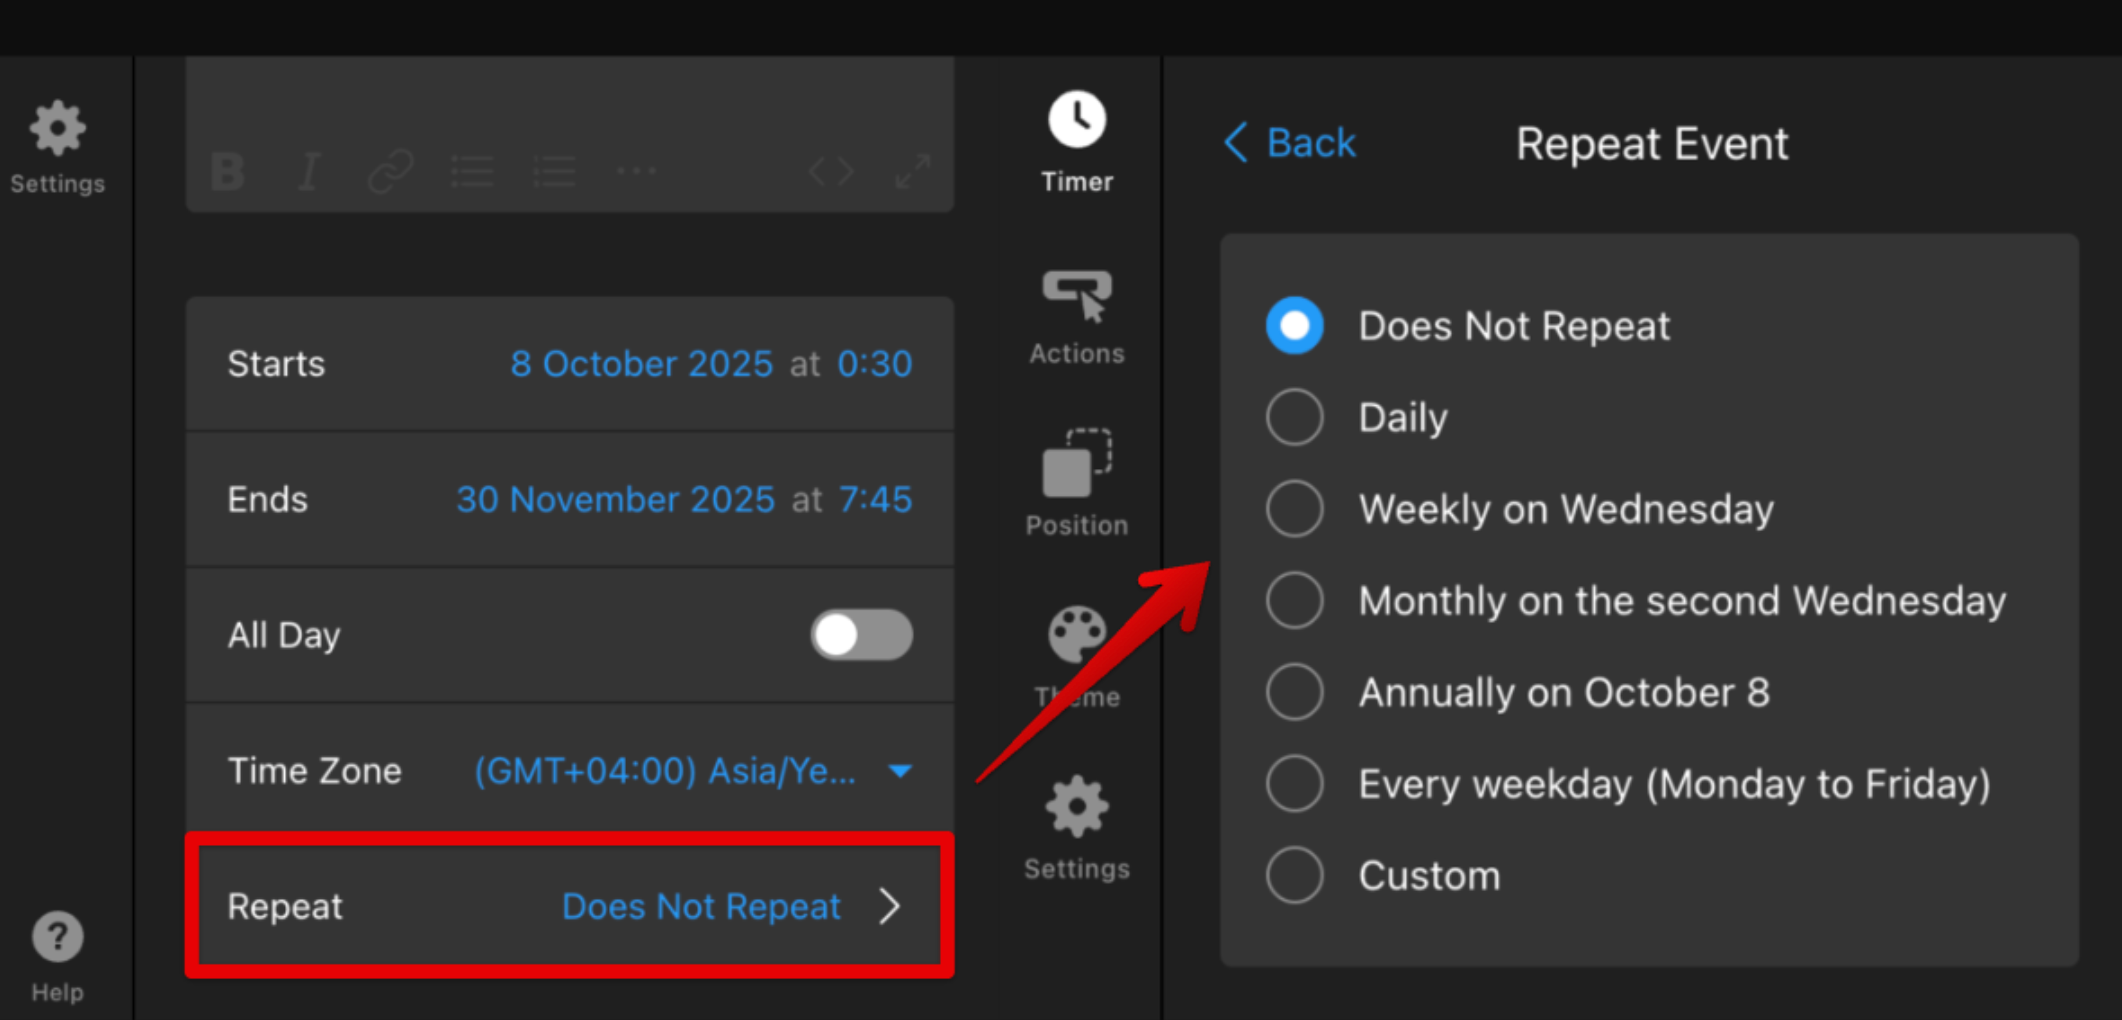
You can also use the optional Repeat setting to make your timer restart daily, weekly, monthly, yearly, or on specific custom dates:
Personal Countdown
Best for: Personalized promotions, trials, lead magnets, or limited-time offers that should reset for each new visitor.
The Personal Countdown creates a unique timer for every visitor. It starts the moment someone opens your page and continues running across pages and sessions, even if they leave and return later.
On the Timer tab, click Change and select Personal Countdown. Then, set the Time Amount (1) and choose the unit (days, hours, minutes, or seconds) in the Time Unit (2) field: 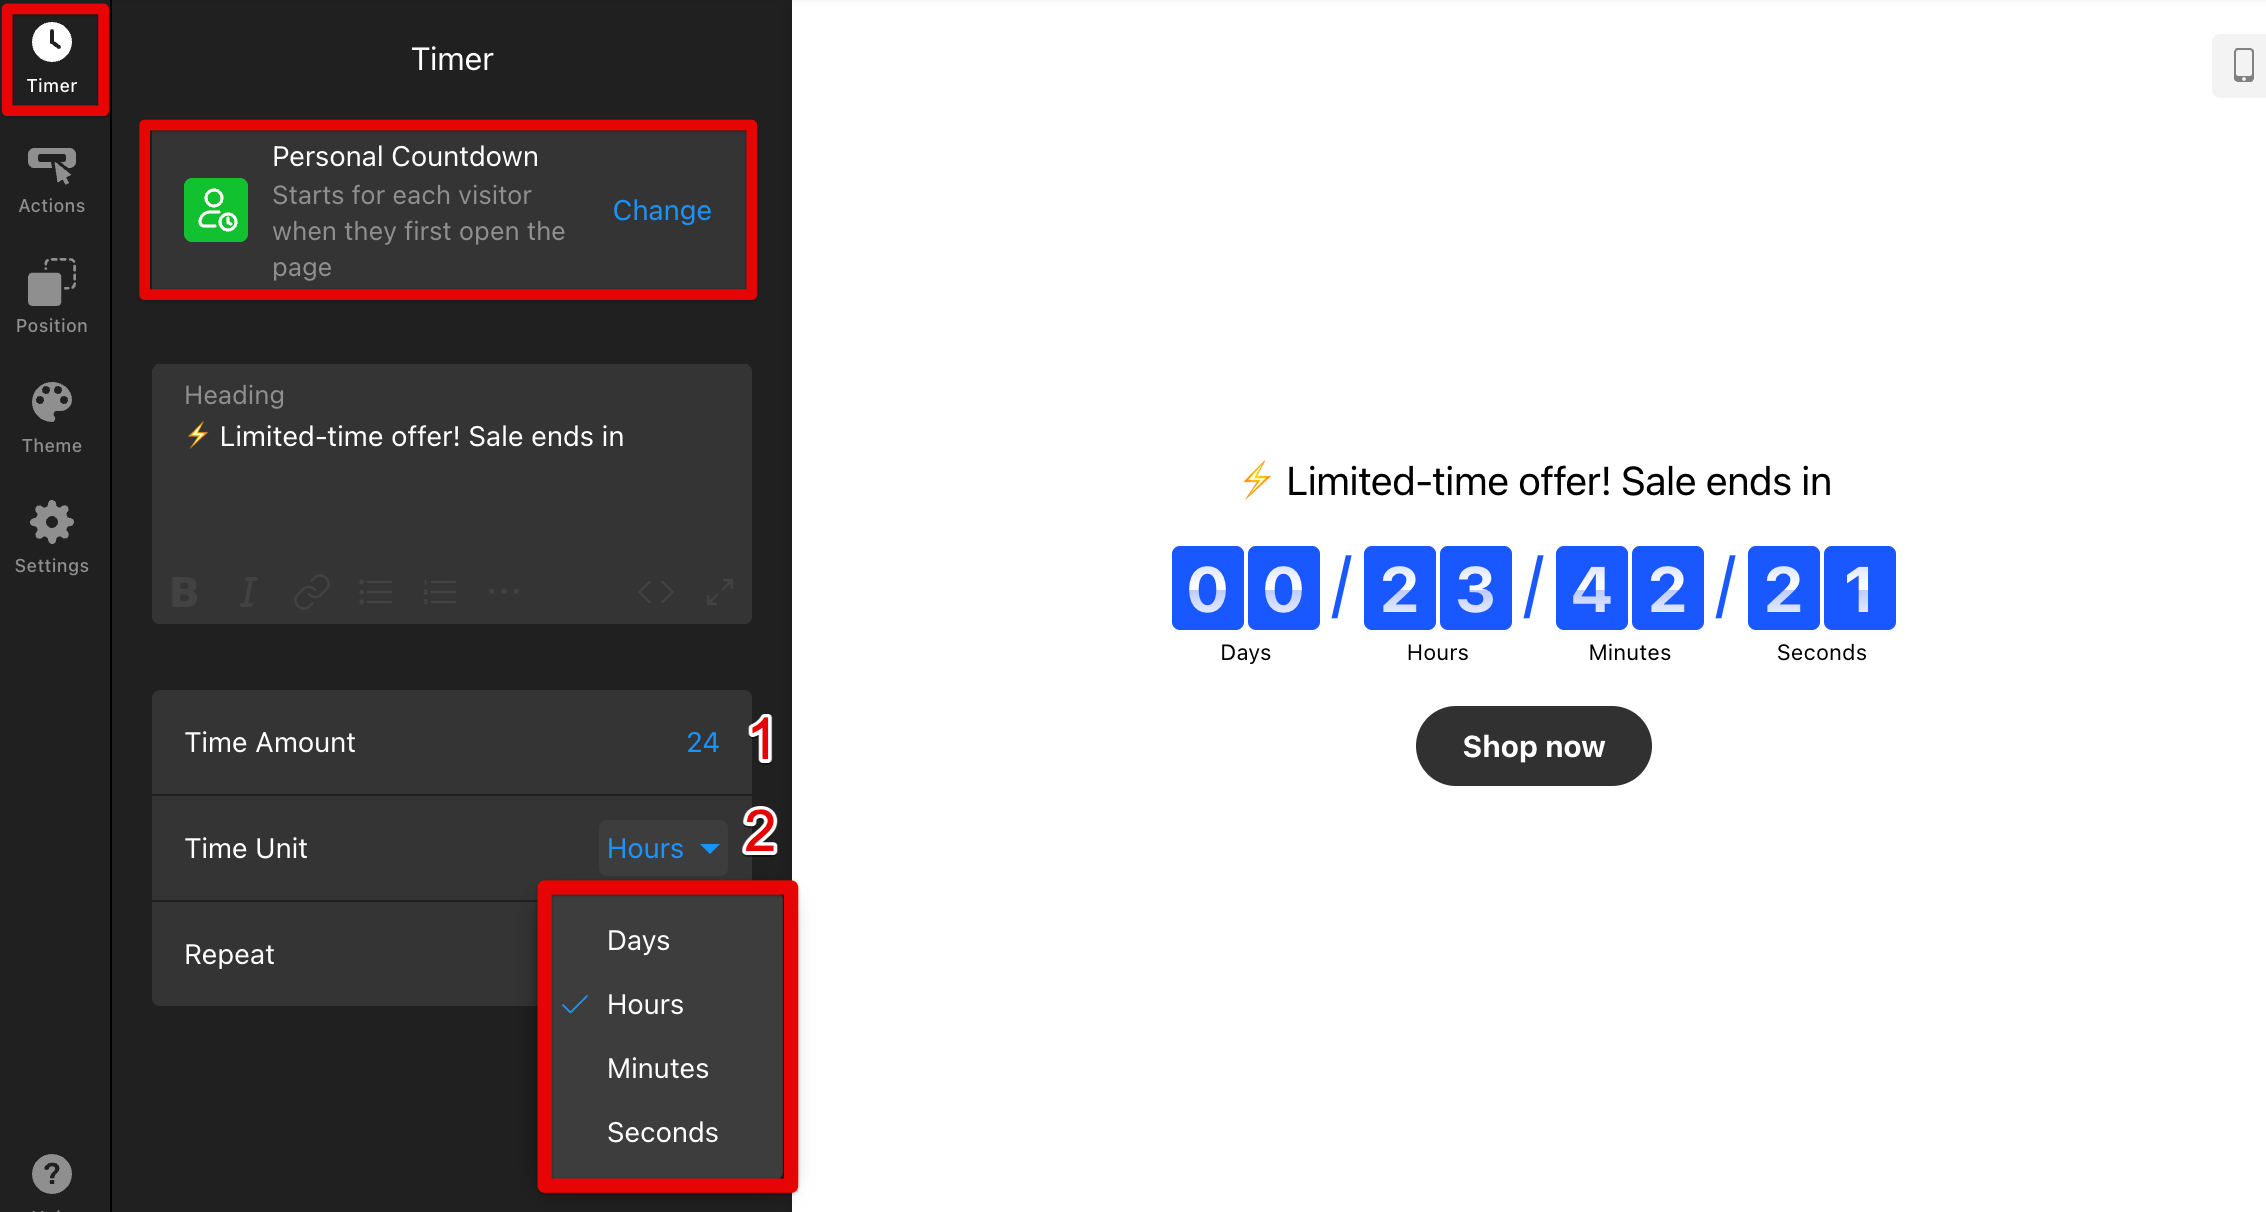
You can also enable the Repeat Countdown option to make the timer restart automatically. Specify the Time Amount and Time Unit to define when it should start again after finishing: 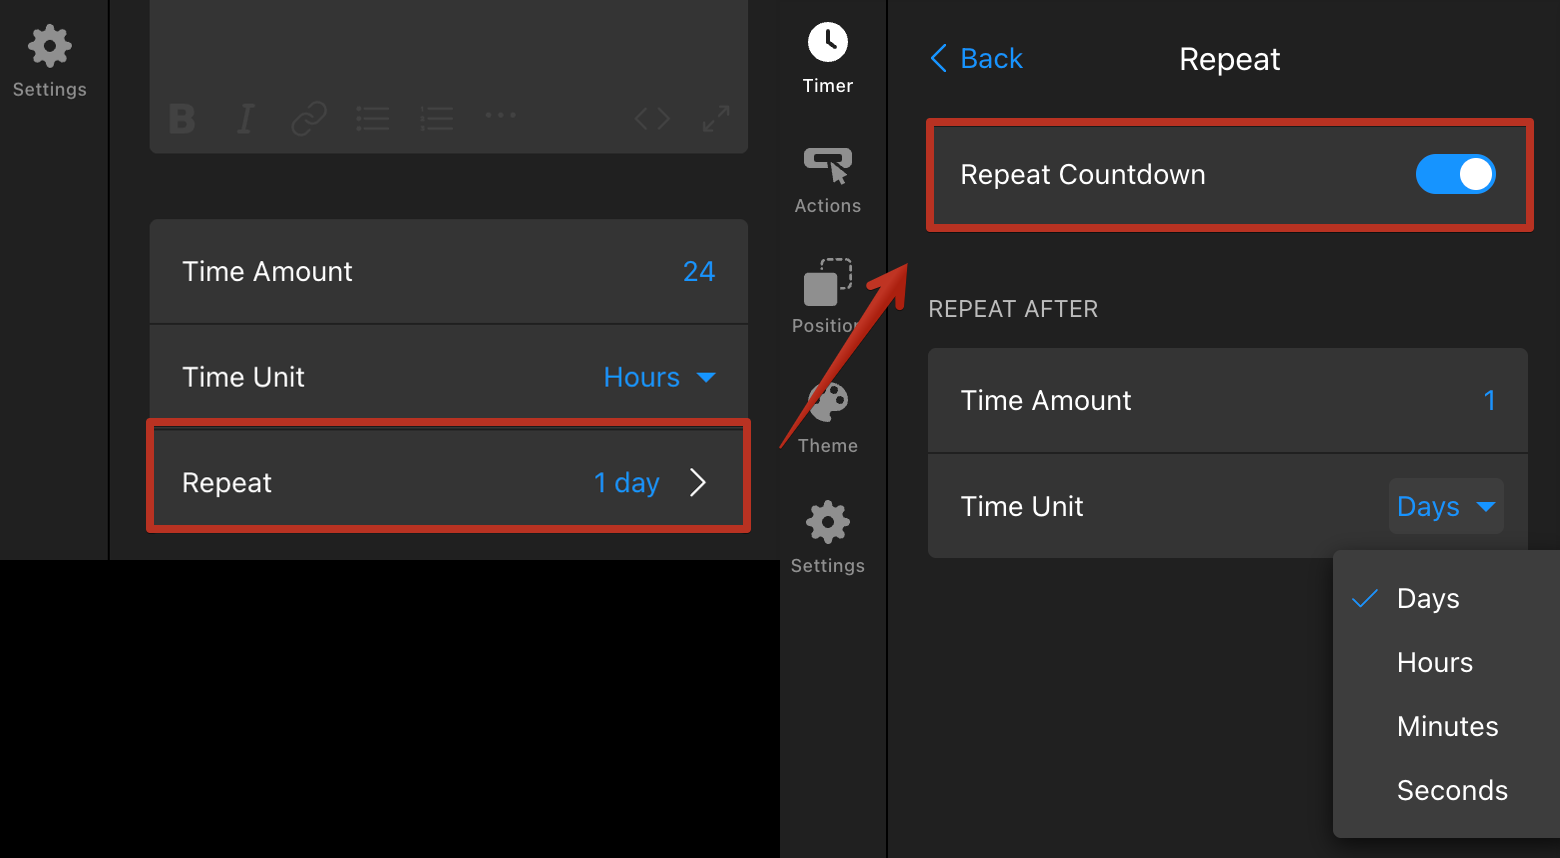
Number Counter
Best for: Showcasing available seats, subscriber counts, or any scenario where a changing number adds urgency.
The Number Counter lets you display a live counter that decreases or increases as visitors browse your site.
Select Number Counter from the menu on the Timer tab. Then set the Start Value (1) and End Value (2) for your counter: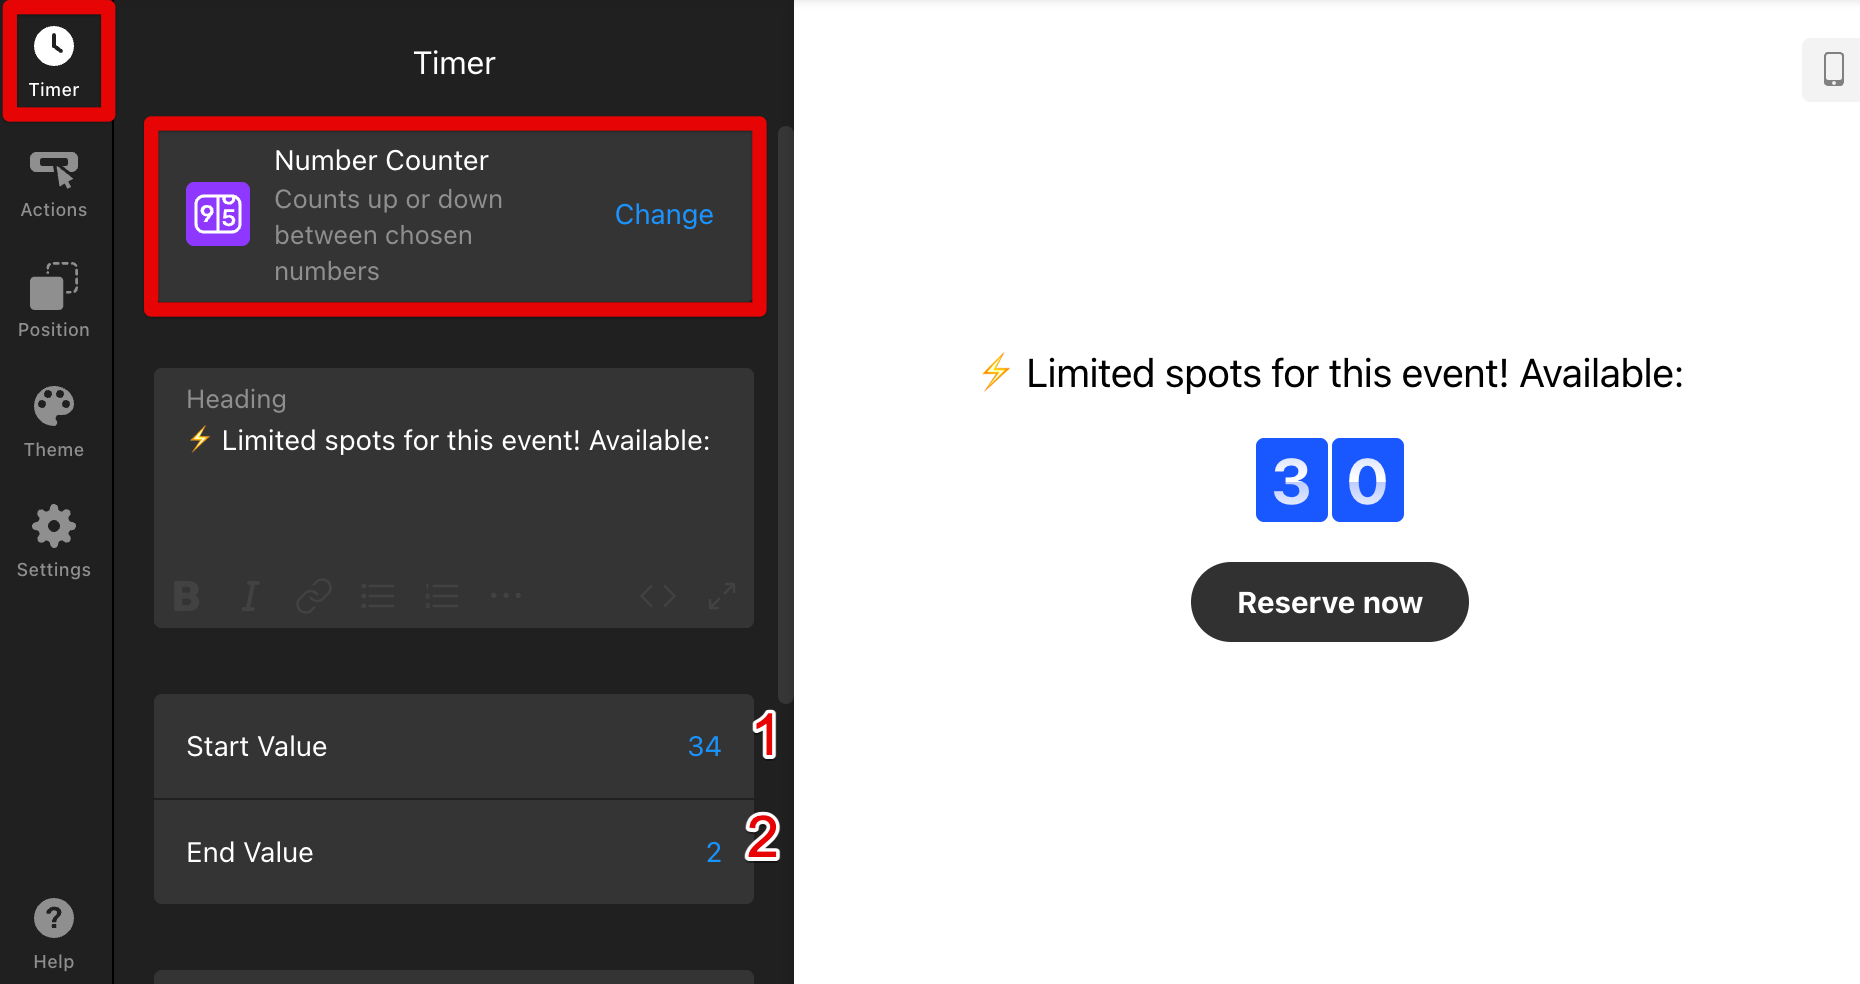
By default, the counter runs automatically, but you can also adjust the Custom Interval (in seconds) to control the update speed:
We hope this guide helped you choose the perfect timer for your event!⏱️
Pro Tip: Check out our Getting Started with Countdown Timer guides to learn how to customize your widget’s look and behavior with holiday themes, analytics, and more.
If none of these options fit your needs or you’d like a custom solution, feel free to contact our Support Team—we’ll be happy to help!