Step 2: Customize Your Countdown Timer's Appearance
Now that you've configured your Countdown Timer widget, let’s style it to match your website and make your event stand out! ✨ You’re currently on:
- Step 1 – Configure Your Countdown Timer
- 👉 Step 2 – Customize Your Countdown Timer’s Appearance
- Step 3 – Adjust Timer’s Advanced Settings
In this article
Position
The Position tab lets you choose where your widget appears on the page: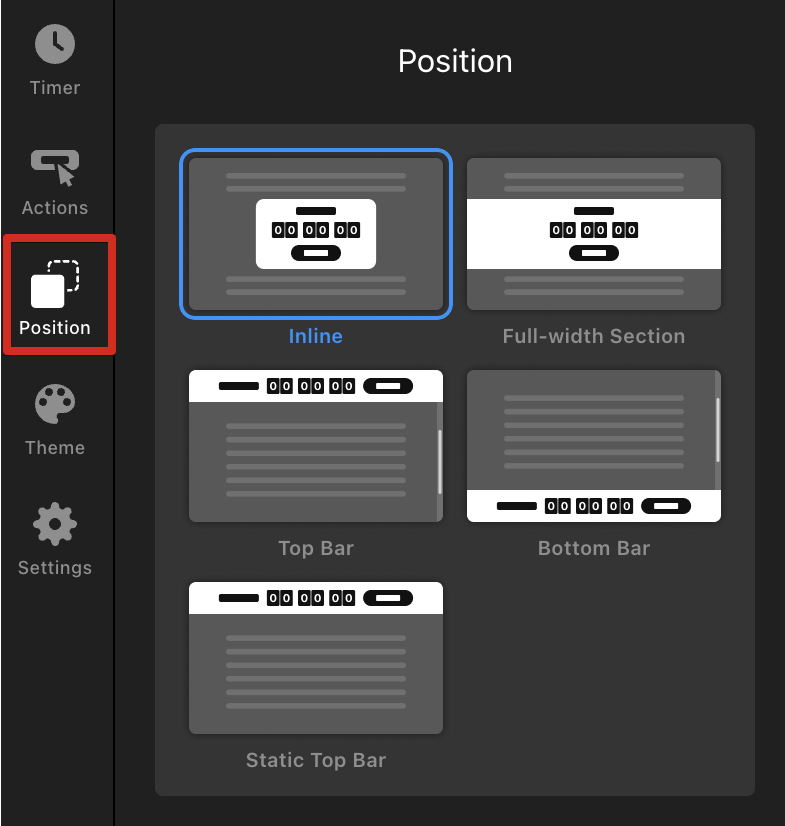
- Inline — embed the widget inside your content at a specific spot.
- Full-width Section — display the widget in a section that spans across the full page width.
- Top Bar — a sticky bar fixed at the top of the screen that stays visible while scrolling.
- Bottom Bar — a sticky bar fixed at the bottom of the screen that stays visible on scroll.
- Static Top Bar — a top bar that scrolls away with the rest of the page.
The Inline and Full-width Section options let you adjust your widget’s width and control text alignment:
You can also show or hide the close button for the Top Bar, Bottom Bar, and Static Top Bar layouts:
Theme
The Theme tab lets you control the look of your countdown timer — from colors and styles to animations and formats: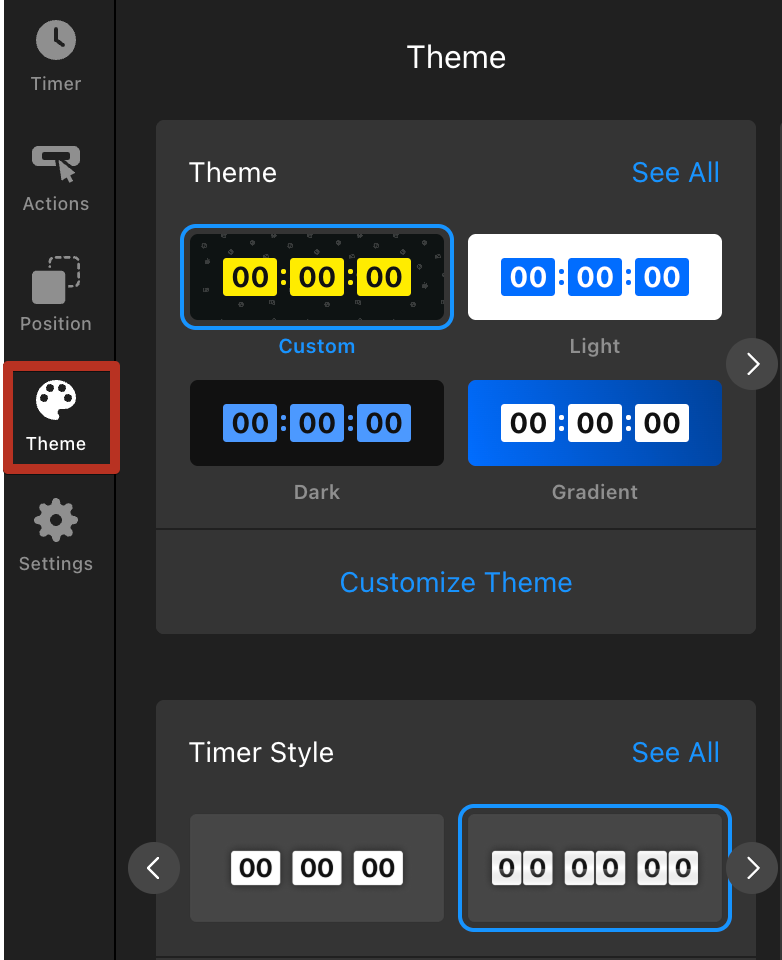
Widget Themes
Choose from built-in Themes, such as Light, Dark, or Gradient, or pick a seasonal one like Halloween, Black Friday, Christmas, or New Year. Click See All to explore all style:
Click Customize Theme to fine-tune your theme’s colors, fonts, button size, and more:
Timer Style
In the Timer Style section, you can pick a timer design that best fits your layout. Click See All to view all styles and choose your favorite:

You can also add Animation, choose a Separator style (colon, dot, slash, or line), define the Time Format (e.g., Days–Hours–Minutes–Seconds), and toggle Labels on or off to show or hide unit names:
That’s it — your countdown timer now matches your website’s design and branding! 🎉 You can now fine-tune its behavior and explore advanced options to make it even more dynamic.