Adding Elfsight Widget to WordPress Website
Looking for instructions on how to add your Elfsight widget to your WordPress website? Follow this simple guide to integrate it seamlessly. Copy your widget installation code, and let’s get started! 🚀
In this article
Important Notes Before You Begin
💰 WordPress Plan
To install the widget, you need the Business or Commerce plan on WordPress. Free, Personal, and Premium plans don't support JavaScript, so the code will appear as plain text. For more details, check the WordPress guide here.
🏗️ WordPress Peculiarities
These are the basic installation steps, but they may vary depending on your theme or builder. See this collection for more specific guides, or contact us for help with installation.
🎨 WordPress Themes
WordPress offers Classic and Block themes. This guide focuses on Classic themes, but we’ll note when steps also apply to Block themes.
Install on a Specific Page
- 1
-
Access the WordPress Backend
Log in to your WordPress website backend and click on Pages. Find the needed page, hover over its title, and click Edit: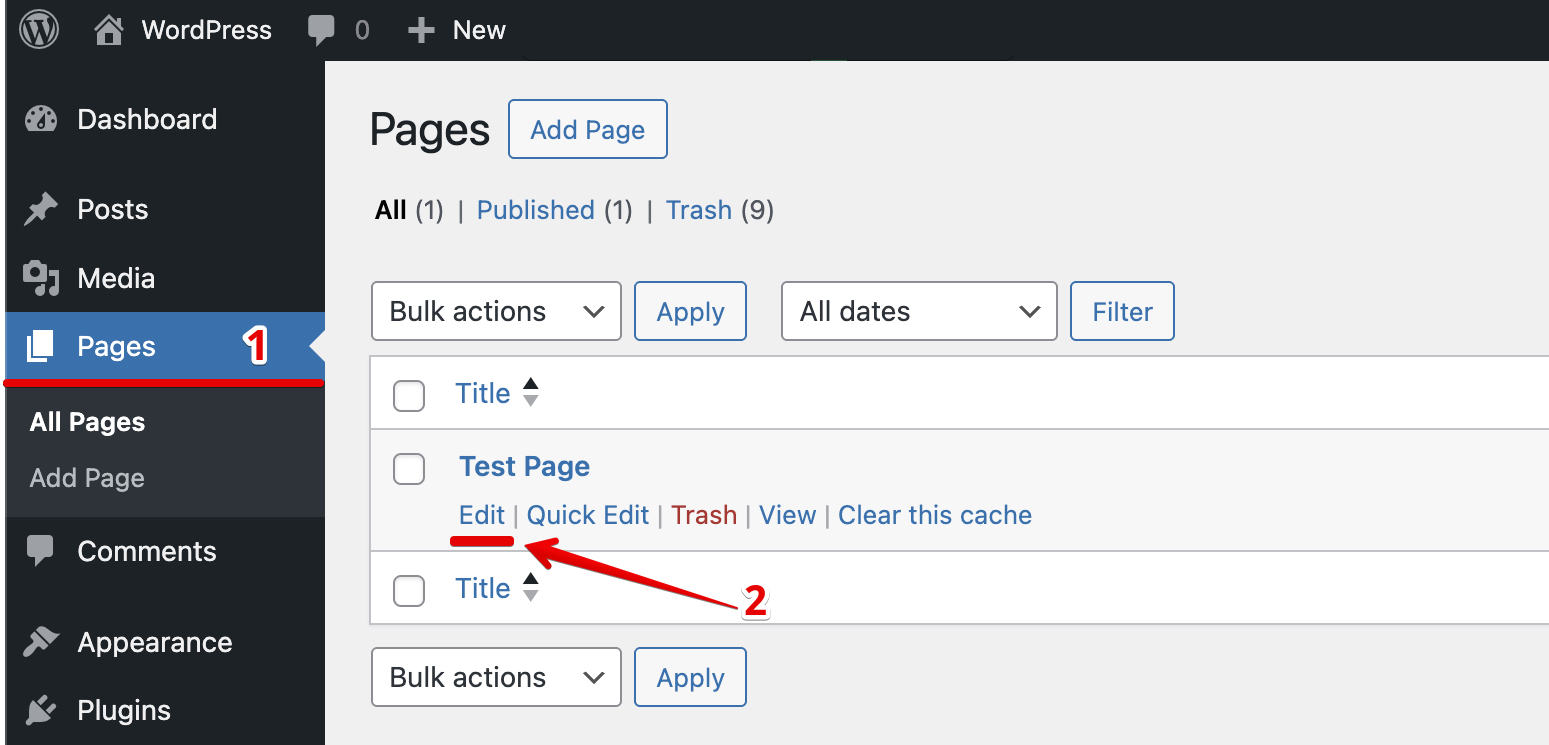
- 2
-
Add the Code Block
In the editor, click the blue ➕ icon: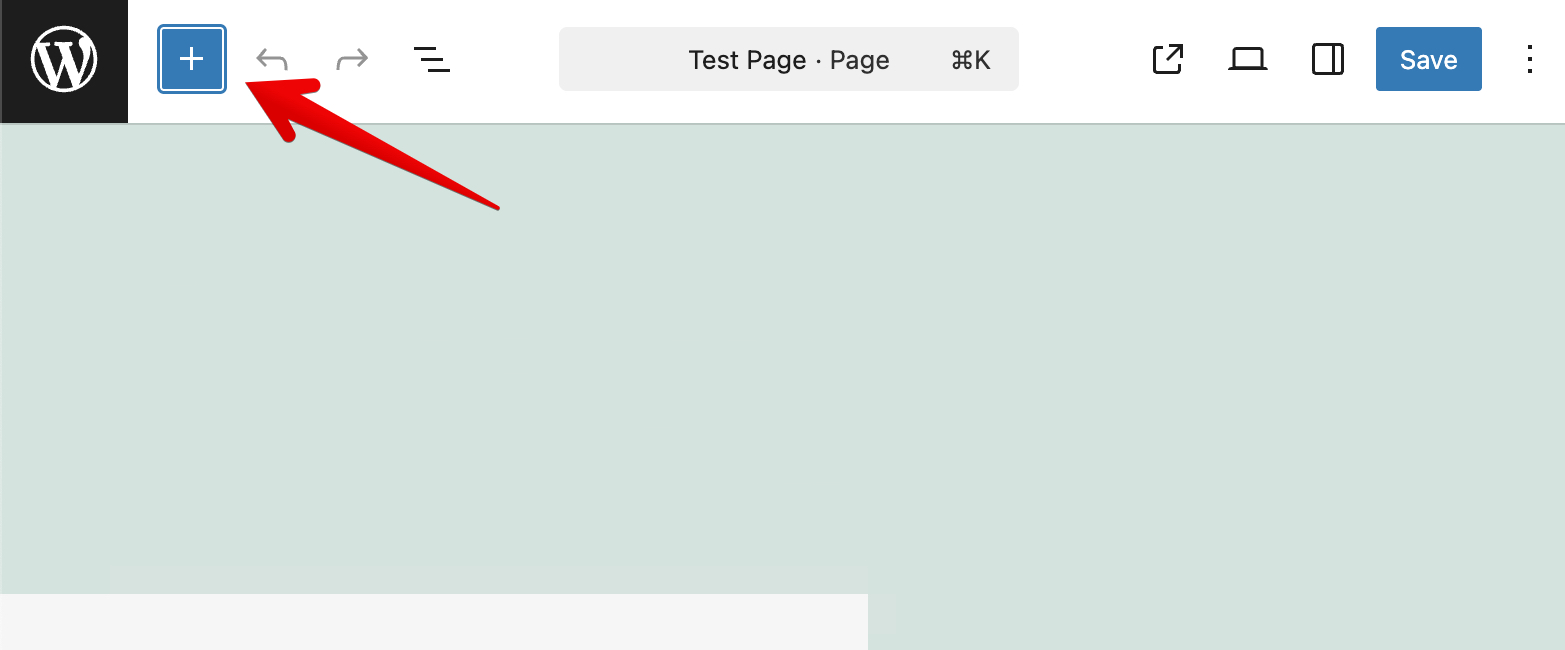
Find Custom HTML and drag and drop it to the spot where you'd like to display the widget:

- 3
-
Paste the Installation Code
Paste your widget installation code in the HTML window and Save the changes: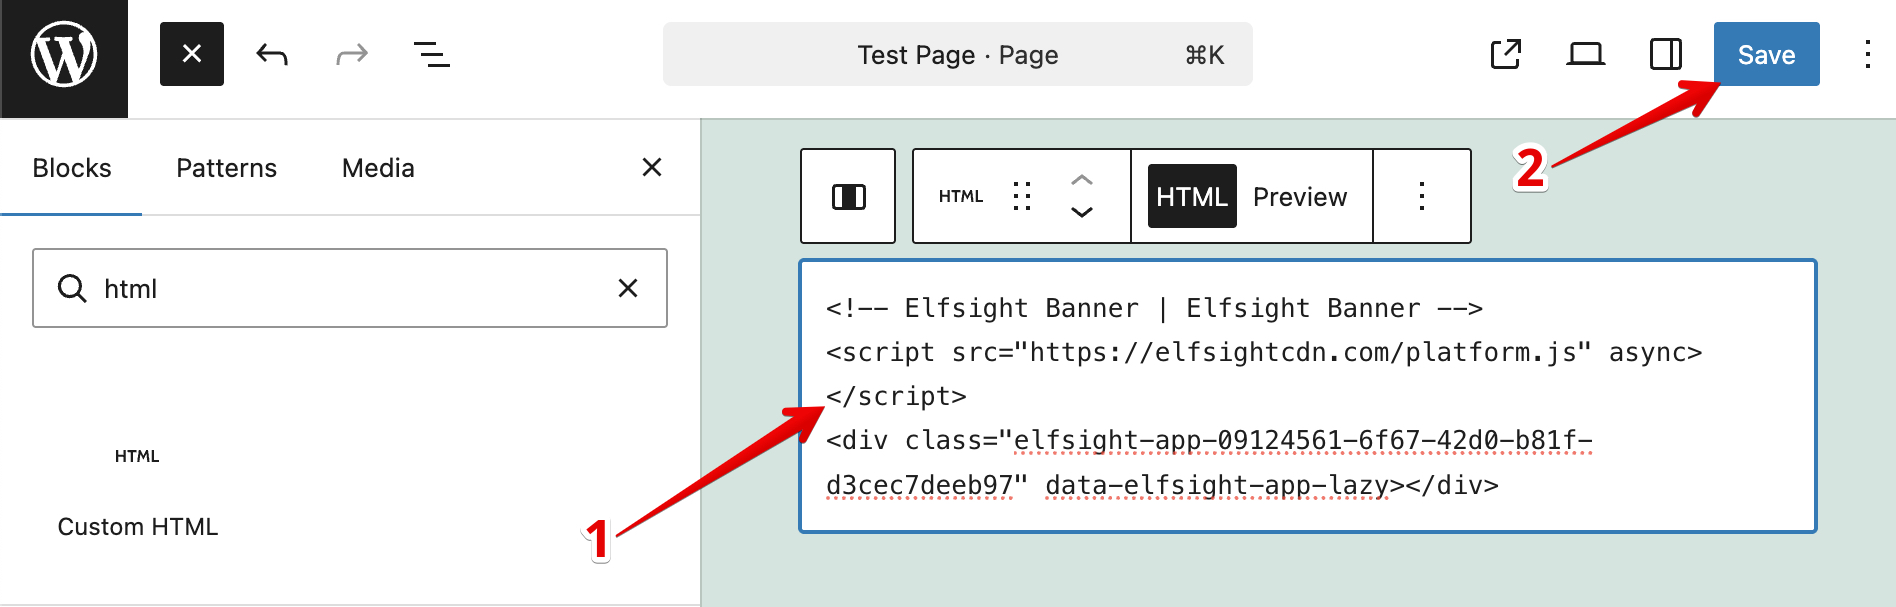


All done! You have successfully added the widget to your WordPress webpage.
Install on All Pages
There are different methods for adding widgets to all pages depending on your theme. In this section, we’ll show you two options that work best for the Classic themes.
Install via Theme Editor
- 1
-
Access the WordPress Backend
Log in to your WordPress website backend. In the left-hand menu, select Appearance → Theme File Editor: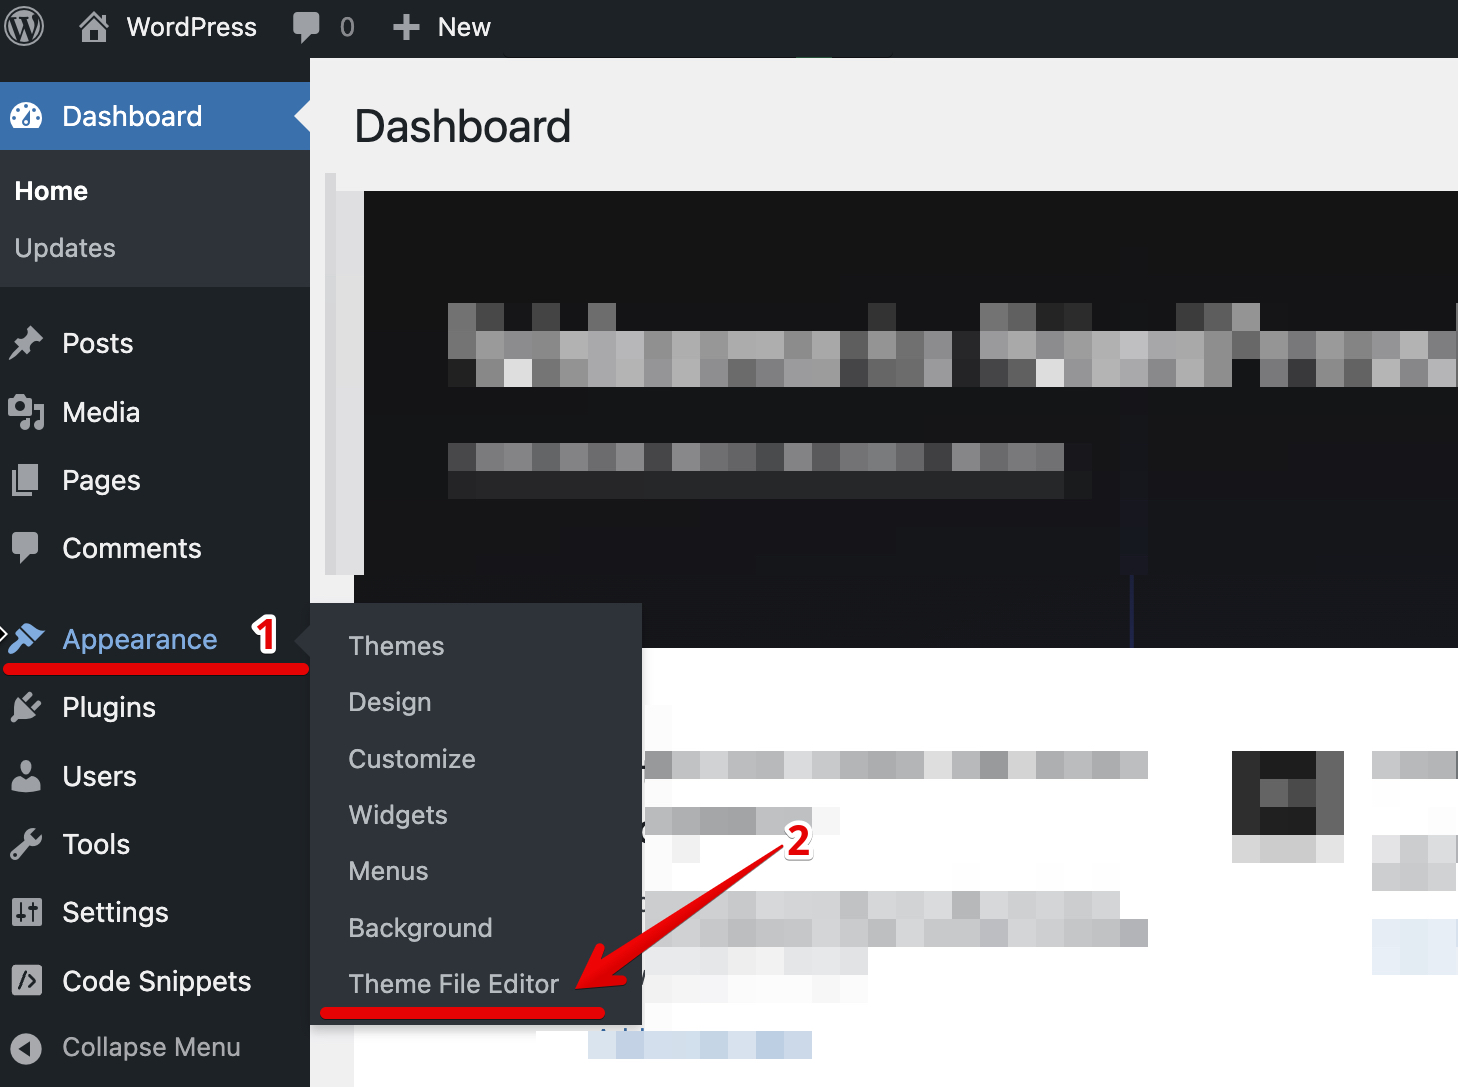
- 2
-
Add the Installation Code
Choose Theme Footer (footer.php) in the right-hand menu of Theme Files. Insert the code before the closing
</body>tag, and click Update File: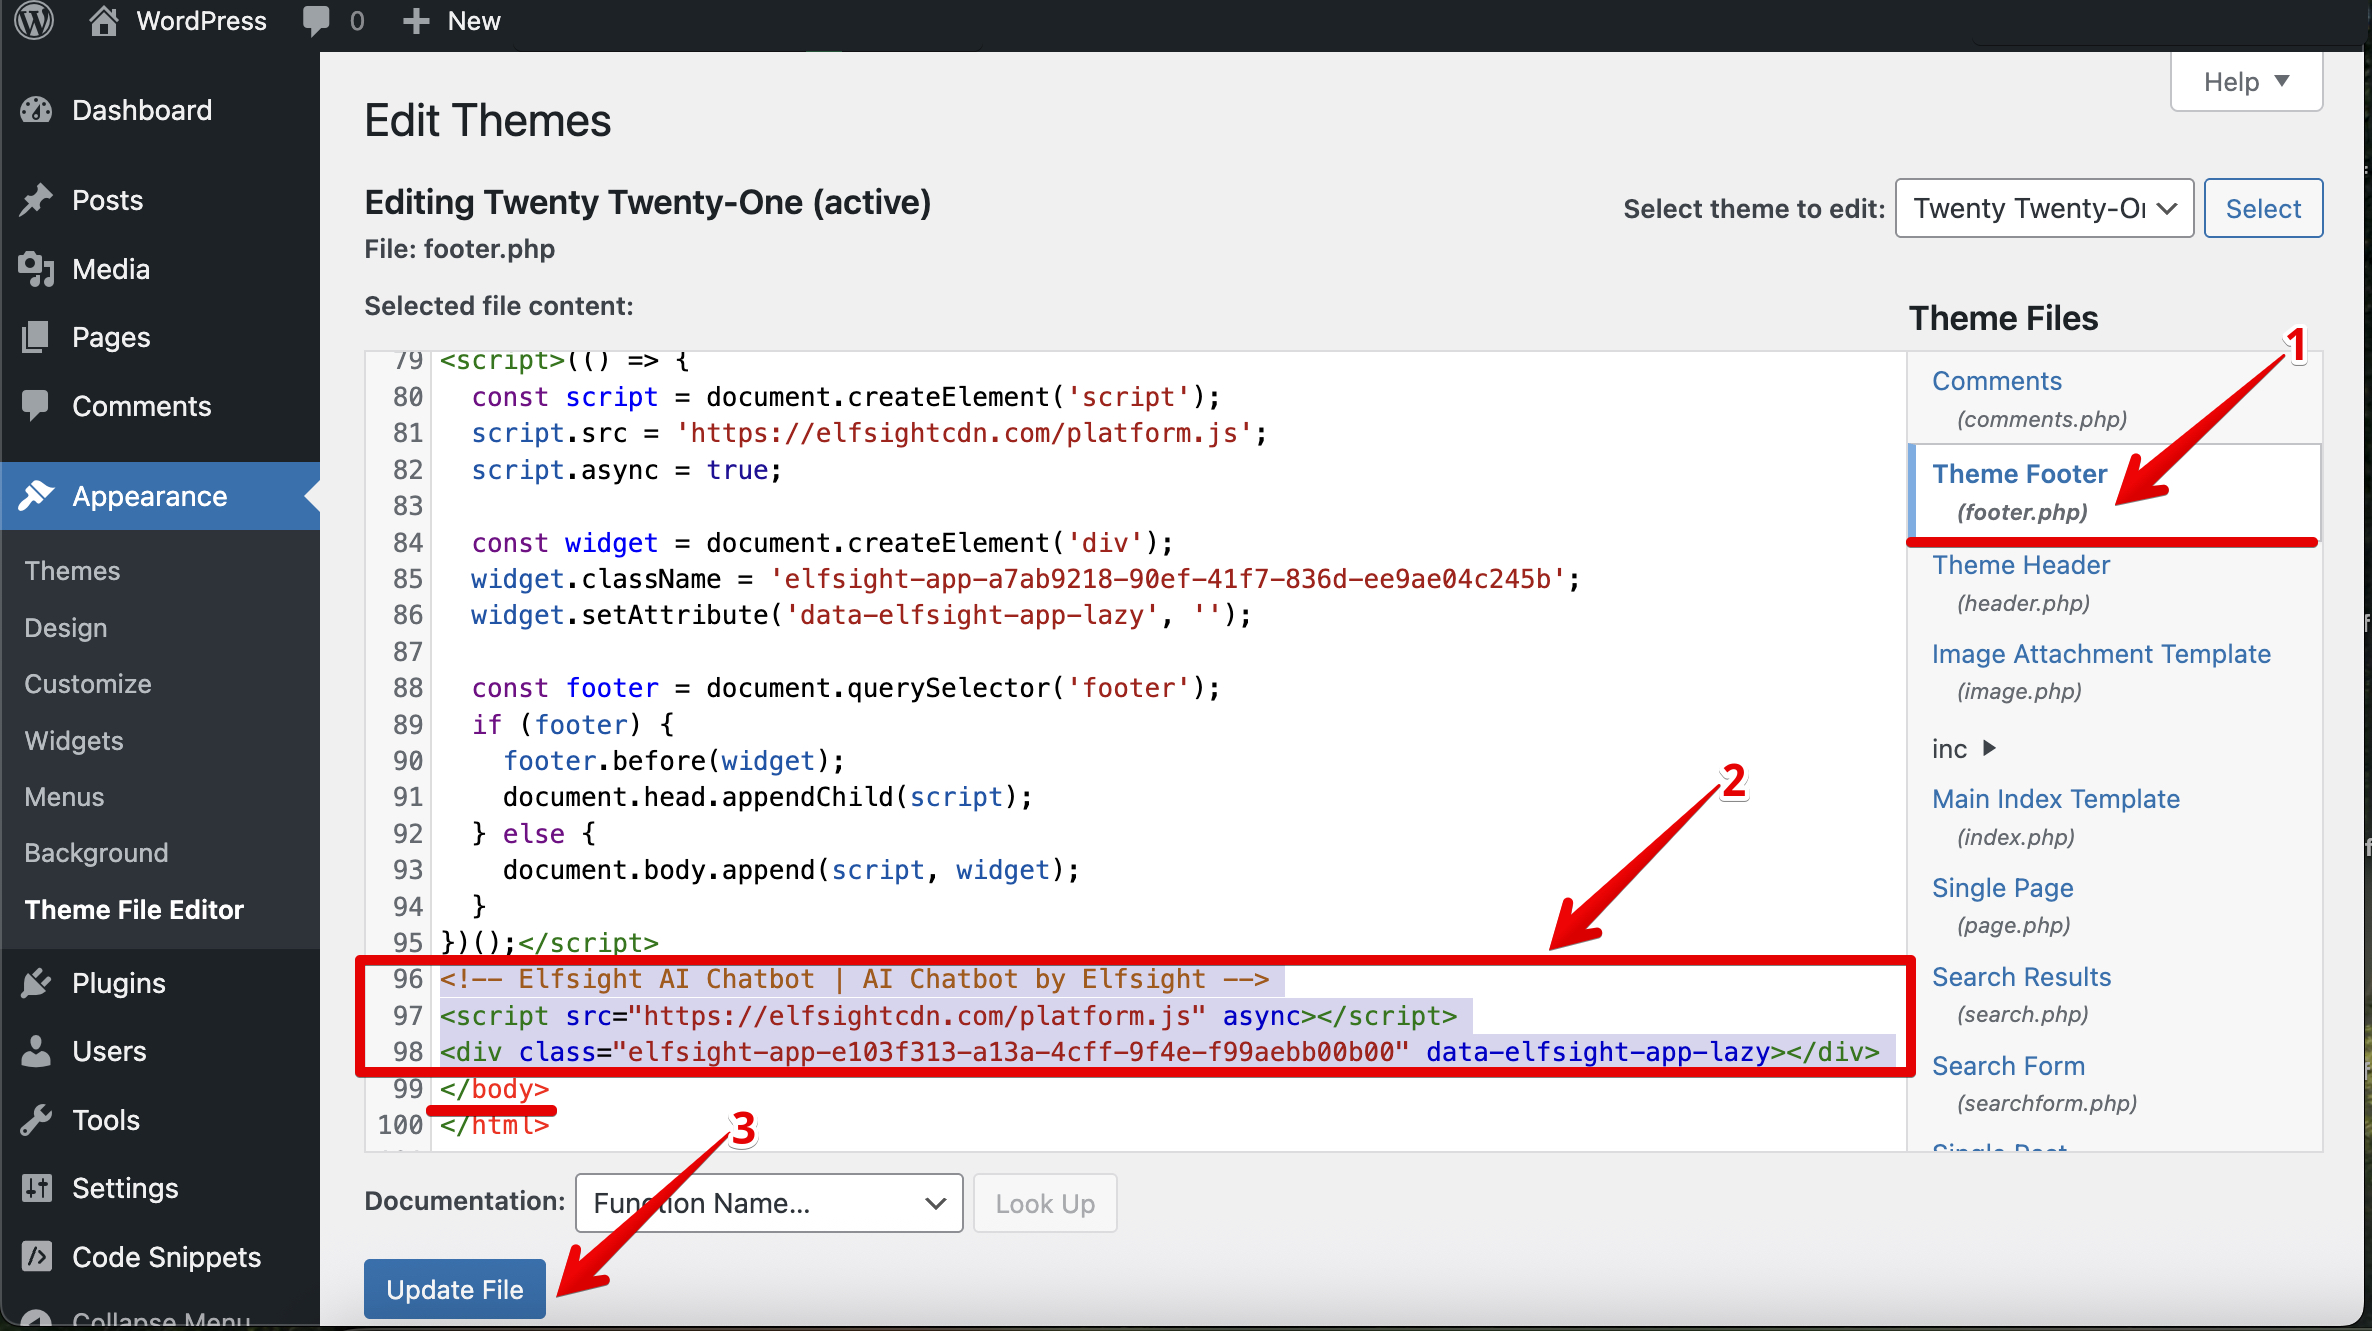


Great! Your floating widget is now installed on all pages of your website.
Install via Customize Option
- 1
-
Access the WordPress Backend
Log in to your WordPress website backend. Go to the Appearance tab in the left-hand menu and click Customize: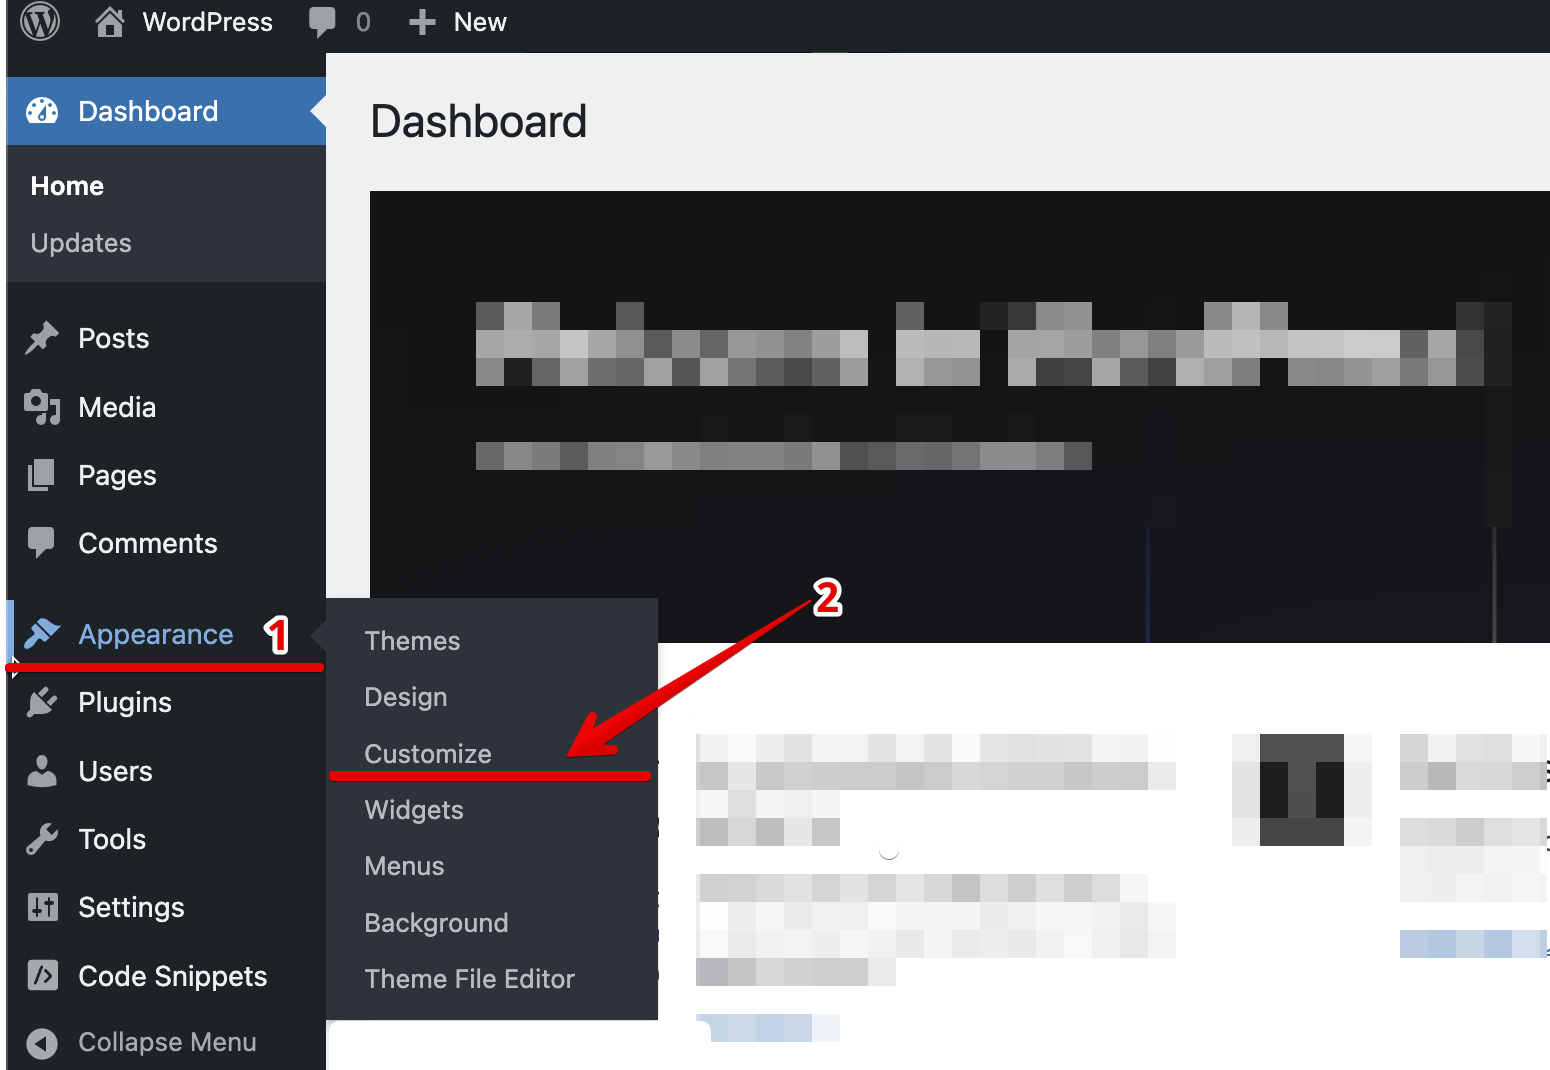
- 2
-
Add Custom HTML Element
Select Widgets in the left-hand menu: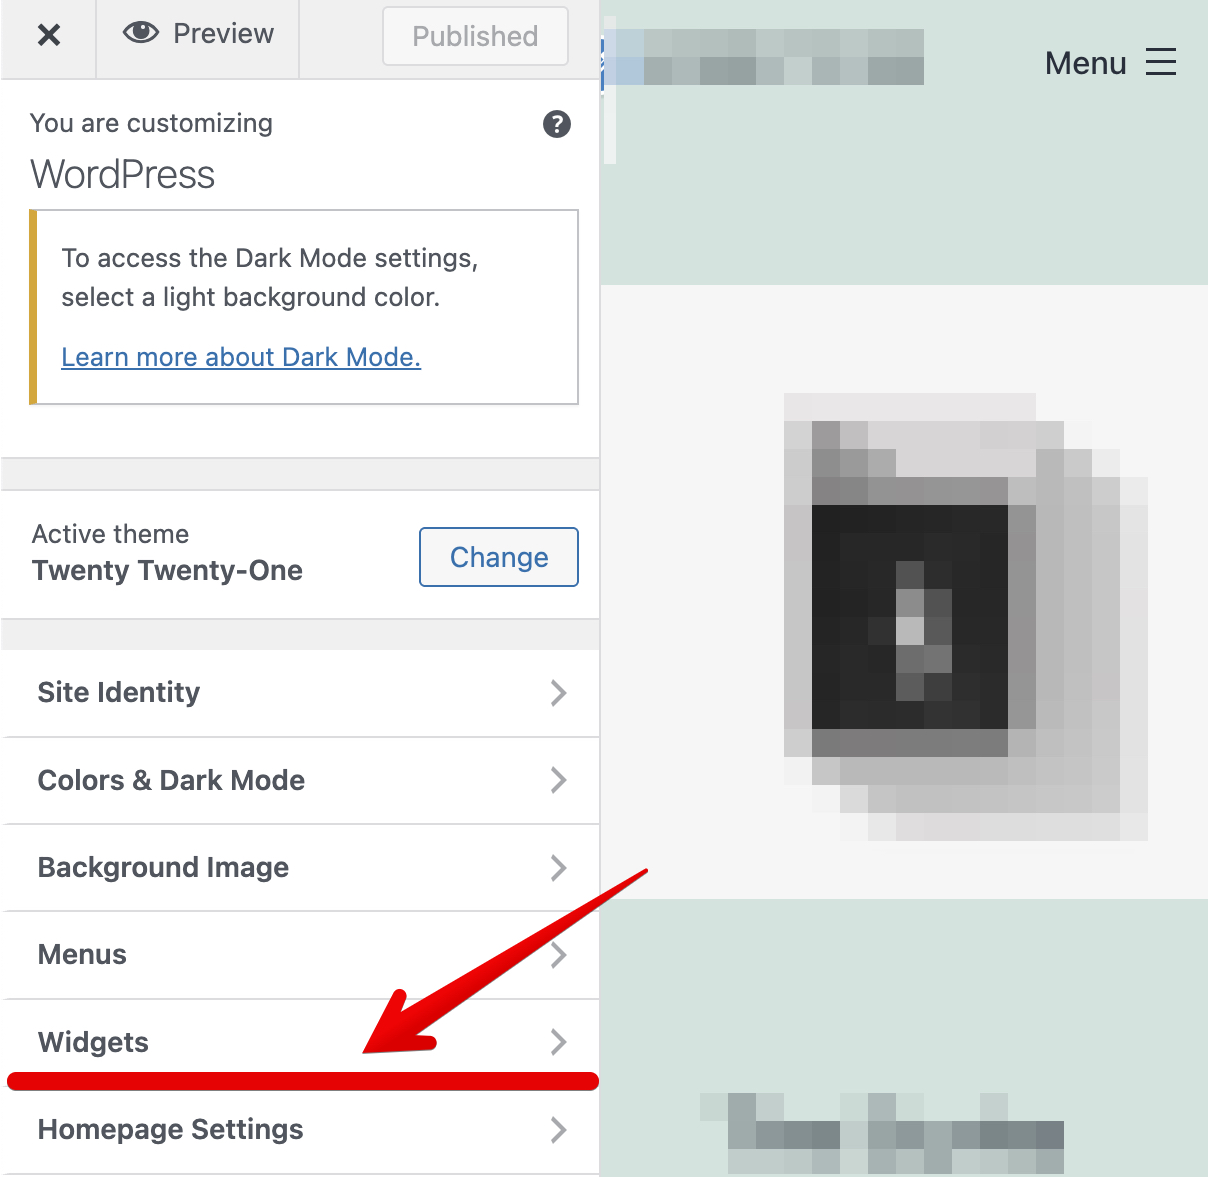
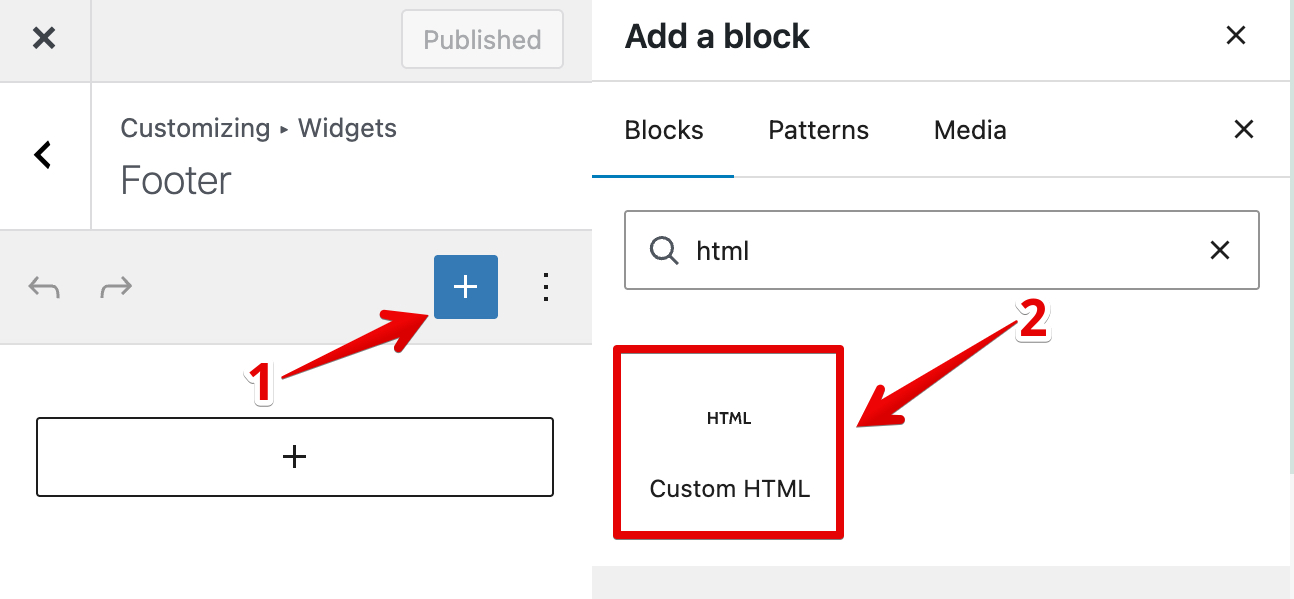
Click the blue ➕ icon, then choose Custom HTML:
- 3
-
Paste the Installation Code
Paste your widget installation code into the HTML field and click Publish to apply the changes: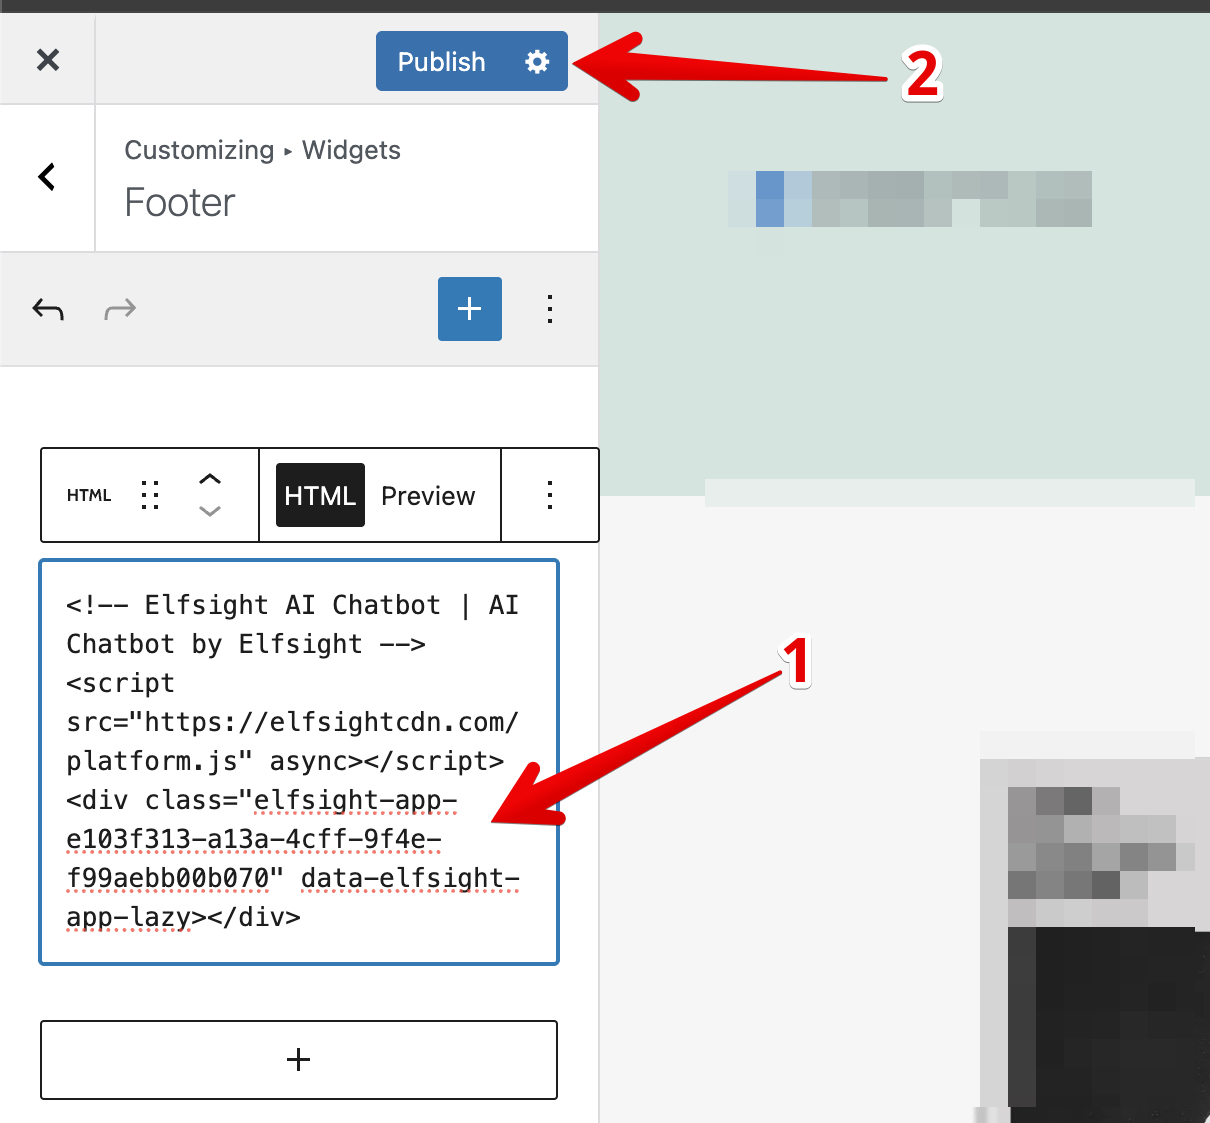


Well done! You have successfully added the widget to all pages of your WordPress website.
Need help with installation? 🙌 Send us a request, and we’ll set it up for you. If anything’s unclear or missing, share your feedback in our forum! Your input helps us improve.