Adding Elfsight Widget to HTML Website
If you've built an HTML website and want to enhance it with an Elfsight widget, this guide will help you through the installation process. Whether it's a simple one-page site or a multi-page project, you can easily add widgets wherever you'd like them to appear.
Just copy your widget installation code and let’s get started! 🚀
In this article
Add a static widget to your website
- 1
-
Open your website files in a code editor (such as Visual Studio Code, Sublime Text, or Notepad++) or use your website's file manager.
- 2
-
Open the HTML file of the page where you want the widget to appear.
- 3
-
Inside the
<body>section, find the place where you’d like the widget to show up, and paste the widget installation code there: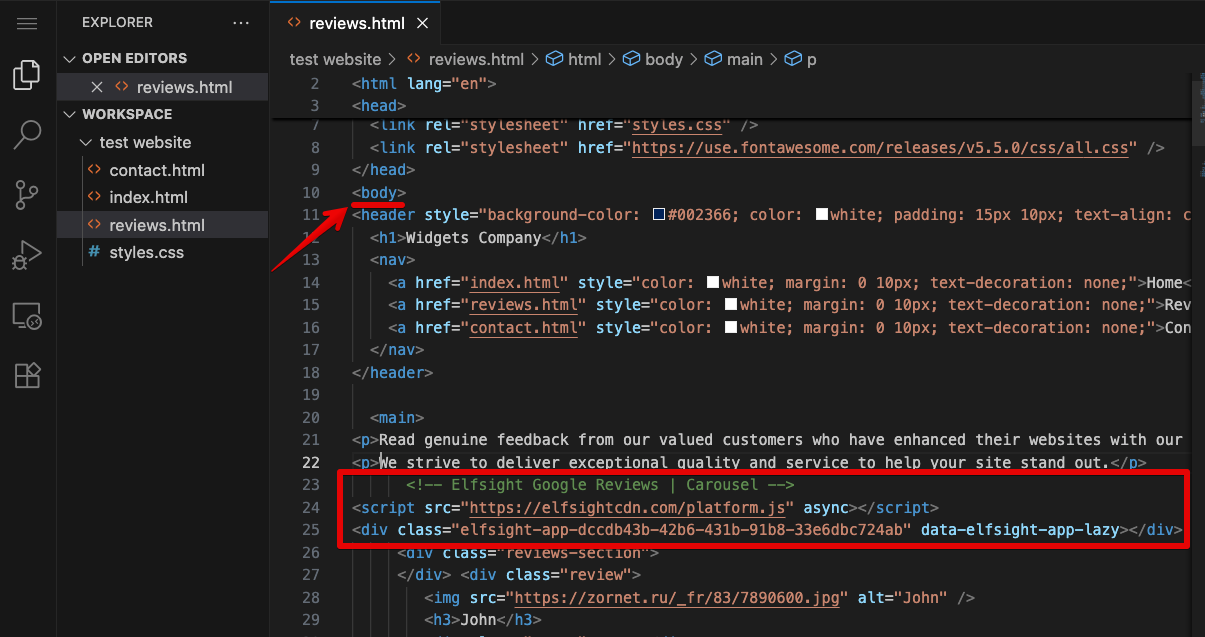
- 4
-
Save the HTML file. If you're editing files locally, upload the updated file to your web server or your hosting file manager.

Great job! 👏🏻 The widget will now appear in the spot you selected:

Add a floating widget to your website
- 1
-
Open your website files in a code editor (like Visual Studio Code, Sublime Text, or Notepad++) or use your website's file manager.
- 2
-
Open the HTML file of the page where you want the widget to appear.
- 3
-
Paste the widget installation code before the closing
</body>tag: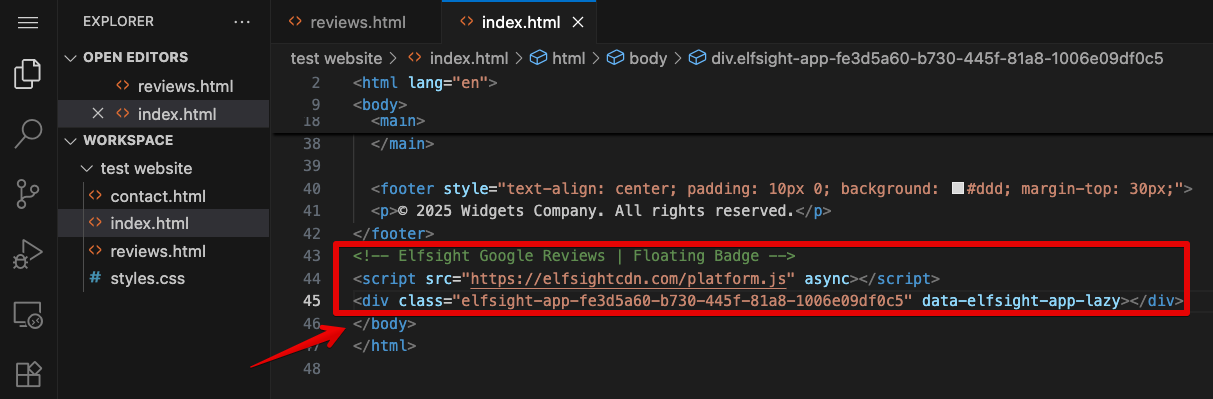
- 4
-
Save the HTML file. If you're editing files locally, upload the updated HTML file to your web server or your hosting file manager.

Well done! 😉 The widget will appear floating on the page:

header.html or footer.html, you can add the script there to have the widget display across all pages.
We hope this guide was helpful! Installing a widget on a custom HTML website can sometimes be tricky, but don't worry – if you run into any issues, feel free to send us an installation request and we'll take care of everything for you!