
Adding Elfsight Widget to Canva Website
Ready to install an Elfsight widget on your Canva website? Follow this quick video guide or continue with the step-by-step instructions below. Let’s dive in! 😊
In this article
Installing Your Widget
- 1
-
Prepare your widget Share Link
To install an Elfsight widget on your Canva website, you need its Share Link. Go to your Elfsight dashboard, find the widget you want to install, and click Install:
Switch to the Share Link tab and click Copy Link:

There are 6 widgets that don't have the Share Link option: Banner, Contact Form, Form Builder, Popup, Slider, and Subscription Form.
If you use one of these widgets in a static layout (except for Popup, as it doesn't have static layouts), you can manually create a Share Link for your widget using this format:https://WIDGET-ID-WITHOUT-HYPHENS.elf.site
In the link above, replace WIDGET-ID-WITHOUT-HYPHENS with your actual Widget ID, without hyphens. Here is an example:
https://6b71ec7fb3ad4df7b4e6291714fe957f.elf.site
This link won't display the widget when clicked directly. It will only work once embedded in your website. - 2
-
Go to your Canva admin panel
Log in to your Canva account, navigate to Projects → Designs and open the website where you want to add the widget: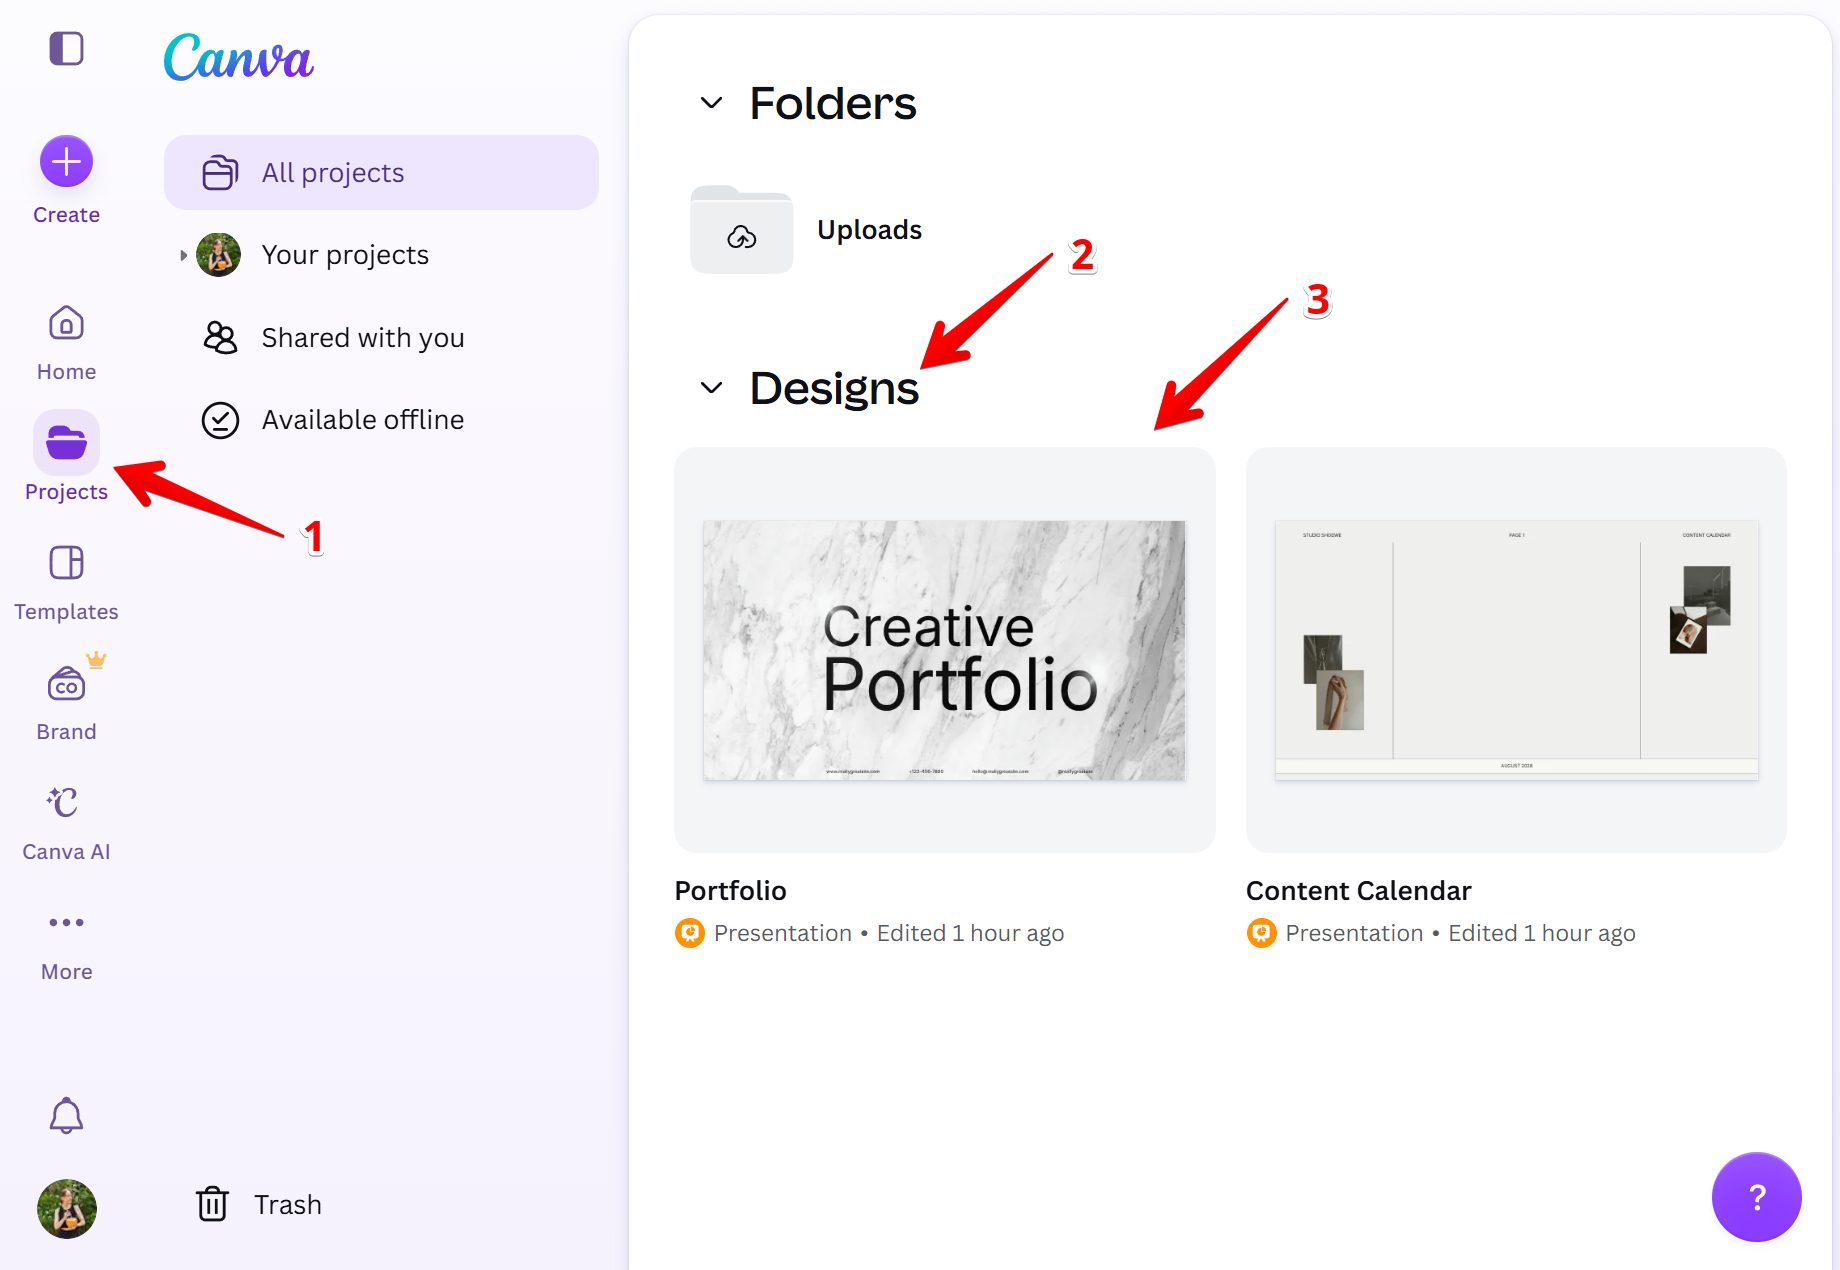
- 3
-
Get the Embed app
In your Canva website editor, go to Apps. Enter “Embed” in the search box and open the Embed app: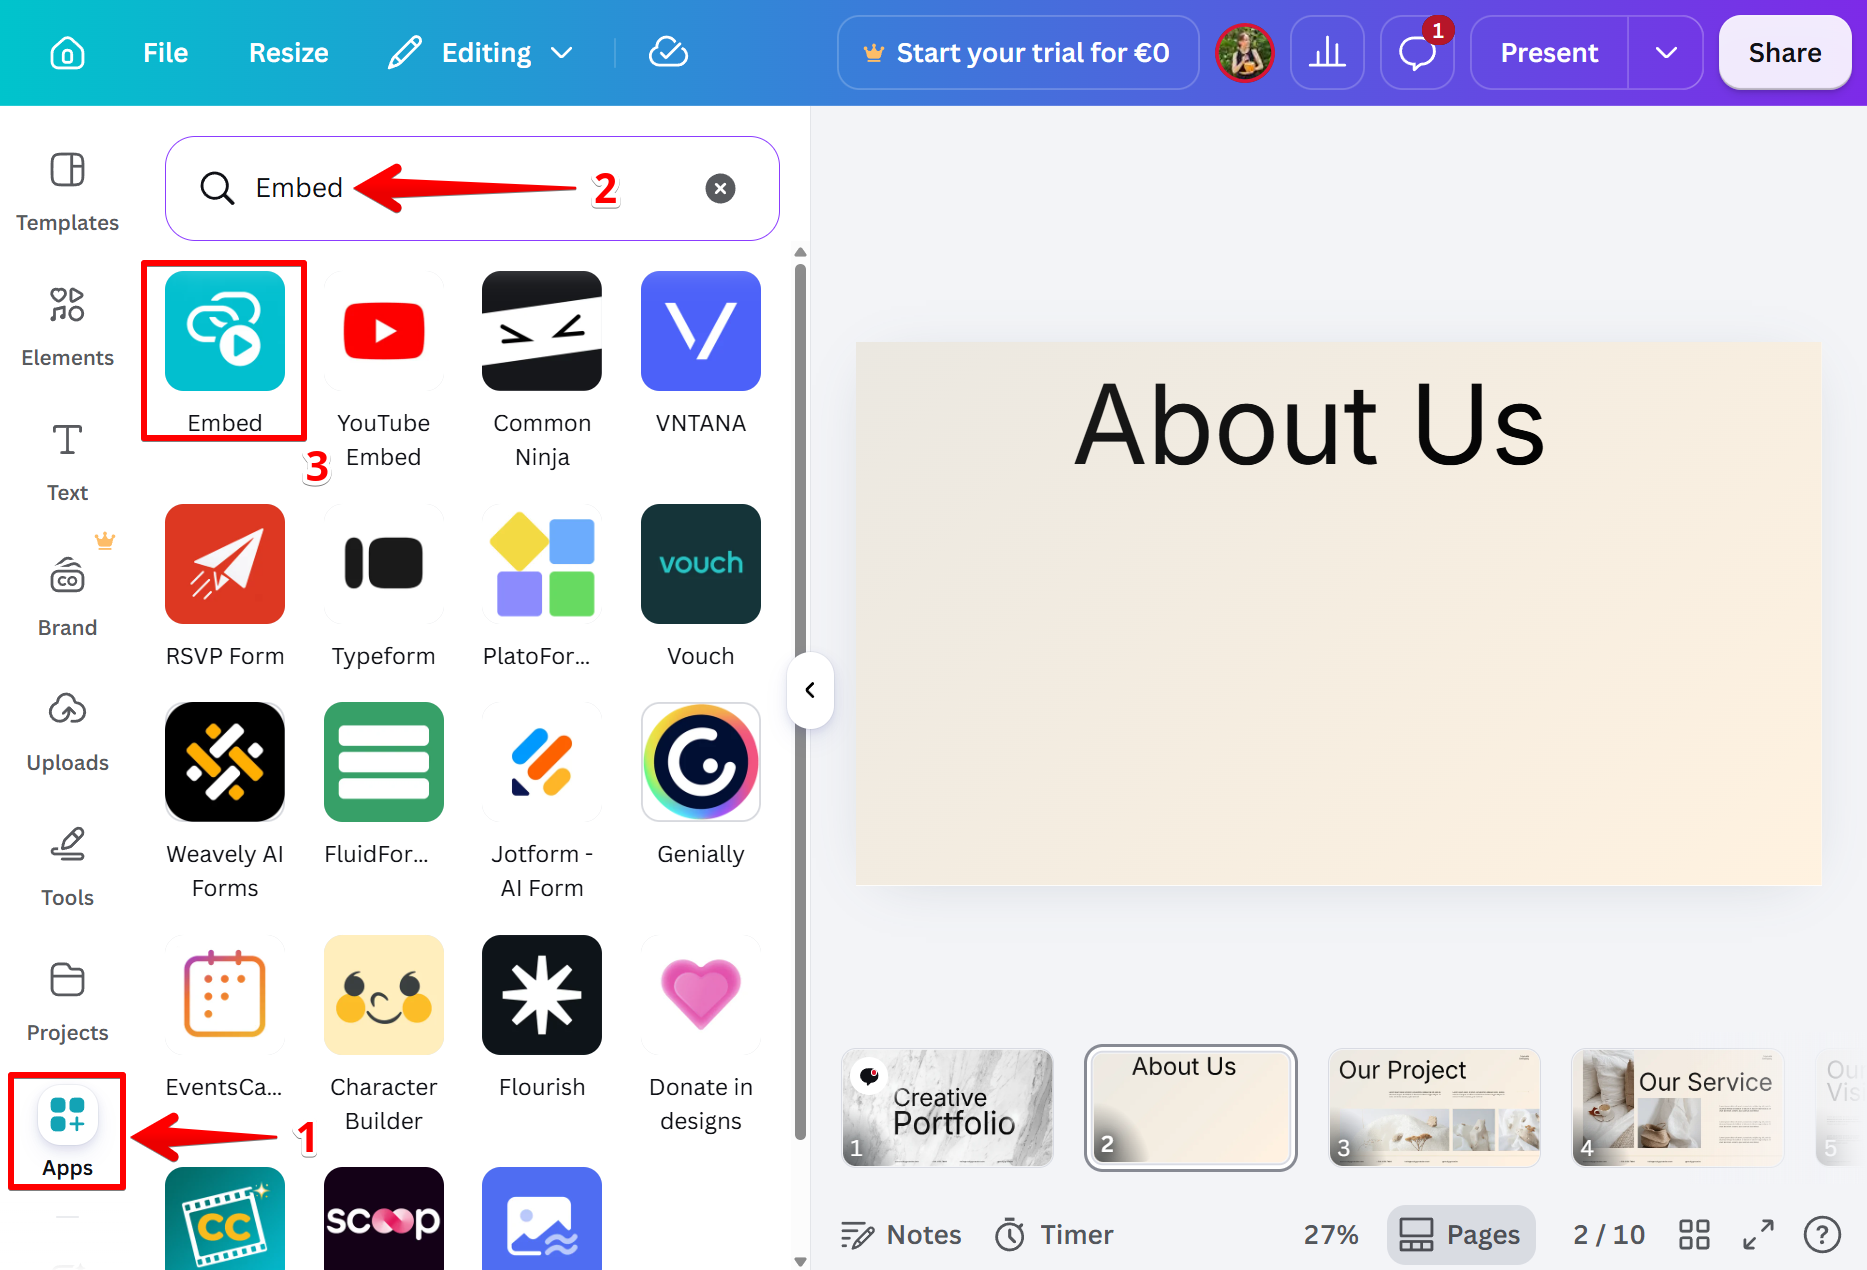
- 4
-
Add the widget
Select the page where you want to see the widget or add a new page (1). Paste the widget Share Link from Step 1 into the field (2) and click Add to design (3):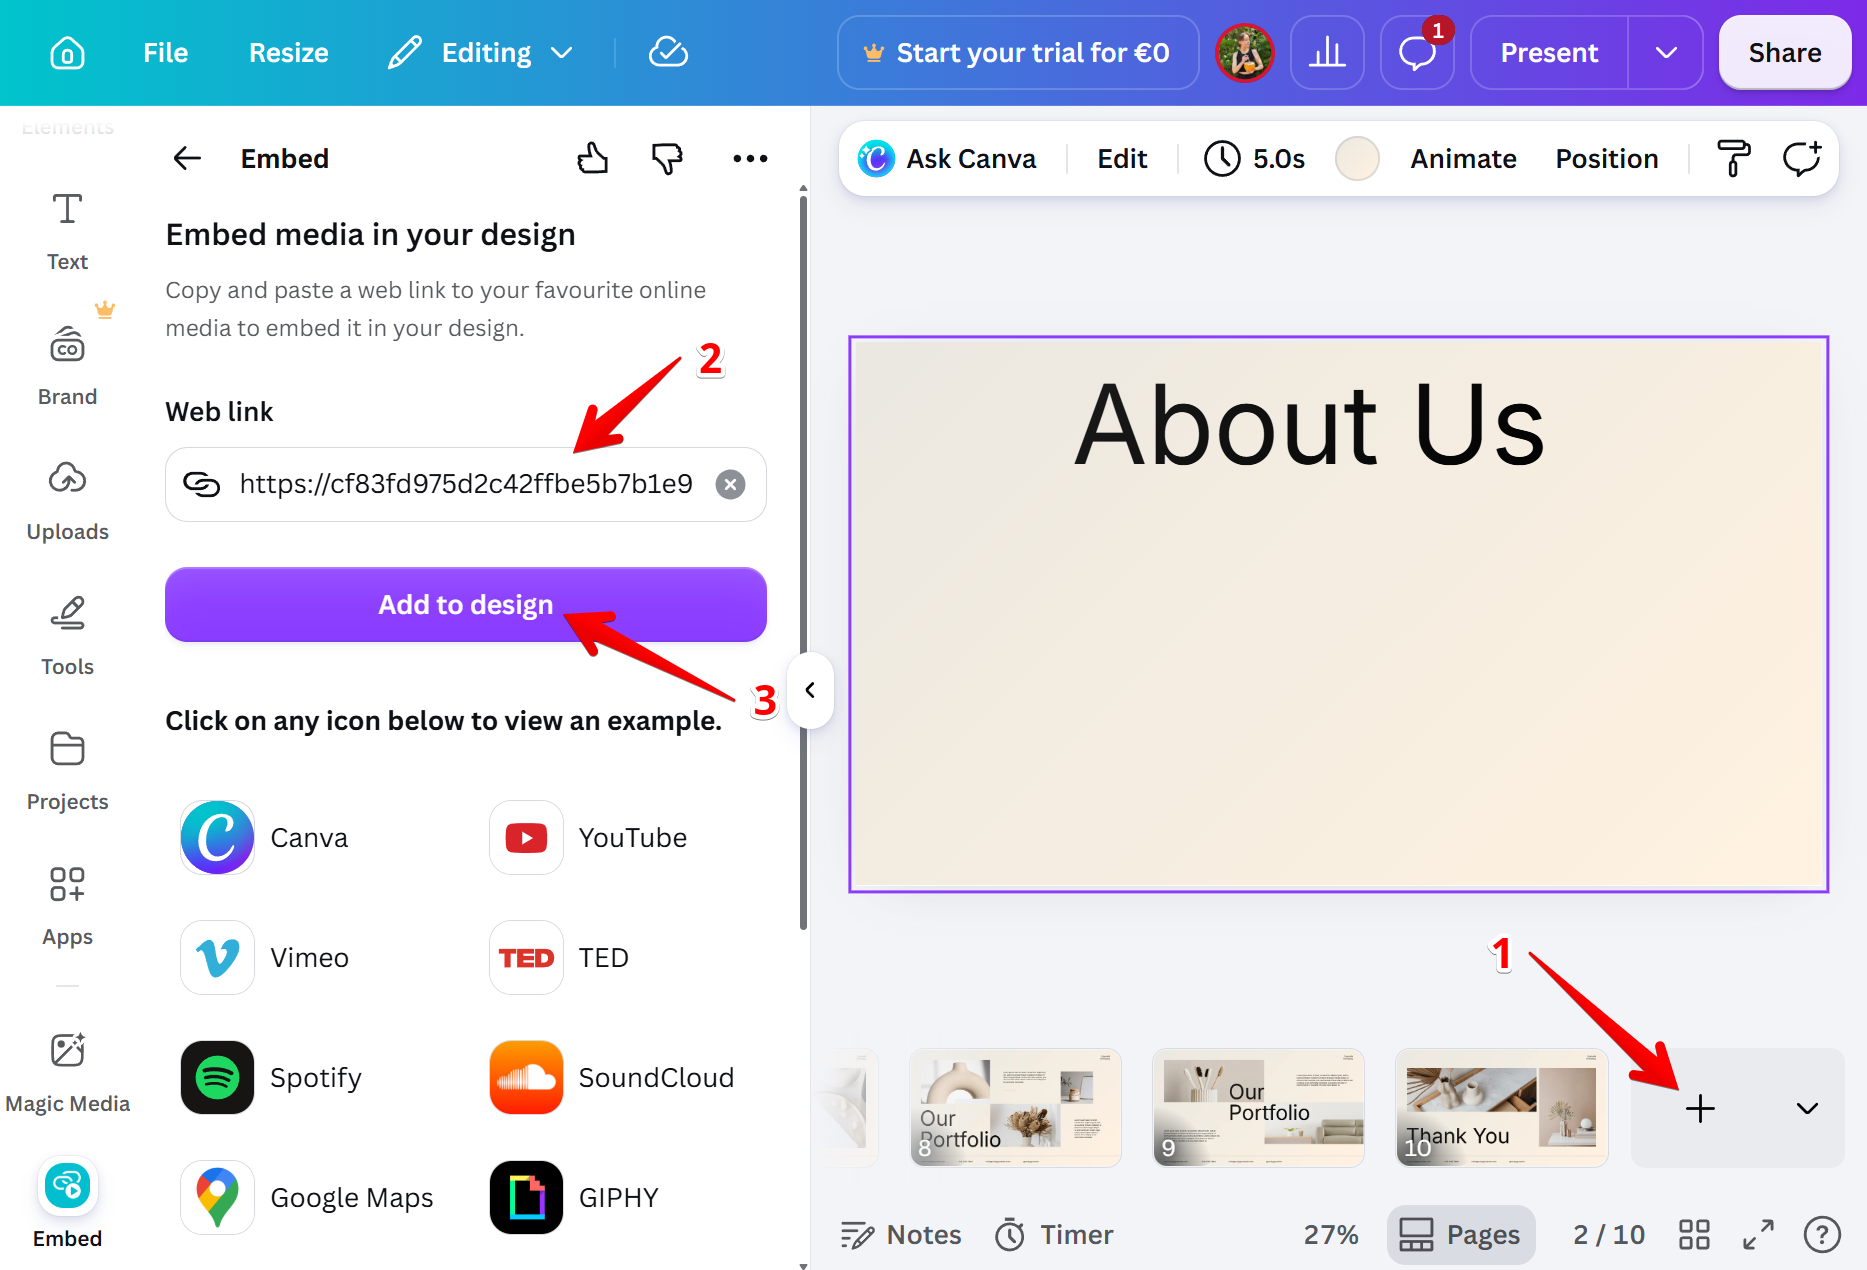
- 5
-
Adjust the widget's size
Once the widget appears, you can change its width, height, and placement by dragging the container:
- 6
-
Save the changes
Click Share, select Website, then click Publish Changes to make your updates live: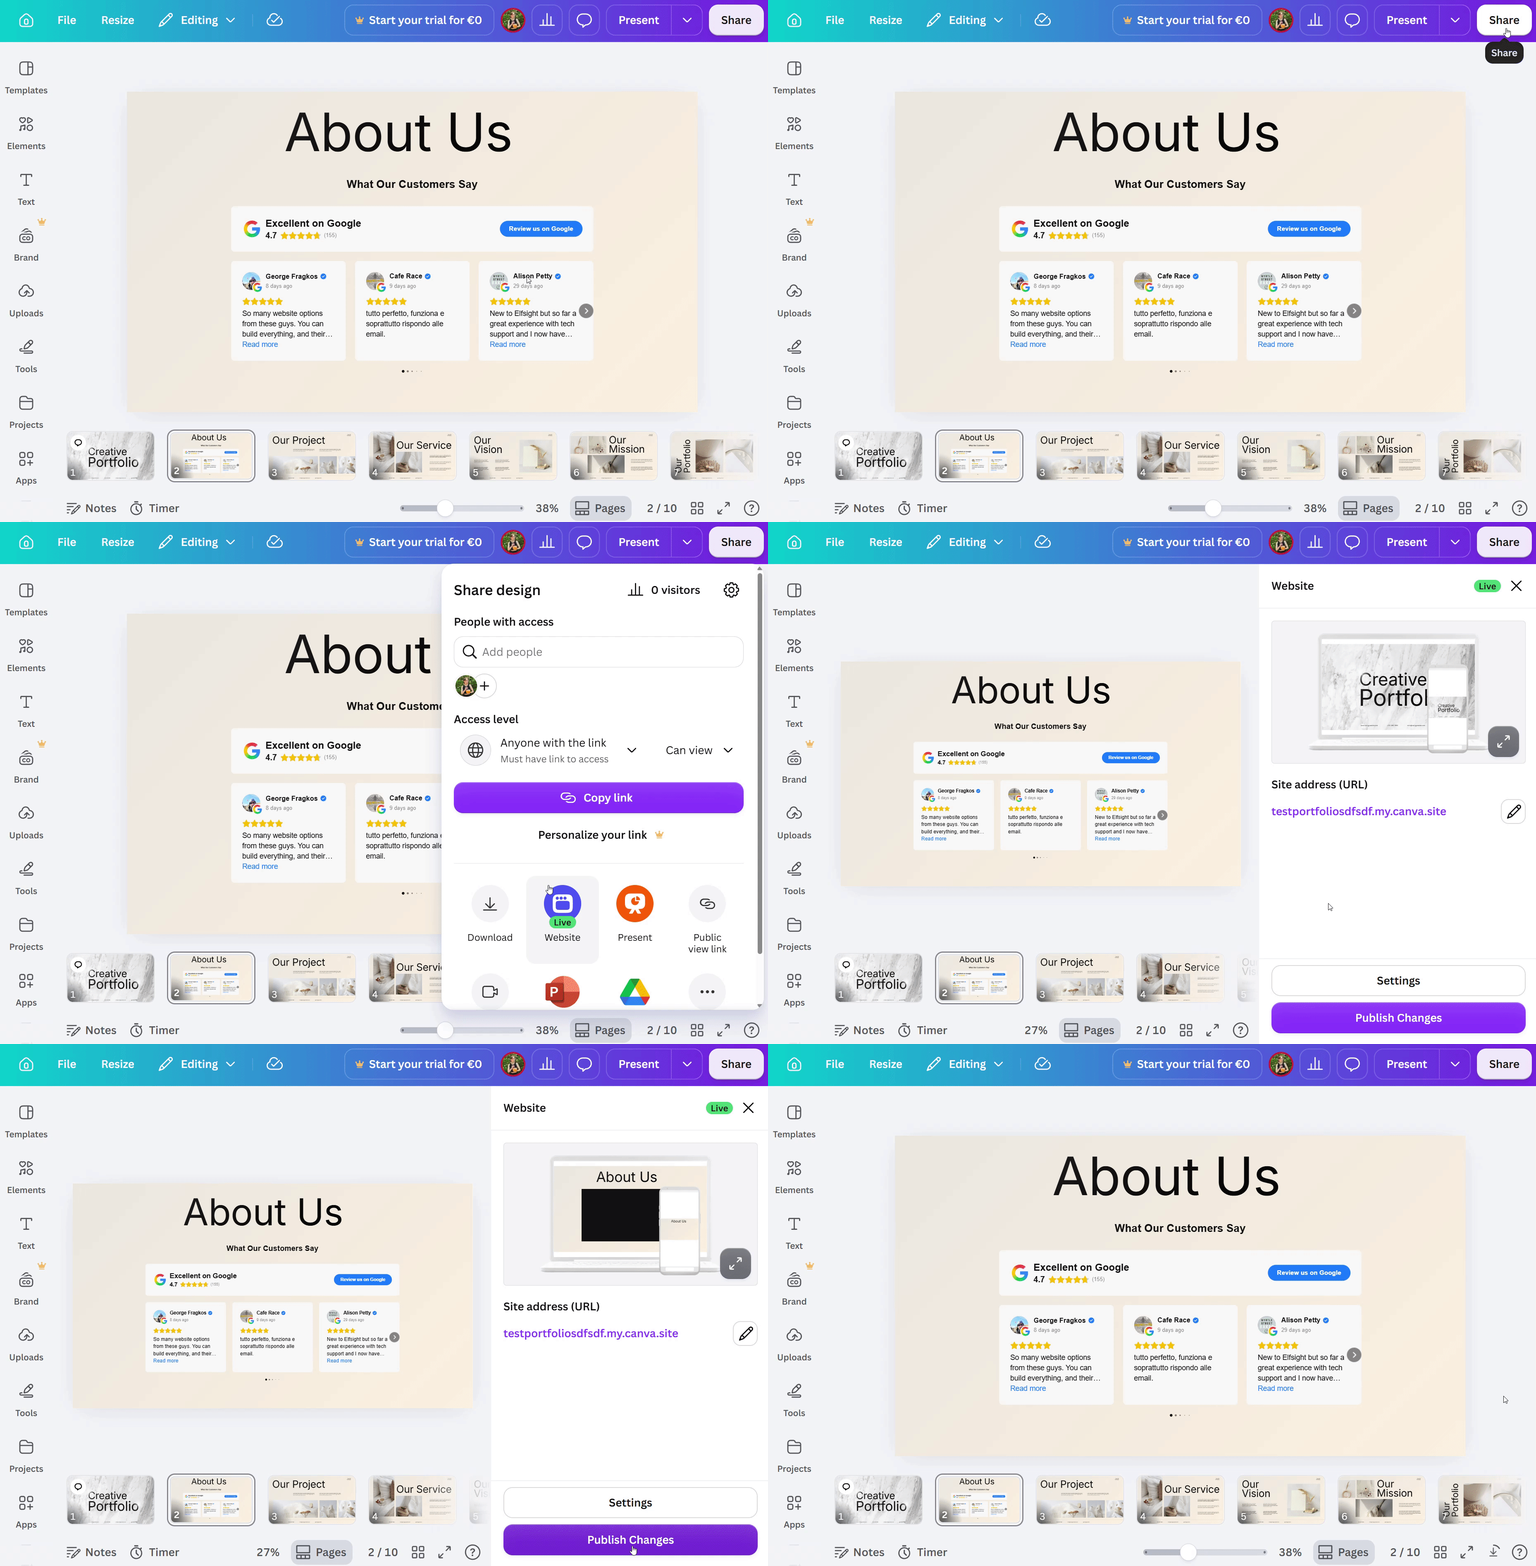


That's it! Your Elfsight widget is now added to your Canva website.
Please note that Canva doesn't allow adding a widget to all pages at once. For a multi-page site, you'll need to add the widget to each page individually.
Stuck with installation? Let us help! Send us a quick request, and we’ll handle the setup for you. 🙌
FAQ
Why is there a black background around my widget?
Canva may display embedded content in dark mode, which can cause a black background to appear around the widget:
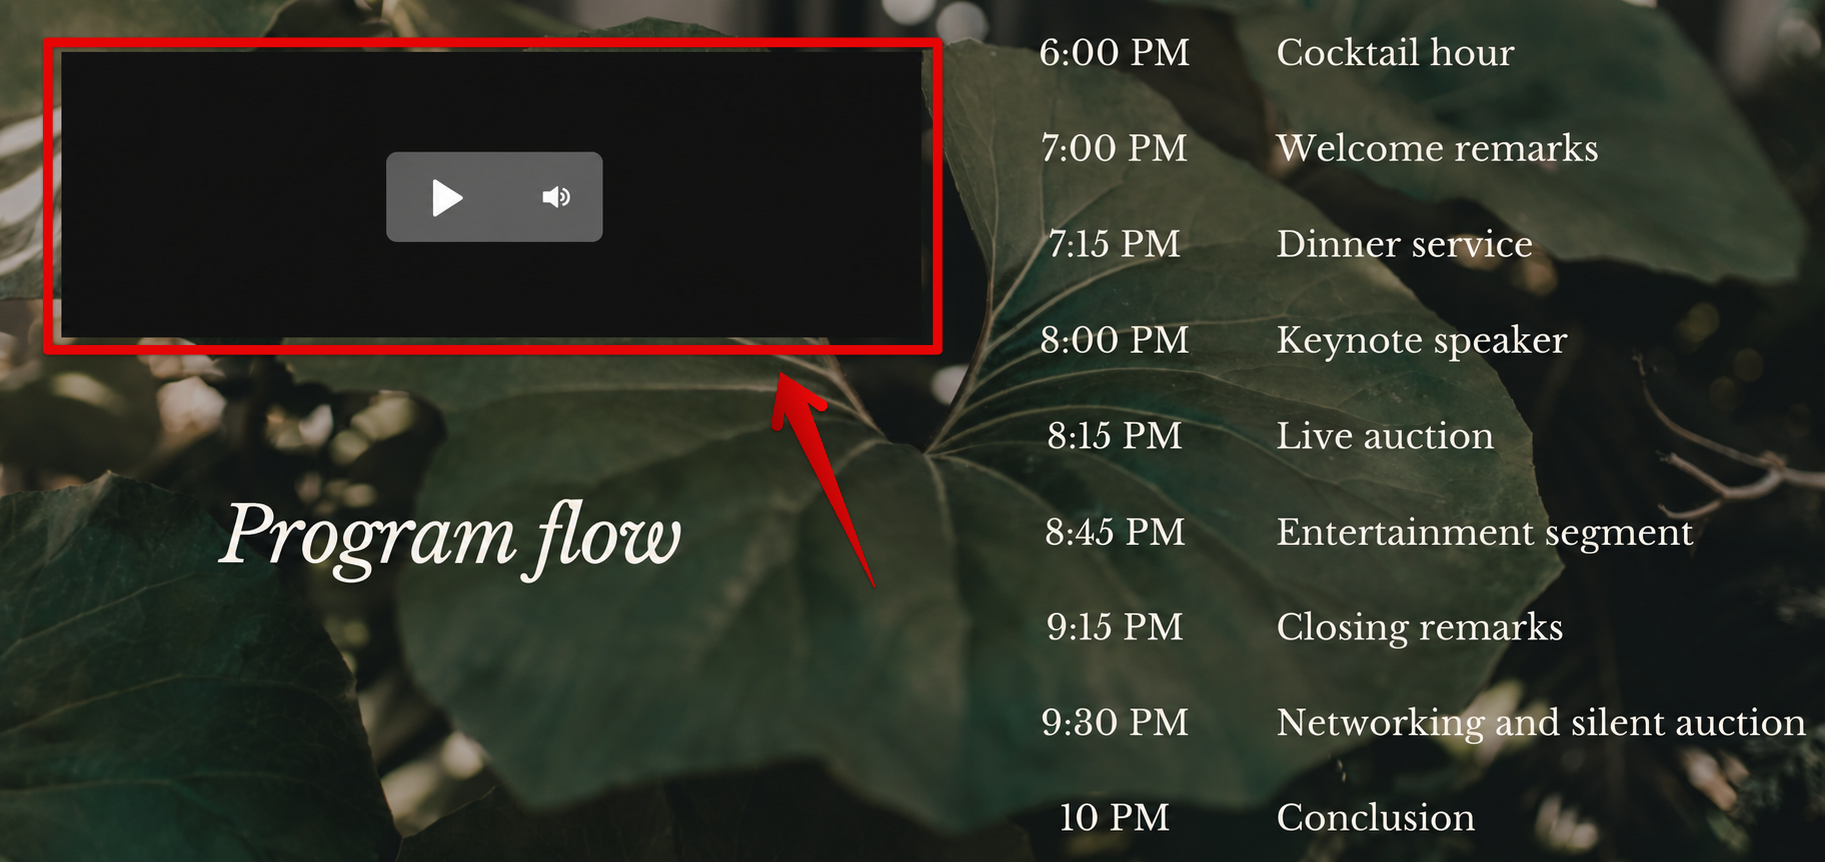
This behavior comes from the way Canva renders embedded content. To fix it, open the widget editor and find the Custom CSS section. Depending on the widget, you can find it under the Settings, Style, or Appearance tab:
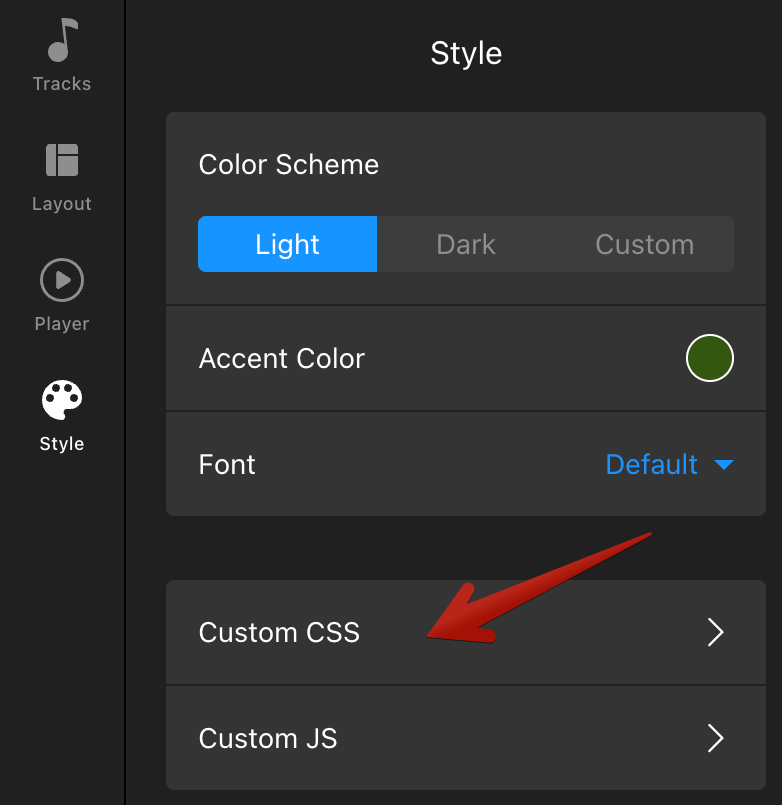
Add the following code to the Custom CSS field:
@external {
  :root {
    color-scheme: light !important;
  }
}
Publish the widget changes and refresh your Canva website. The widget should now appear without the black background.
Why does my widget look too narrow or incorrectly sized?
After being embedded in Canva, the widget may appear too narrow, too tall, or out of proportion. This happens because Canva controls the dimensions of embedded content and, as a result, some widget layouts may not fit the available space correctly.
First, try resizing and repositioning the embedded block in the Canva editor. If the widget still doesn't display correctly, contact our Support Team and provide us with access to your Canva website so we can look into it.