
Adding Elfsight Widget to Your Website via Google Tag Manager
If you can’t add custom code directly to your website, you can install your Elfsight widget using Google Tag Manager (GTM).
This guide explains how to connect Google Tag Manager to your website and use it to display an Elfsight widget on all pages or a specific page.
Installation Steps
1. Connect Google Tag Manager to Your Website
- 1
-
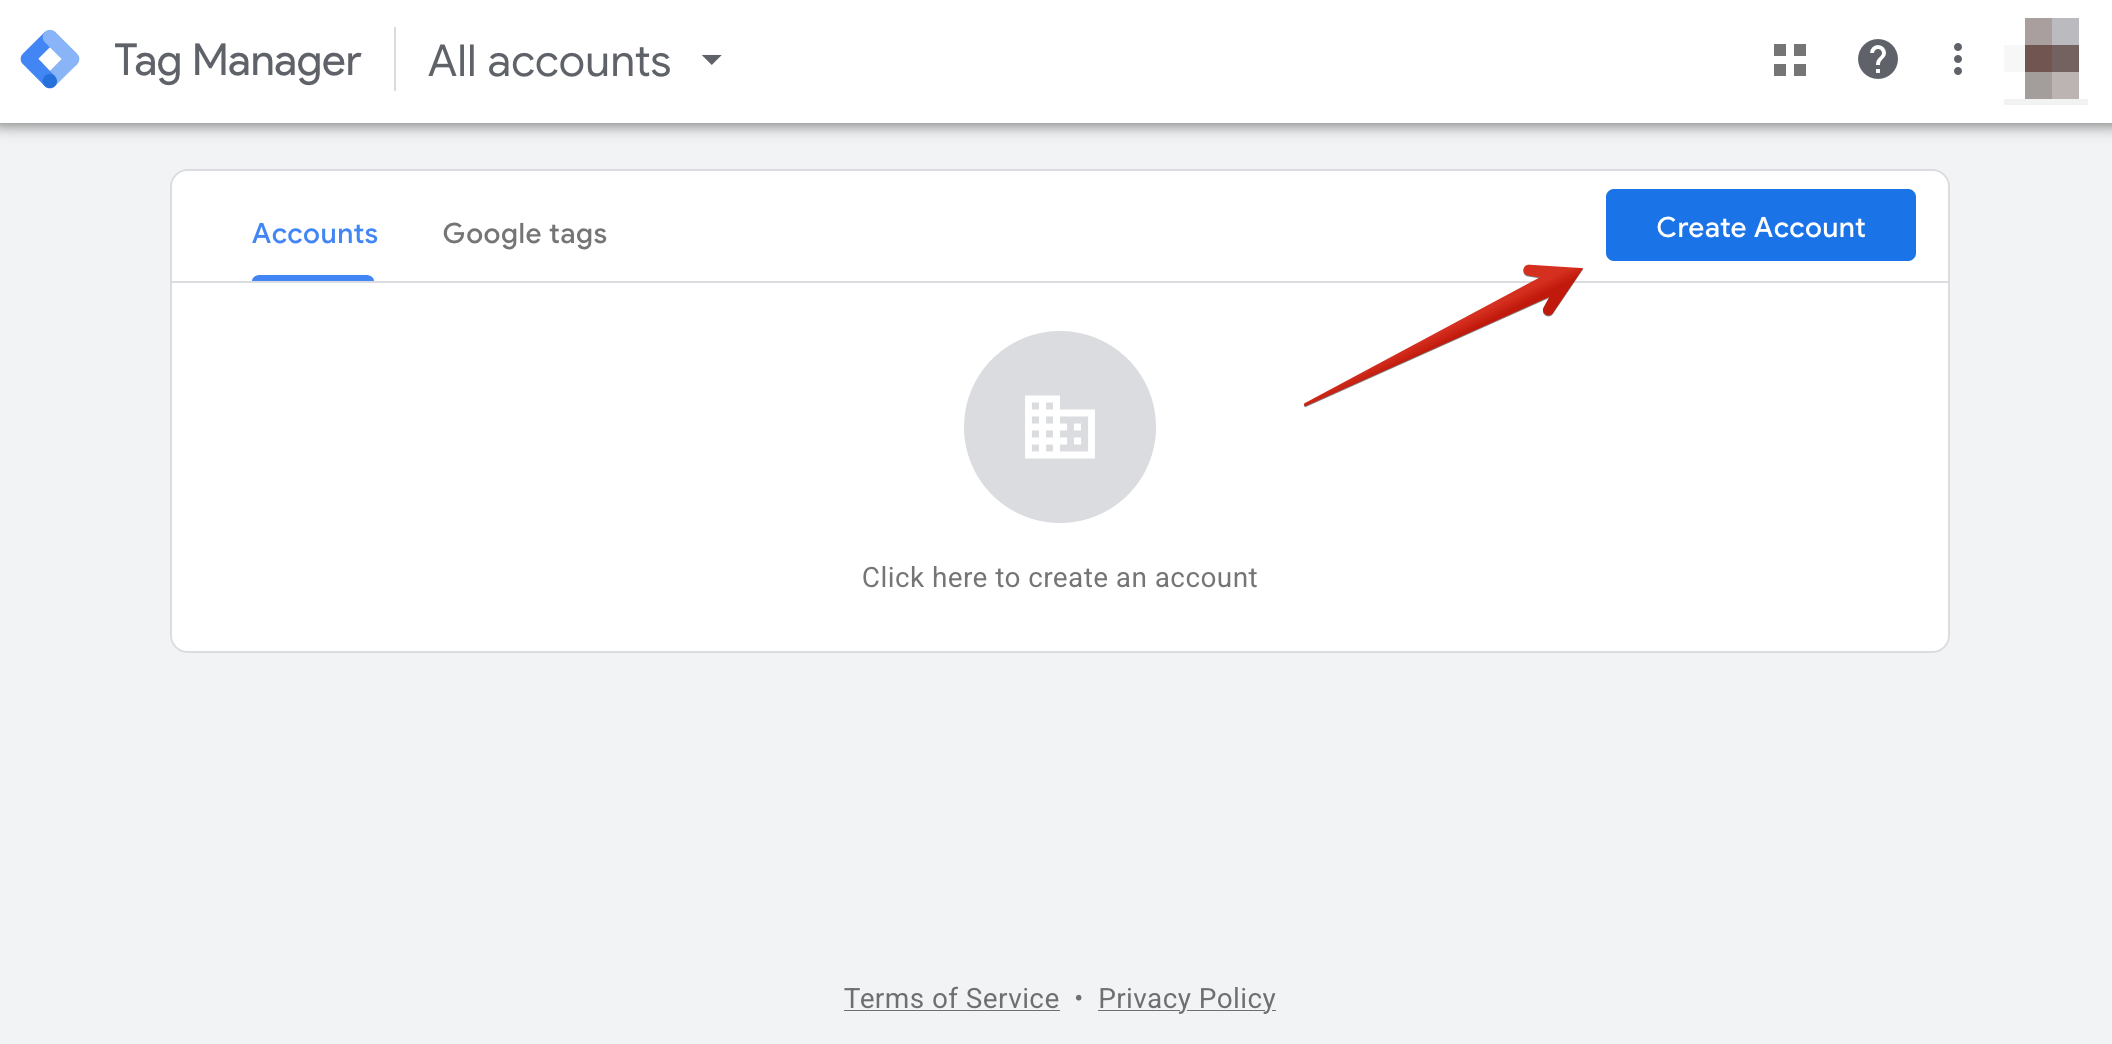
Open Google Tag Manager and create an account:
- 2
-
Fill in the account and container details, then click Create:
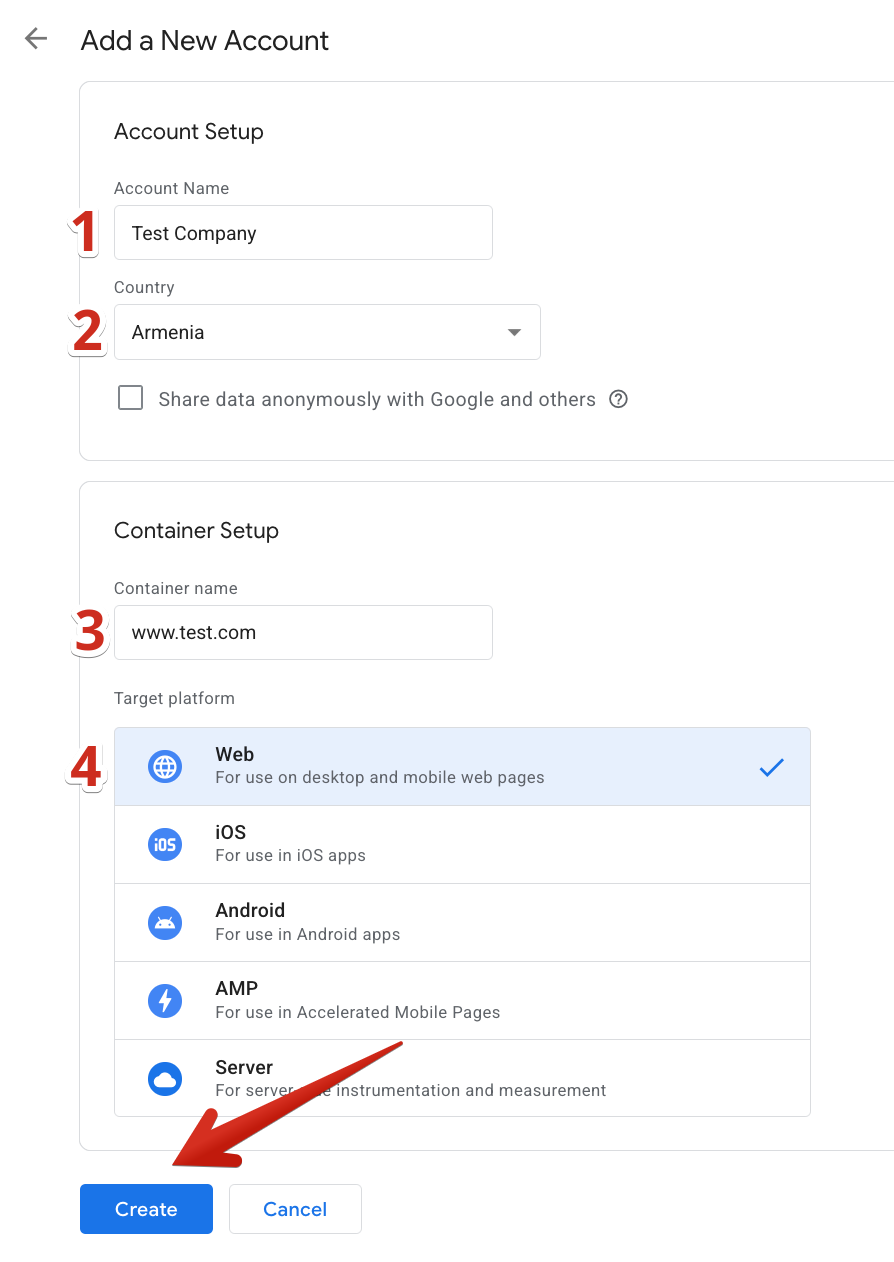
- Account Name — enter your company or organization name.
- Country — select the country where your organization is based.
- Container name — enter your website URL, for example,
www.example.com. - Target platform — select Web.
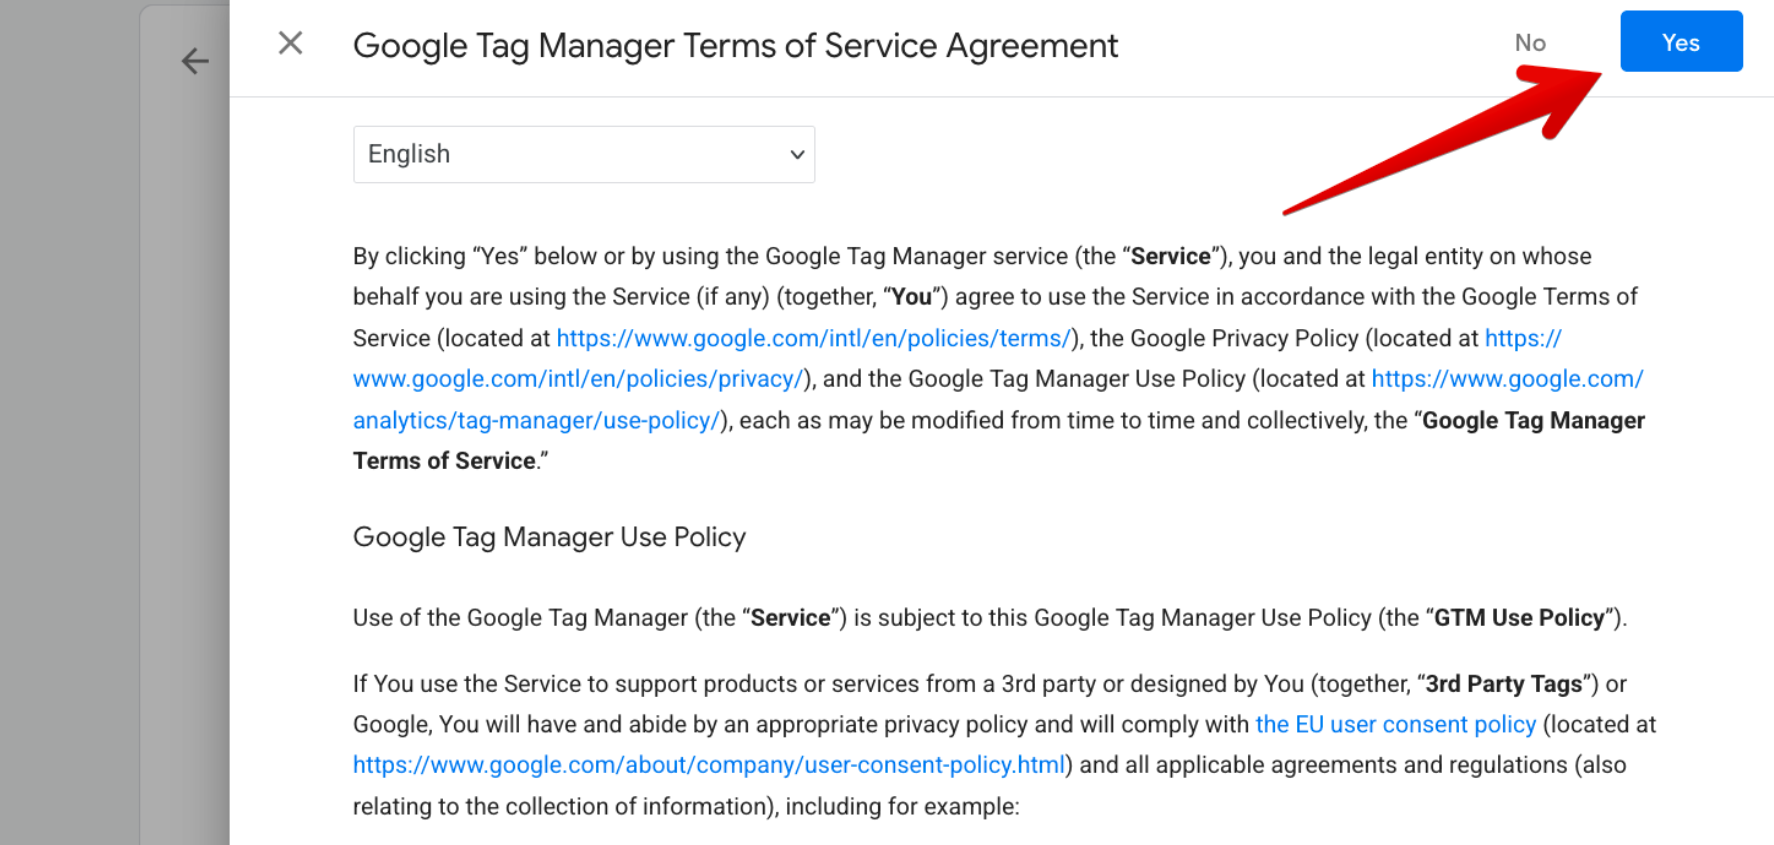
Review and accept the Google Tag Manager Terms of Service:
- 3
-
Google Tag Manager will provide two installation snippets. Add the first snippet as high as possible inside your website’s
<head>, and the second immediately after the opening<body>tag: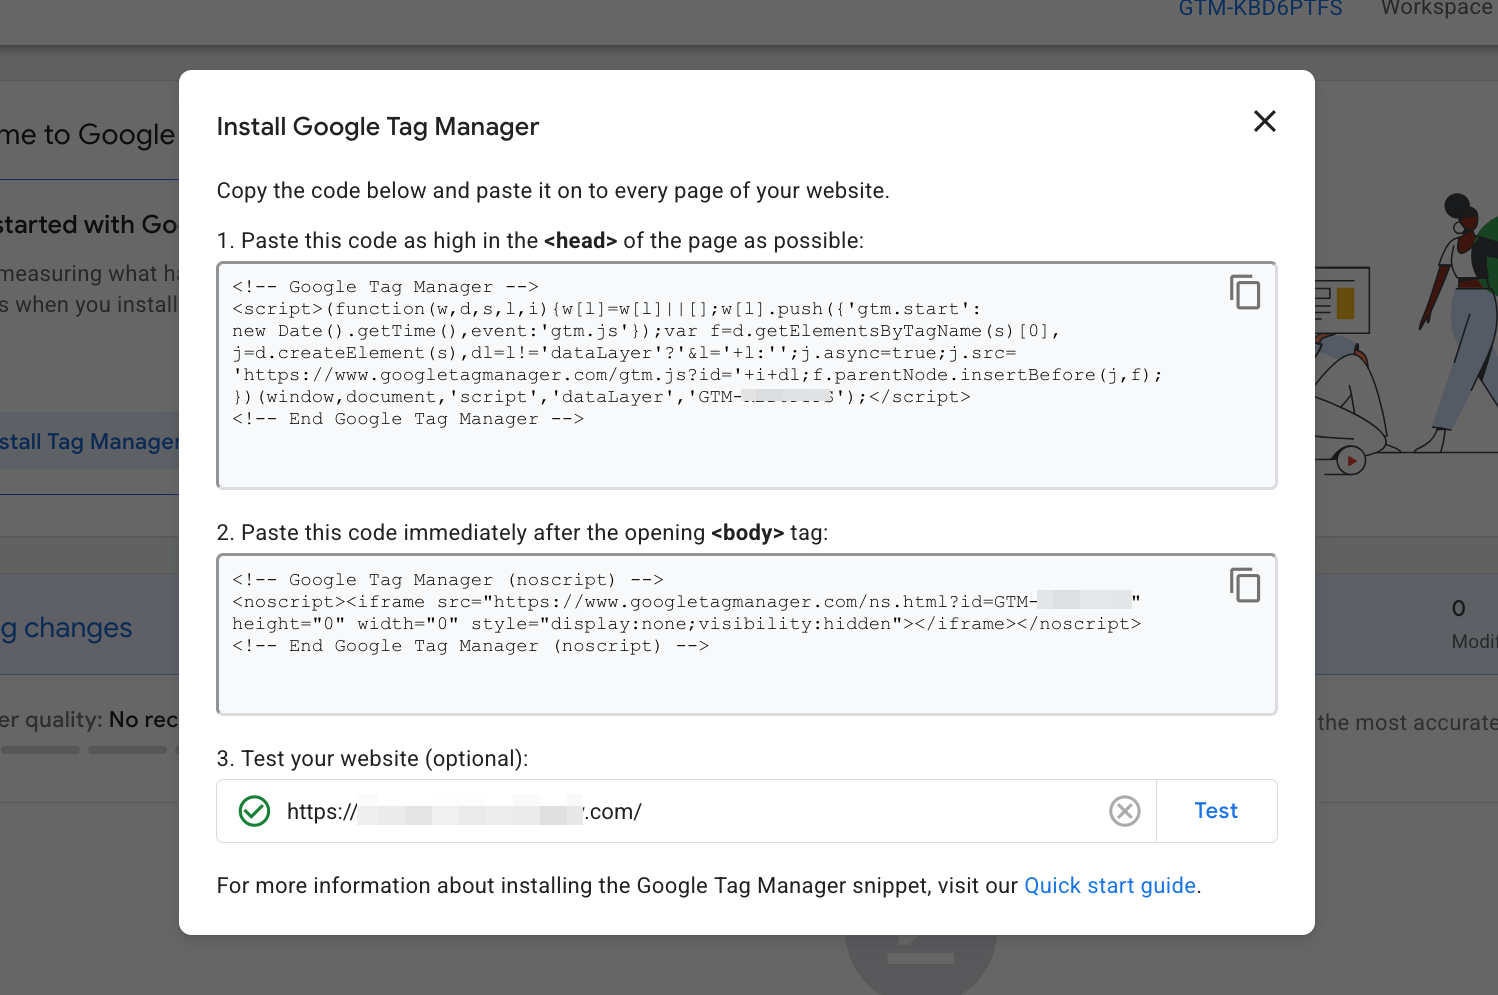
Once Google Tag Manager is connected to your website, you can create a tag for your Elfsight widget.
2. Create a Tag for Your Elfsight Widget
Add your widget installation code to Google Tag Manager by following these steps:
- 1
-
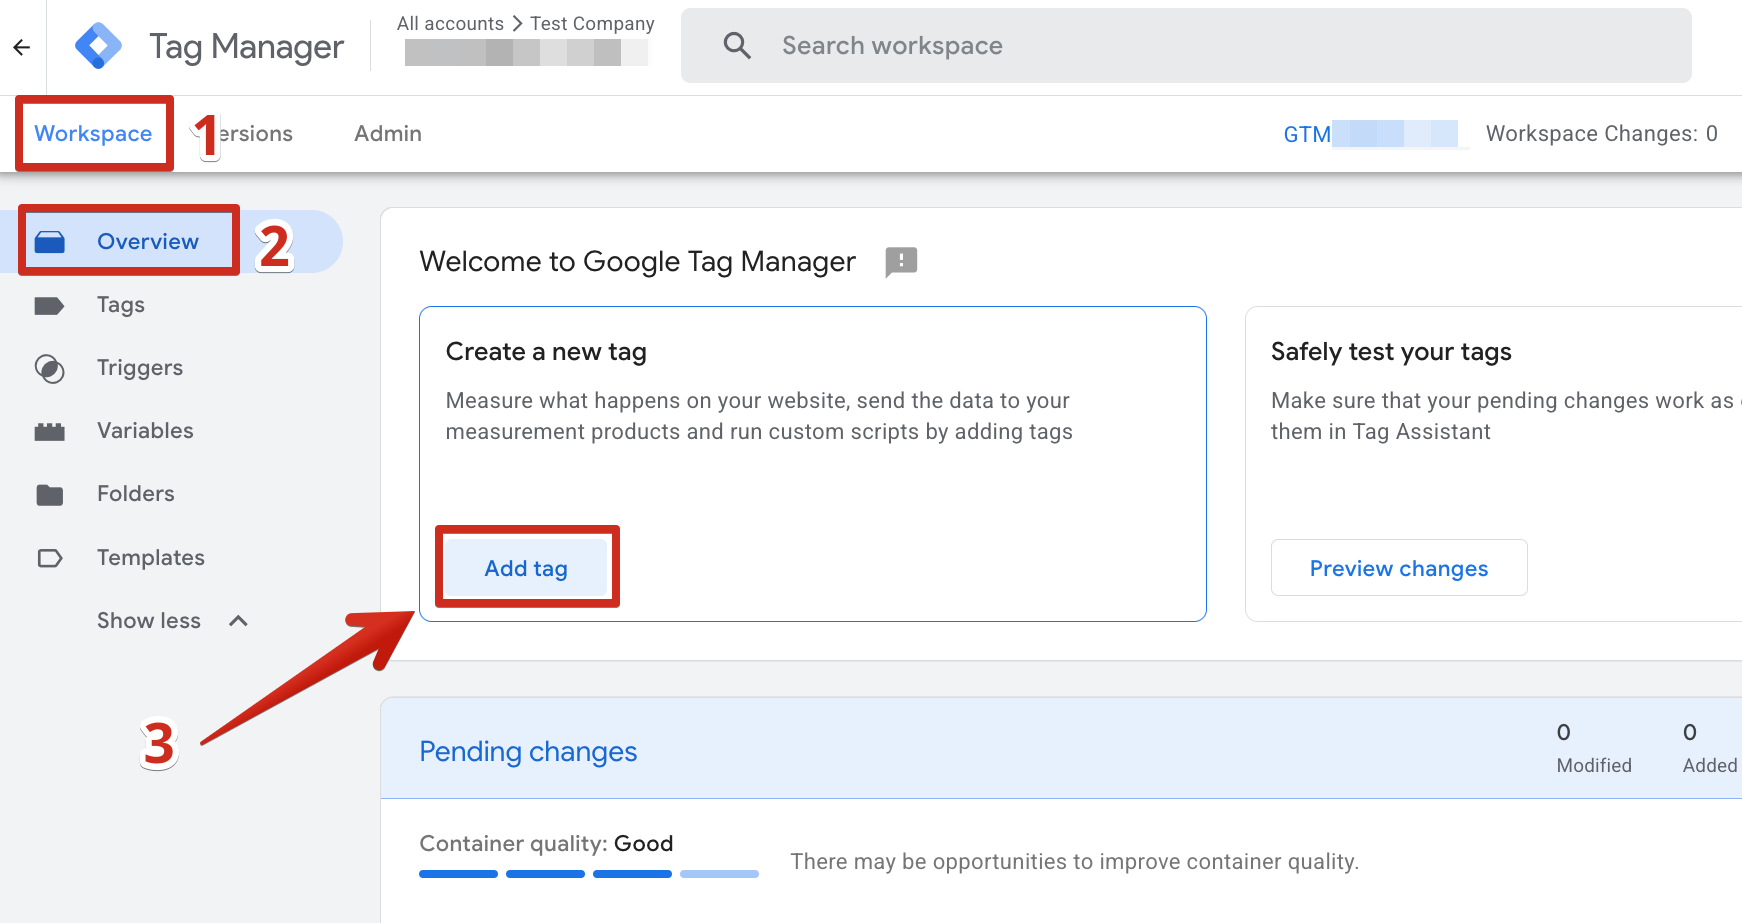
In Google Tag Manager, go to the Workspace tab → Overview → Add tag:
- 2
-
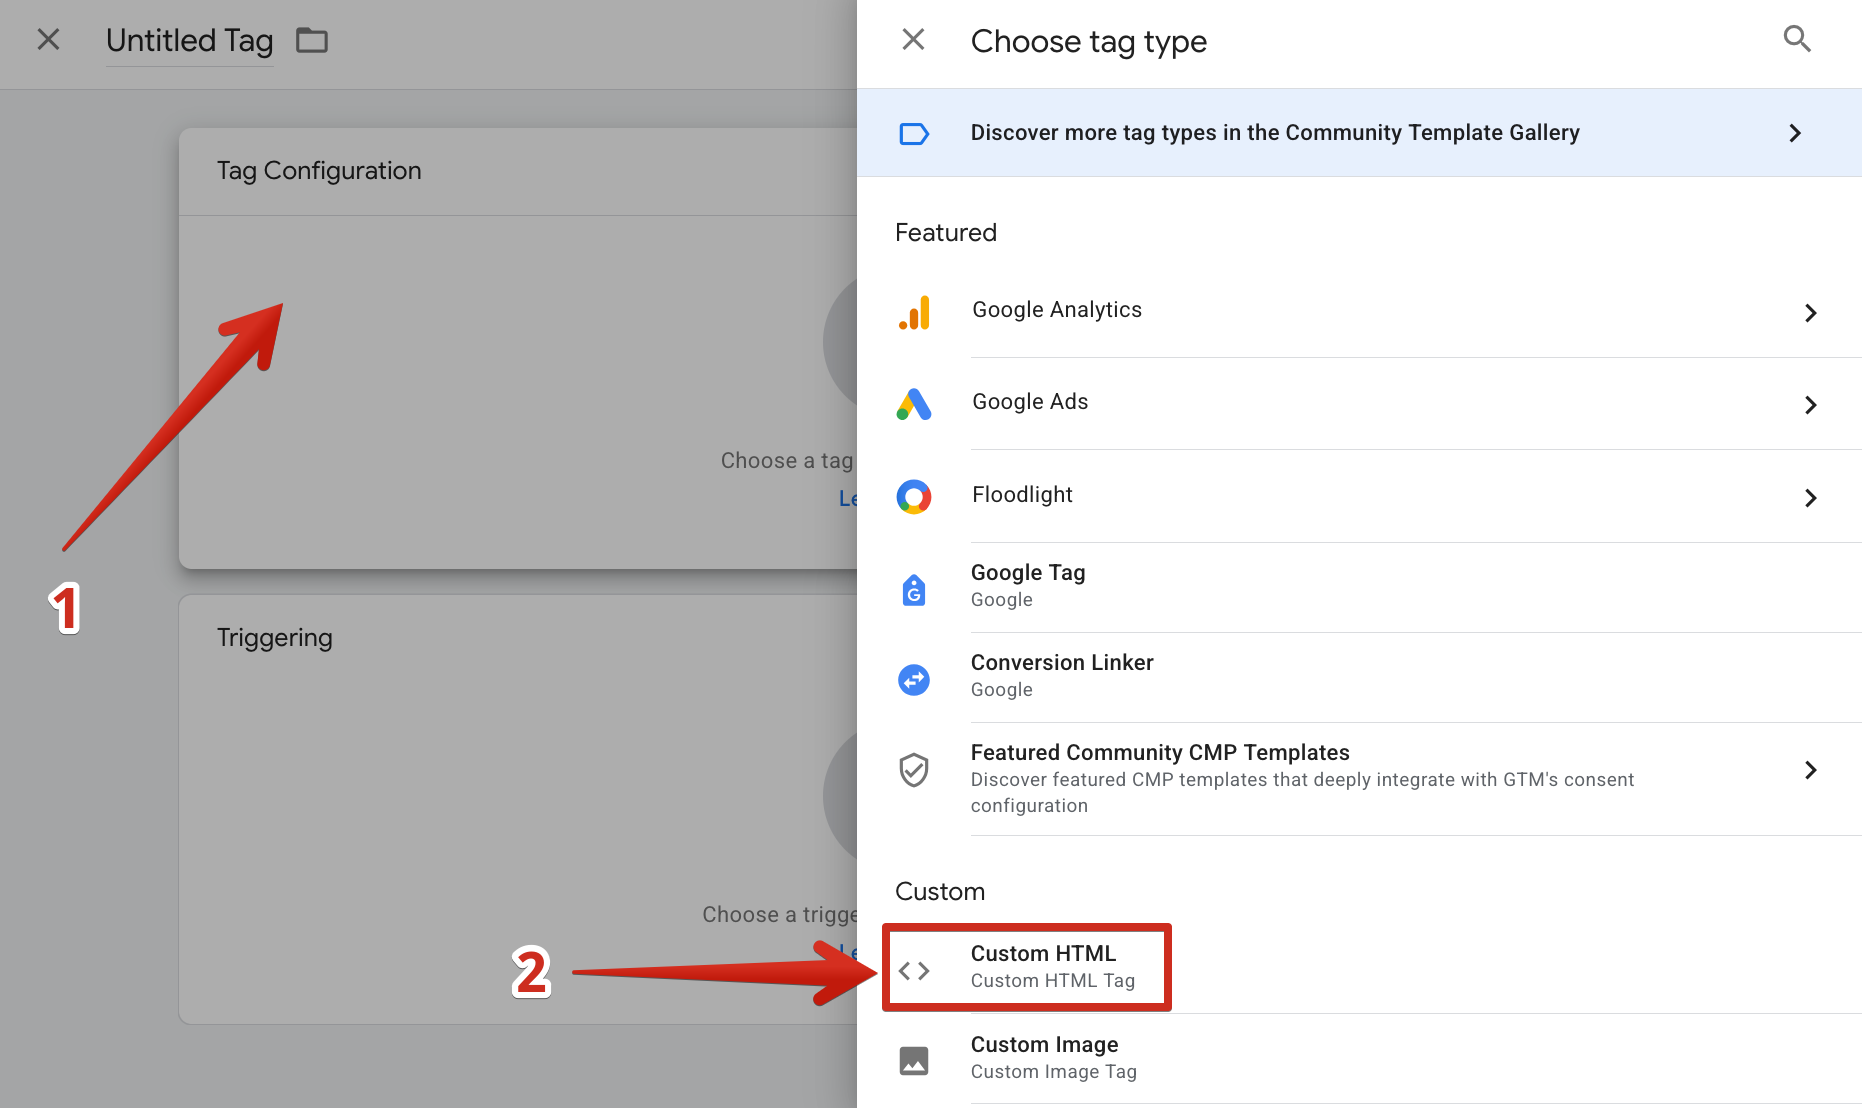
Click Tag Configuration and select Custom HTML:
- 3
-
Copy your widget installation code from the Elfsight dashboard and paste it into the HTML field:
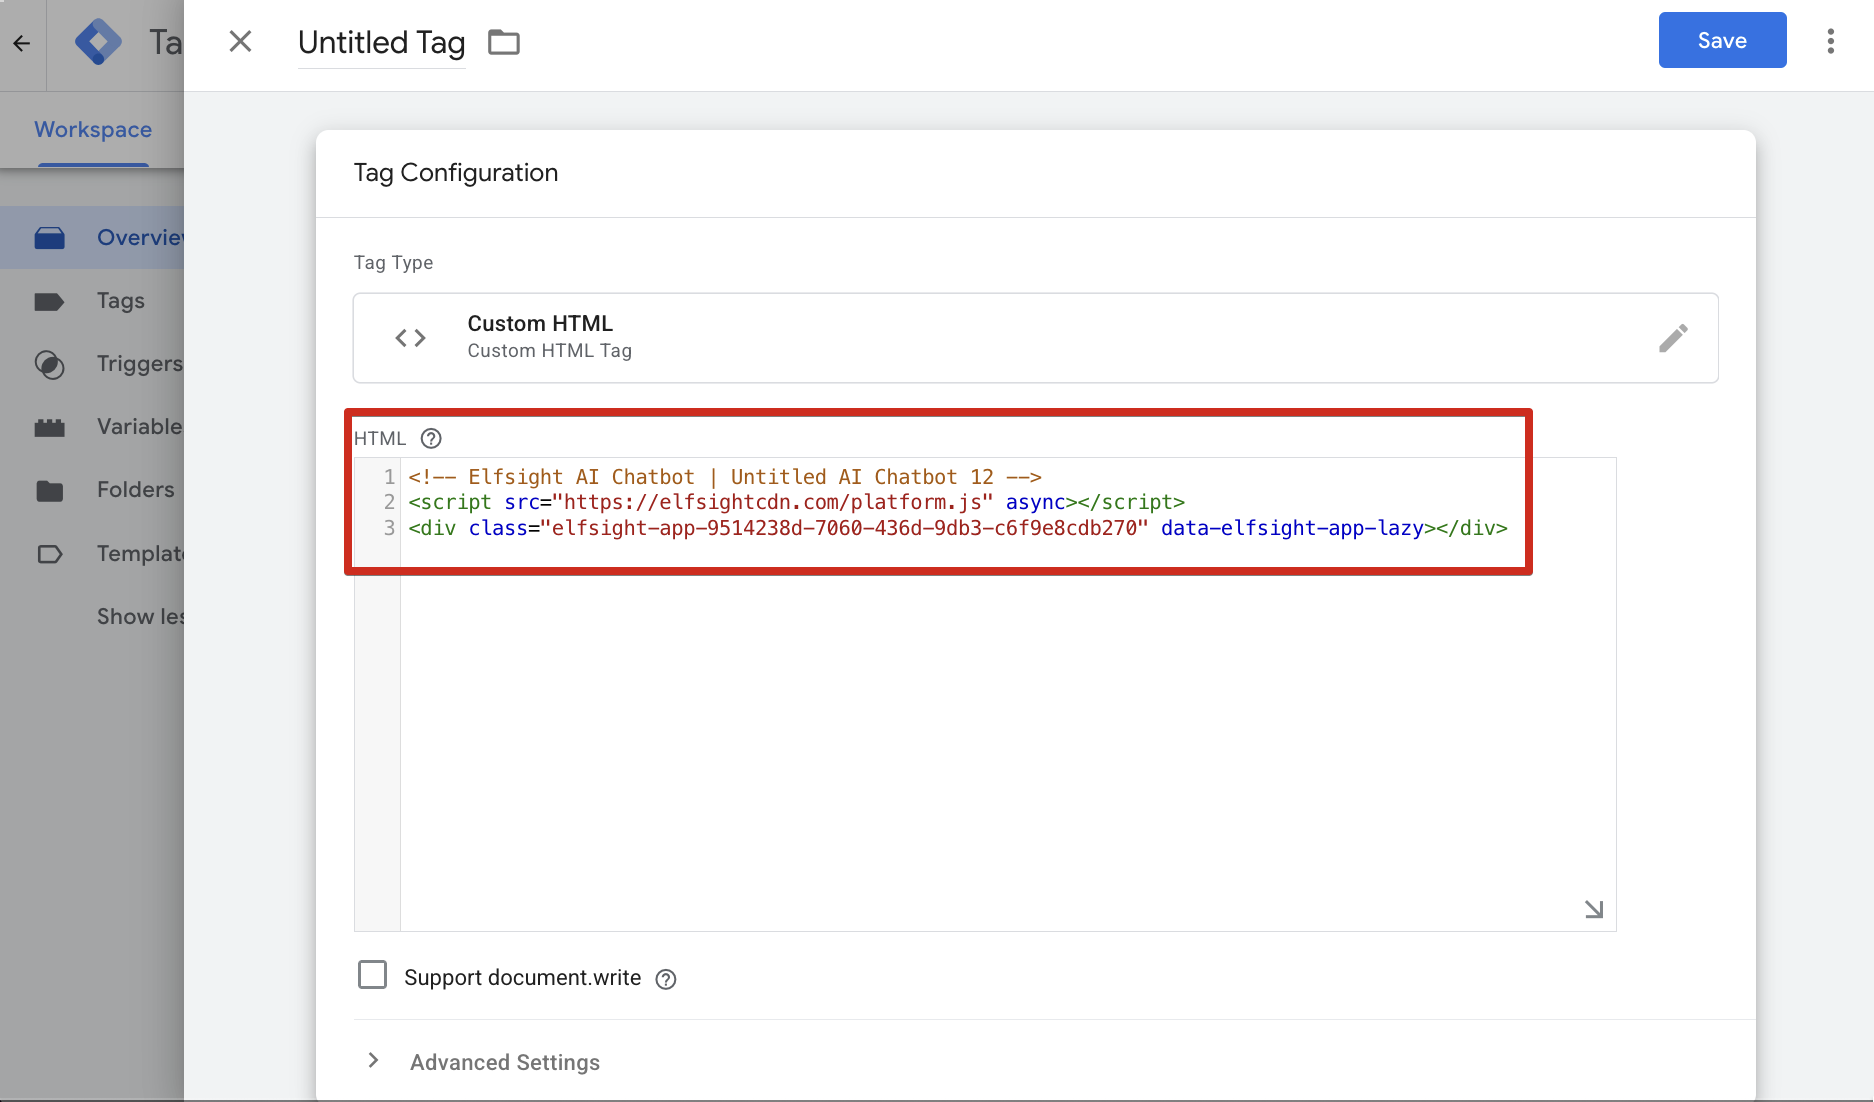
Your widget code is now added to the tag. Next, choose where the widget should appear.
3. Set Up a Trigger
A trigger defines when your tag runs and where the widget displays. Click the toggle that matches your needs and follow the instructions:
Display the widget on all pages
To display your floating widget on every page of your website, follow these steps:
- 1
-
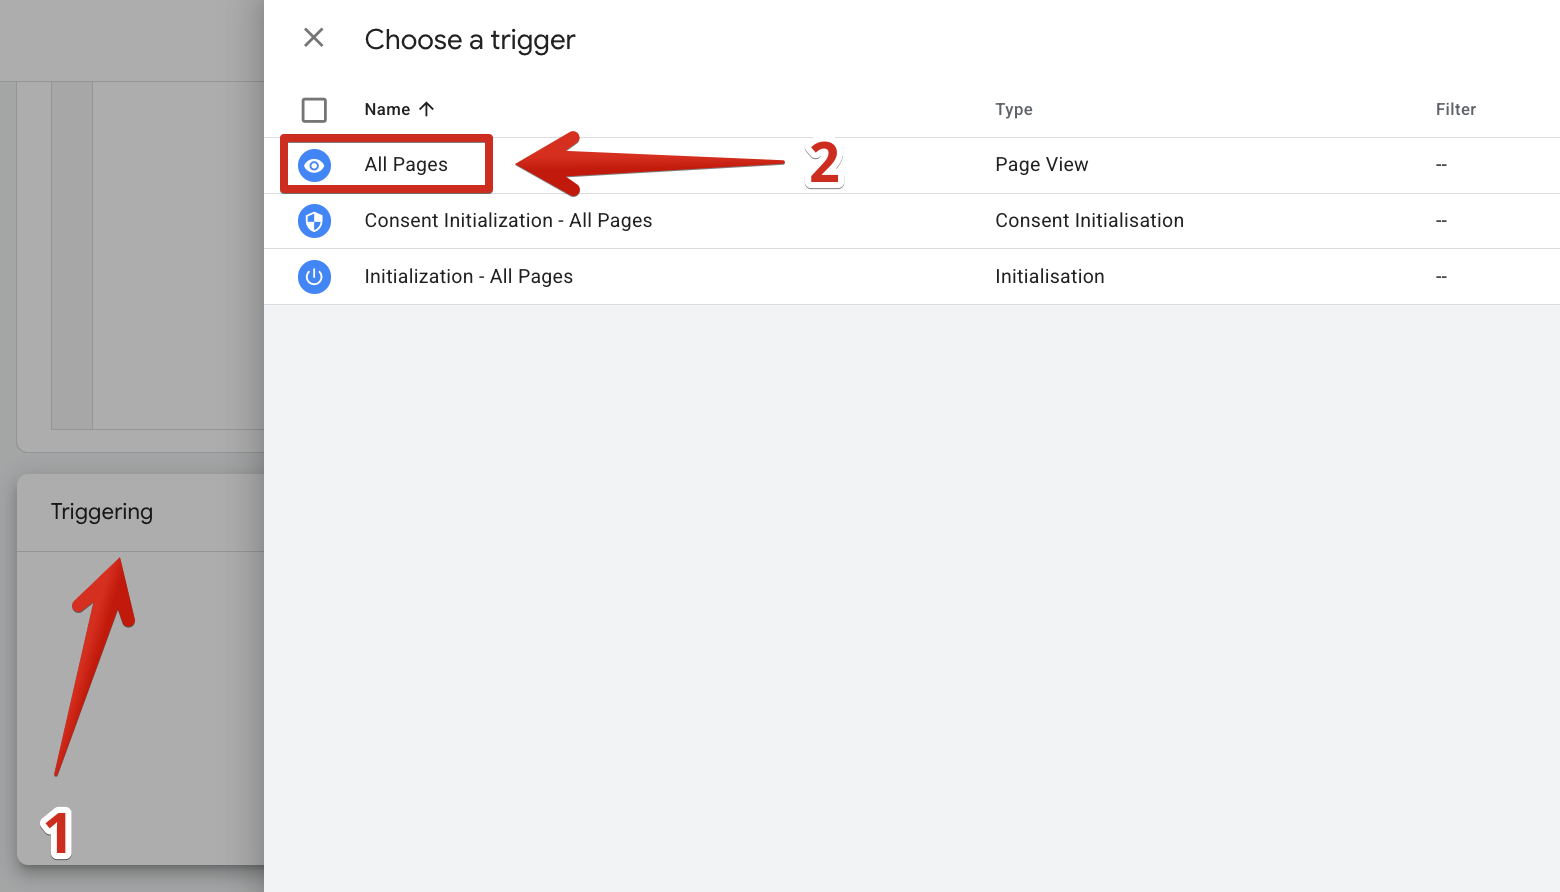
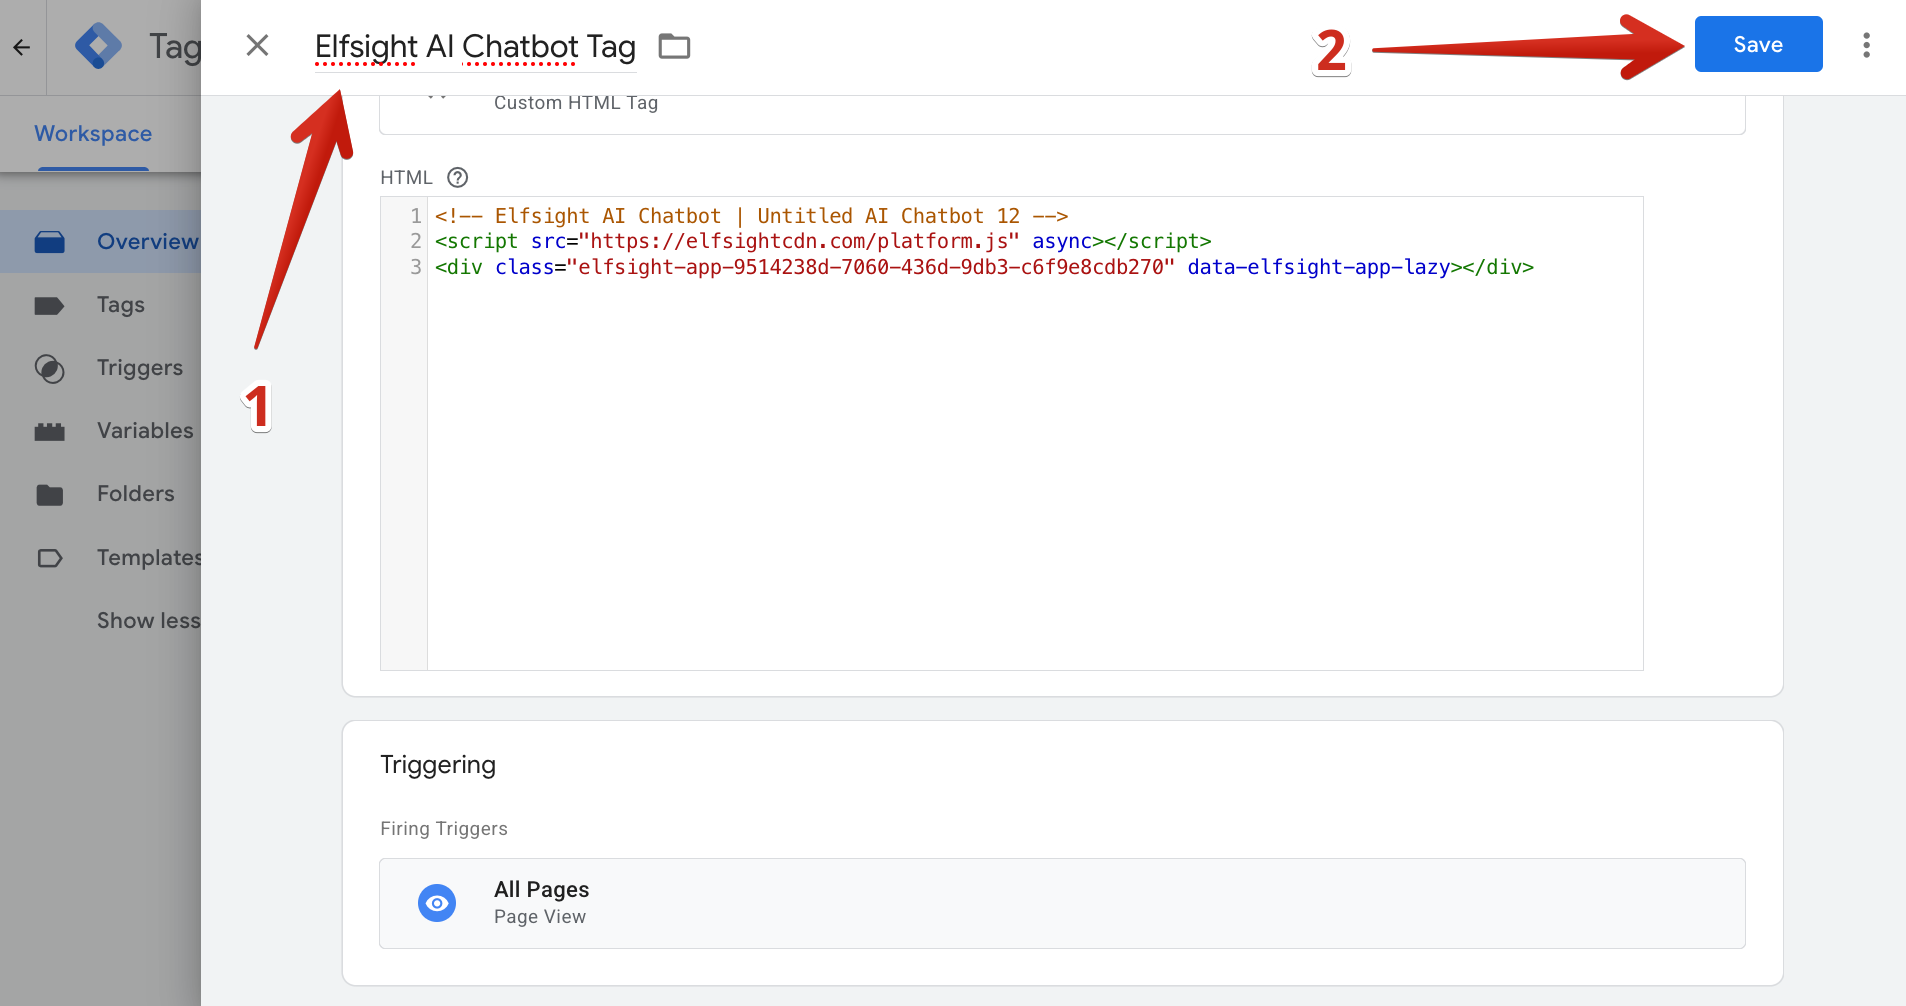
In your tag settings, scroll down, click Triggering, and select All Pages:
- 2
-
Enter any name for the tag and click Save:
Display the widget on a specific page
To display the widget only on a particular page, create a trigger based on its URL:
- 1
-
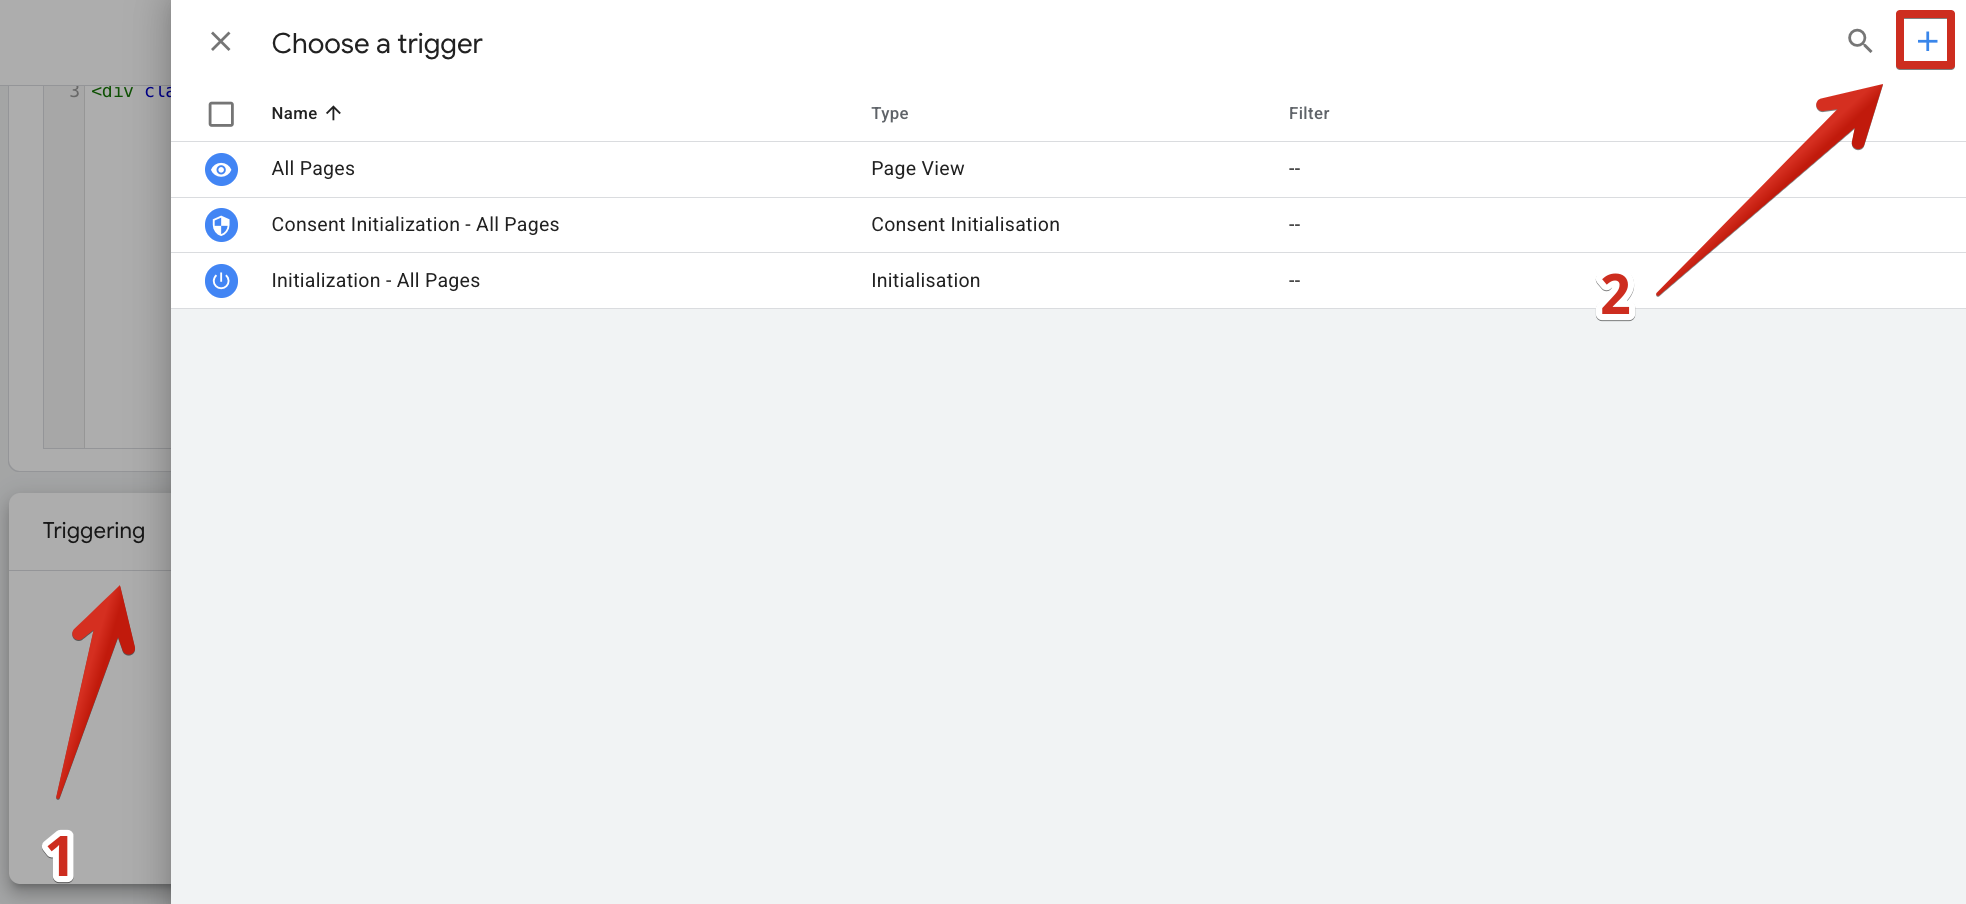
In your tag settings, scroll down and click Triggering. In the trigger selection window, click the ➕ icon in the upper-right corner:
- 2
-
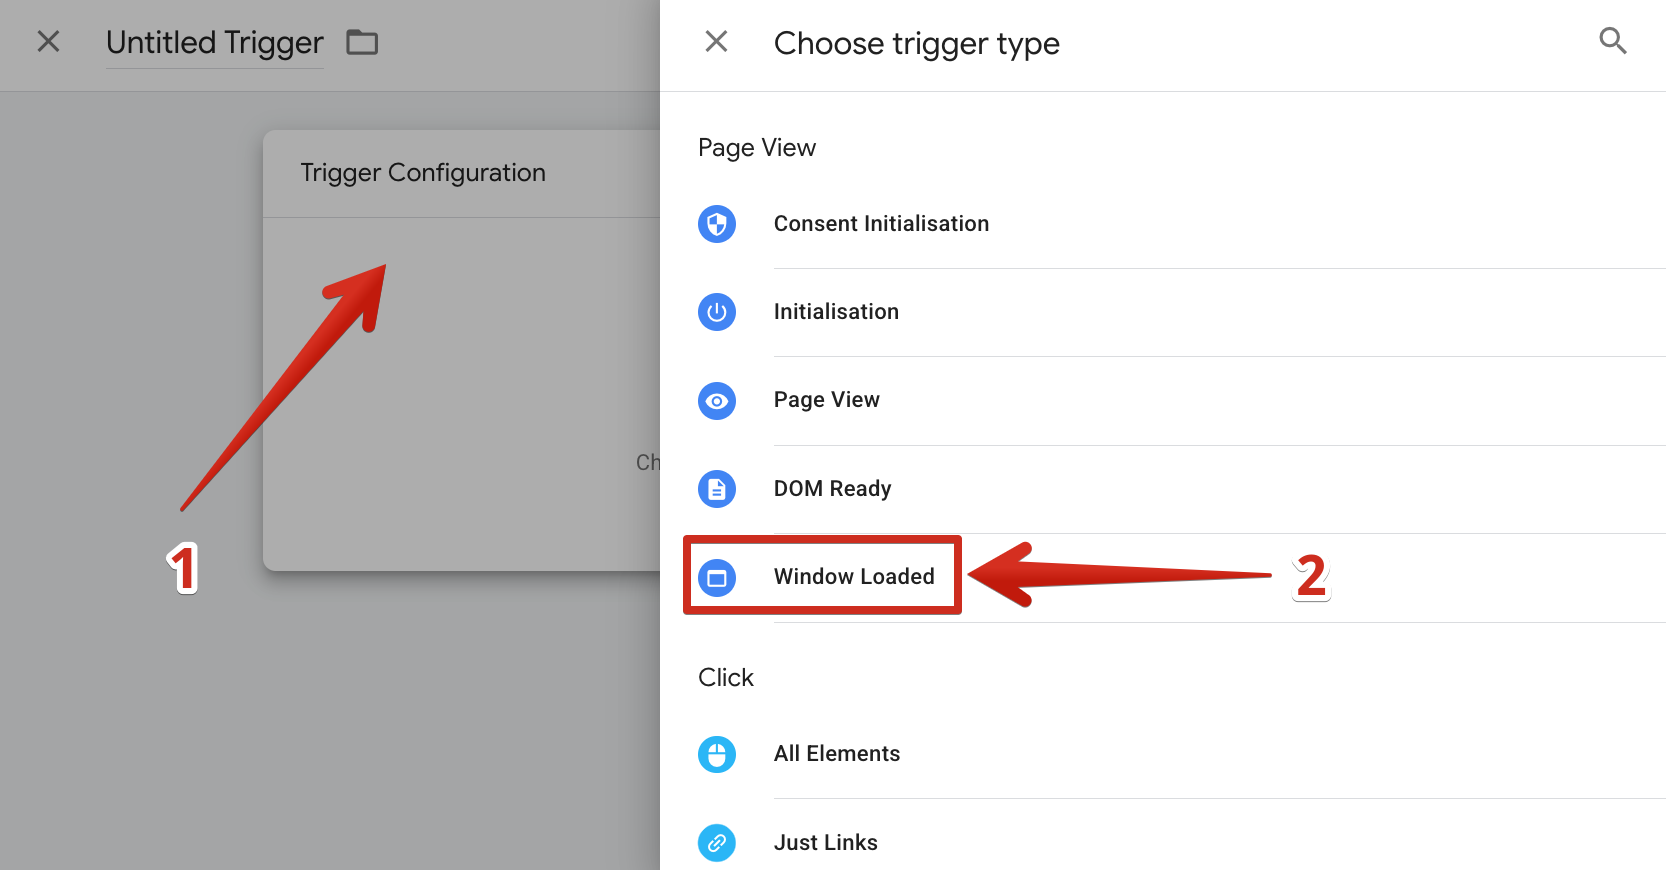
Click Trigger Configuration and select Window Loaded from the Page View section:
- 3
-
Select Some Window Loaded Events. In the first dropdown, choose Page URL:
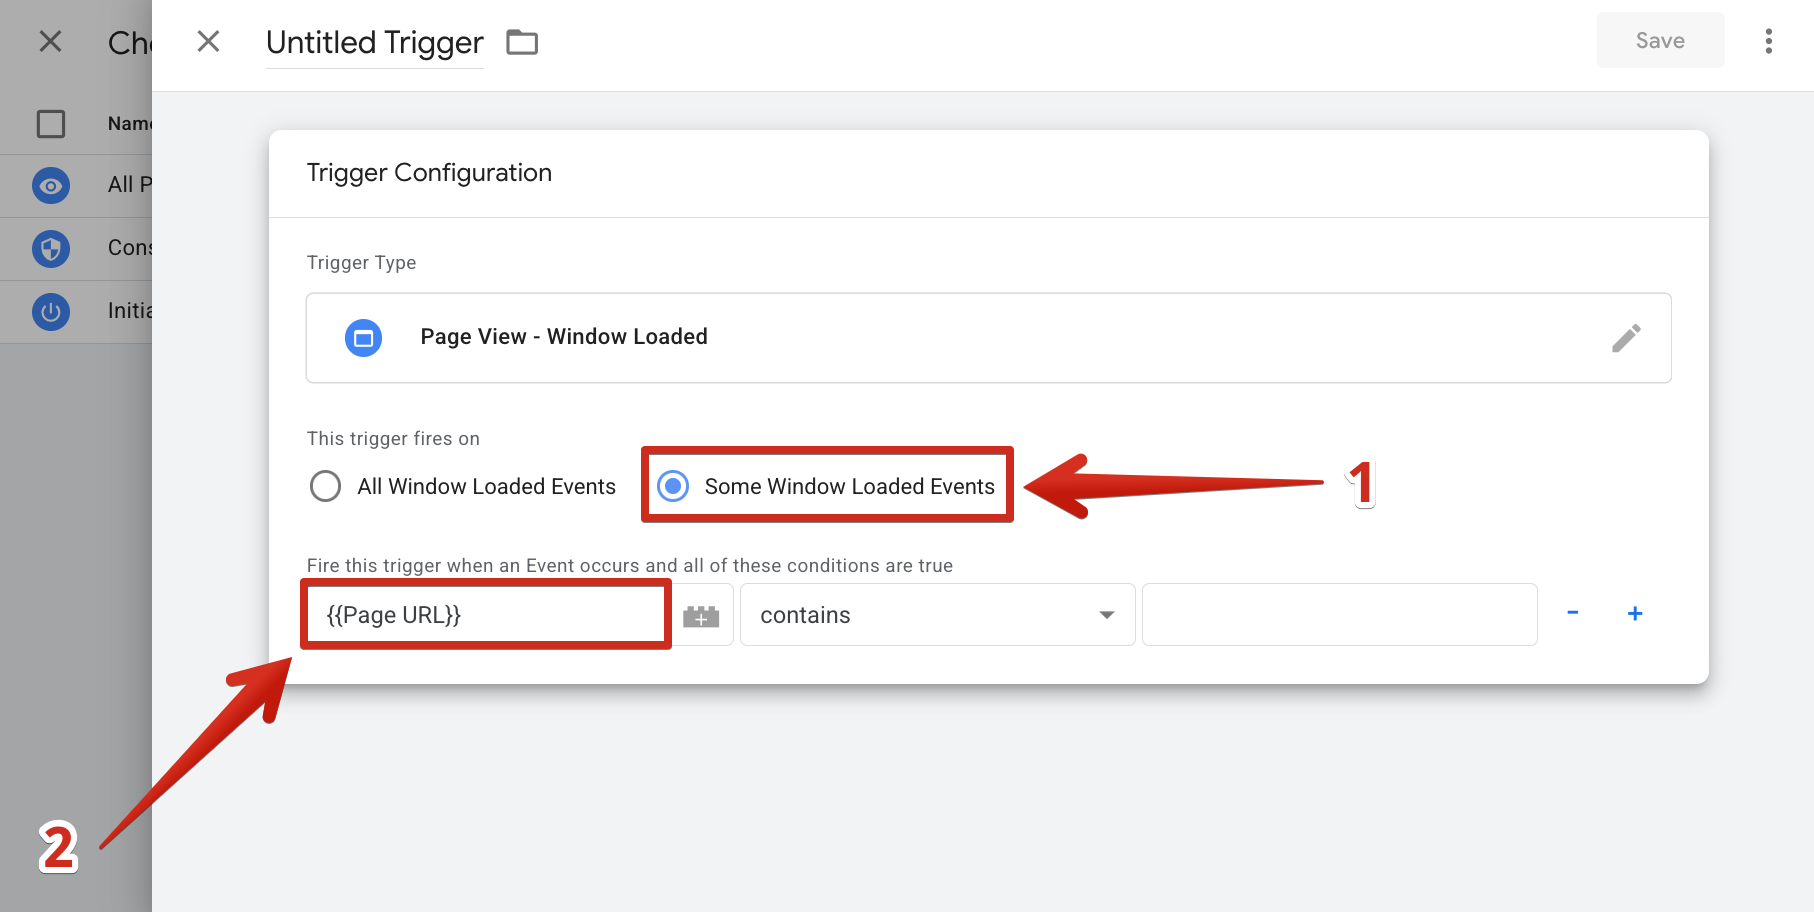
Choose a condition, then enter the page URL or a unique part of it. For example, select contains and enter
/contact-usto run the tag on URLs containing that path: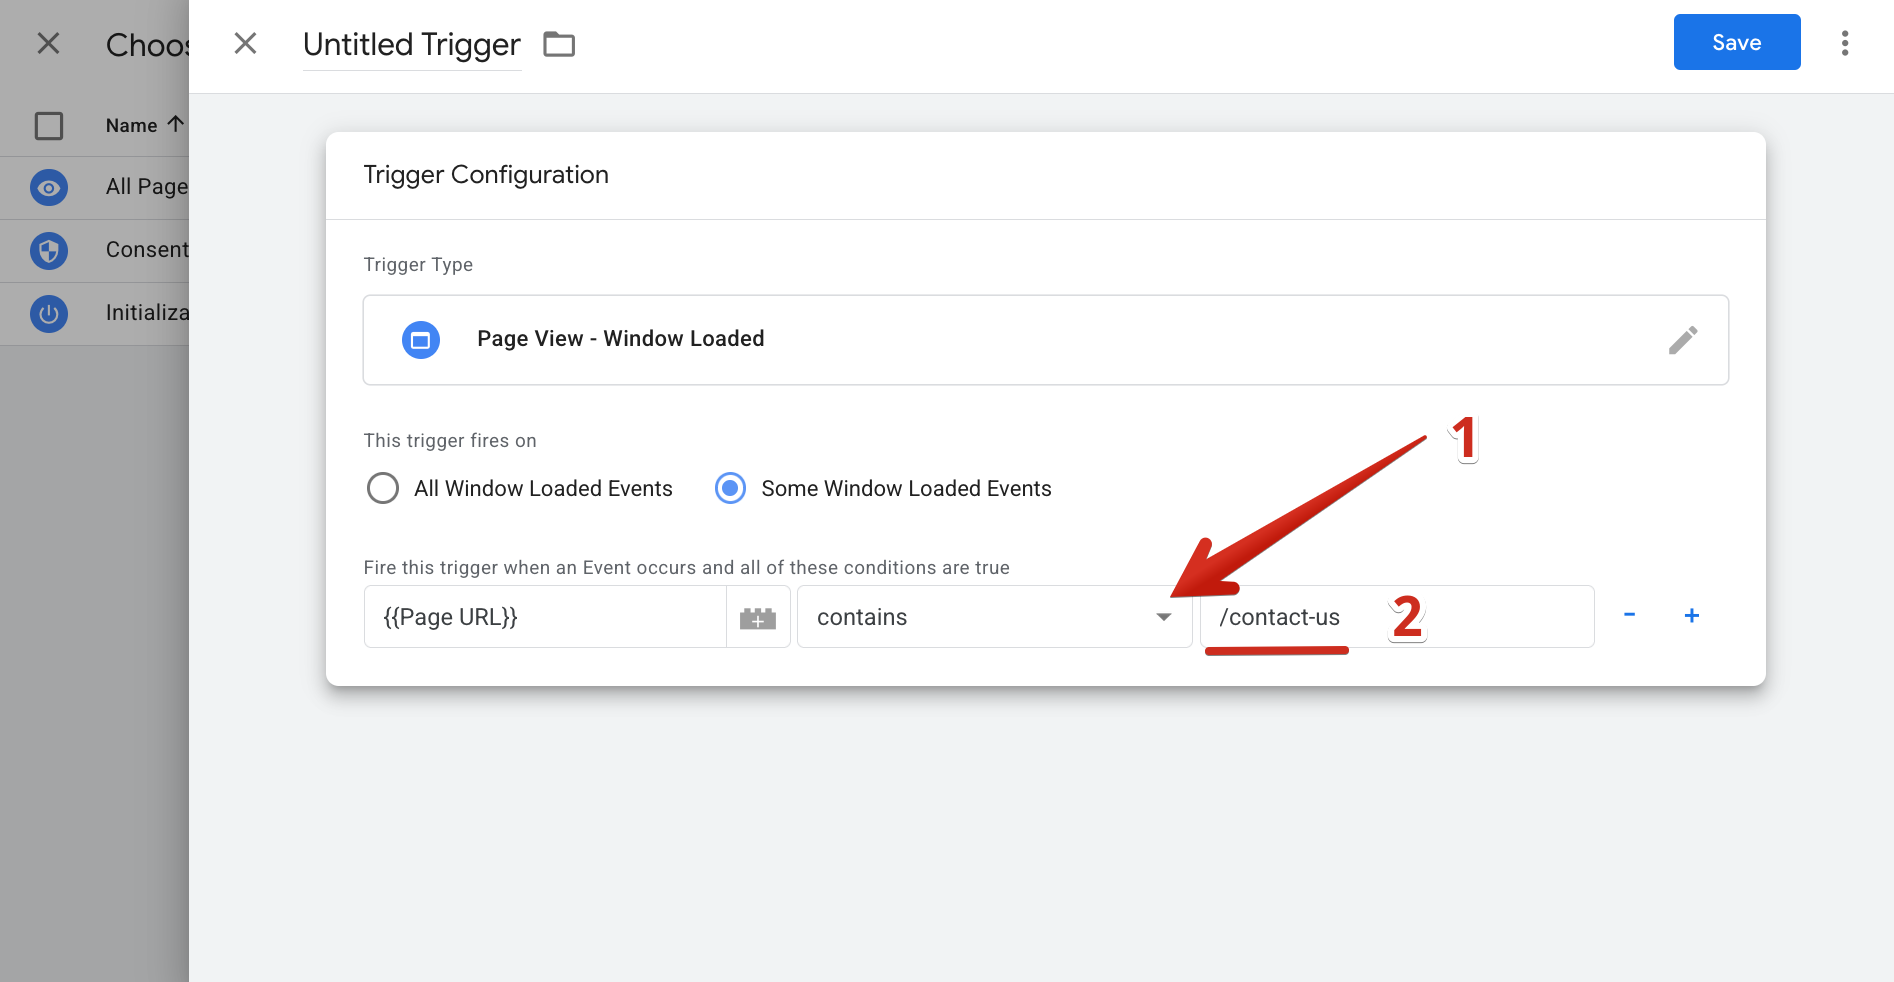
Google Tag Manager supports other URL conditions, including equals, ends with, does not contain, and regular expressions. Choose a condition that uniquely identifies the pages where the widget should appear. - 4
-
Name and save the trigger:
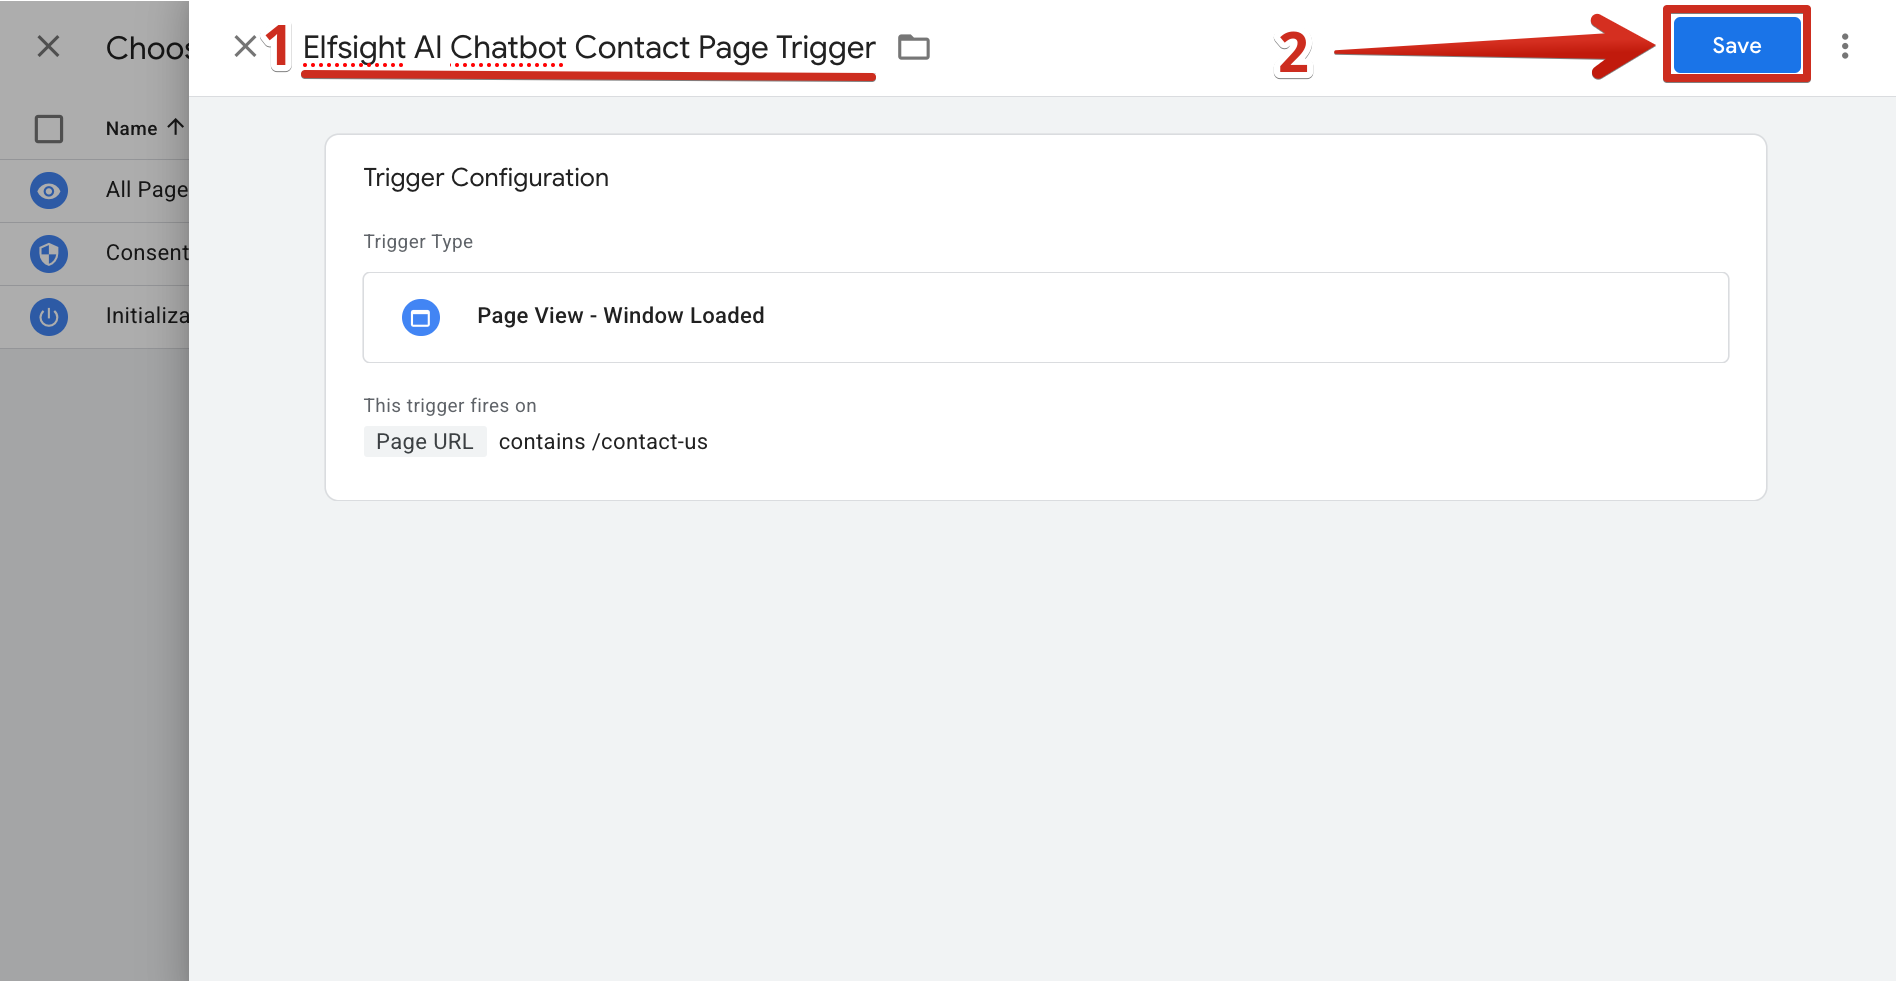
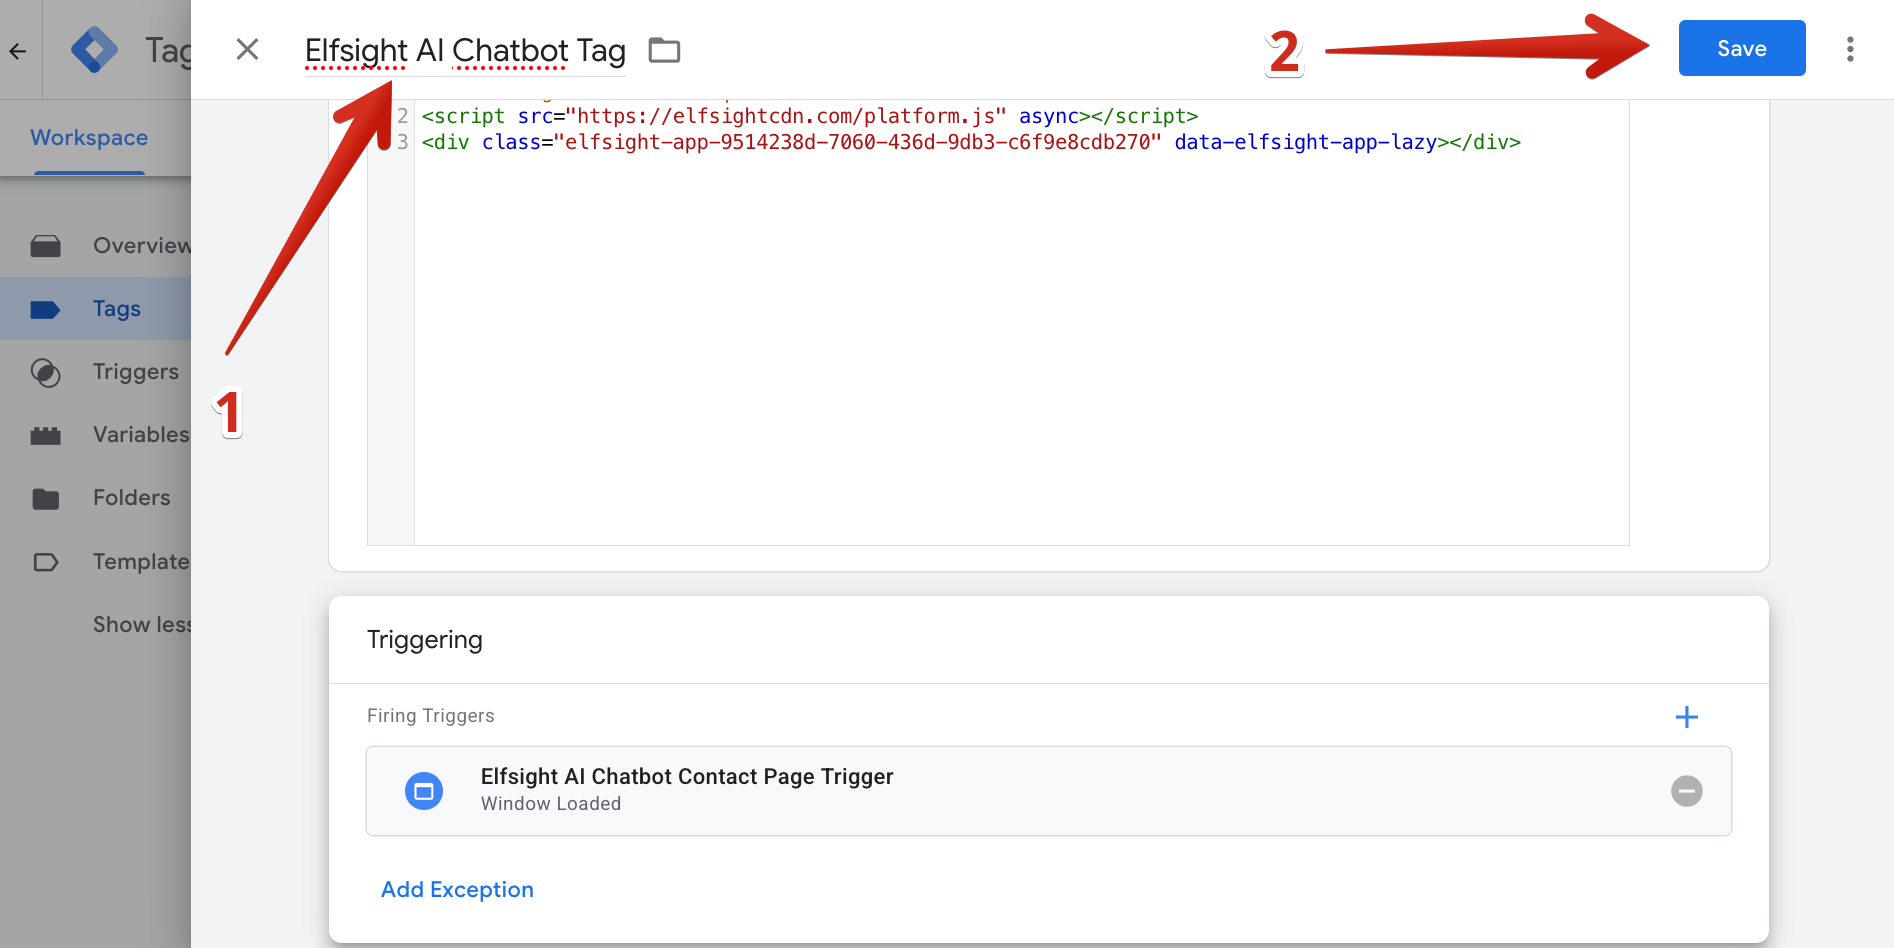
Then, enter any name and save the tag:
4. Publish Your Tag
Almost done! To make the widget live on your website, publish the newly created tag. In the Workspace tab, click Submit → Publish:
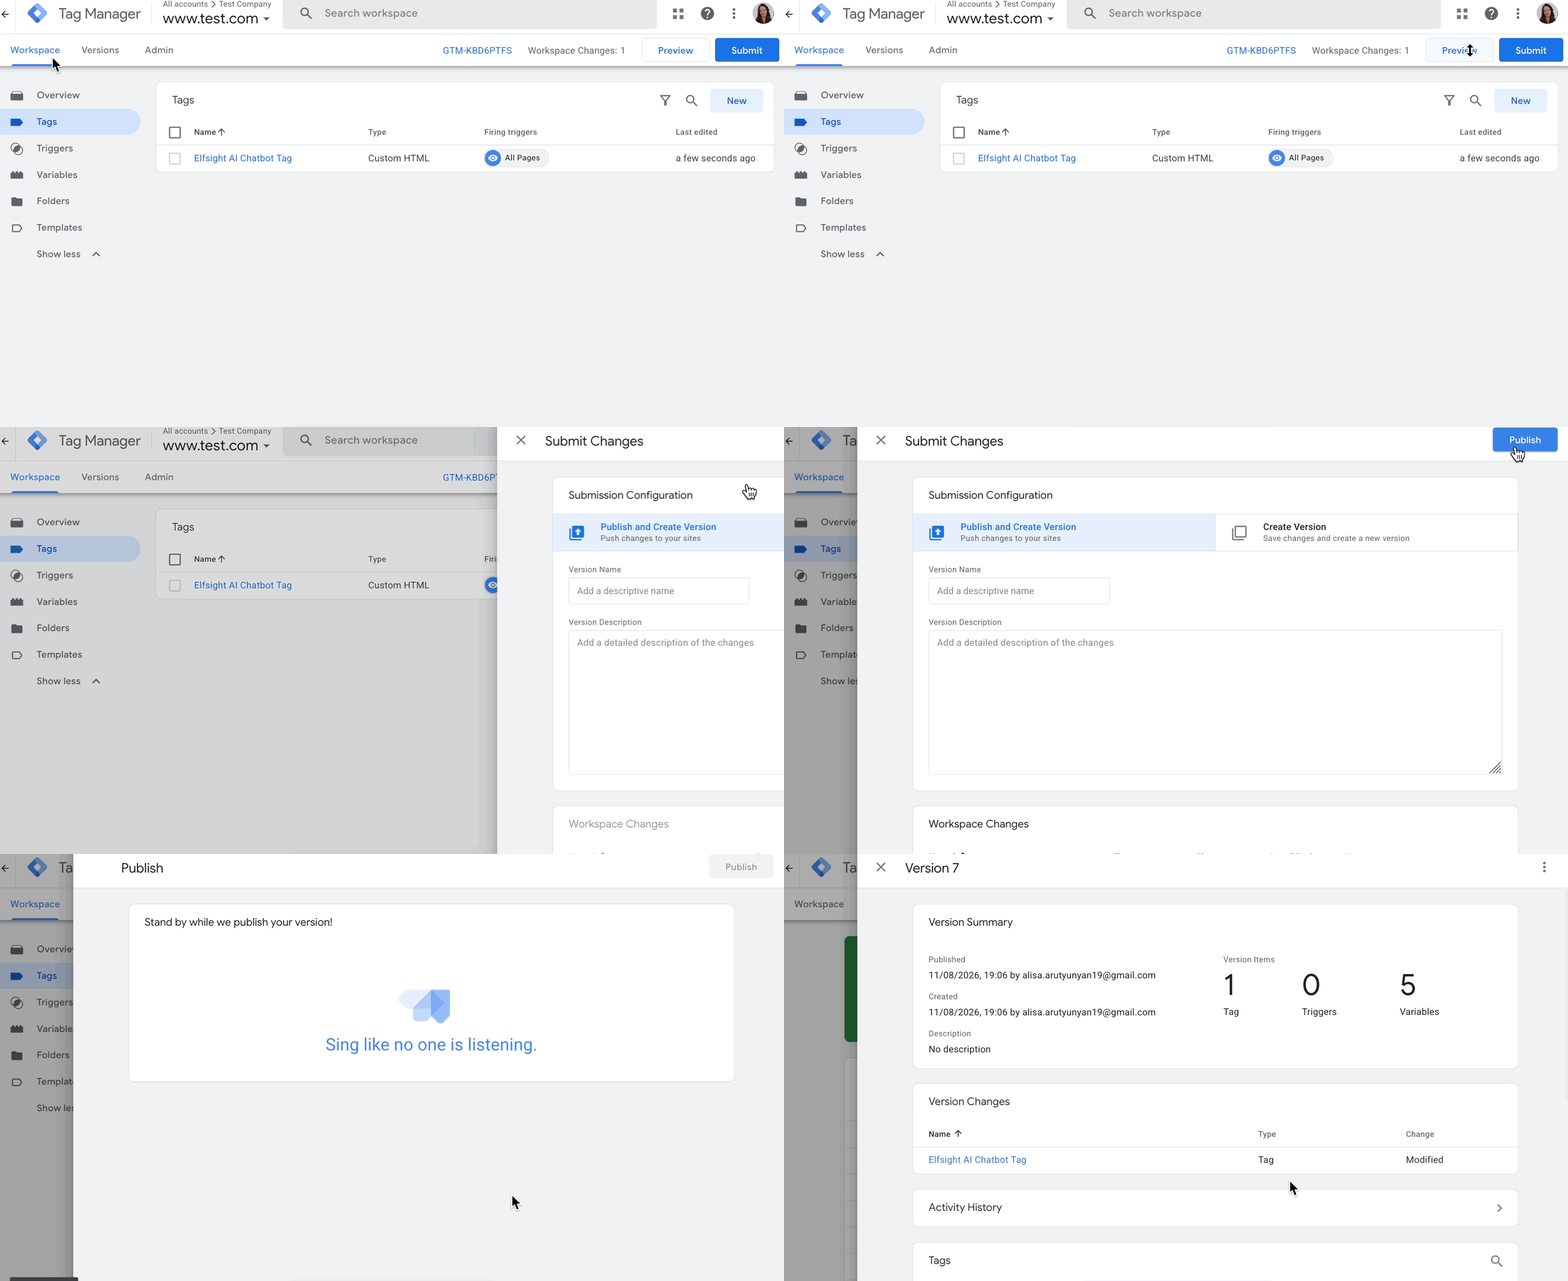
All set! Open your website and make sure the widget appears as expected.
Having trouble installing your widget with GTM? Feel free to contact our Support team and provide:
- Your widget installation code.
- The page links where you’d like to display the widget, or let us know if it should appear on all pages.
- Temporary access to your Google Tag Manager container.
We'll be happy to assist! 🙌