
Adding Elfsight Widget to WordPress Website with Elementor
If you want to add an Elfsight widget to your WordPress website with Elementor Page Builder, follow this step-by-step guide for a smooth integration. Copy your widget installation code and let's get started! 🚀
Choose how to install your widget
Add a Widget to a Specific Page
- 1
-
Choose a page
Log in to your WordPress dashboard and go to Pages. Hover over the page title where you want to add the widget and click Edit with Elementor: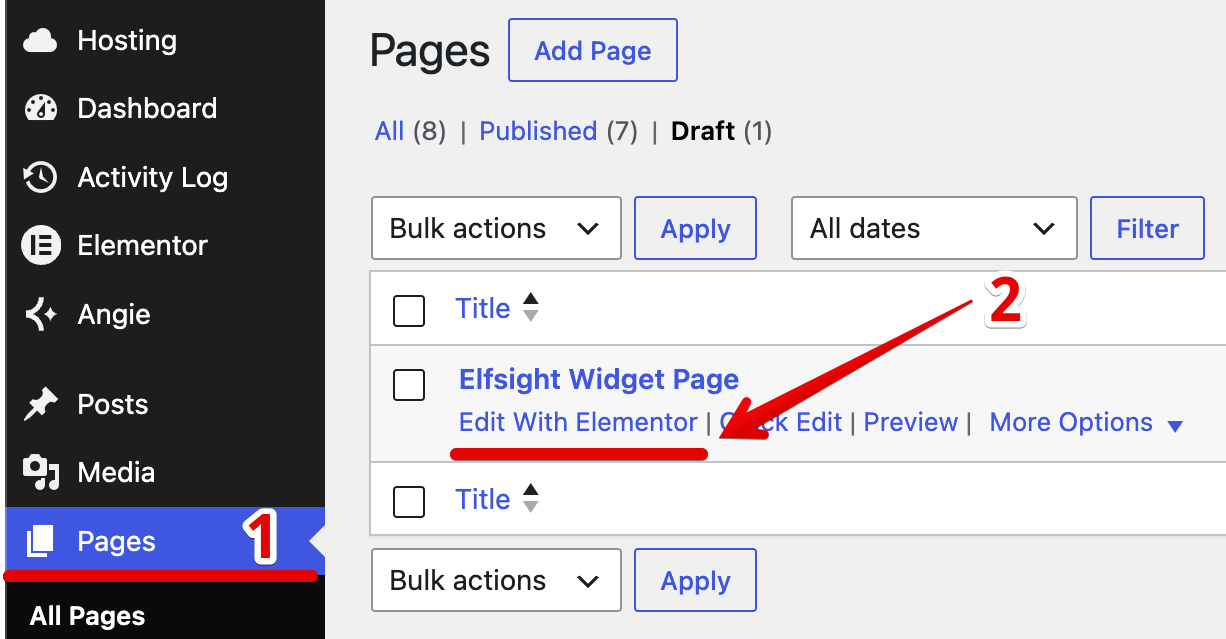
- 2
-
Add an HTML element
Find the HTML element in the sidebar and drag it onto the spot on the page where you want to place the widget: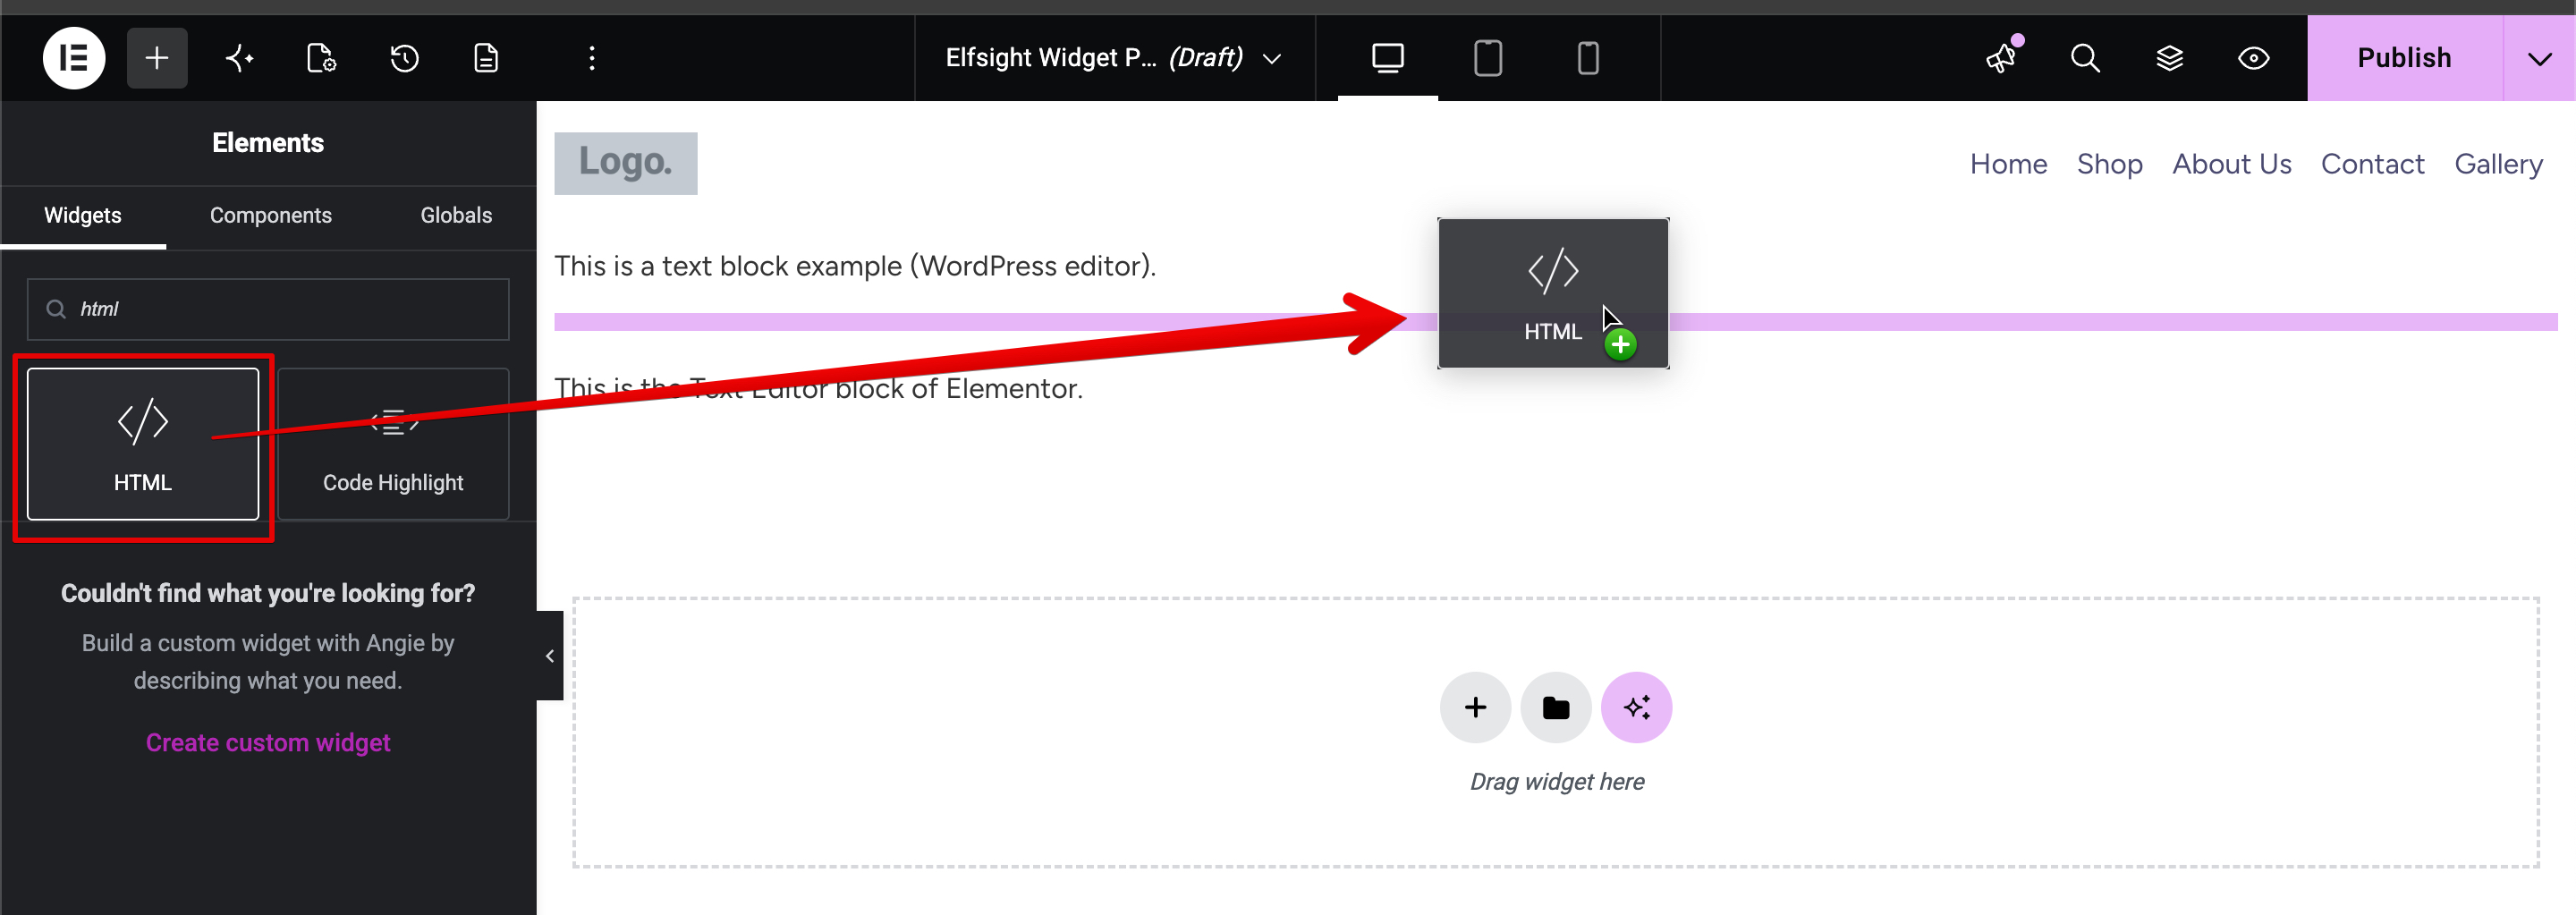
⚠️ Make sure to select the HTML element as shown in the screenshot. Avoid using the Custom HTML element, as it may not work correctly with the widget.
- 3
-
Paste the widget installation code
Next, paste the installation code into the HTML Code field, and your widget will appear on the page:
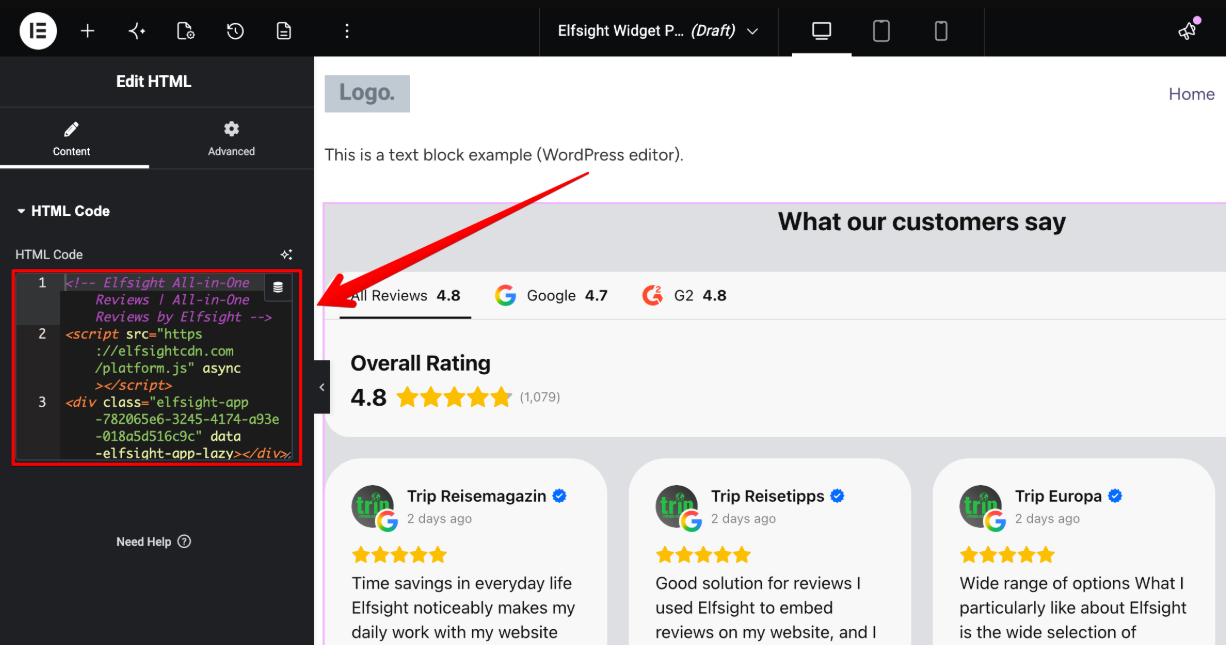
Don't forget to Publish the changes 😉 You have successfully installed your widget on a specific page!
Add a Widget to All Pages
To add a widget to all pages at once, use Custom Code in Elementor Page Builder.
- 1
-
Open Custom Code section
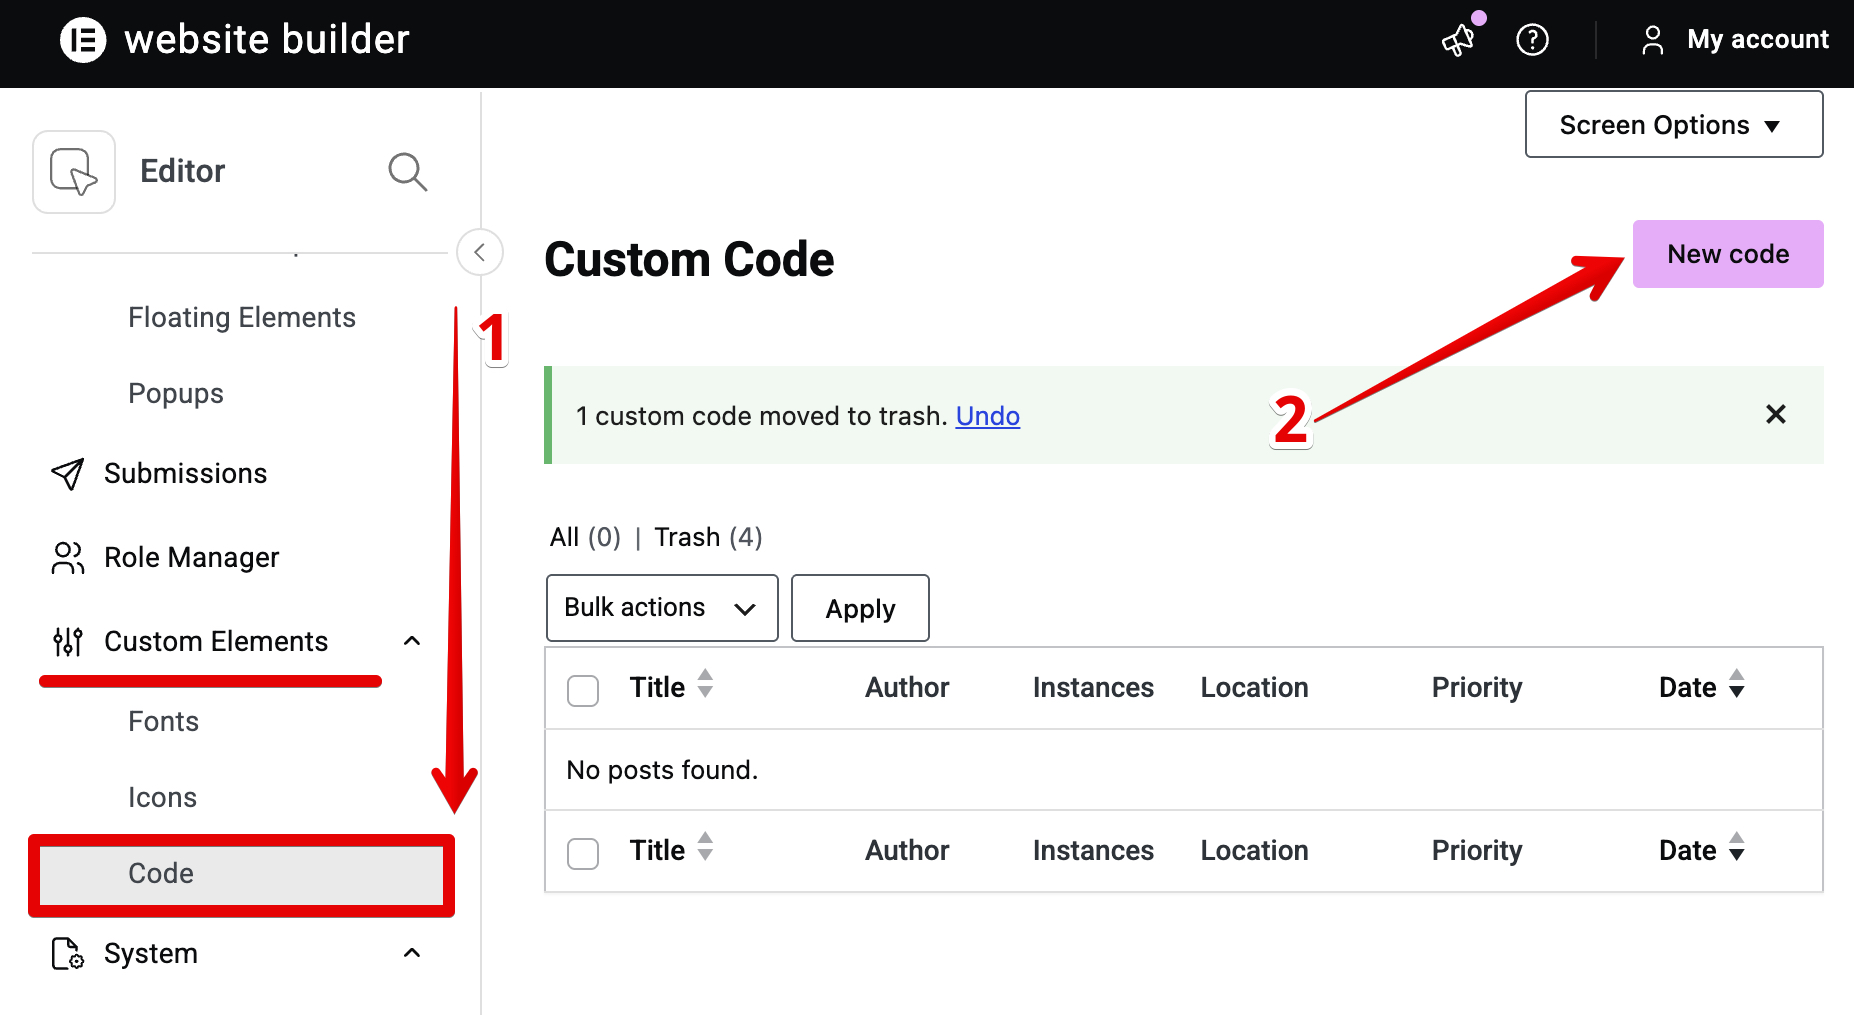
Log in to WordPress and navigate to Elementor left-hand menu. Hover over the Editor and click Custom Elements:
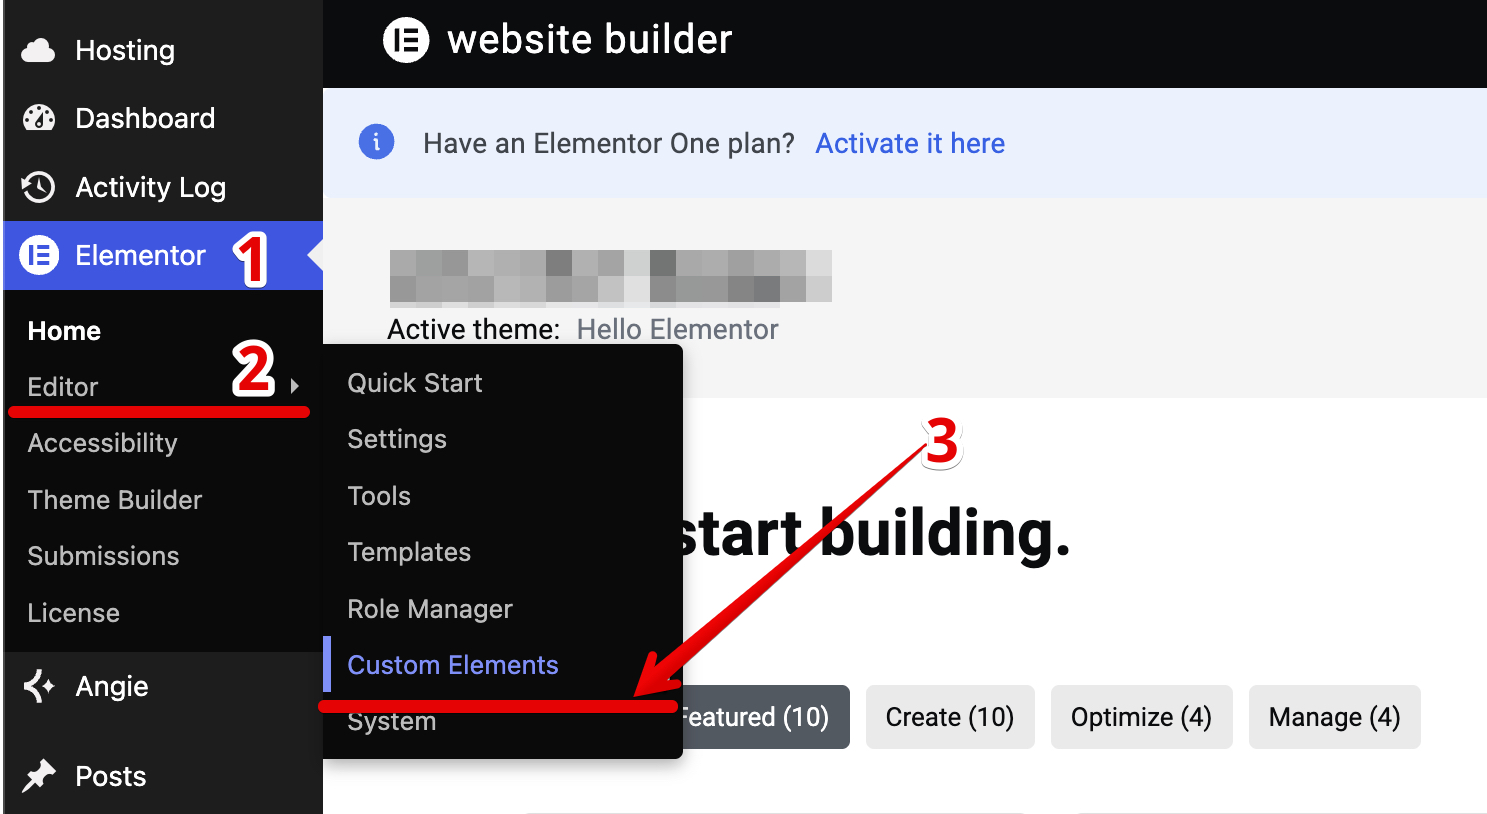 Scroll down to the Custom Elements section and click Code. Then click on the New code button:
- 2
-
Add the widget installation code
Add a Title for your widget and paste the installation code to the code field. Then click Publish: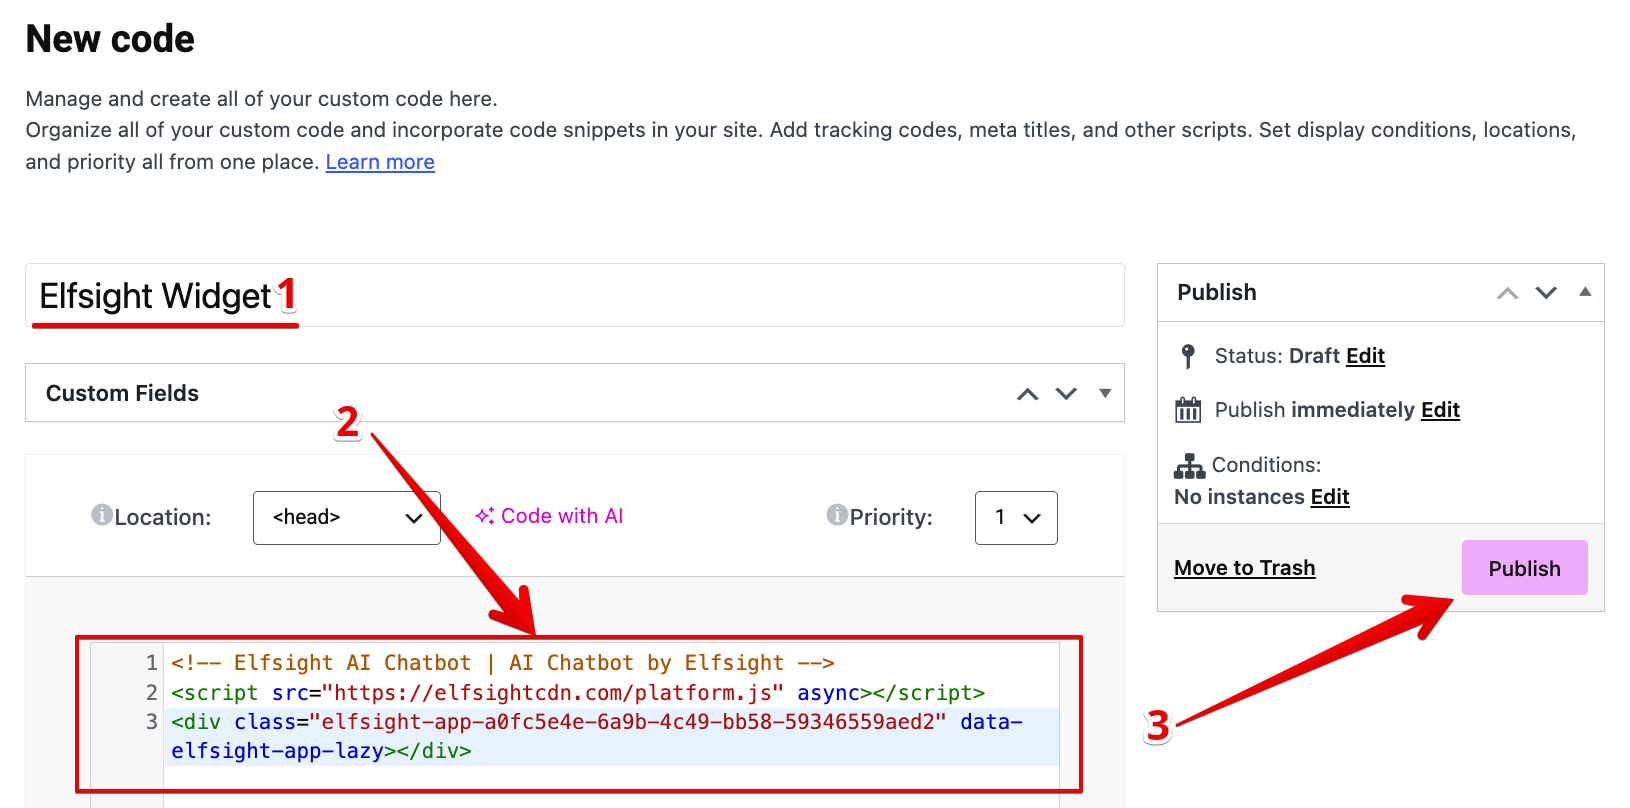
- 3
-
Set the display position
Include your code on Entire Site to display the widget across your site pages: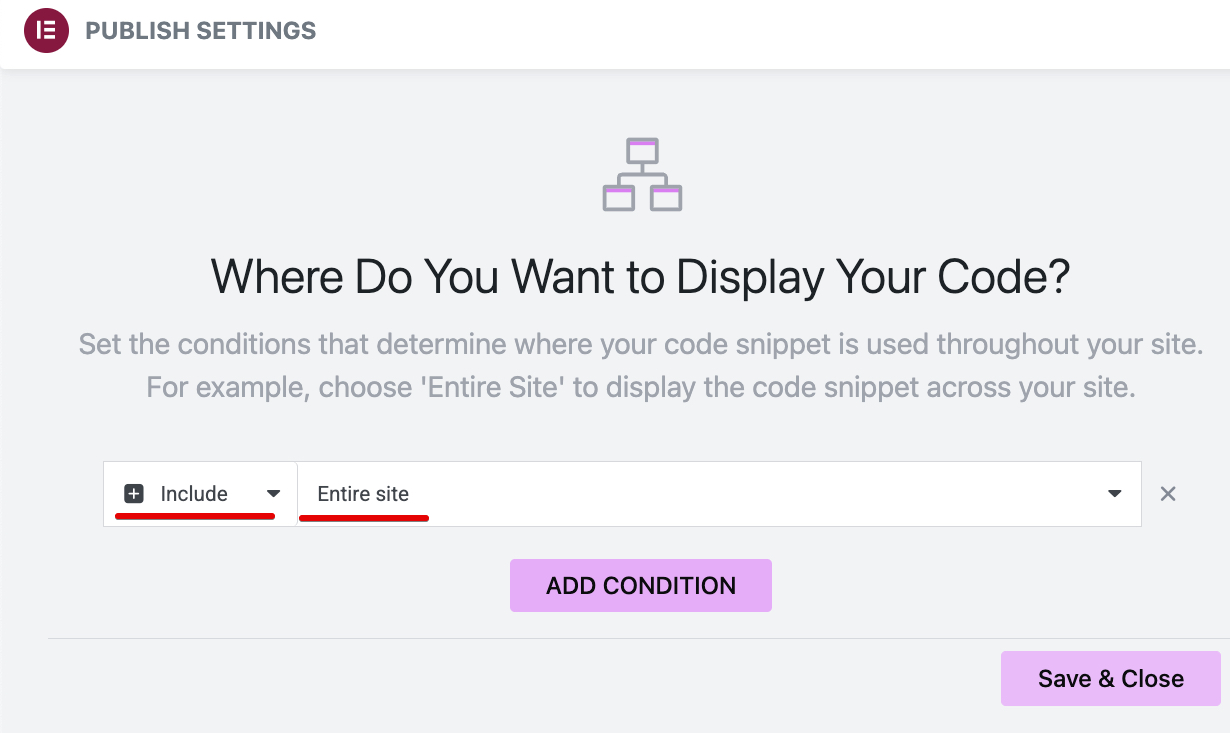
 Scroll down to the Custom Elements section and click Code. Then click on the New code button:
Don't forget to save the changes. Your widget is now installed on all pages of your website!
Struggling with the installation or have a different setup? Let us help! 🙌 Request installation assistance, and we'll handle the rest.