
Step 3: Adjust Your Audio Player Settings
You’re almost there! 🚀 Now that your Audio Player is set up and styled, it’s time to adjust the final settings. In this step, you’ll configure how the player behaves and make the last changes before publishing it on your website.
- Step 1 – Add Your Tracks to Audio Player
- Step 2 – Customize Your Audio Player Appearance
- 👉 Step 3 – Adjust Your Audio Player Settings
In this article
Customize Player Behavior
Go to the Settings tab and click Player: 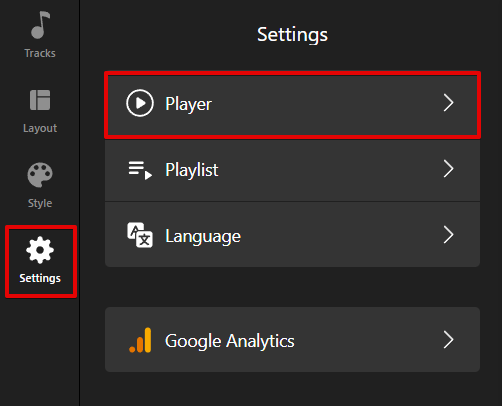
Here you can configure which controls and track details are shown and adjust playback behavior: 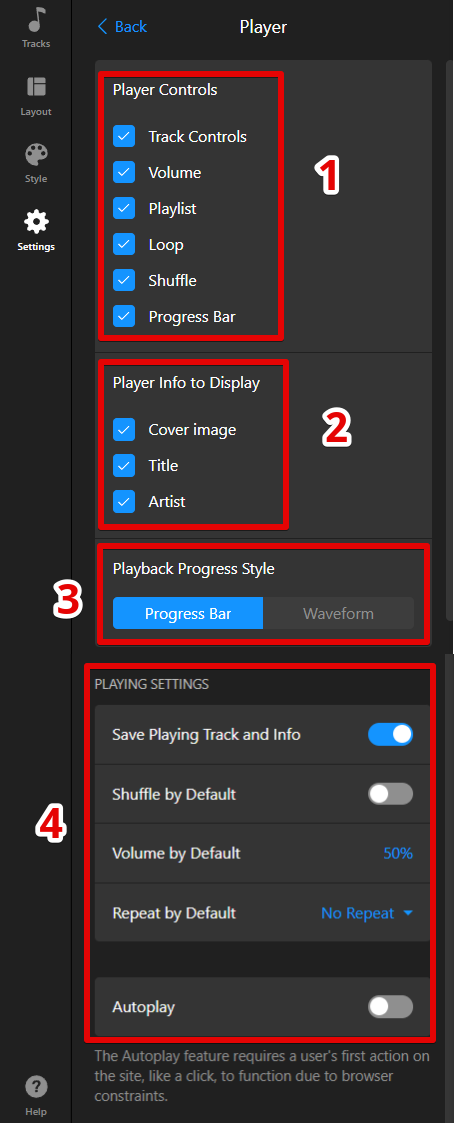
- 1
-
Player Controls – Choose which controls to show, such as Volume, Loop, Shuffle, Progress Bar, and more.
- 2
-
Player Info to Display – Select which track details should appear in the player: Cover image, Title, or Artist.
- 3
-
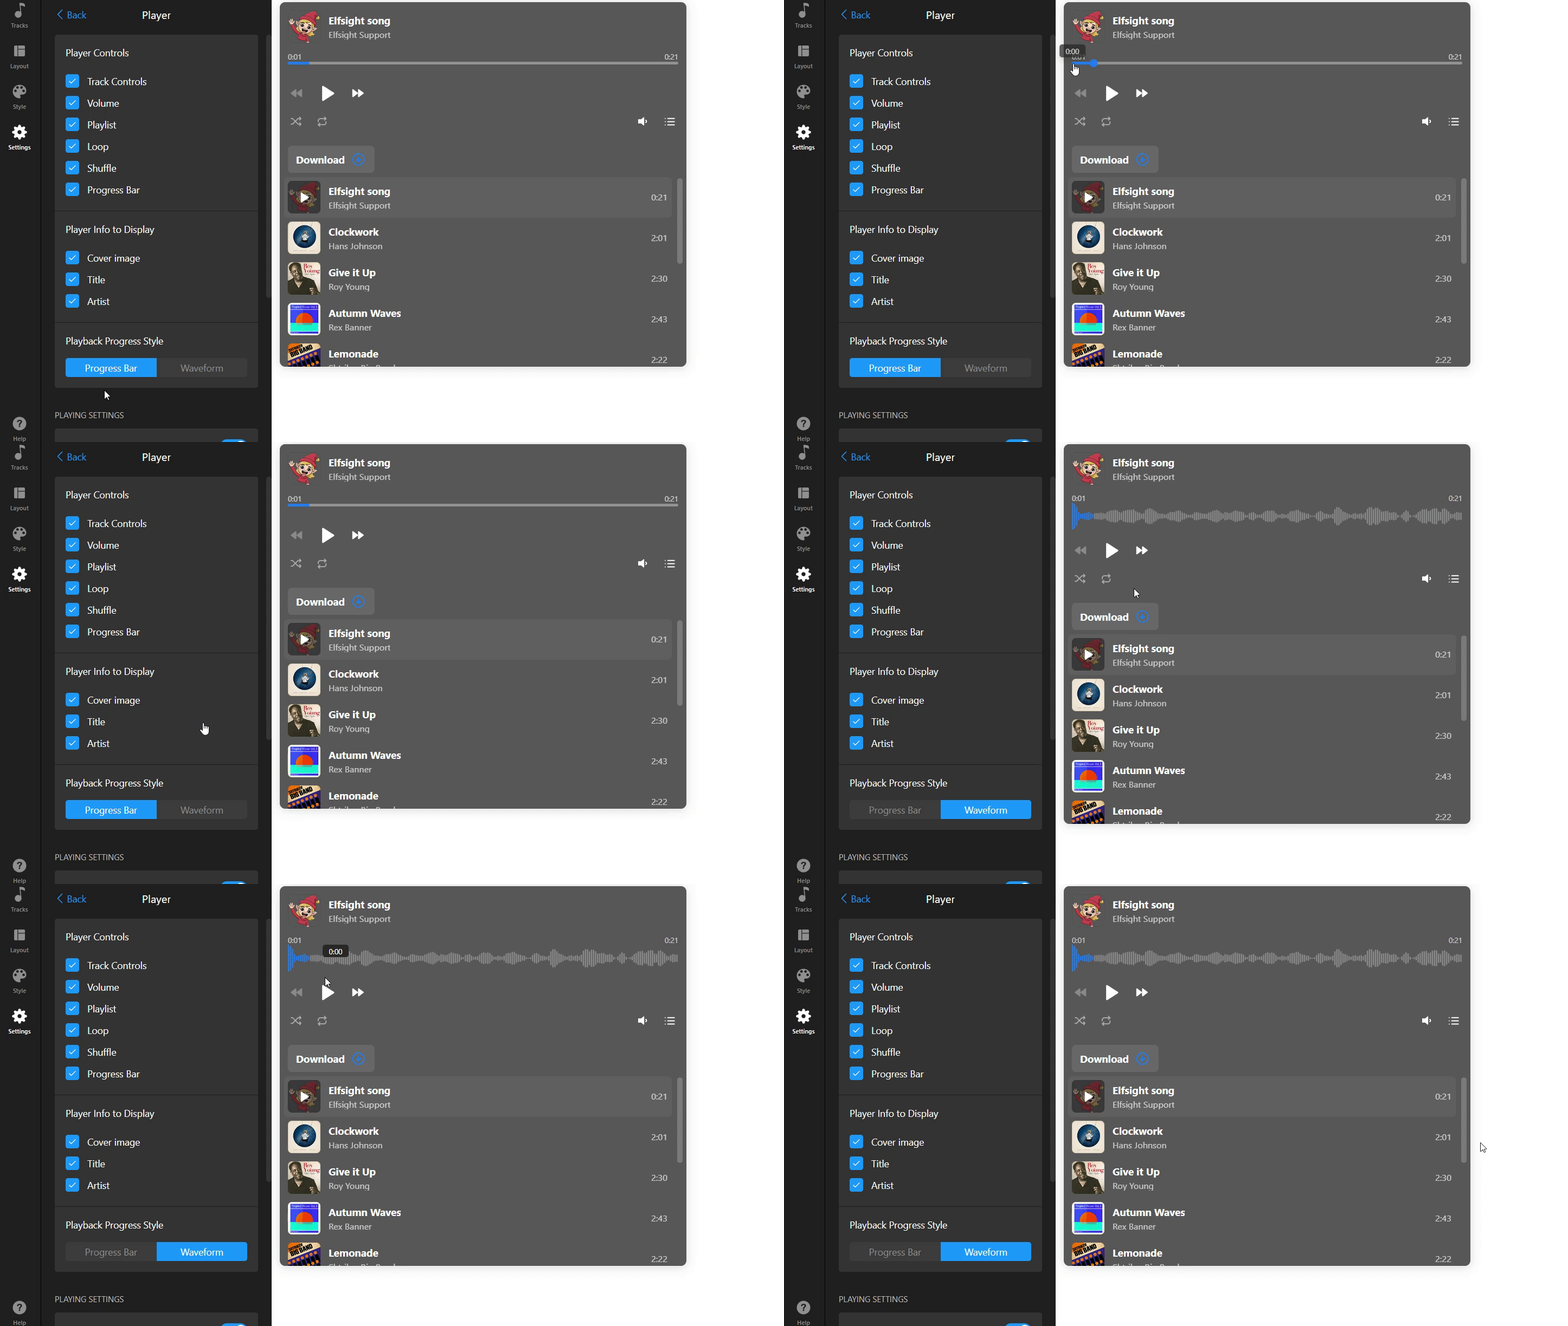
Playback Progress Style – Choose how the progress appears. Progress Bar offers a minimal line, while Waveform shows the audio wave for a more visual experience.
- 4
-
Player Settings – Adjust behavior during playback:
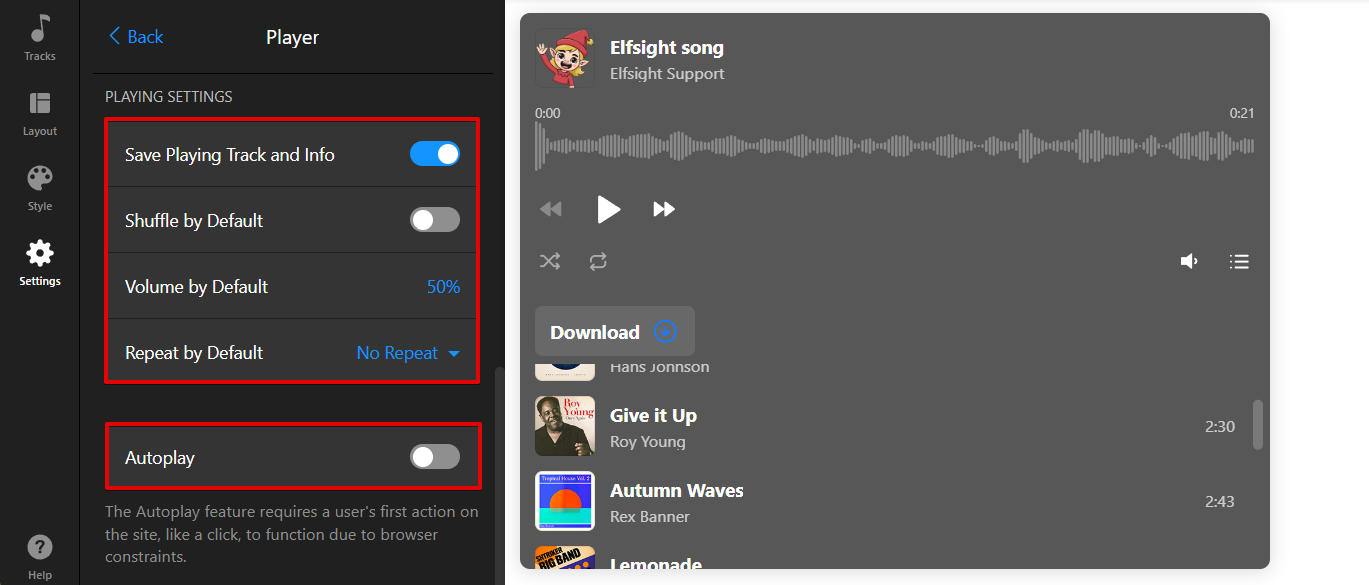
- Save Playing Track and Info – Keep the current track and playback info if visitors leave or reload the page.
- Shuffle by Default – Play tracks in random order.
- Volume by Default – Set the default volume level.
- Repeat by Default – Repeat tracks automatically by default.
- Autoplay – Start playback automatically.
Due to browser restrictions, autoplay may not start until a visitor interacts with your website (e.g., clicks anywhere on the page). Learn more: Why Autoplay Doesn't Work in My Audio Player.
Configure Playlist Display
In the Settings tab, click Playlist to configure how the playlist appears: 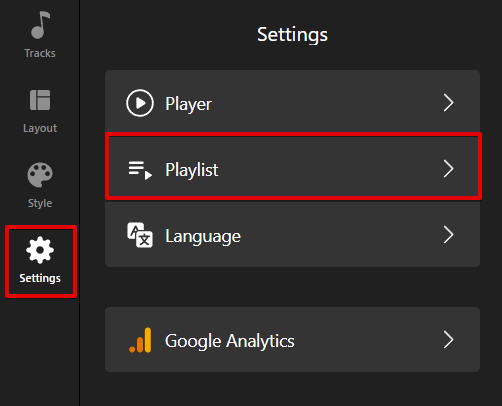
Here you can adjust which track details are visible and set playlist behavior: 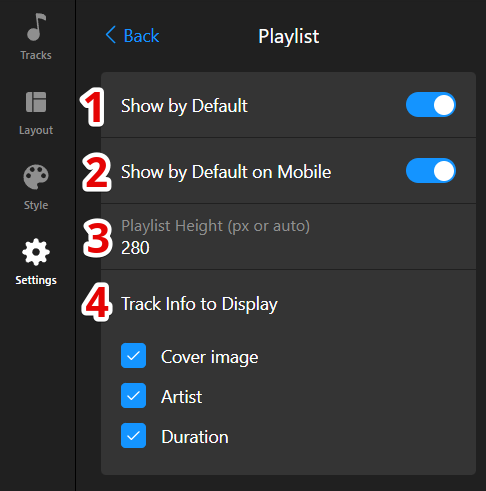
- 1
-
Show by Default – Display the playlist when the widget loads.
- 2
-
Show by Default on Mobile – Show the playlist on mobile devices by default.
- 3
-
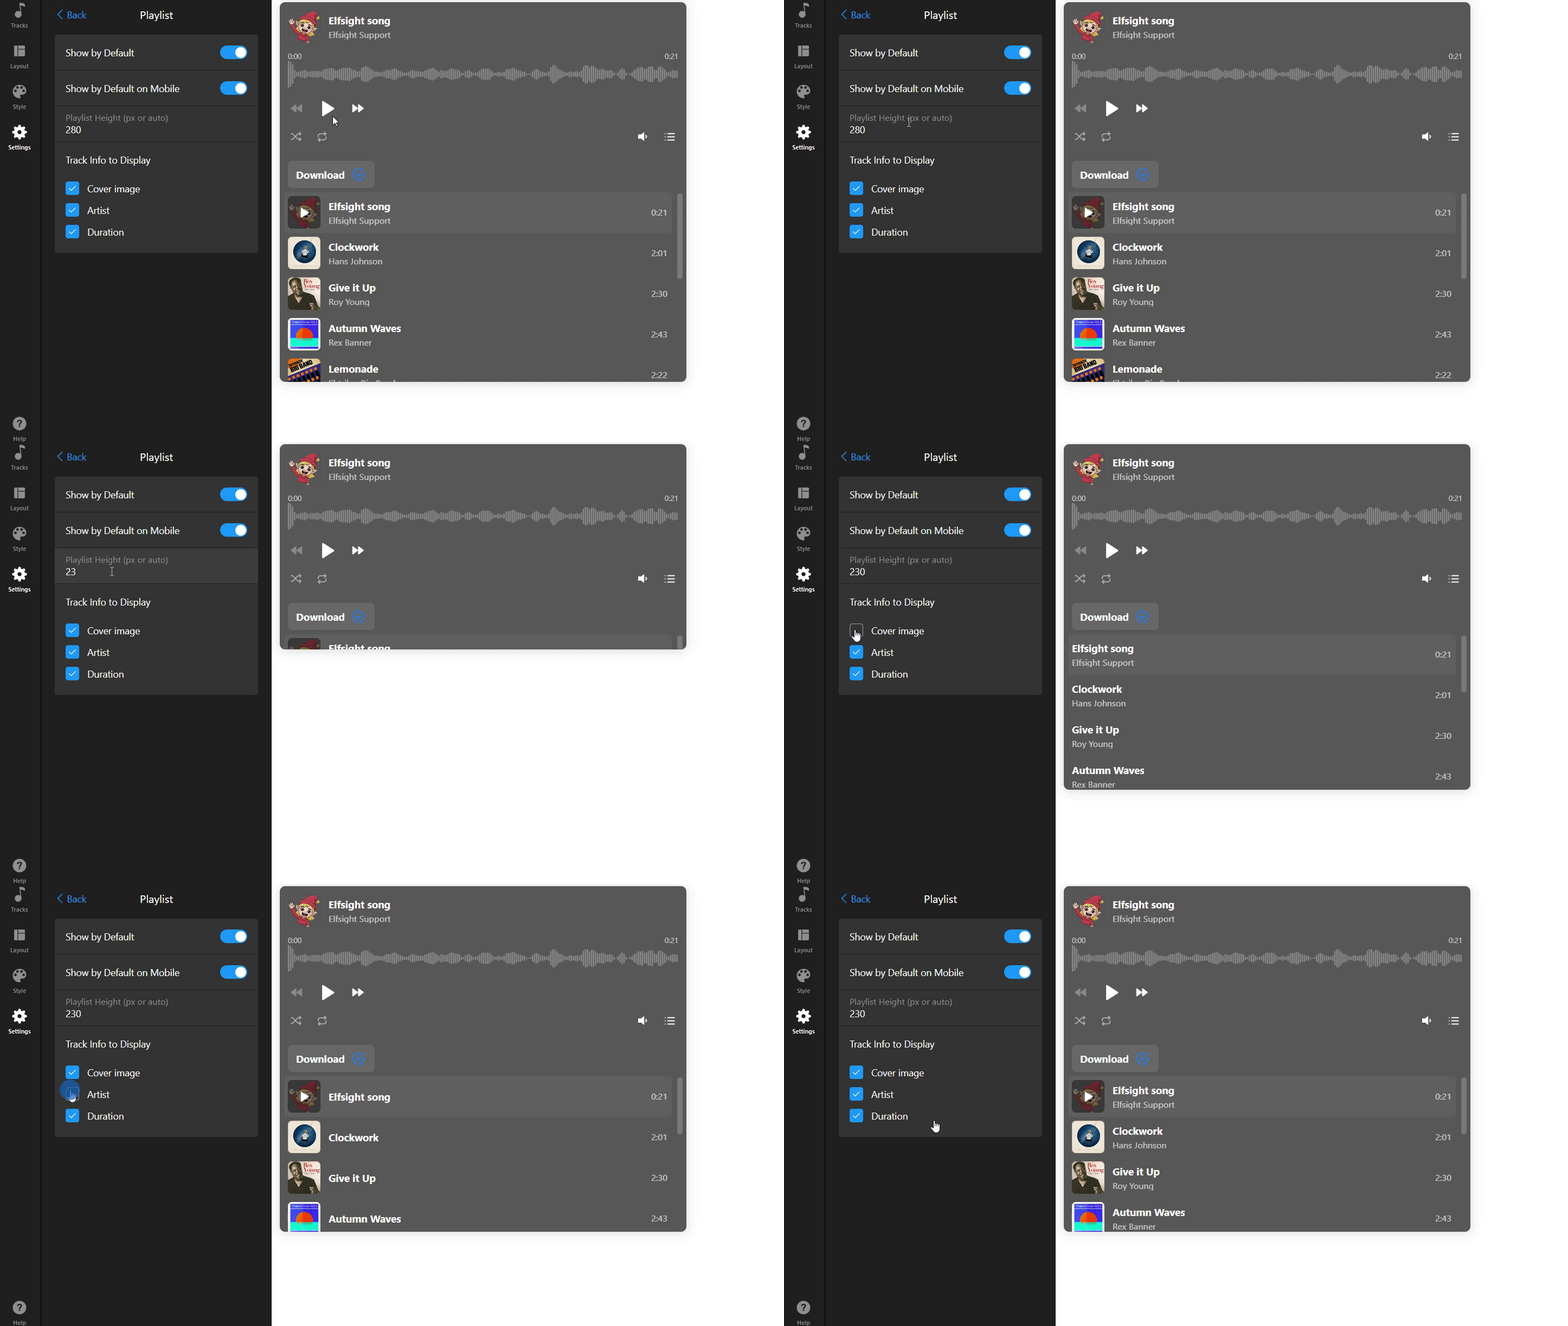
Playlist Height – Set the playlist height in pixels or use auto to let it adjust automatically.
- 4
-
Track Info to Display – Choose which details to display for each track: Cover Image, Artist and Duration.
Here is a visual example of how the widget changes with these settings:
Manage Analytics & Language
In the Settings tab, you can also manage tracking and language options for your Audio Player: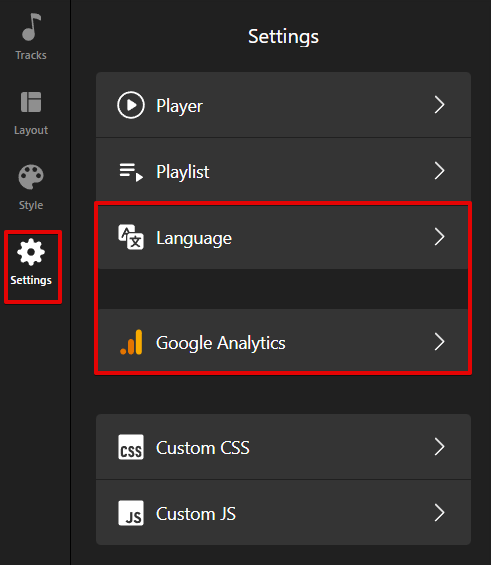
Language
Select the widget's language from the Language dropdown. You can also customize the interface labels using Edit Text : 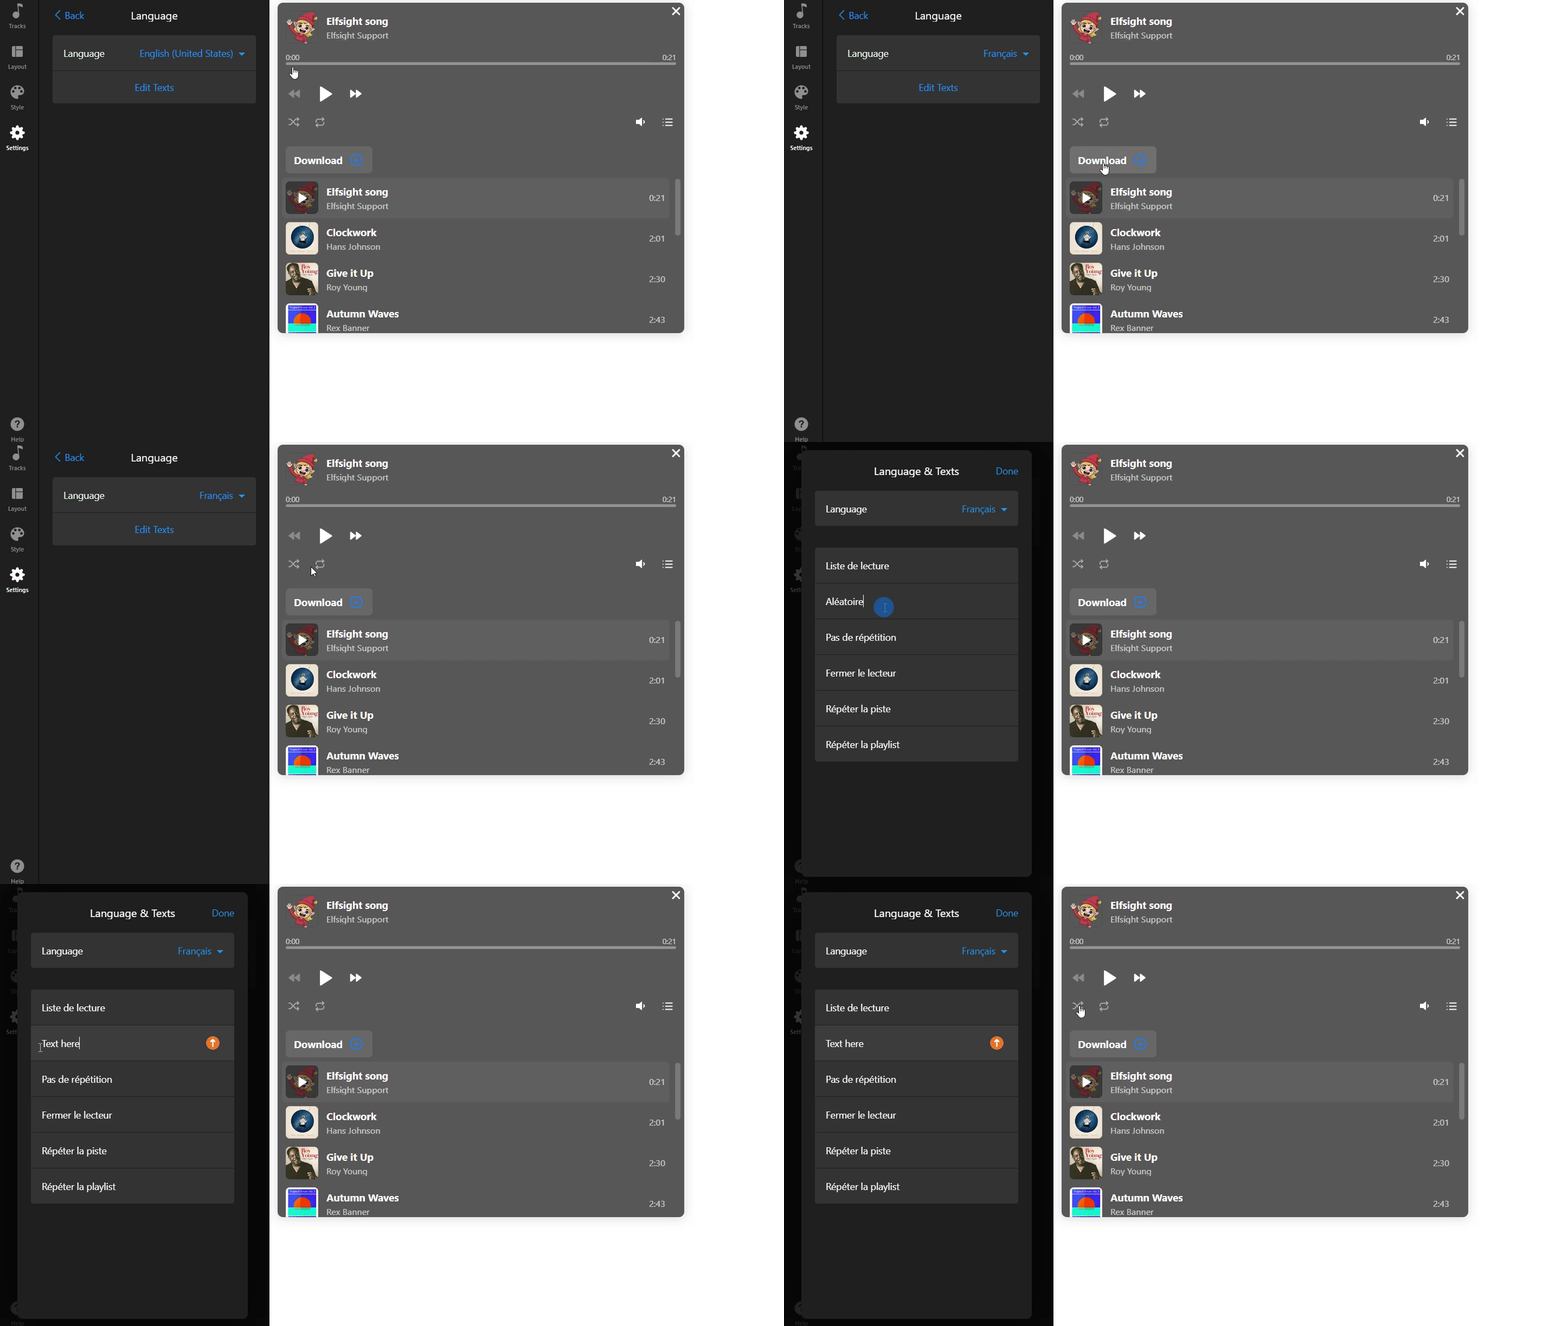
Google Analytics
Connect Google Analytics and track when a new track starts. Click + Add Event and choose the Track Started Playing action: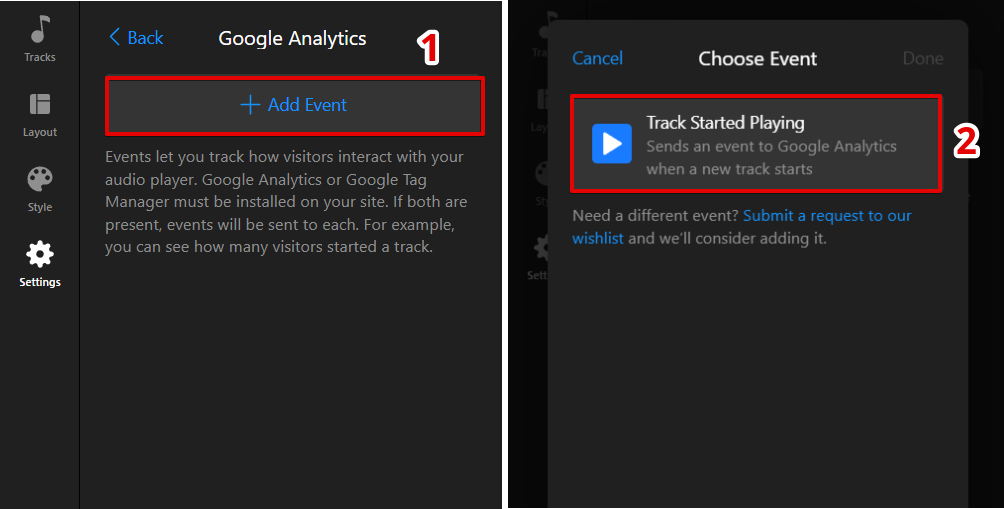
Adjust Advanced Settings
Use Custom CSS and Custom JS sections to further customize your widget or integrate external tools: 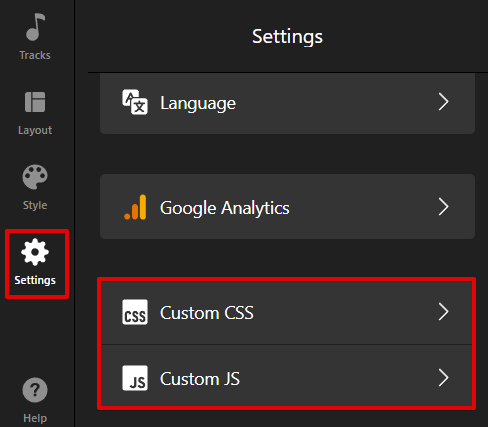
Explore our community post for CSS code tips and ideas to enhance your player’s design and functionality.
All set — your Audio Player is now fully configured, customized, and ready to add to your website 🎉