
Adding Elfsight Widget to GoHighLevel Website
Looking for instructions on how to add your Elfsight widget to your GoHighLevel website? Follow this easy step-by-step guide for seamless integration. Copy your widget installation code, and let’s get started!🚀
Choose how to install your widget
Add a Widget to a Specific Page (Home, Contact, etc.)
- 1
-
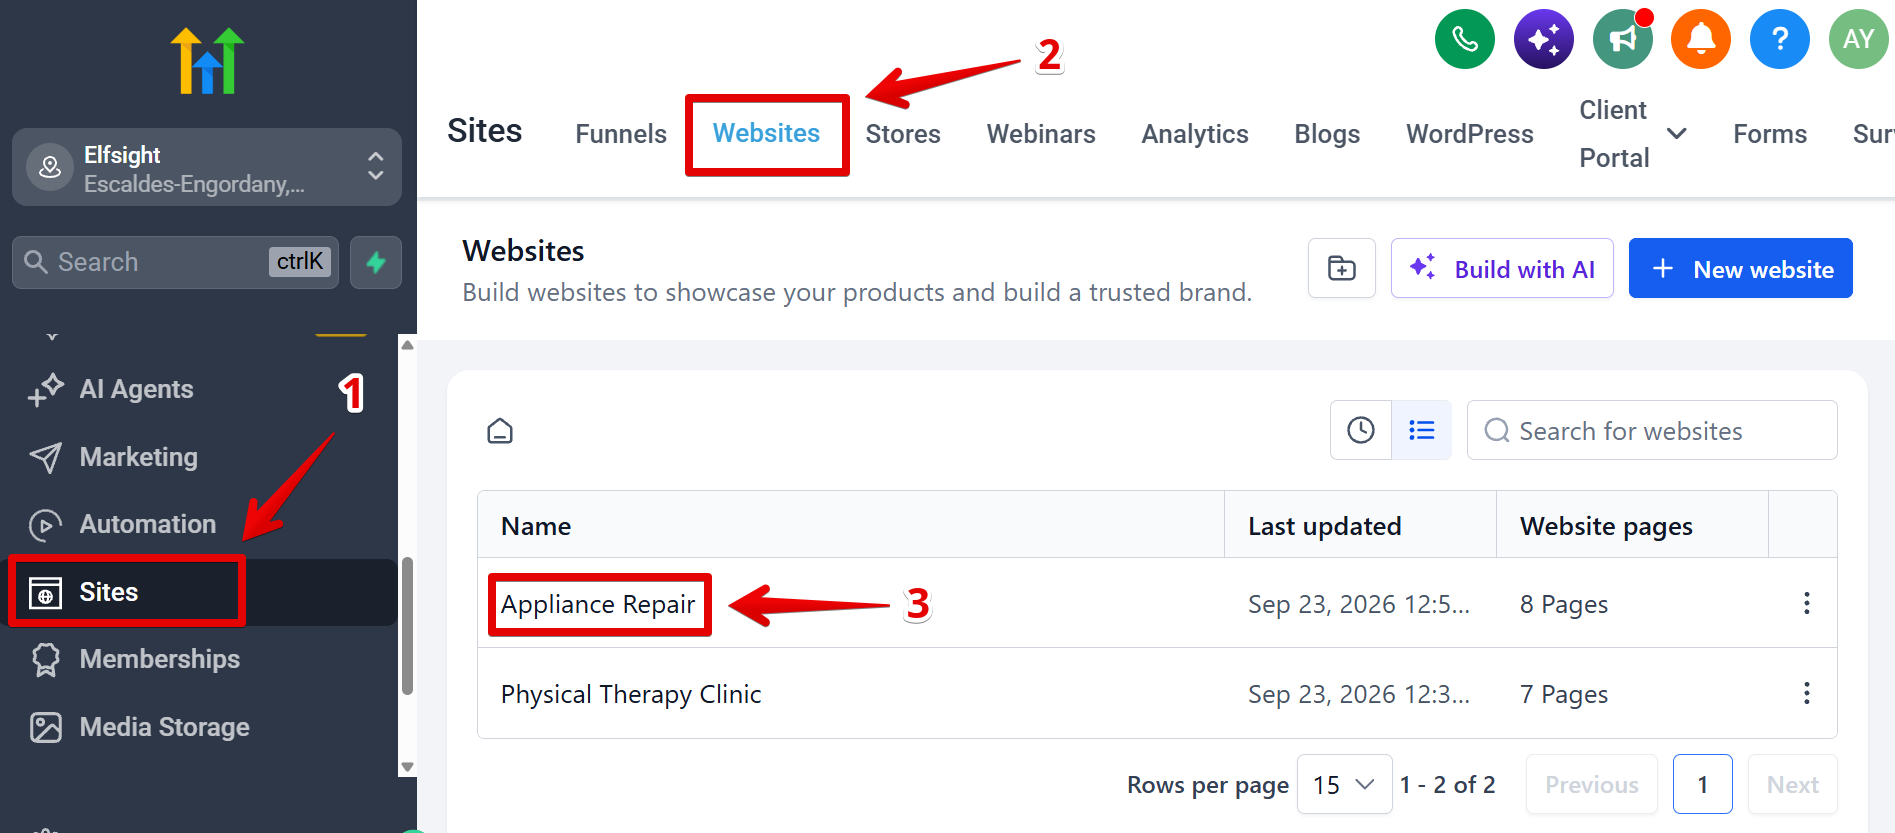
Open your GoHighLevel website admin panel. Select Sites → Websites tab. Click on the website you'd like to edit:
- 2
-
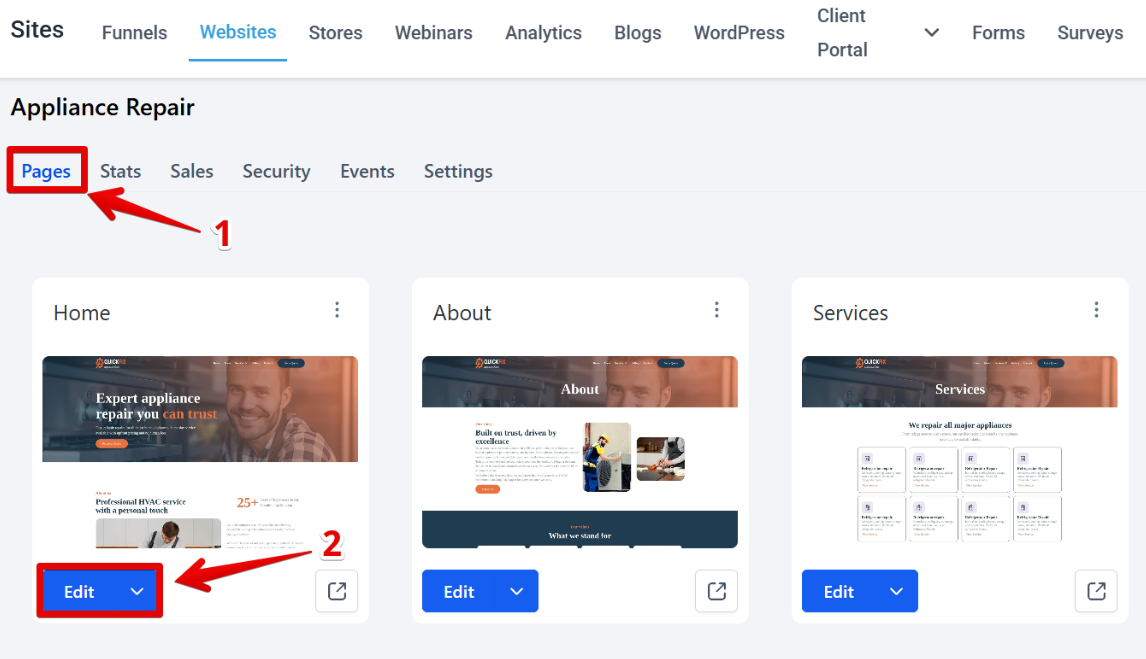
Under the Pages tab, choose a page where you want to add the widget and click Edit:
- 3
-
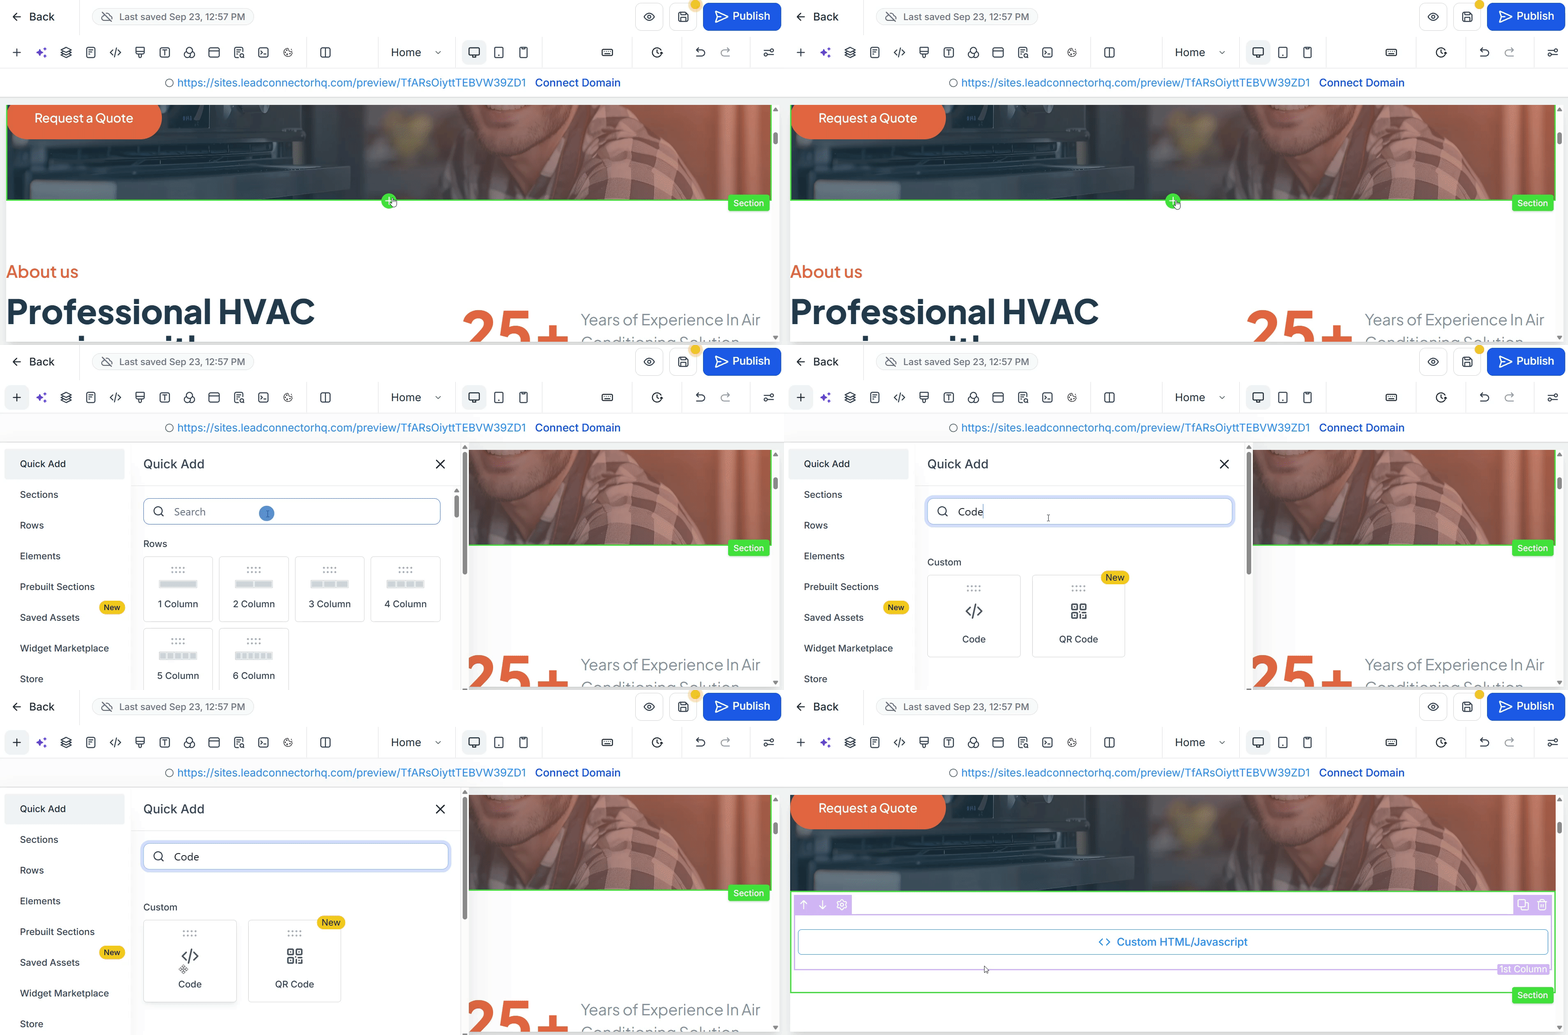
Choose the place where you’d like to add the widget. Click the ➕ (Plus) sign → select the Code element:
- 4
-
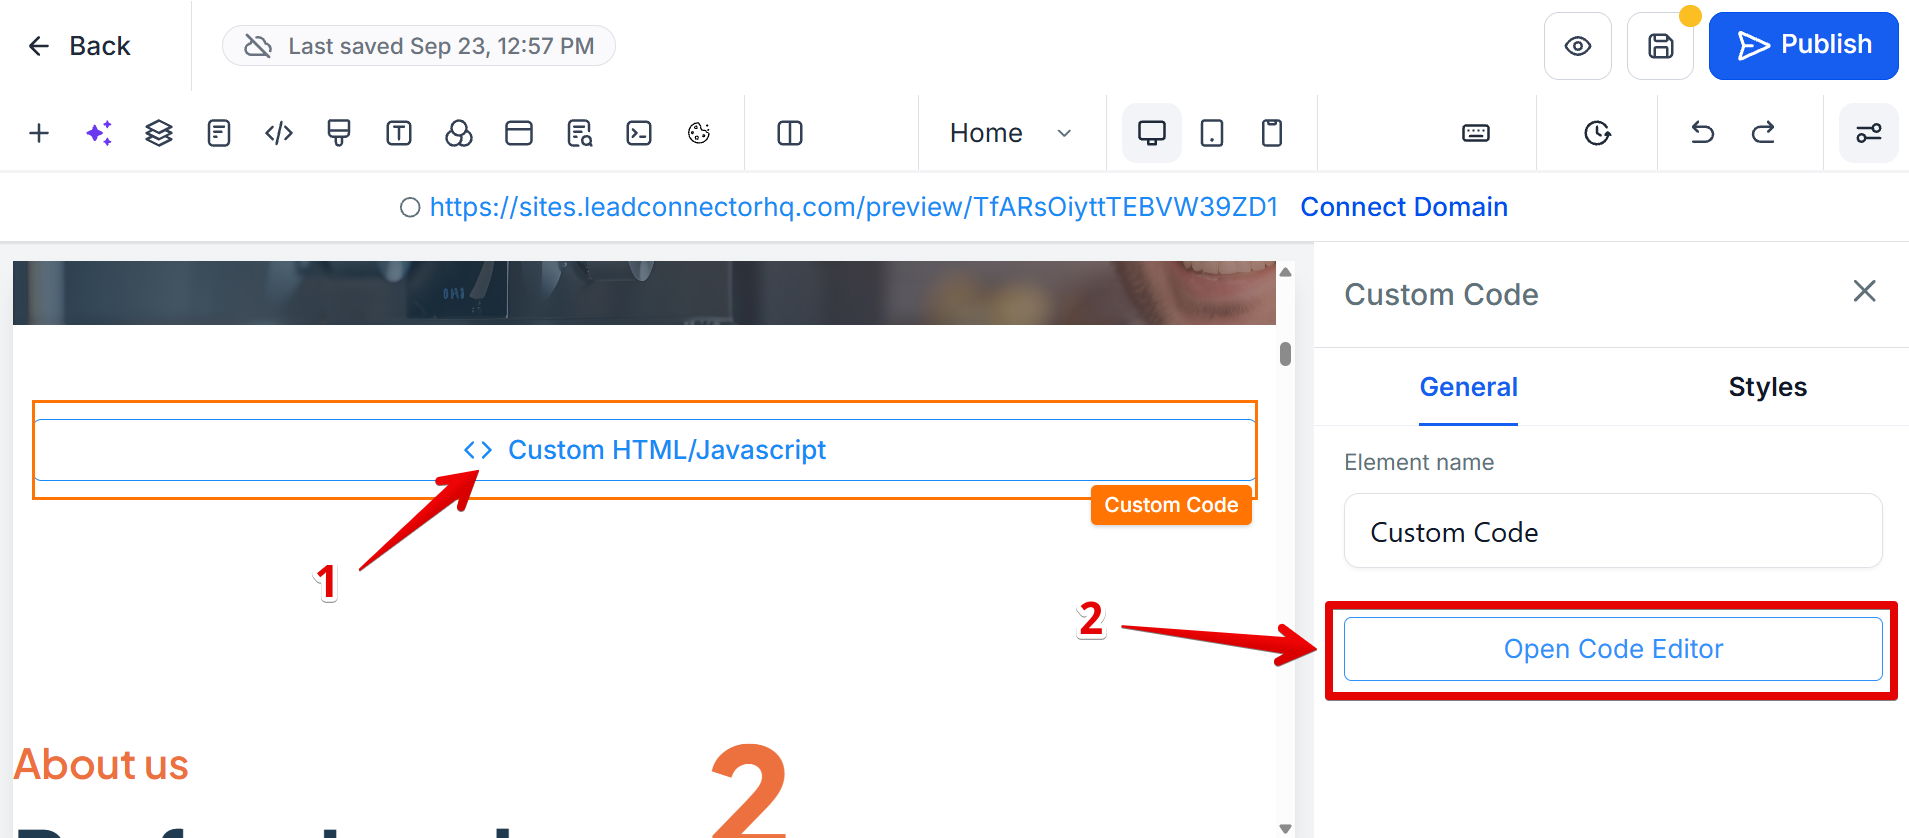
Click on the added block → Open Code Editor:
- 5
-
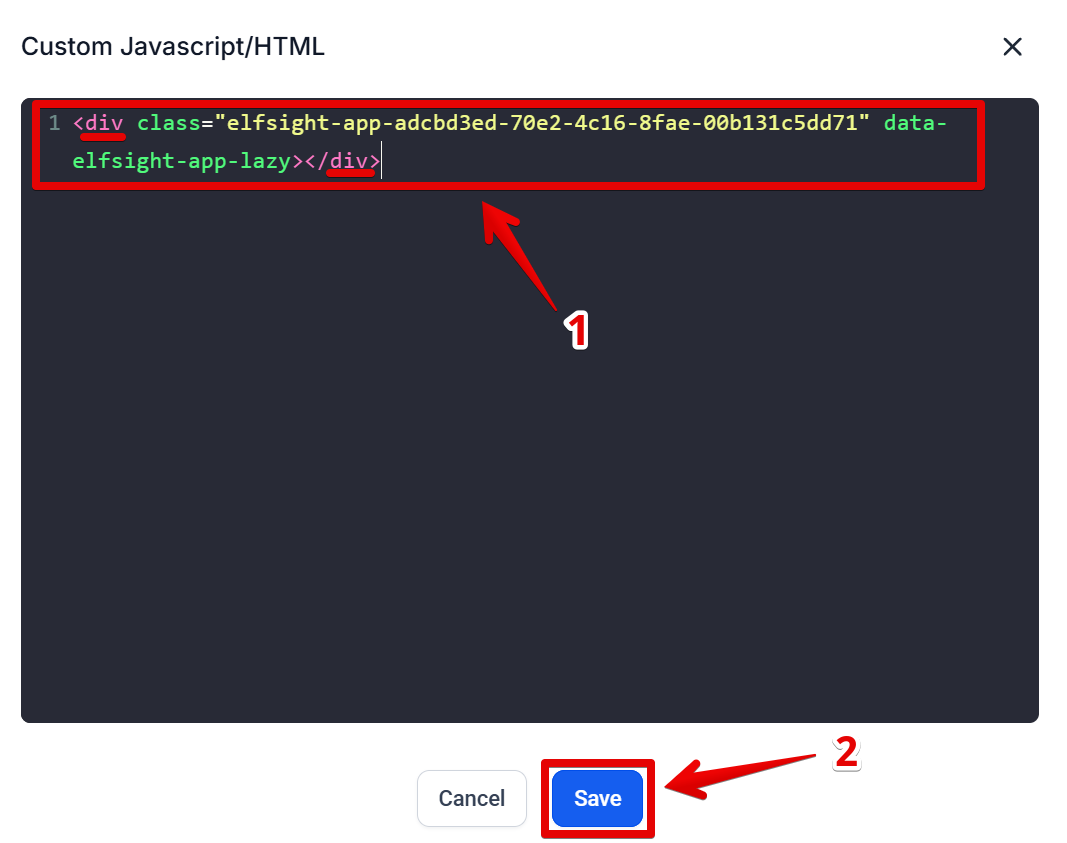
In the opened window, add the second line of your installation code (containing
<div>) → Save the changes:
- 6
-
Click the Tracking code </> icon in the top bar → switch to the Footer Tracking tab, and paste the first line of your installation code (containing
<script>) into the field. Click Save: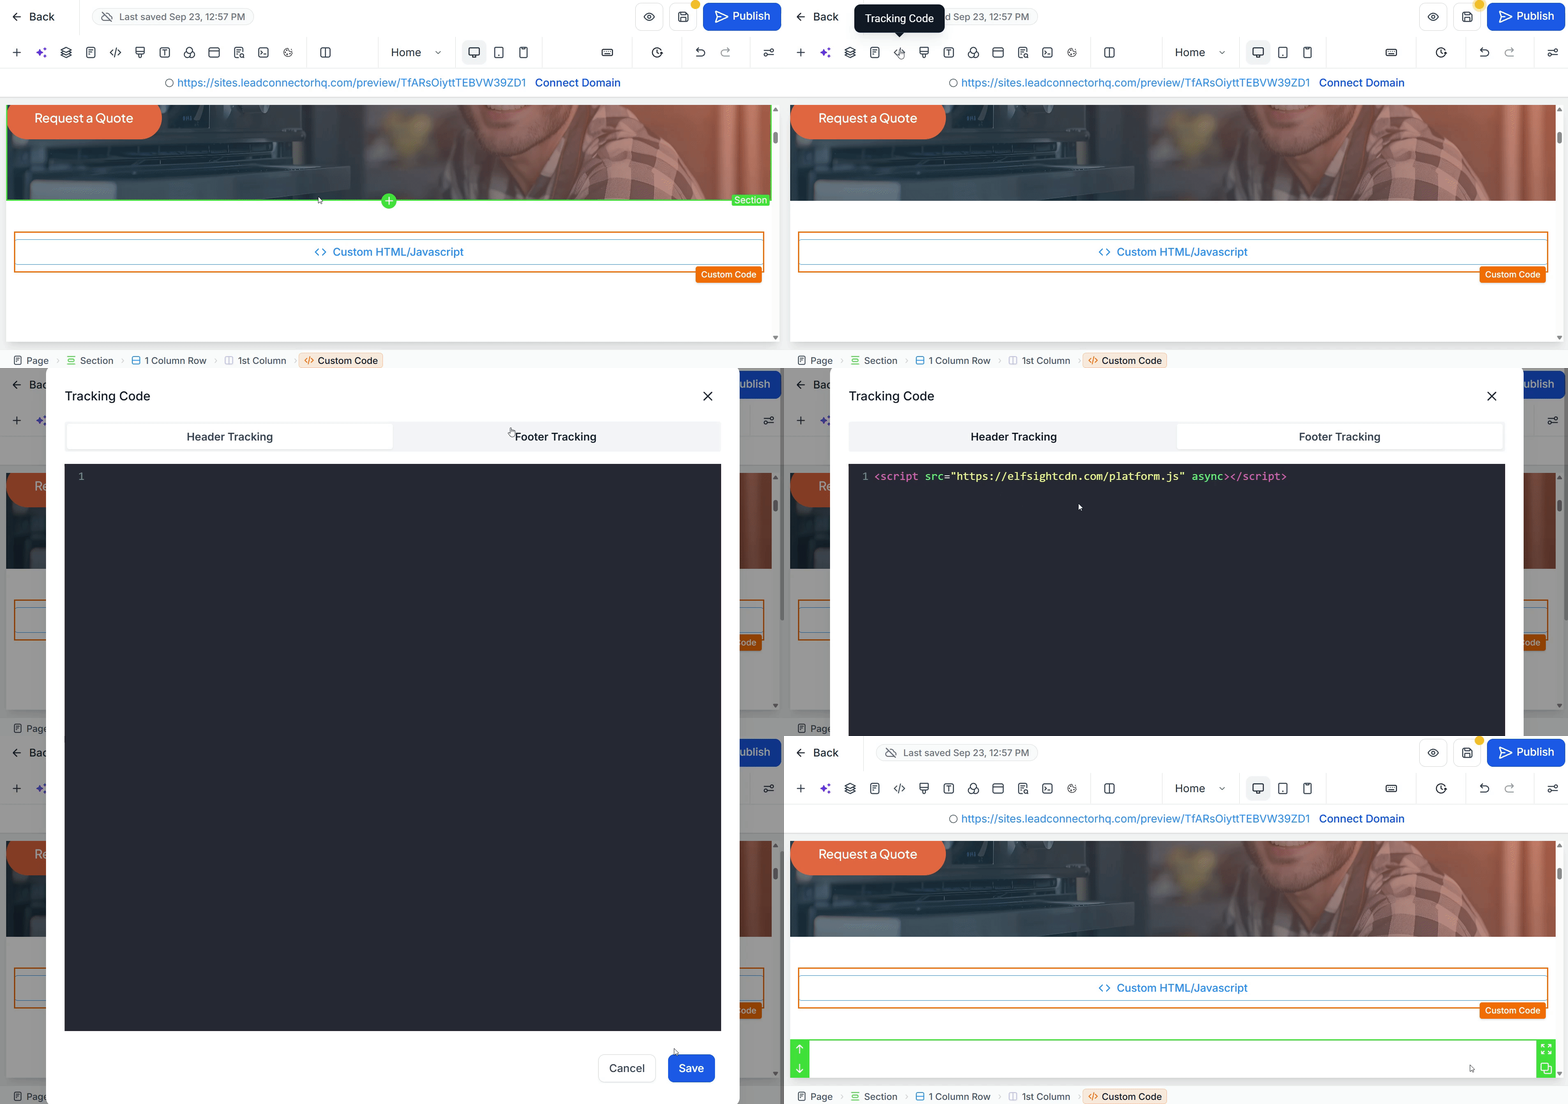
Don't forget to click Publish to make your widget visible on your live website.
Done! You have successfully added the Elfsight widget to a specific page of your GoHighLevel website.
Add a Widget to All Pages
- 1
-
Open your GoHighLevel website admin panel. Select Sites → Websites tab. Click on the website you'd like to edit:
- 2
-
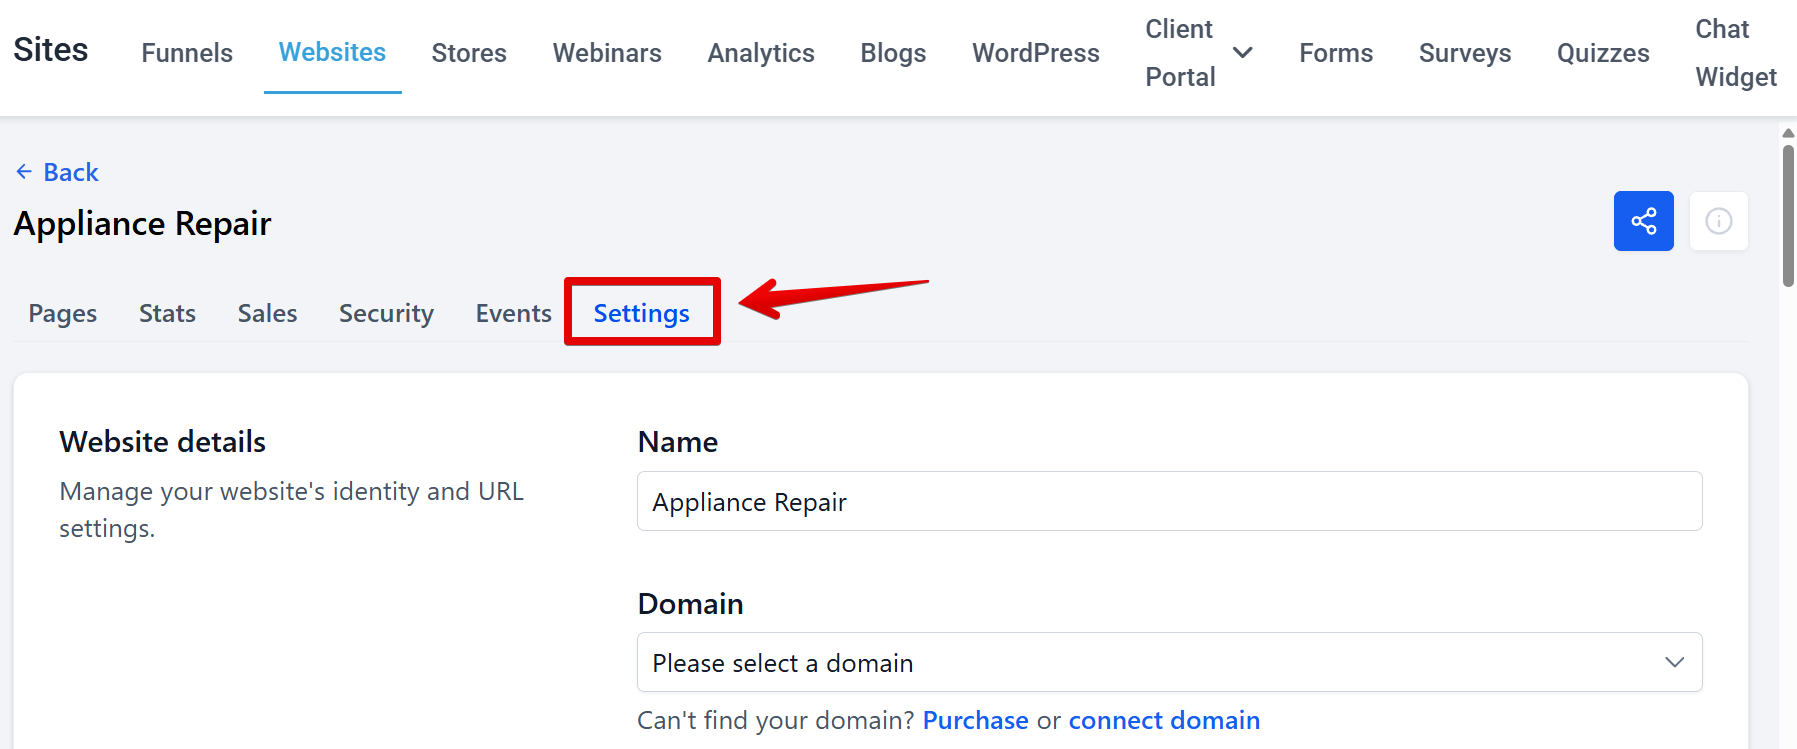
Go to the Settings tab:
- 3
-
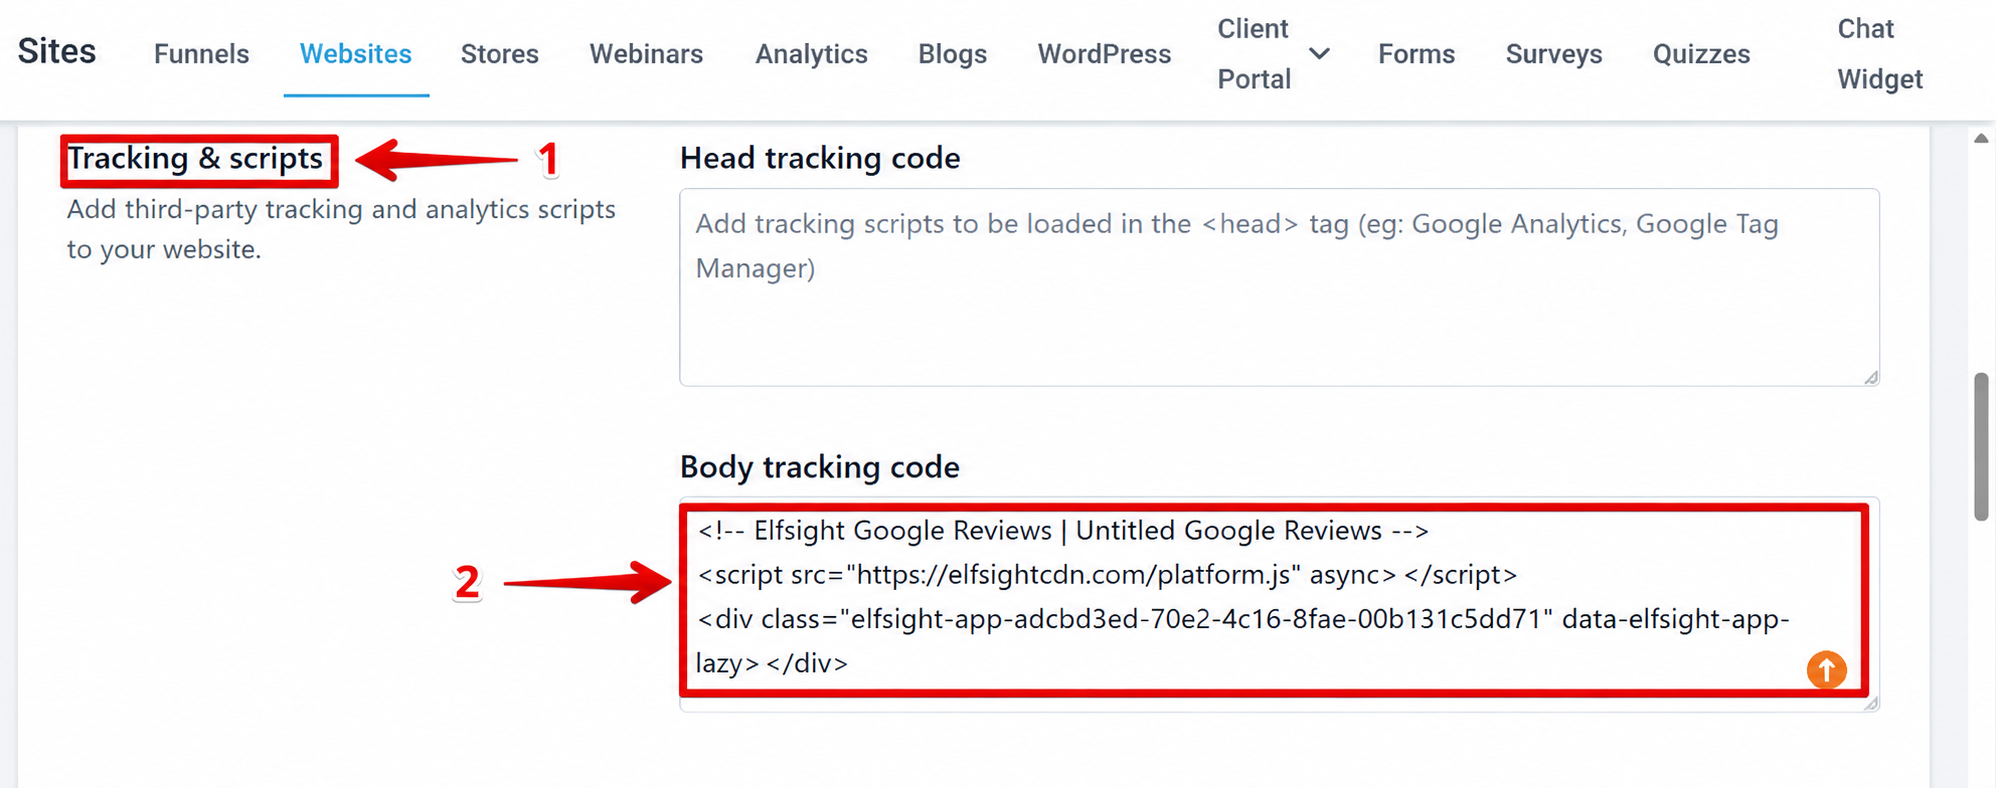
Find the Tracking & scripts section and add your widget installation code to the Body tracking code field:
- 4
-
Save the changes:
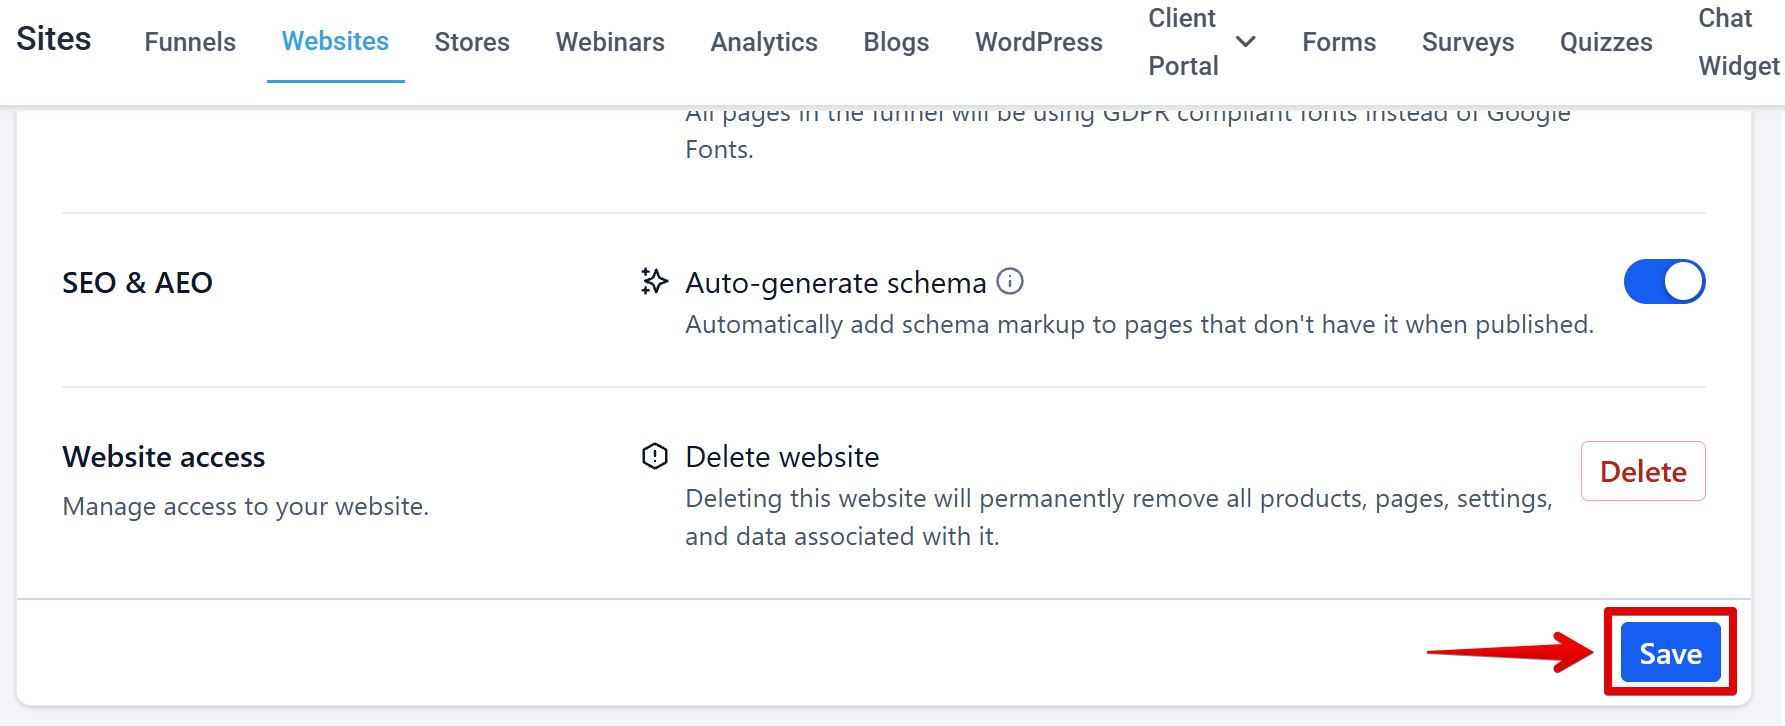
Great! You have successfully added your widget to all pages of your GoHighLevel website.
Stuck with installation? Let us help! 🙌 Send us a quick request, and we’ll handle the setup for you.