
Adding Elfsight Widget to Ghost Website
Looking for instructions on how to add your Elfsight widget to your Ghost website? Follow this easy step-by-step guide for seamless integration. Copy your widget installation code, and let’s get started! 🚀
Choose how to install your widget
Add a static widget to a specific post or page
- 1
-
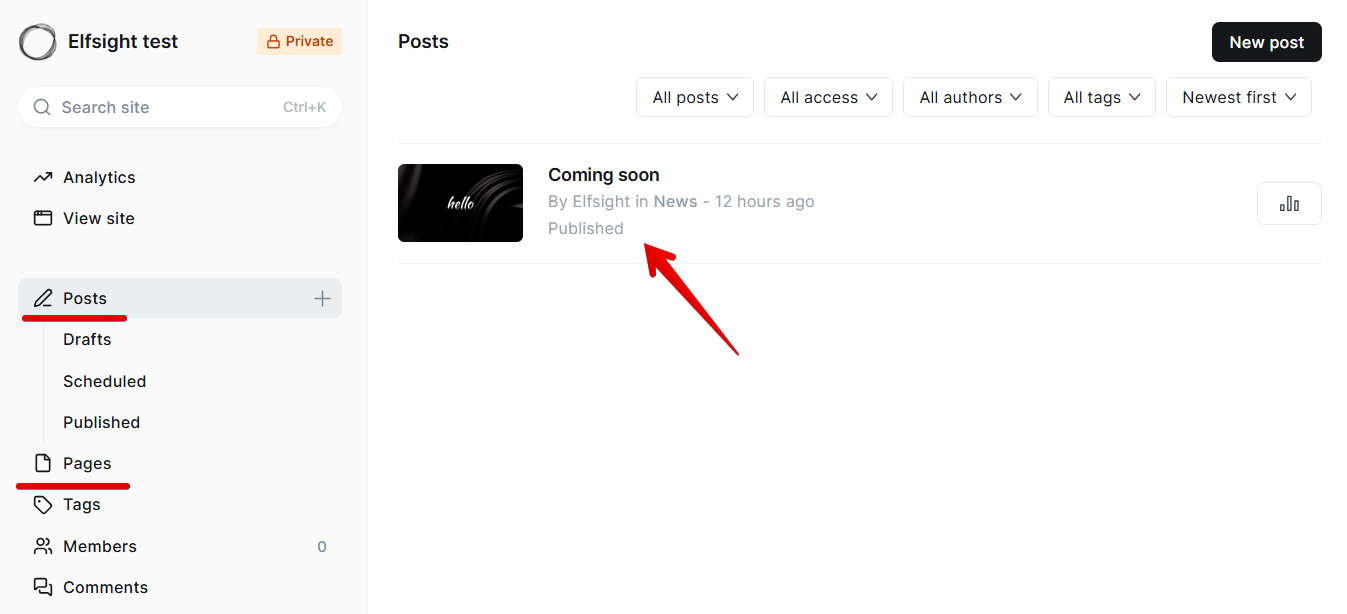
In your Ghost admin panel, select the post or a page where you want to add the widget:
- 2
-
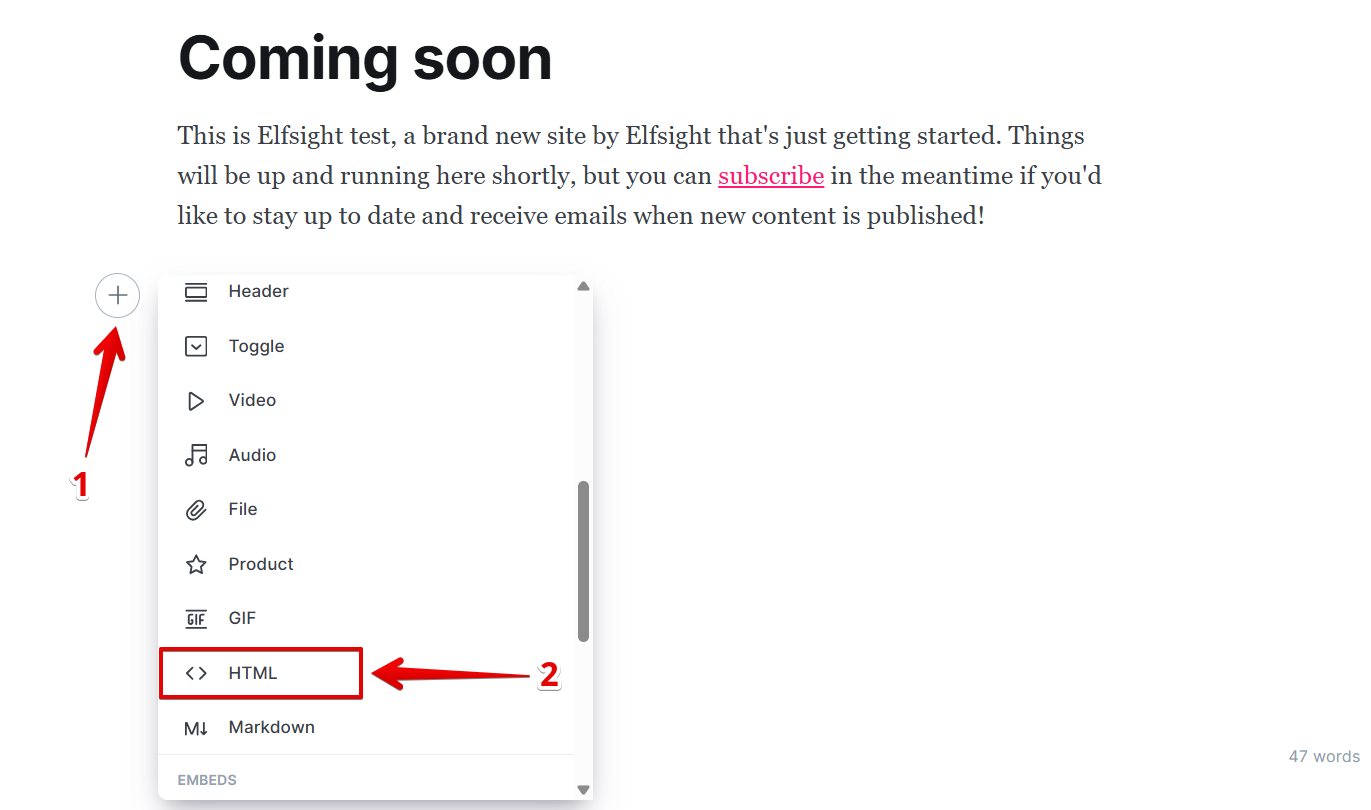
Place the cursor where you want to display the widget and press Enter for the ➕ icon to appear. Click it and select HTML:
- 3
-
Paste your widget installation code into the HTML field:
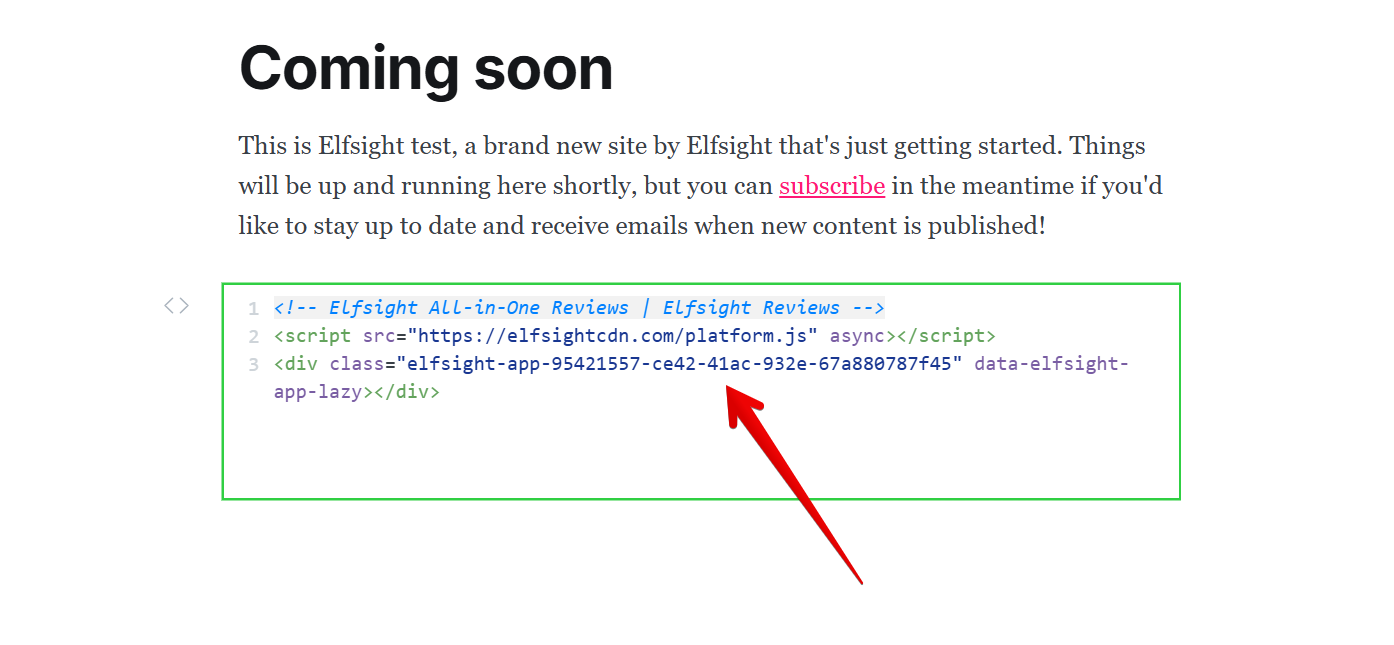
The widget won’t appear in the Ghost editor. Instead, you’ll see an “Embedded JavaScript” placeholder. The widget will display correctly on the published page. - 4
-
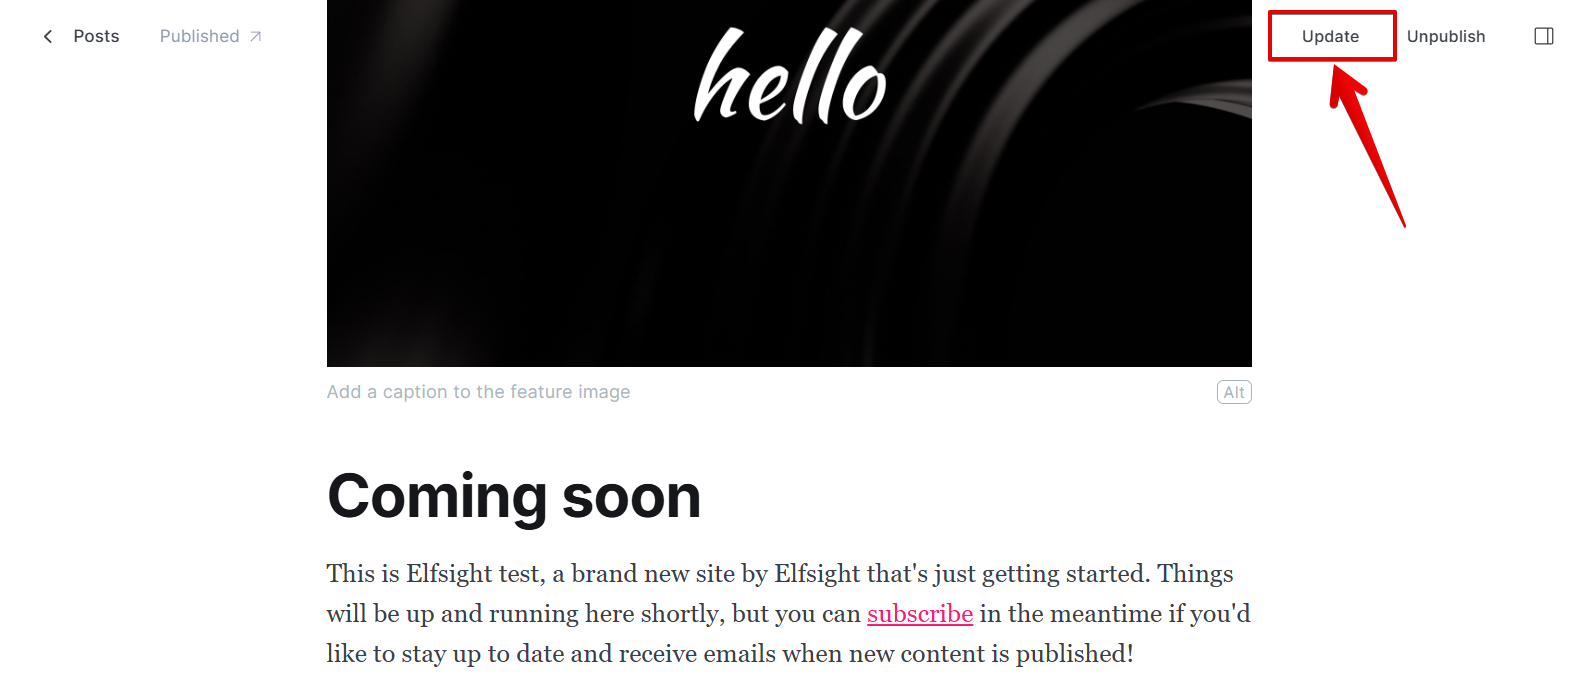
Click Update in the upper-right corner to publish the changes:
You’re all set! Your static widget has been successfully added to your Ghost page.
Add a floating widget to a specific post or page
- 1
-
In your Ghost admin panel, select the post or page where you want to add the widget:
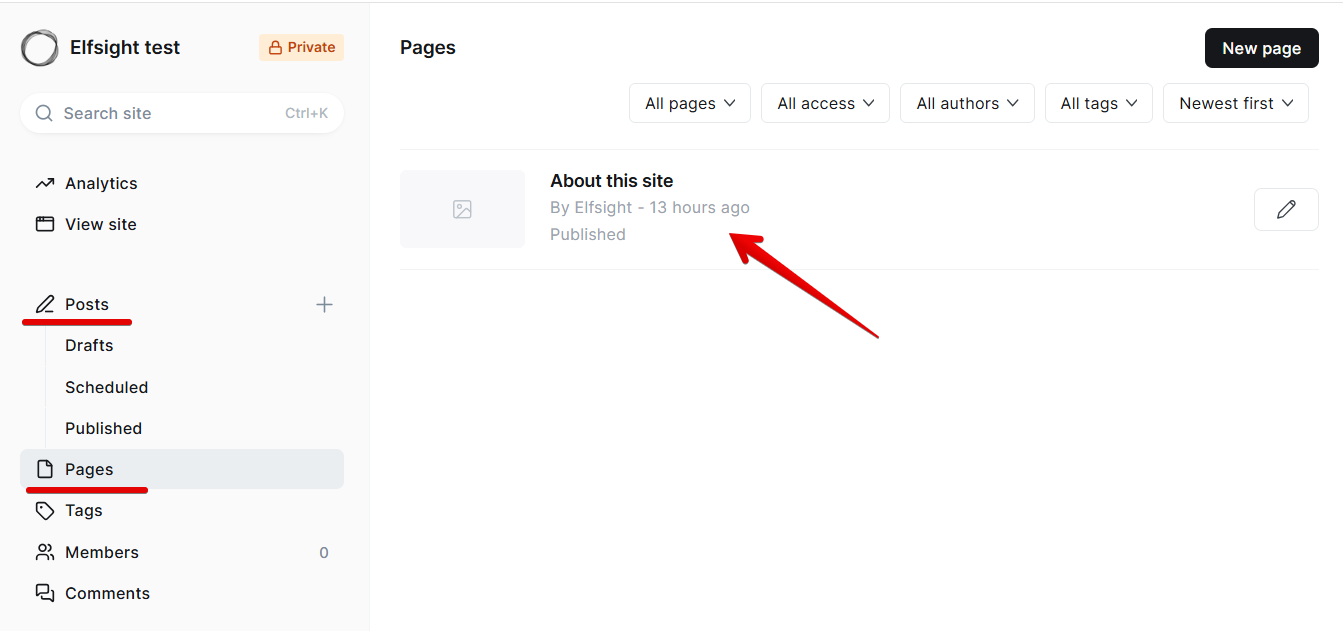
- 2
-
Open the sidebar by clicking the menu icon in the top-right corner:
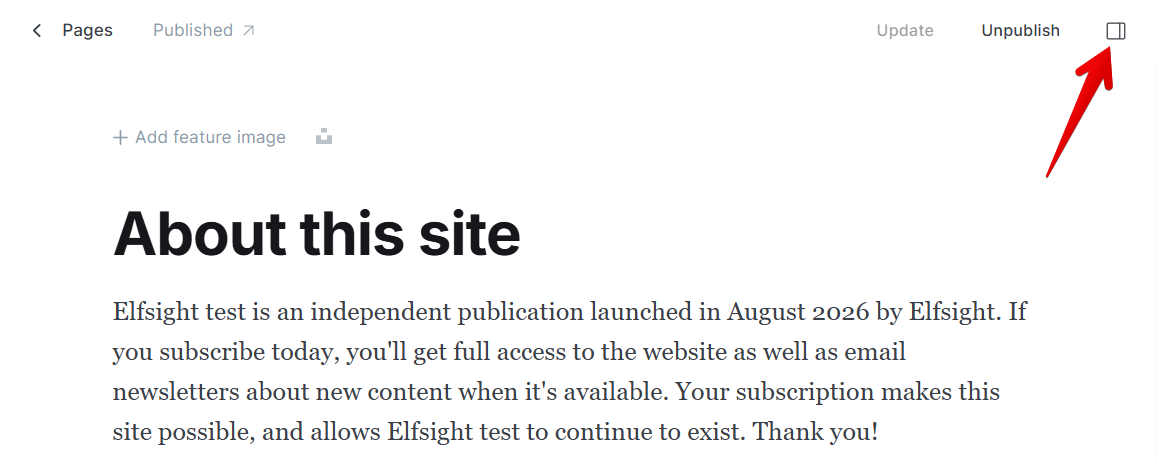
- 3
-
Open the Code Injection section:
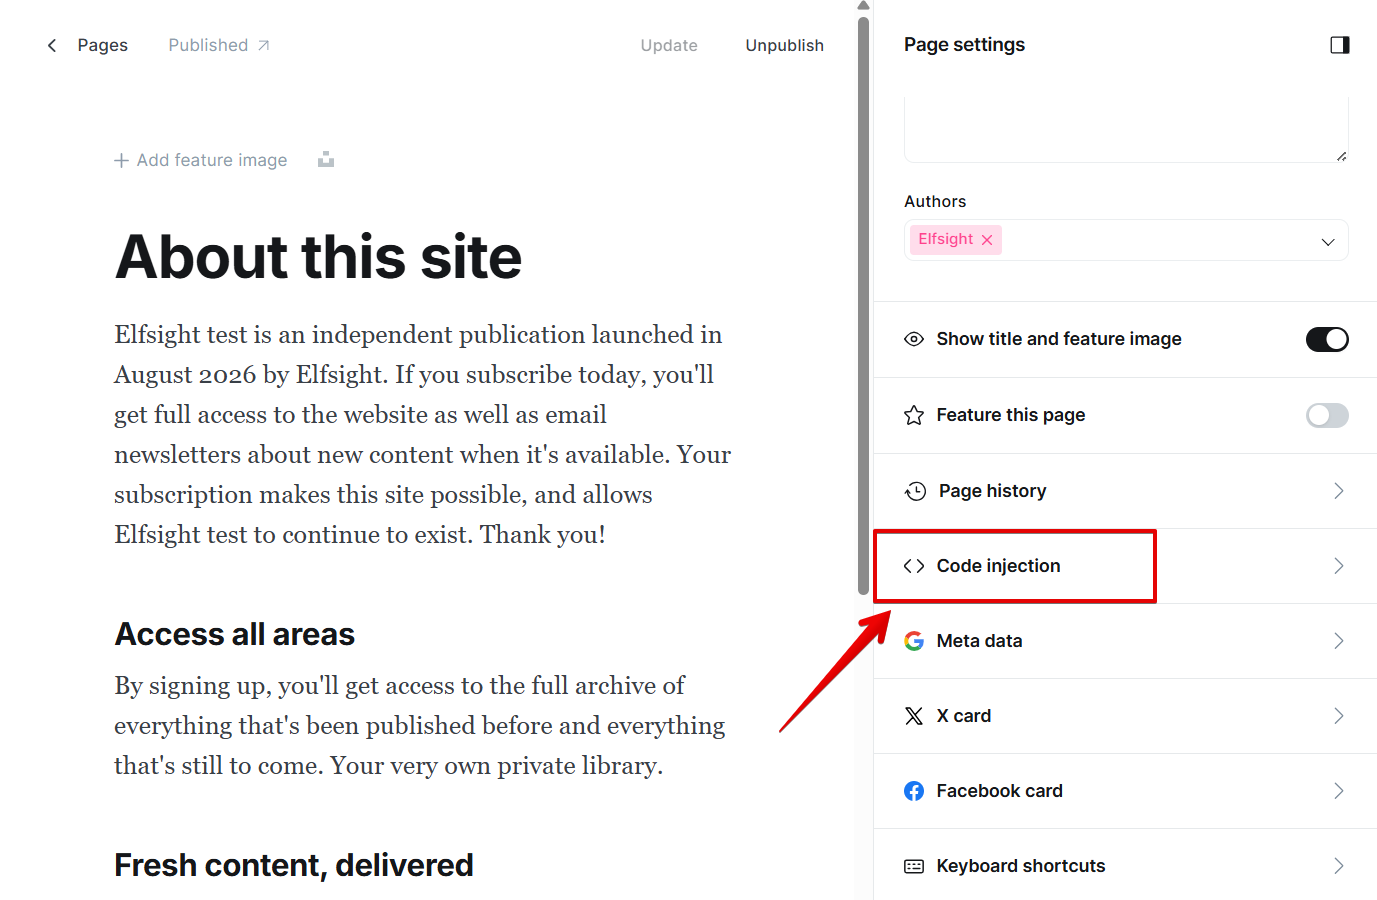
- 4
-
Paste your widget installation code into the Page footer field:
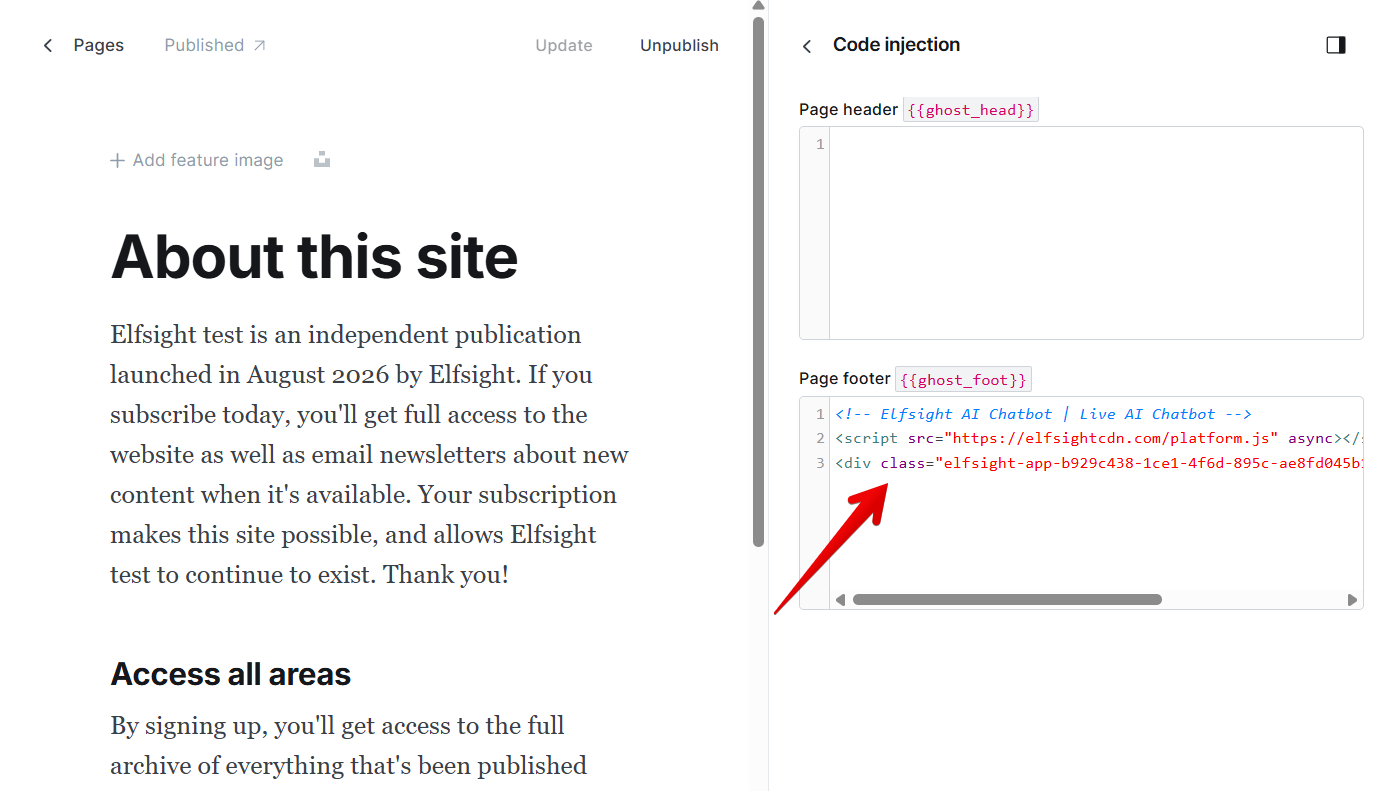
That’s it! Your floating widget will appear on the live page automatically.
Add a floating widget to all pages
- 1
-
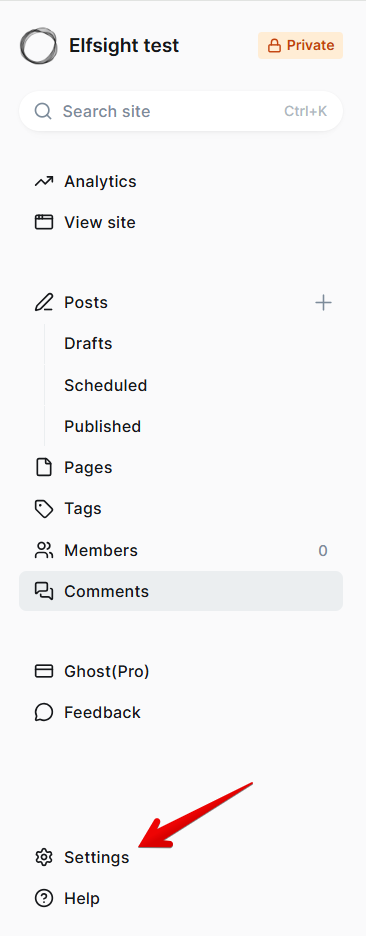
In your Ghost admin panel, go to Settings:
- 2
-
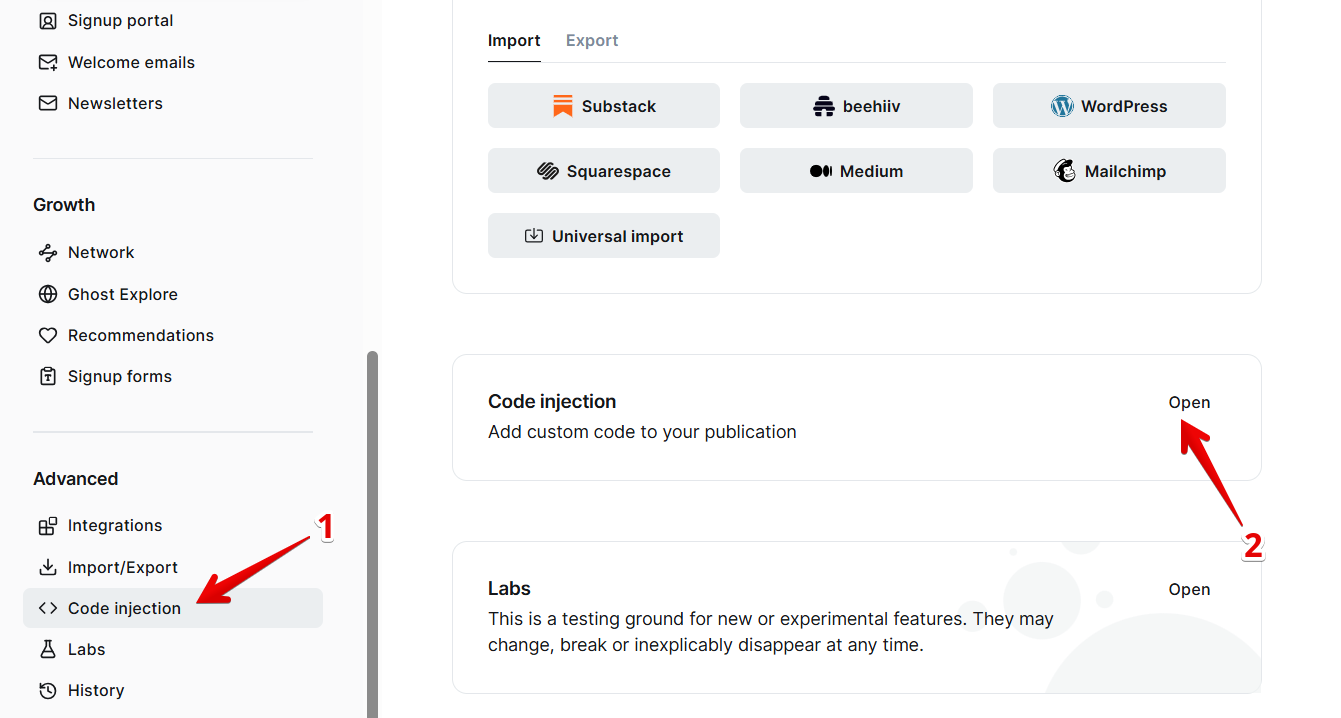
Under Advanced, find Code Injection and click Open:
- 3
-
Switch to the Site footer tab, paste your widget code, and click Save:
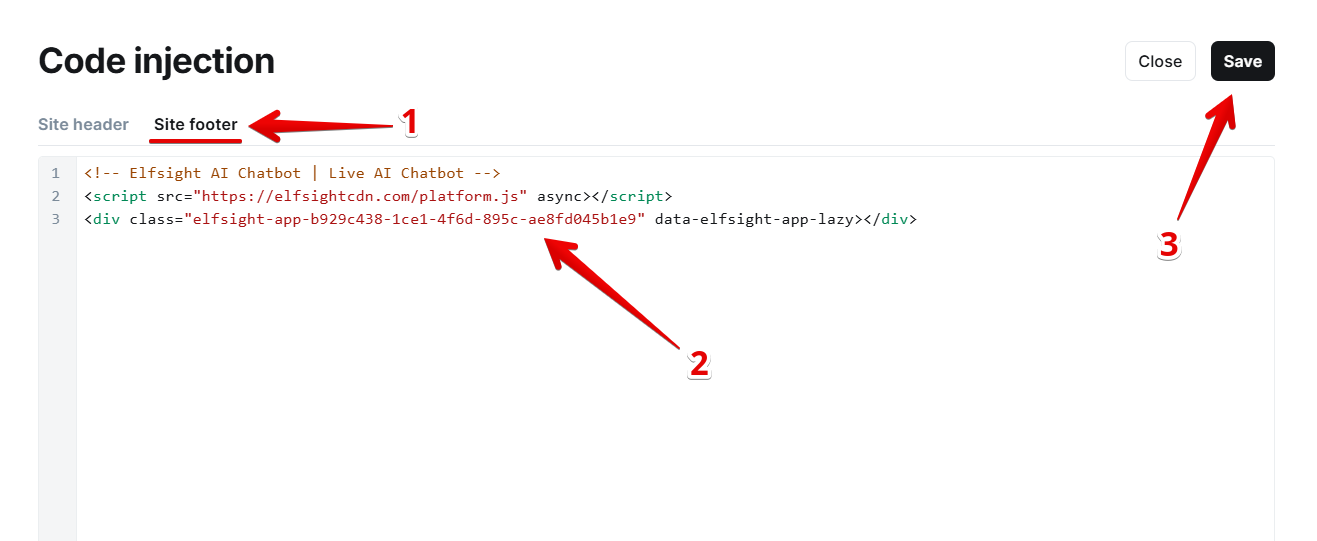
Great! You have successfully added a floating widget to all pages of your Ghost website.
Stuck with installation? Let us help! 🙌 Send us a quick request, and we’ll handle the setup for you.