Adding Elfsight Widget to Podia Website
Looking for instructions on how to add your Elfsight widget to your Podia website? Follow this simple guide for seamless integration. Let's get started! 🚀
Choose how to install your widget
Add a Static Widget to a Specific Page
To embed a widget on a specific page of your Podia site, use the widget’s Share Link and follow the steps below.
- 1
-
In your Elfsight dashboard, find the widget you want to add and click Install:

Switch to the Share Link tab and click Copy Link:

Some widgets don’t include a ready Share Link. In this case, you can create one manually — it won't display directly when clicked but will still work on your website. For details, see Widgets without Share Link. - 2
-
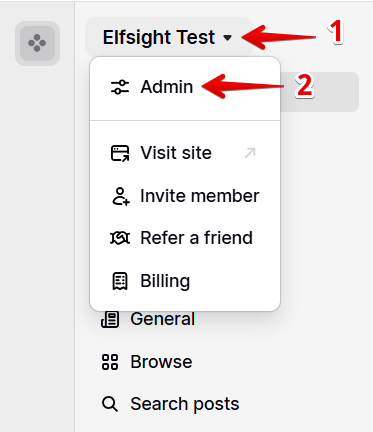
In your Podia dashboard, click on your workspace and select Admin:
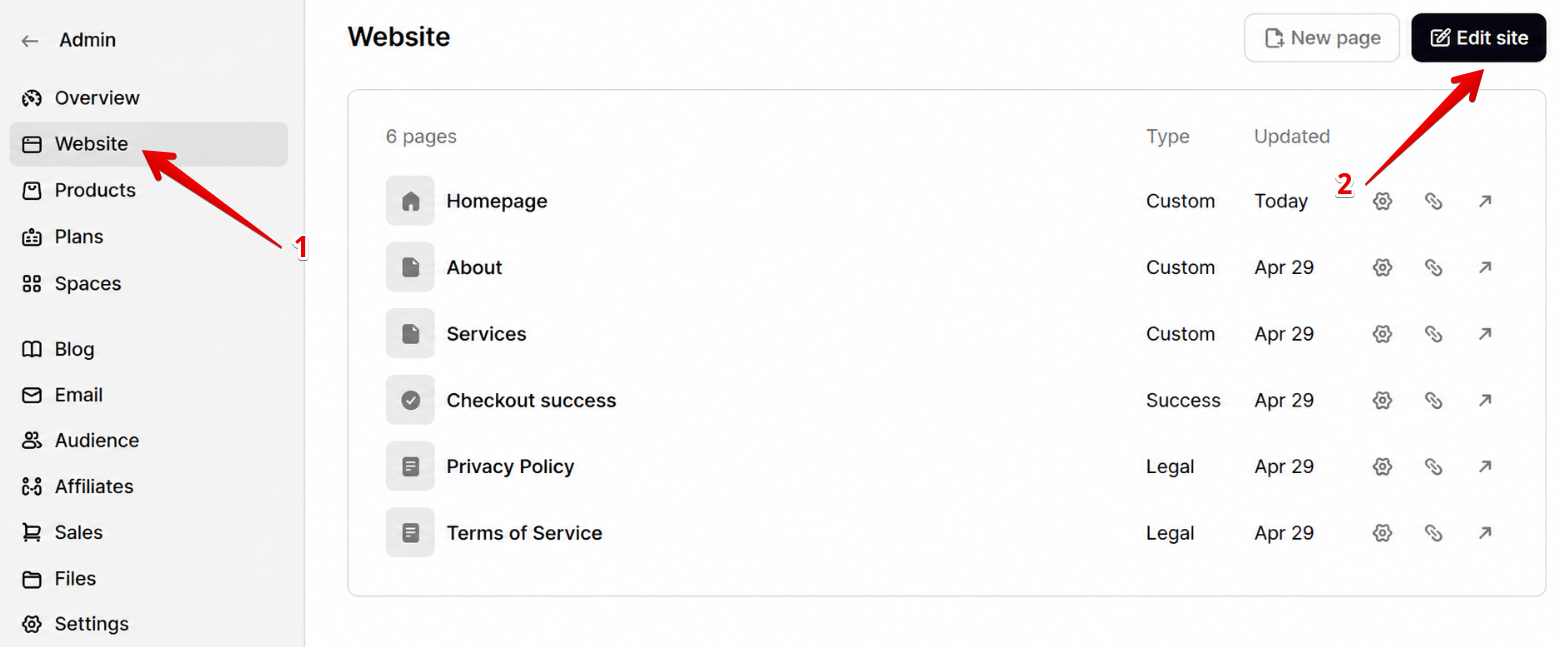
Click Website → Edit site:
- 3
-
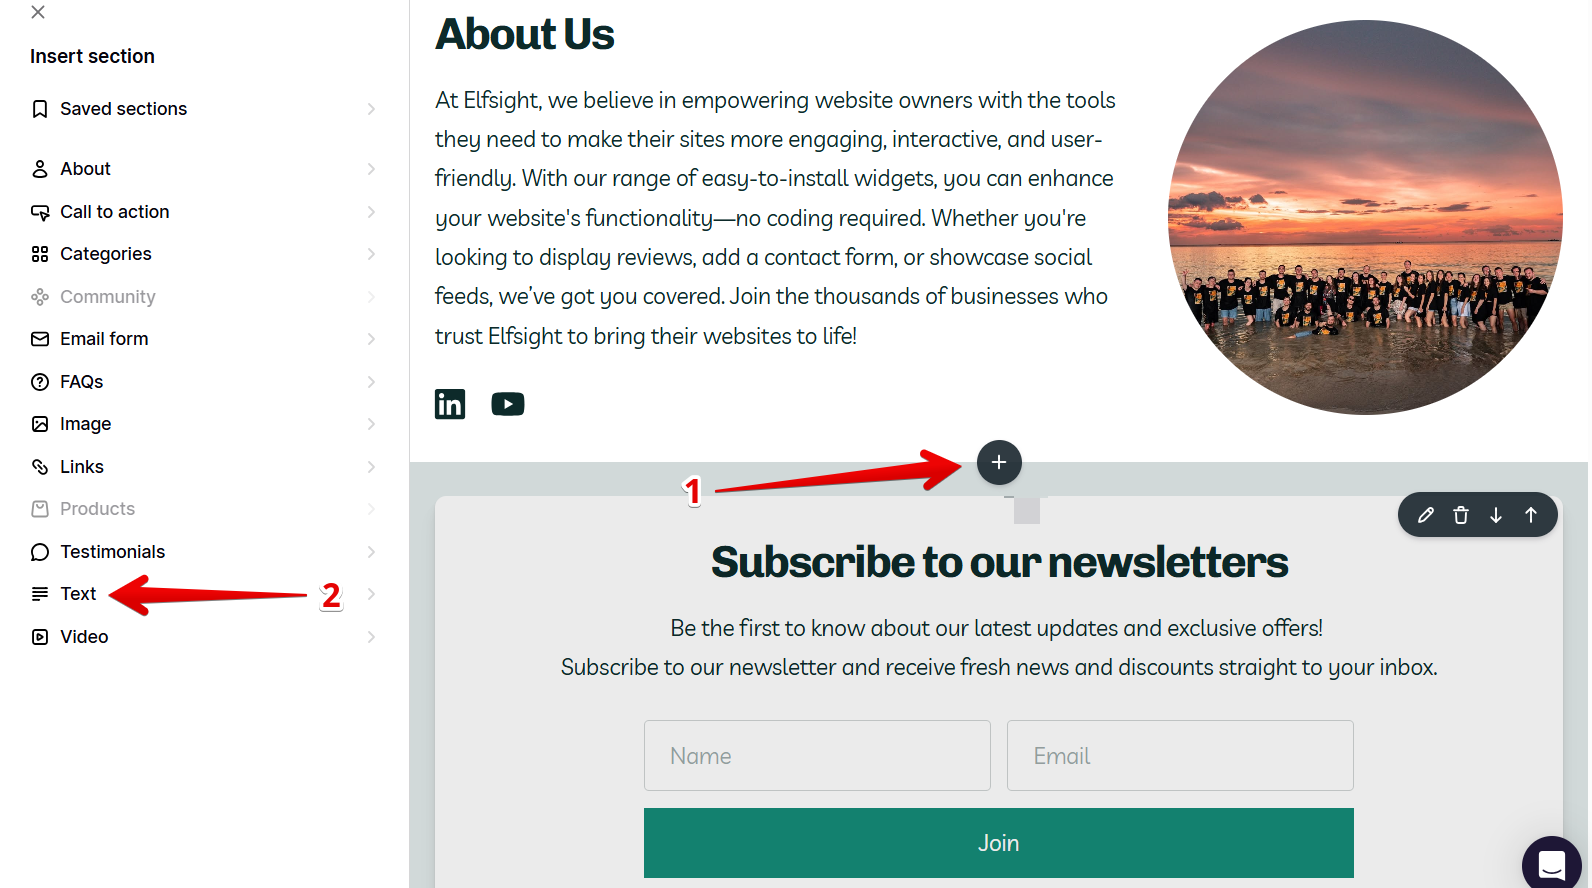
In the website editor, find the place for the widget, click the ➕ icon, and select Text :
- 4
-
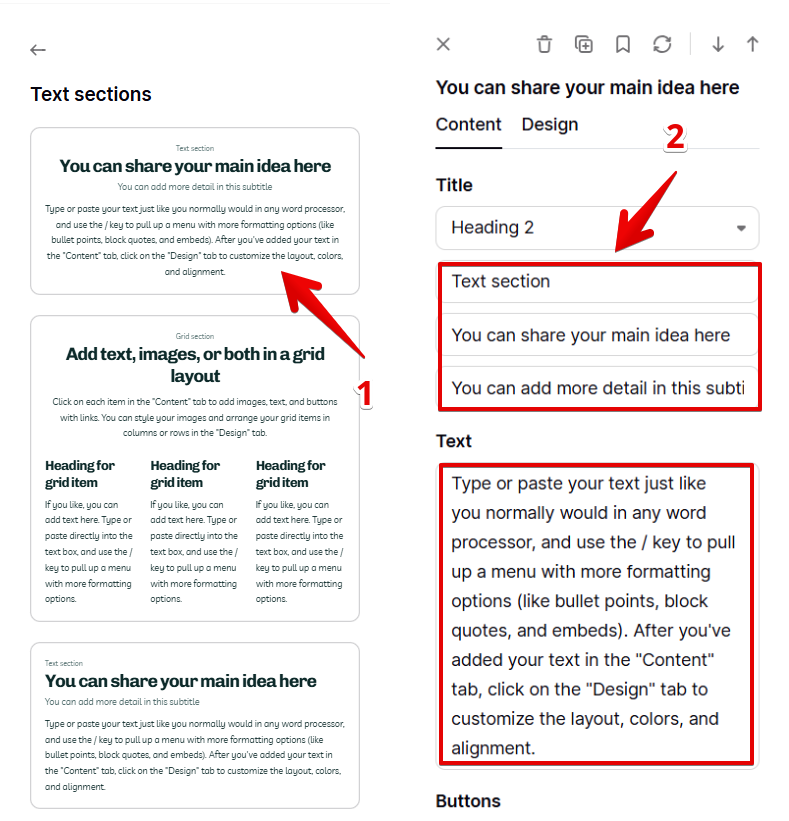
Choose the first text layout and remove the placeholder texts:
- 5
-
Click the Embed button in the Text field:
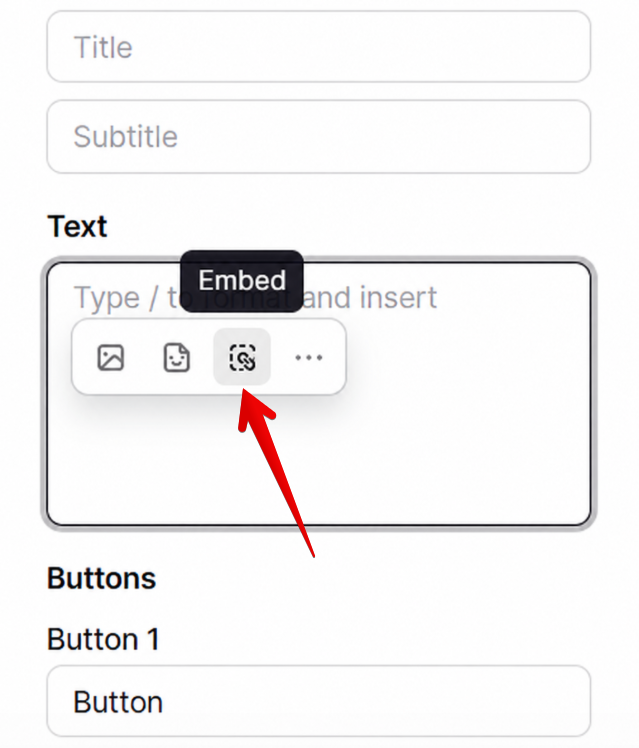
Add the widget's Share Link you copied and click Insert:

The widget may not appear in the editor immediately, but it will be visible on the live website. - 6
-
Click Publish in the top-right corner to apply the changes:
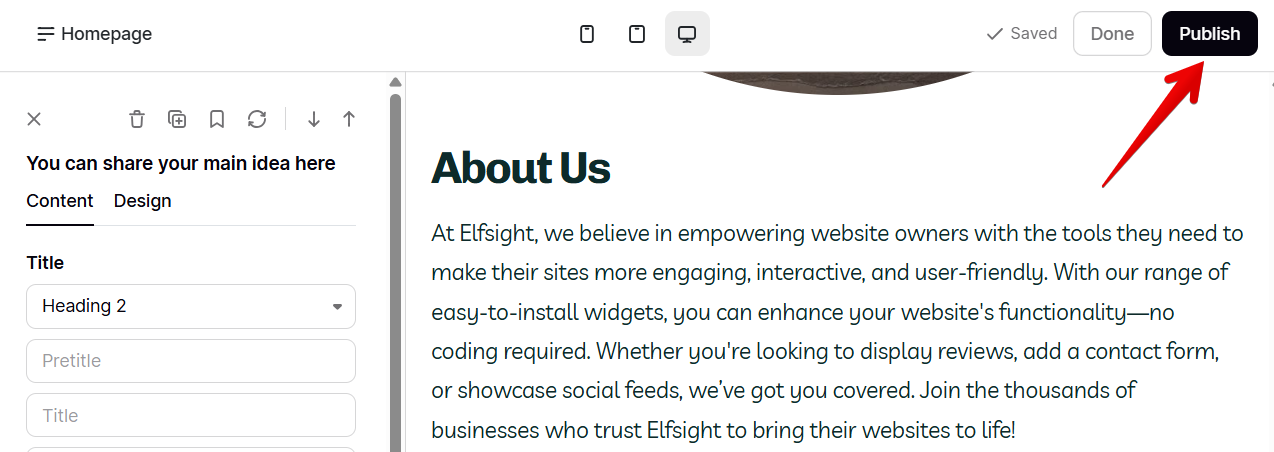


Great! You've successfully added the static widget to a specific page of your Podia website.
Add a Floating Widget to a Specific Page
To display a floating widget on specific pages only, you’ll need to add a custom installation script.
- 1
-
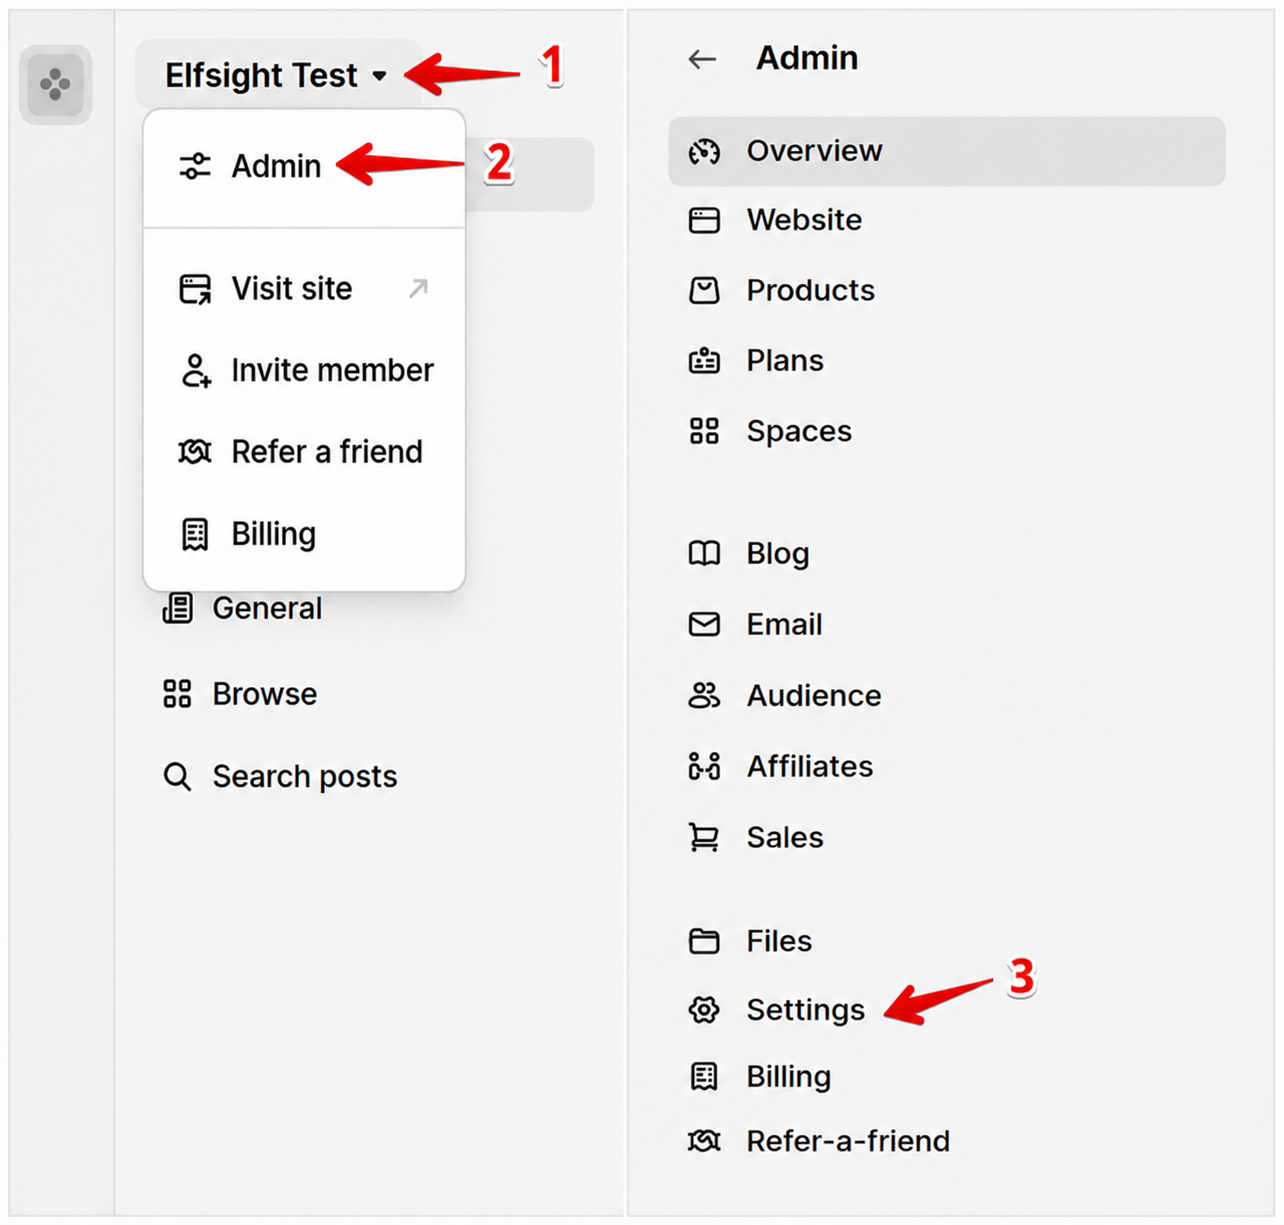
In your Podia dashboard, click on your workspace → Admin → Settings:
- 2
-
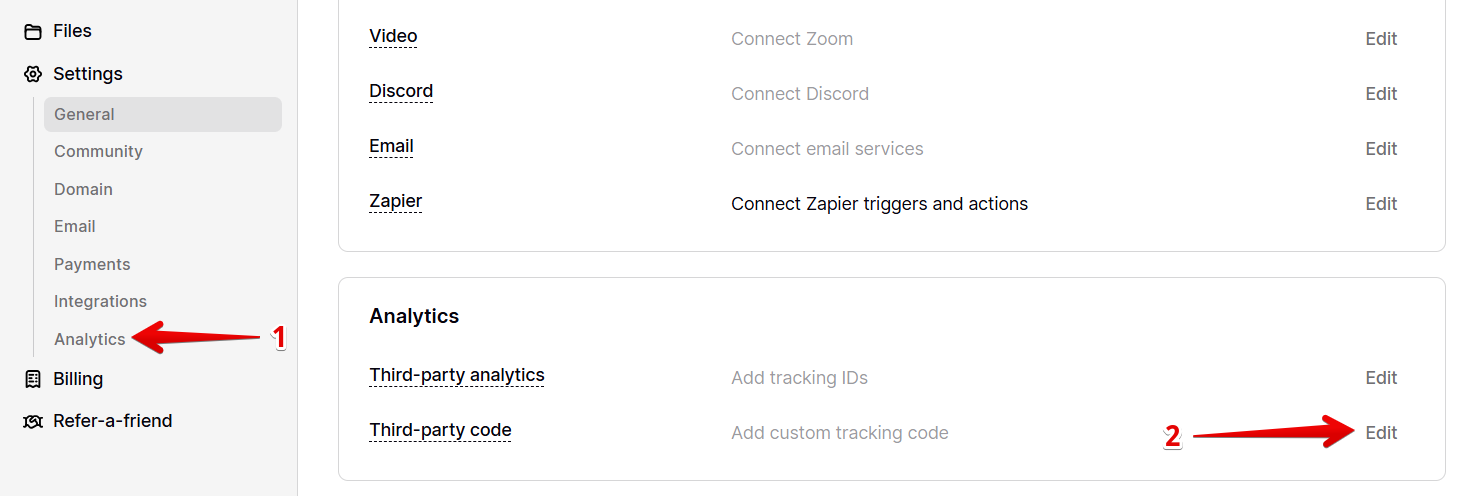
Select Analytics in the dropdown and click Edit next to Third-party code:
- 3
-
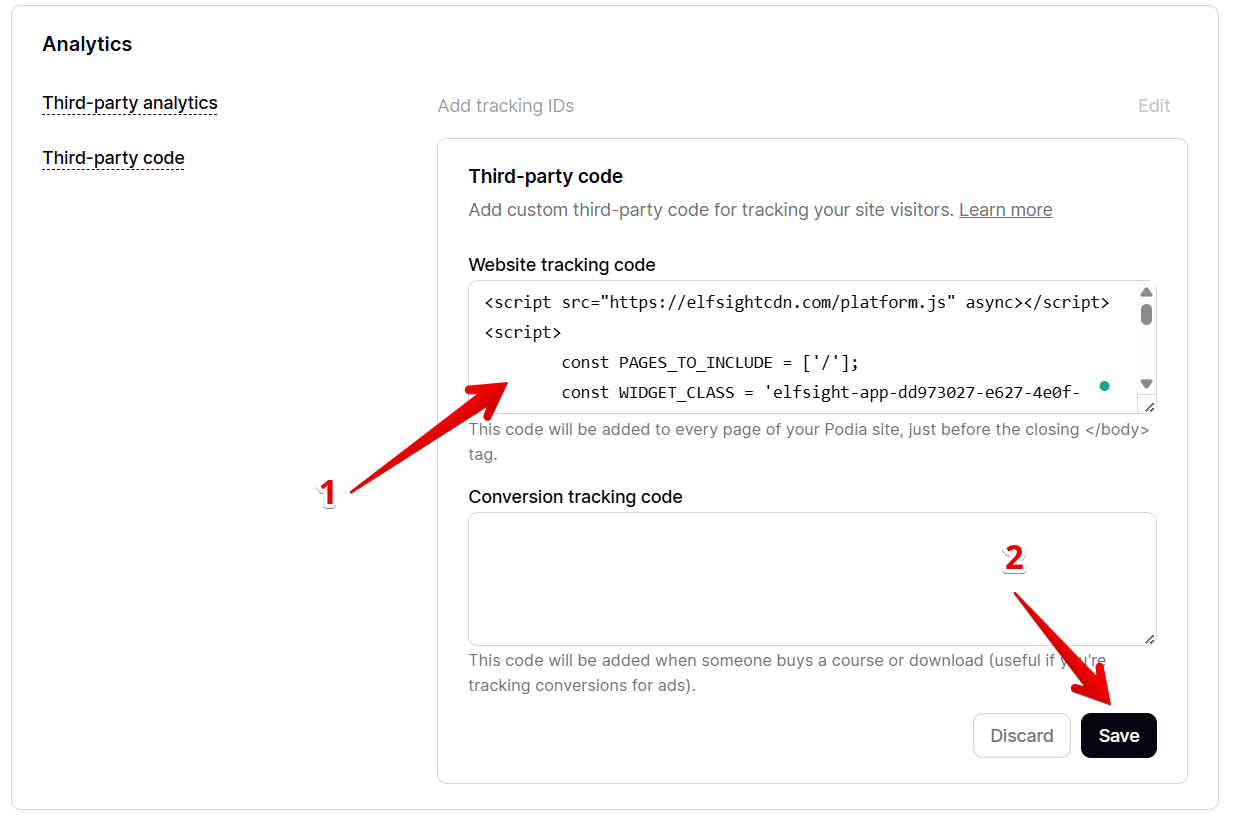
Create your custom installation script using this template:
<script src="https://elfsightcdn.com/platform.js" async></script>
<script>
	const PAGES_TO_INCLUDE = ['/', '/about'];
	const WIDGET_CLASS = 'elfsight-app-WIDGET_ID';

	const normalize = (url) => (url === '/' ? '/' : url.replace(/\/+$/, ''));
	const checkPage = (url) =>
		PAGES_TO_INCLUDE.some((path) => normalize(path) === normalize(url));

	window.addEventListener('DOMContentLoaded', () => {
		if (checkPage(window.location.pathname)) {
			const widget = document.createElement('div');
			widget.classList.add(WIDGET_CLASS);
			document.body.append(widget);
		}
	});
</script>
Update the script before adding it:
- In PAGES_TO_INCLUDE, specify the page paths where the widget should appear. For example:
['/', '/about', '/reviews']. The'/'path represents the Home page. - Replace WIDGET_ID with your actual widget ID. Here’s how to find it: Where to get your widget ID .
Here’s an example of a completed script that displays the widget on the Home page only:
<script src="https://elfsightcdn.com/platform.js" async></script> <script> const PAGES_TO_INCLUDE = ['/']; const WIDGET_CLASS = 'elfsight-app-dd973027-e627-4e0f-aea3-0ab5dfadf4b9'; const normalize = (url) => (url === '/' ? '/' : url.replace(/\/+$/, '')); const checkPage = (url) => PAGES_TO_INCLUDE.some((path) => normalize(path) === normalize(url)); window.addEventListener('DOMContentLoaded', () => { if (checkPage(window.location.pathname)) { const widget = document.createElement('div'); widget.classList.add(WIDGET_CLASS); document.body.append(widget); } }); </script> - In PAGES_TO_INCLUDE, specify the page paths where the widget should appear. For example:
- 4
-
Paste your installation script into the Website tracking code field and click Save:
Padding below the footer may appear in the website editor. Don't worry — it won't be visible for your visitors on the live website.
Fantastic! You've successfully added a floating widget to a specific page of your Podia website.
Add a Floating Widget to All Pages
Use the standard widget installation code for this setup: Where to get Elfsight widget installation code.
- 1
-
In your Podia dashboard, click on your workspace → Admin → Settings:
- 2
-
Select Analytics in the dropdown and click Edit next to Third-party code:
- 3
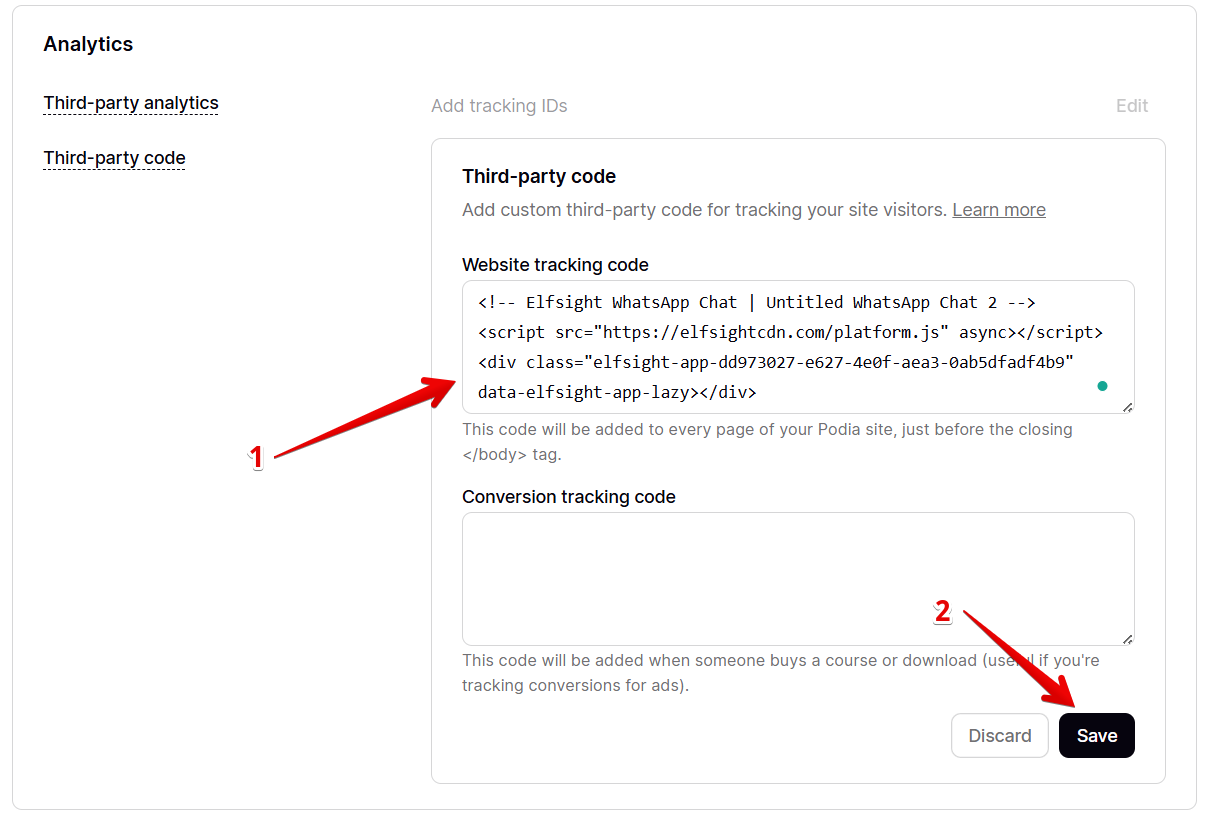
-
Paste your widget installation code into the Website tracking code field and click Save:
Padding below the footer may appear in the website editor. Don't worry — it won't be visible for your visitors on the live website.

That's it! You've successfully added a floating widget to all pages of your Podia website!
Stuck with installation? Let us help! 🙌 Send us a quick request, and we’ll handle the setup for you.