Tracking Events with Google Tag Manager
Elfsight widgets can send interaction events, such as clicks, messages, and form submissions, to Google Analytics. If you’re using Google Tag Manager, you can capture these events and send them to GA4 for tracking. Let’s see how to set it up! 🚀
In this article
Important Notes Before You Begin
📊 Built-in Google Analytics Support
Built-in Google Analytics events are currently available in the following widgets:
AI Chatbot Chat Widgets Popup Click to Call Countdown Timer Spinning Wheel Website Translator Slider Audio Player Reviews Widgets Social Feed Forms
If you're using one of these, first check Setting Up Google Analytics Events in Your Widget.
If your widget isn’t on the list, contact Support for a custom solution.
🔄 Using GA4 and GTM Together
If your website has both the GA4 script and Google Tag Manager installed, follow this guide instead: Tracking Events in Google Analytics 4.
⚙️ Requirements
Make sure your widget and Google Tag Manager are installed on the same website, and your GTM container already includes a GA4 Configuration tag. For more details, see Set Up GA4 in Google Tag Manager.
Setting Up Event Tracking in GTM
When using Google Tag Manager, widget events aren’t sent automatically. In your GTM container, you need to create:
- A GA4 Event tag to send event data
- A Custom Event trigger to fire the tag
- 1
-
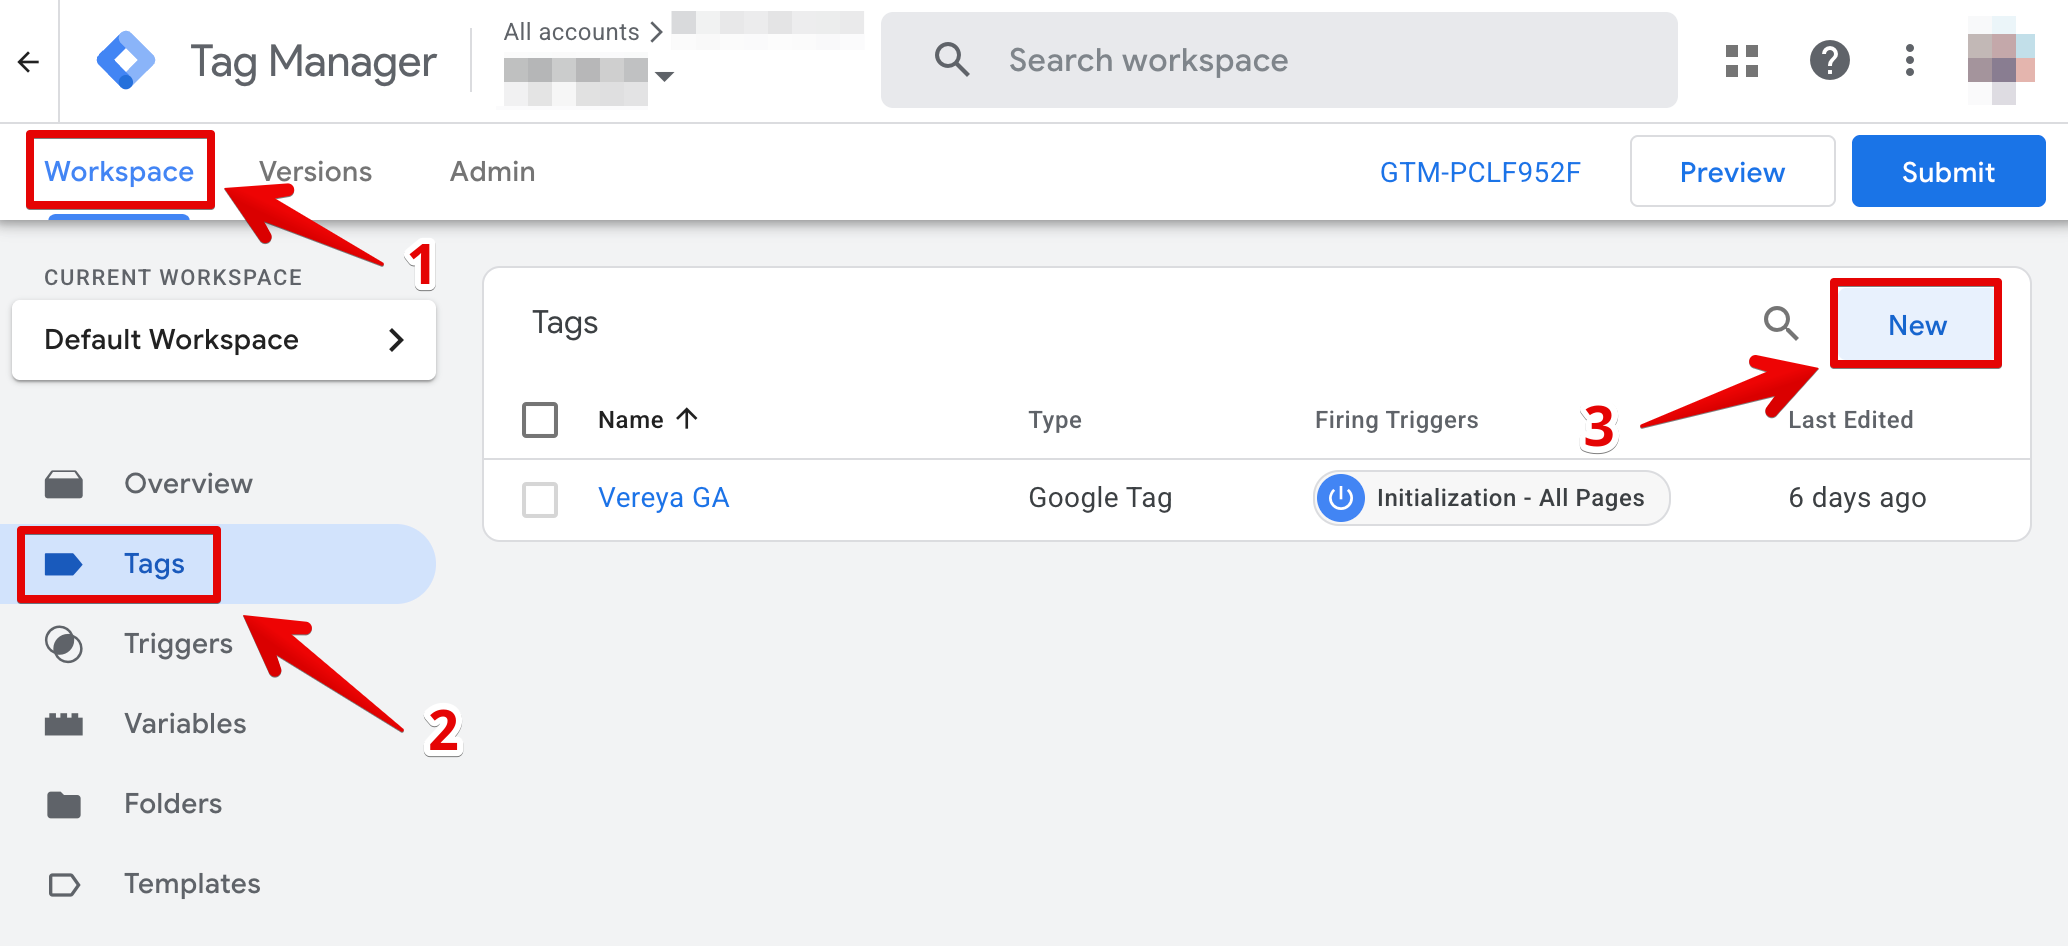
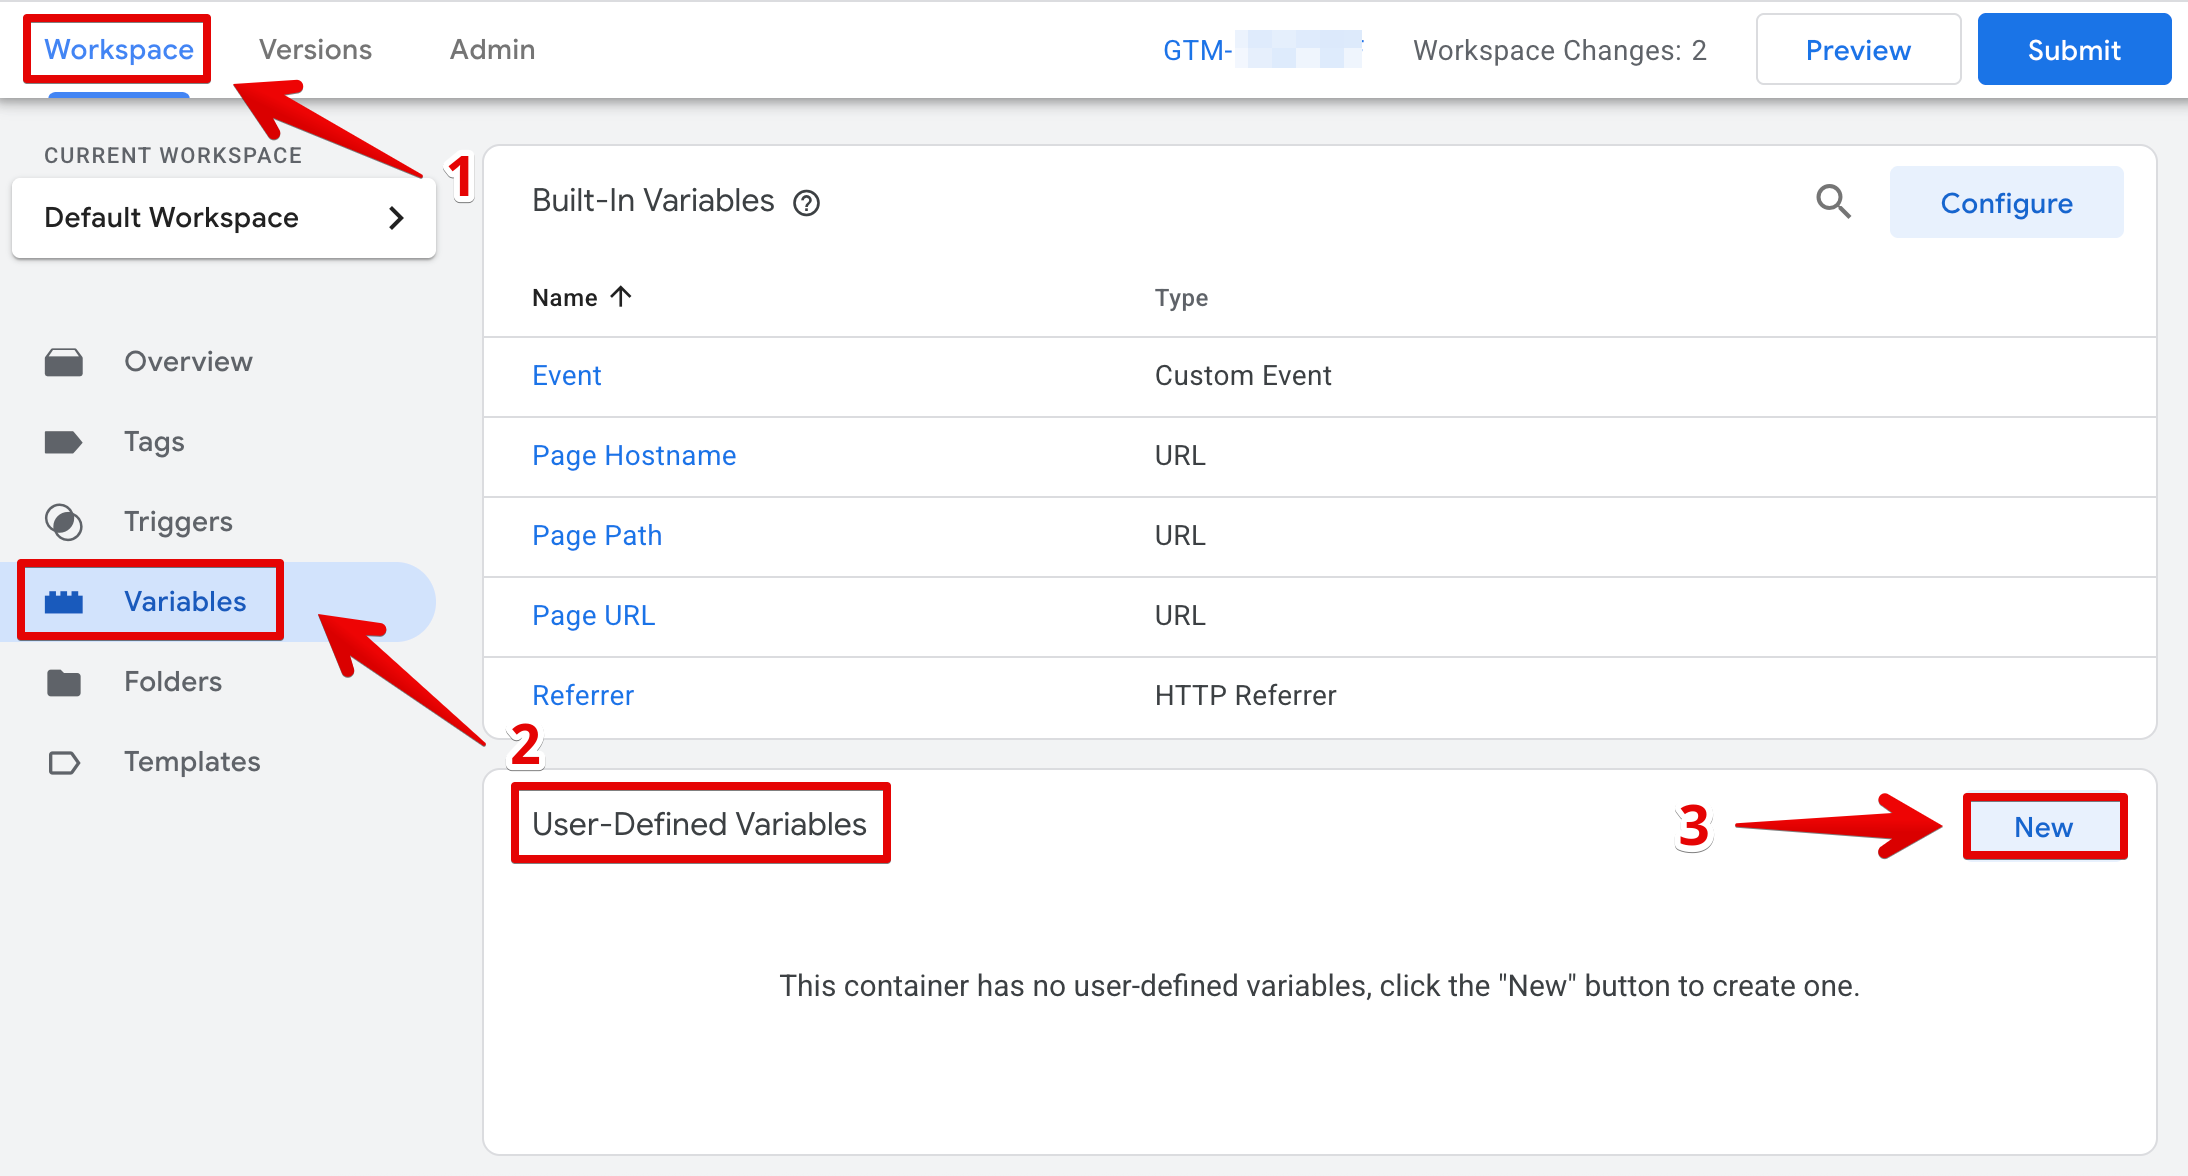
In Google Tag Manager, open your Workspace and go to Tags → New:
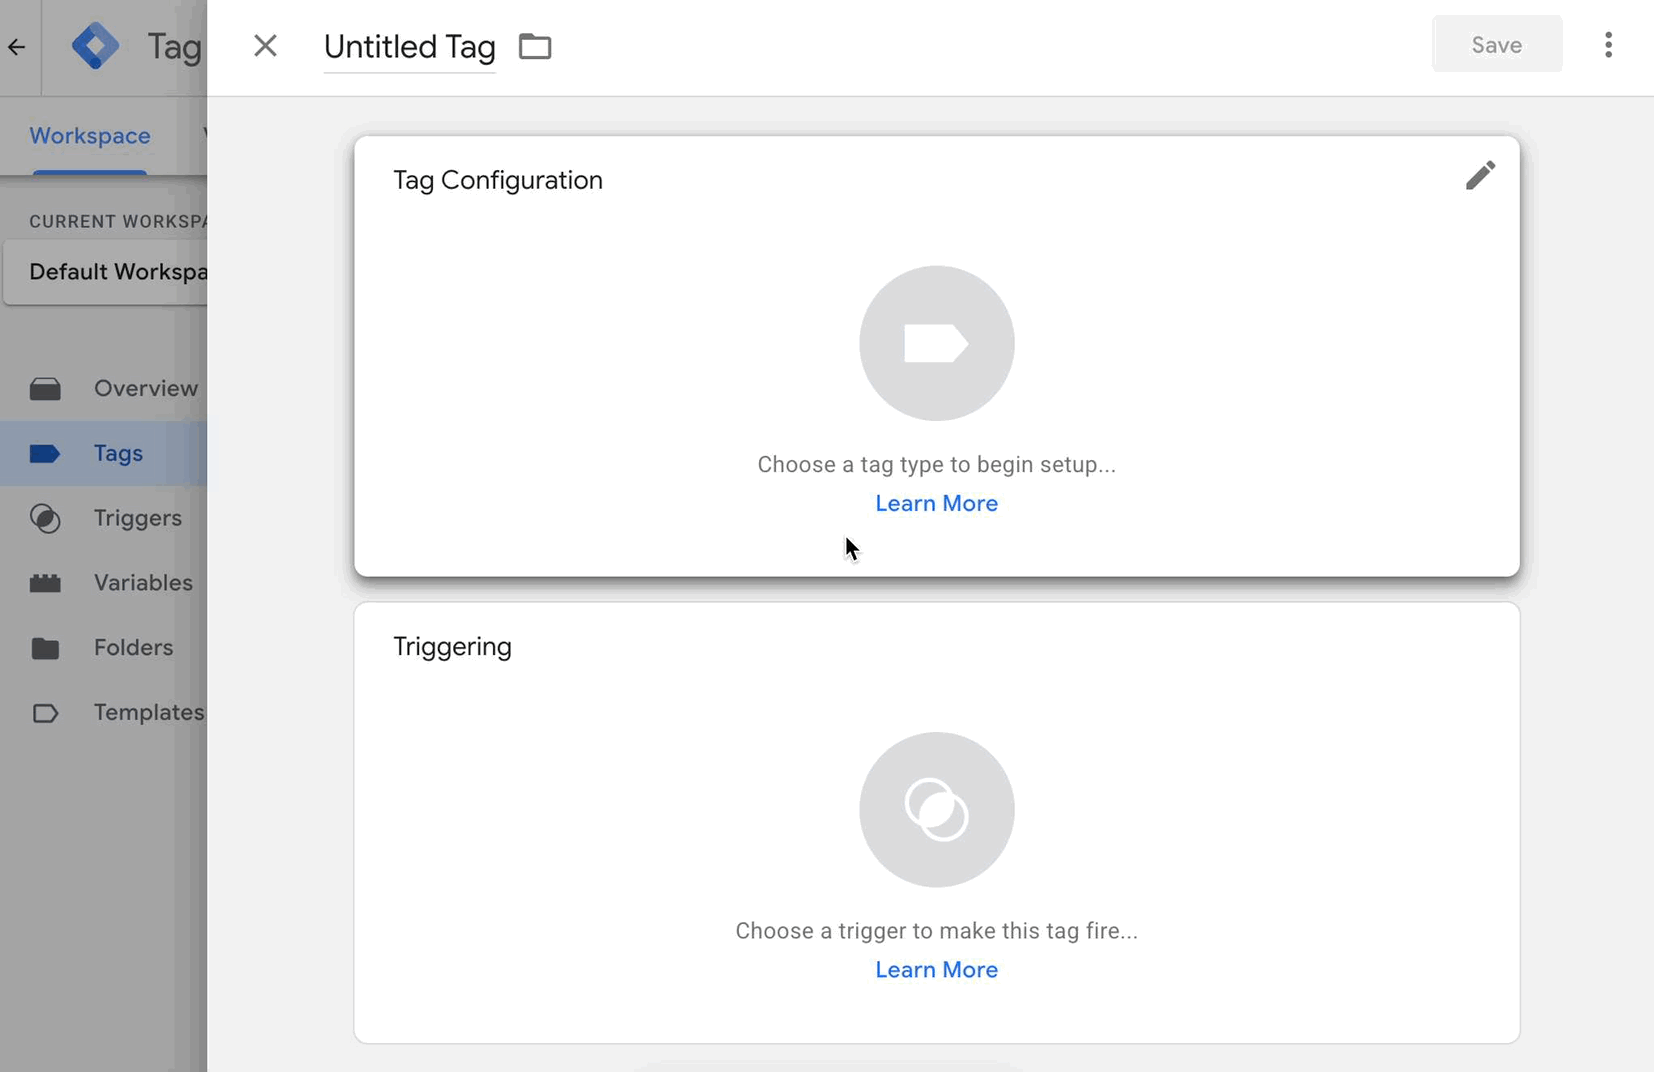
Click Tag Configuration, choose Google Analytics, and select Google Analytics: GA4 Event:
- 2
-
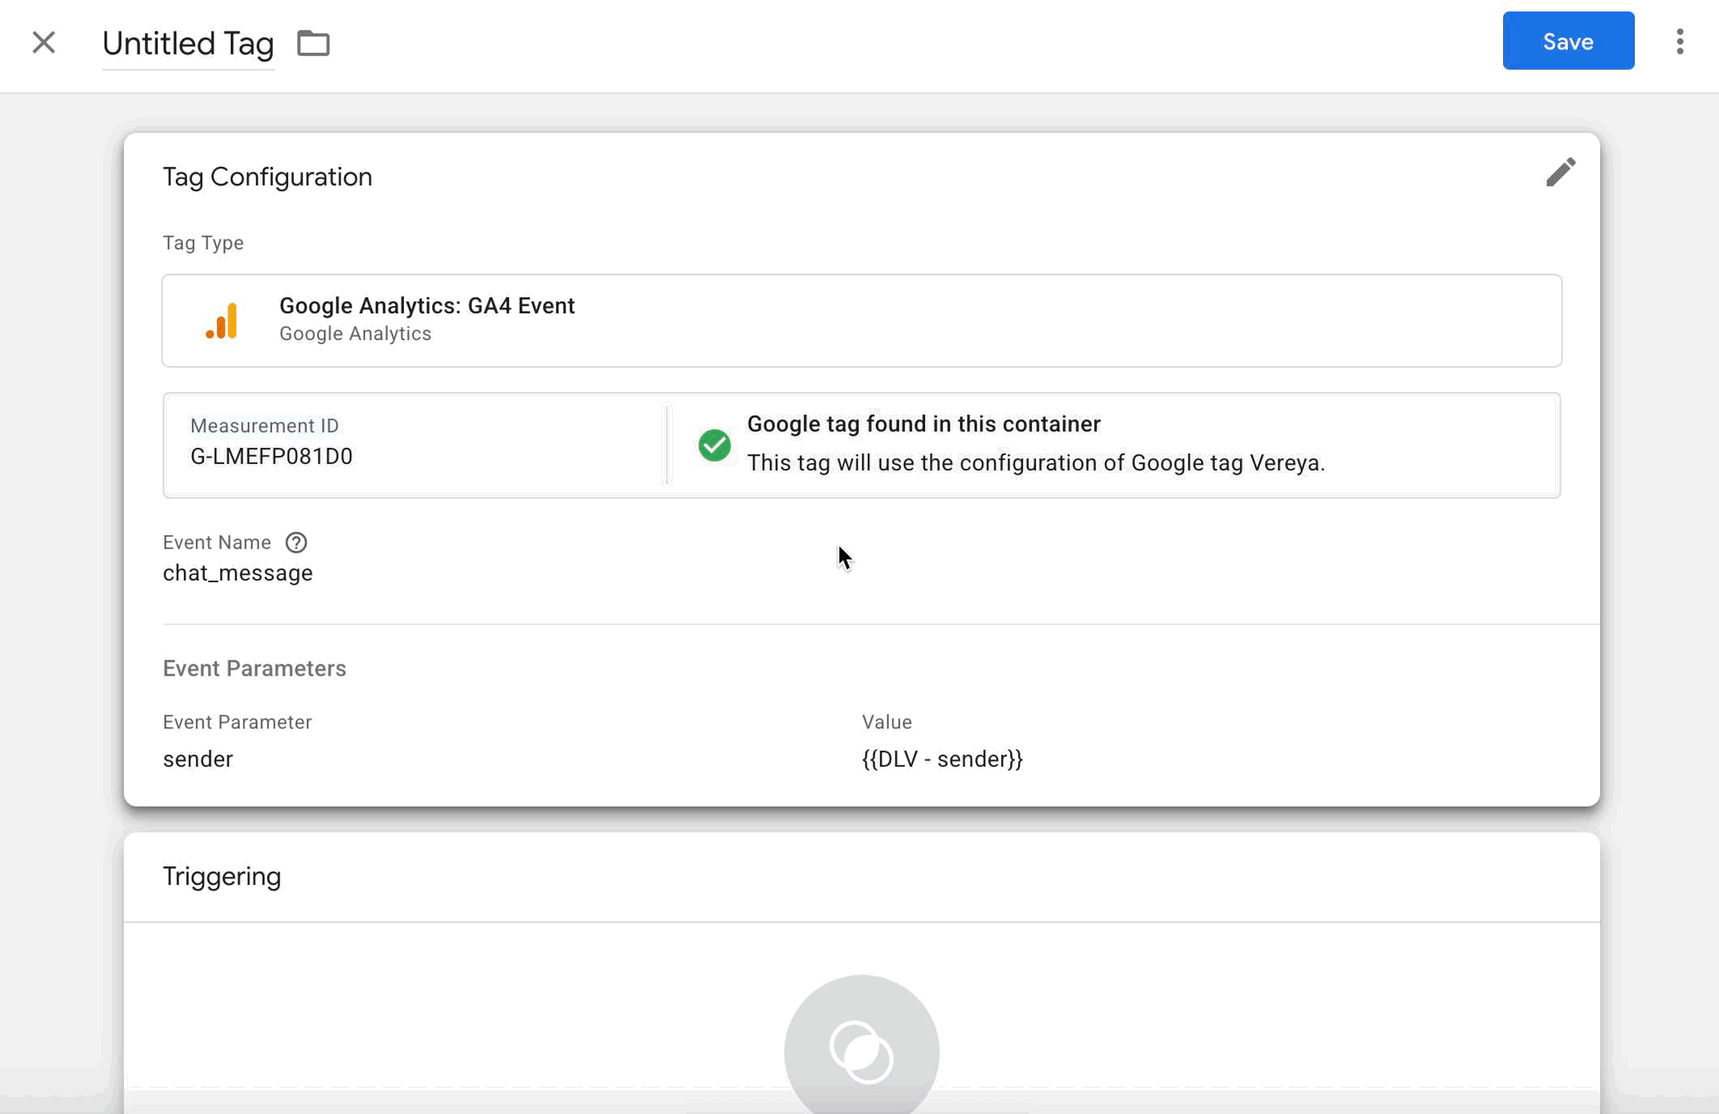
Enter your Measurement ID and set the Event Name:
- You can use any event name that works for your reports
- Or use
{{Event}}to pass the original event name dynamically
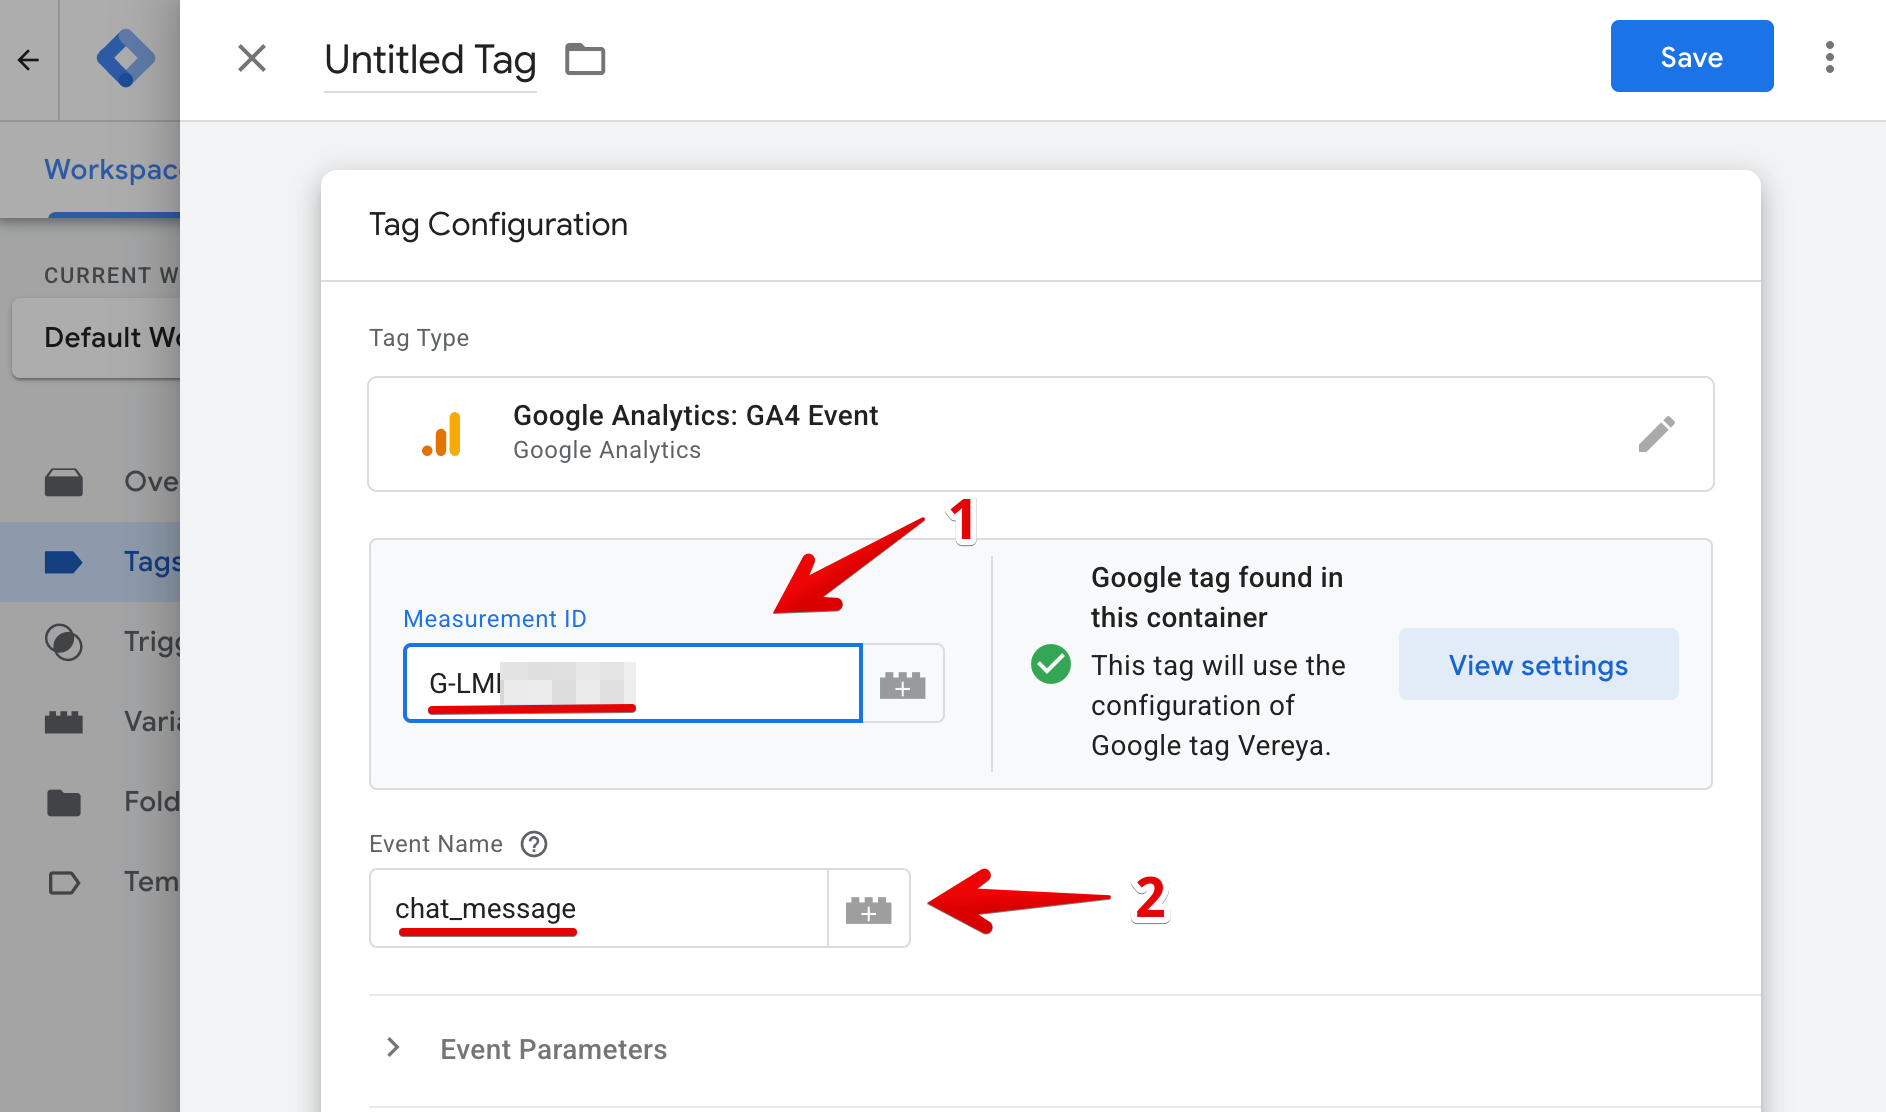
If you’re not sure where to find your Measurement ID, see: Find your GA4 Measurement ID. - 3
-
If you want to track event parameters, click Event Parameters → Add Parameter. Enter the parameter name and value exactly as defined in your widget:
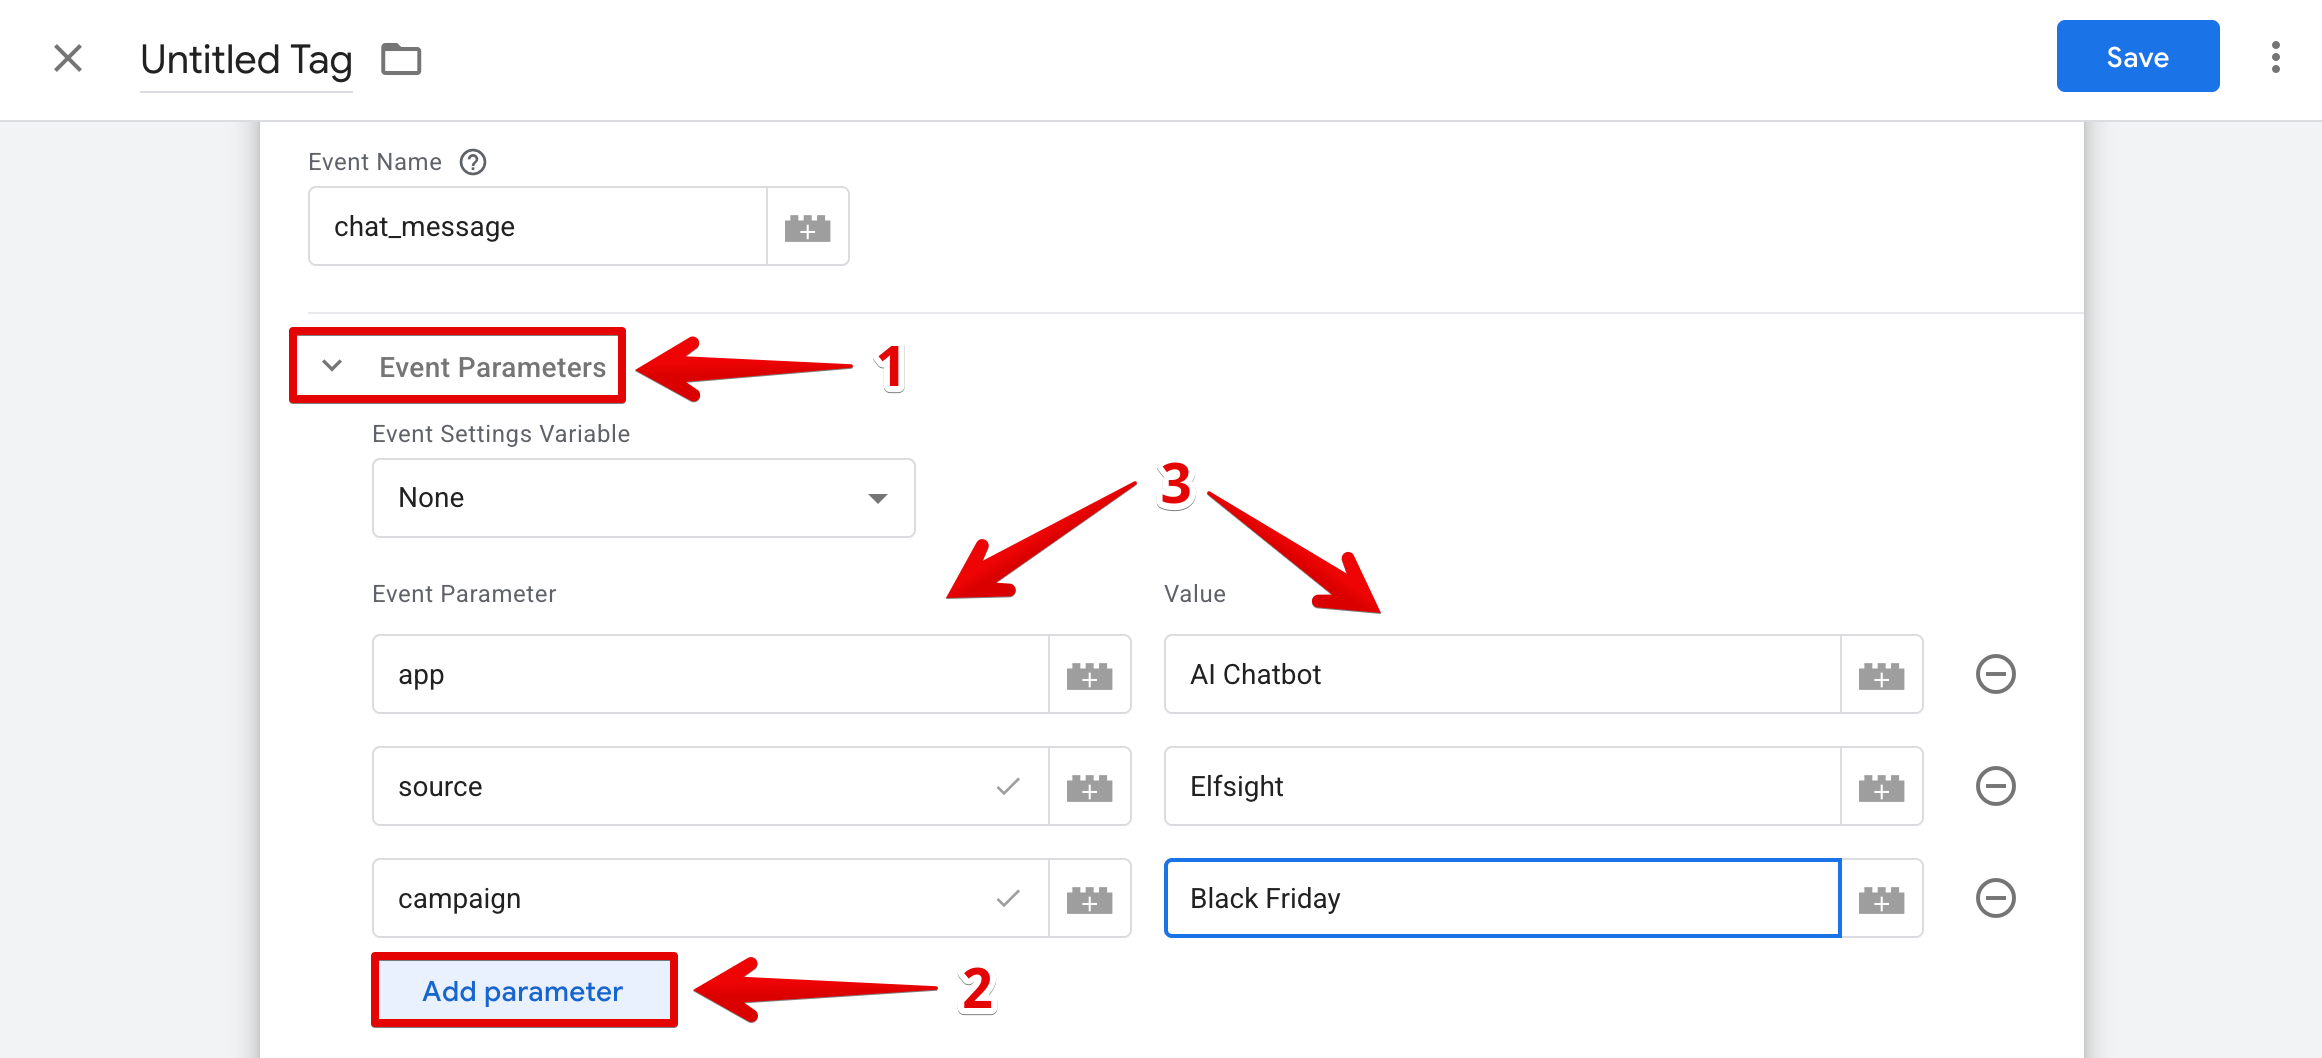
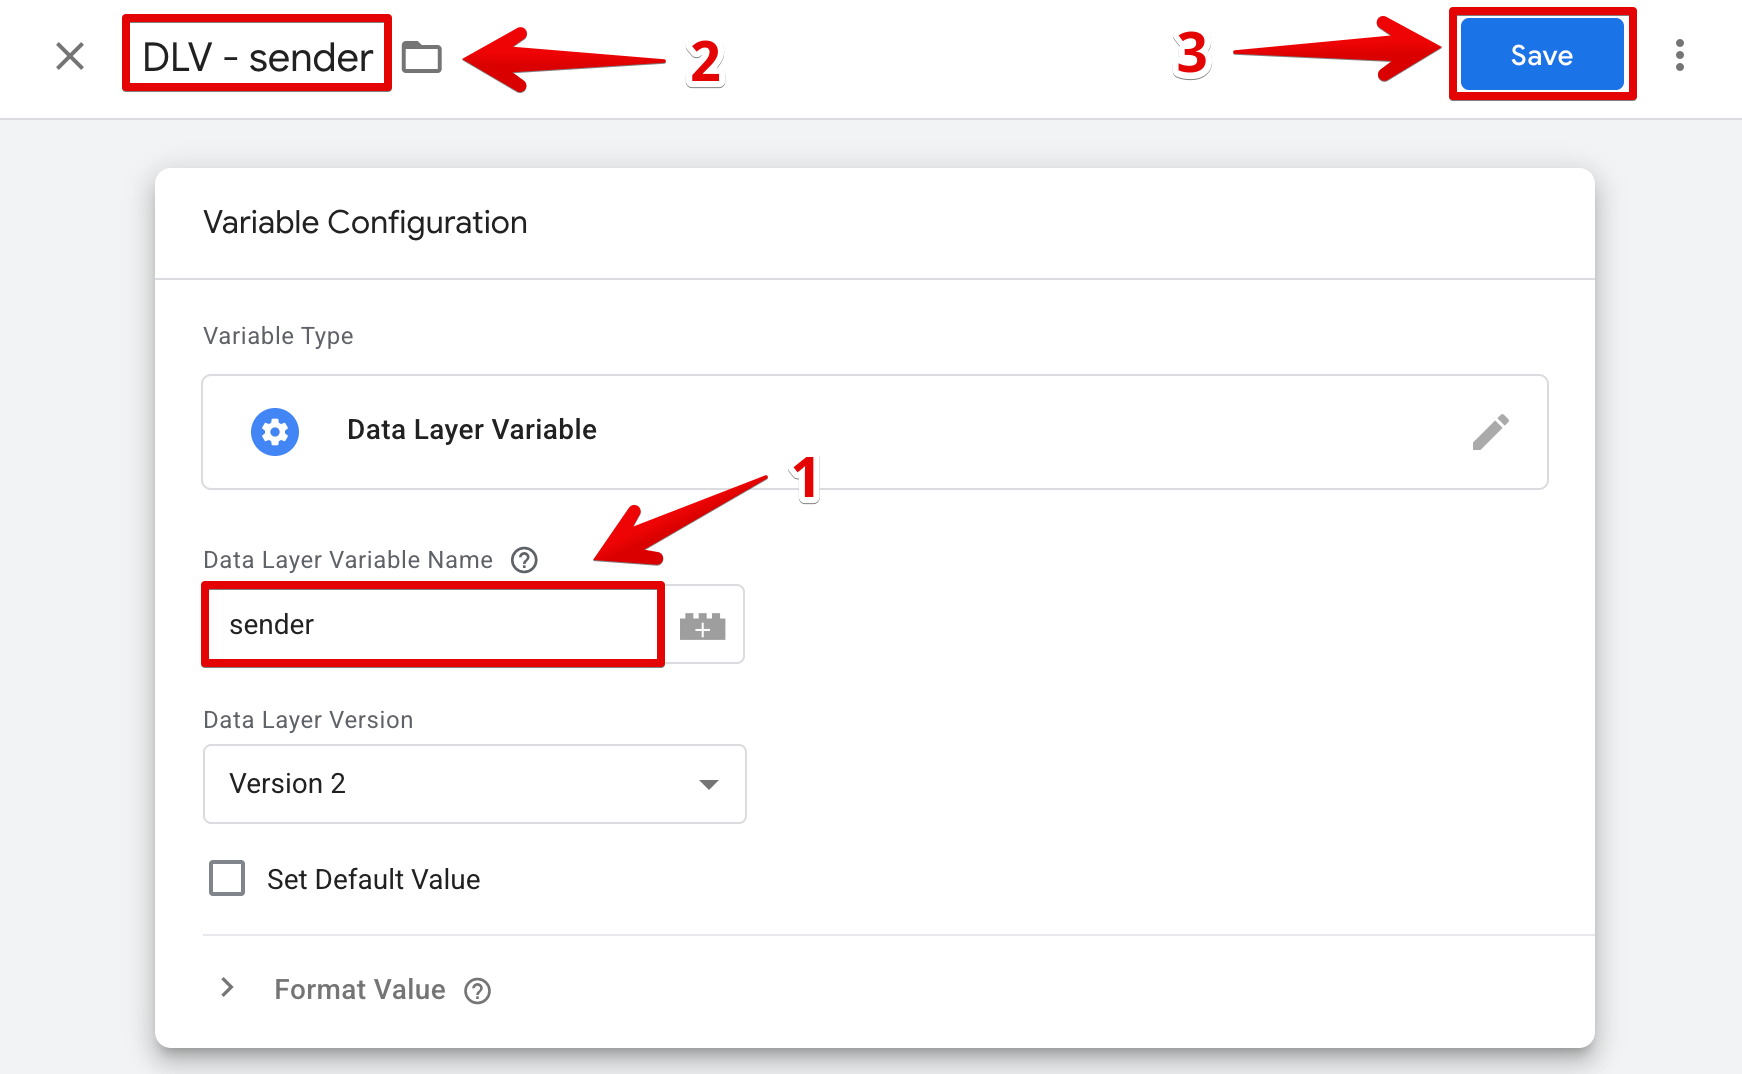
Some parameters have dynamic values. For example, in the AI Chatbot widget, the sender parameter in the chat_message event changes depending on who sends the message — user or agent.
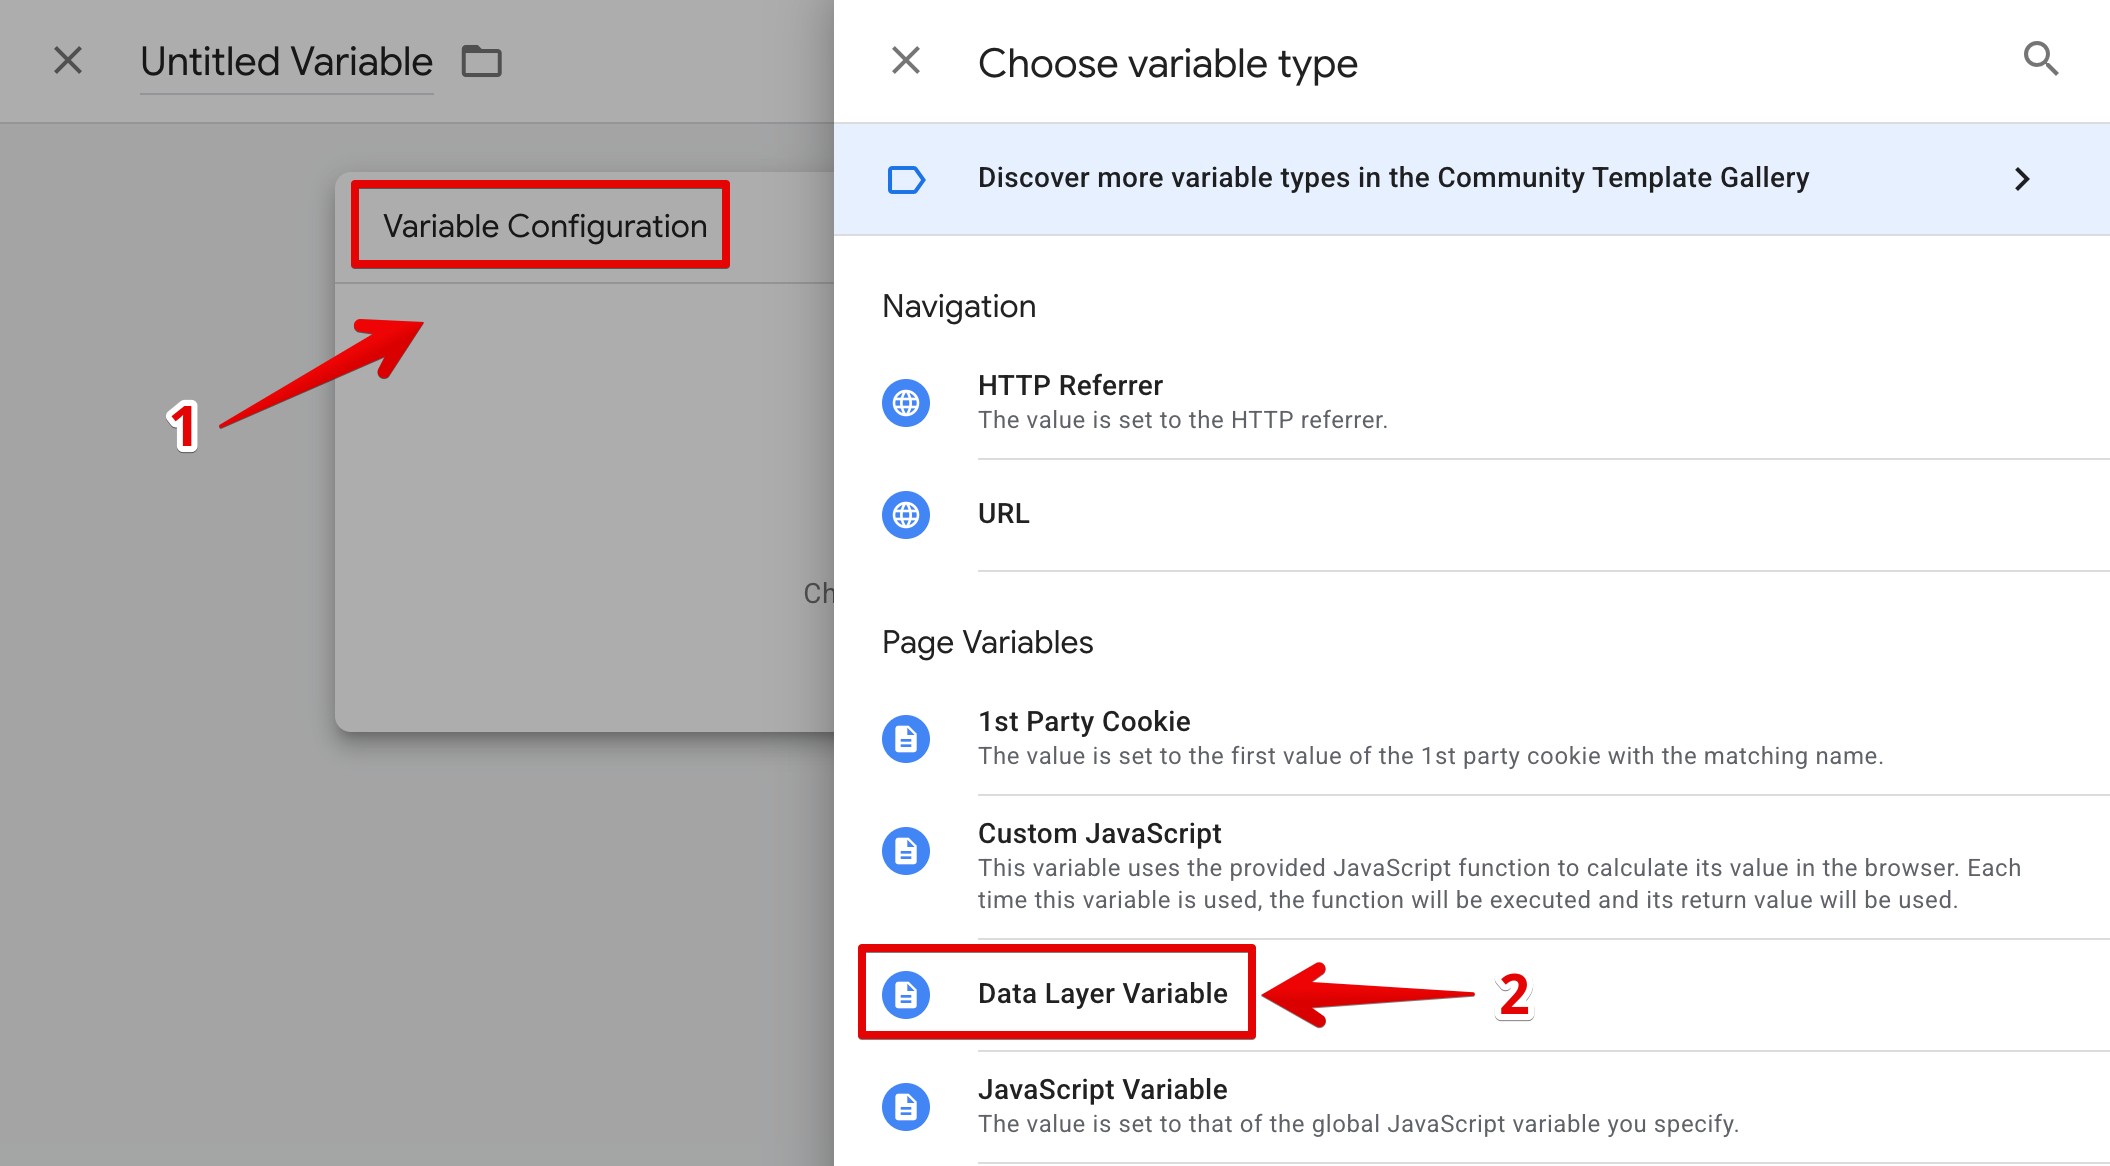
In this case, use a Data Layer Variable (e.g.{{DLV - sender}}) instead of a fixed value:
- 4
-
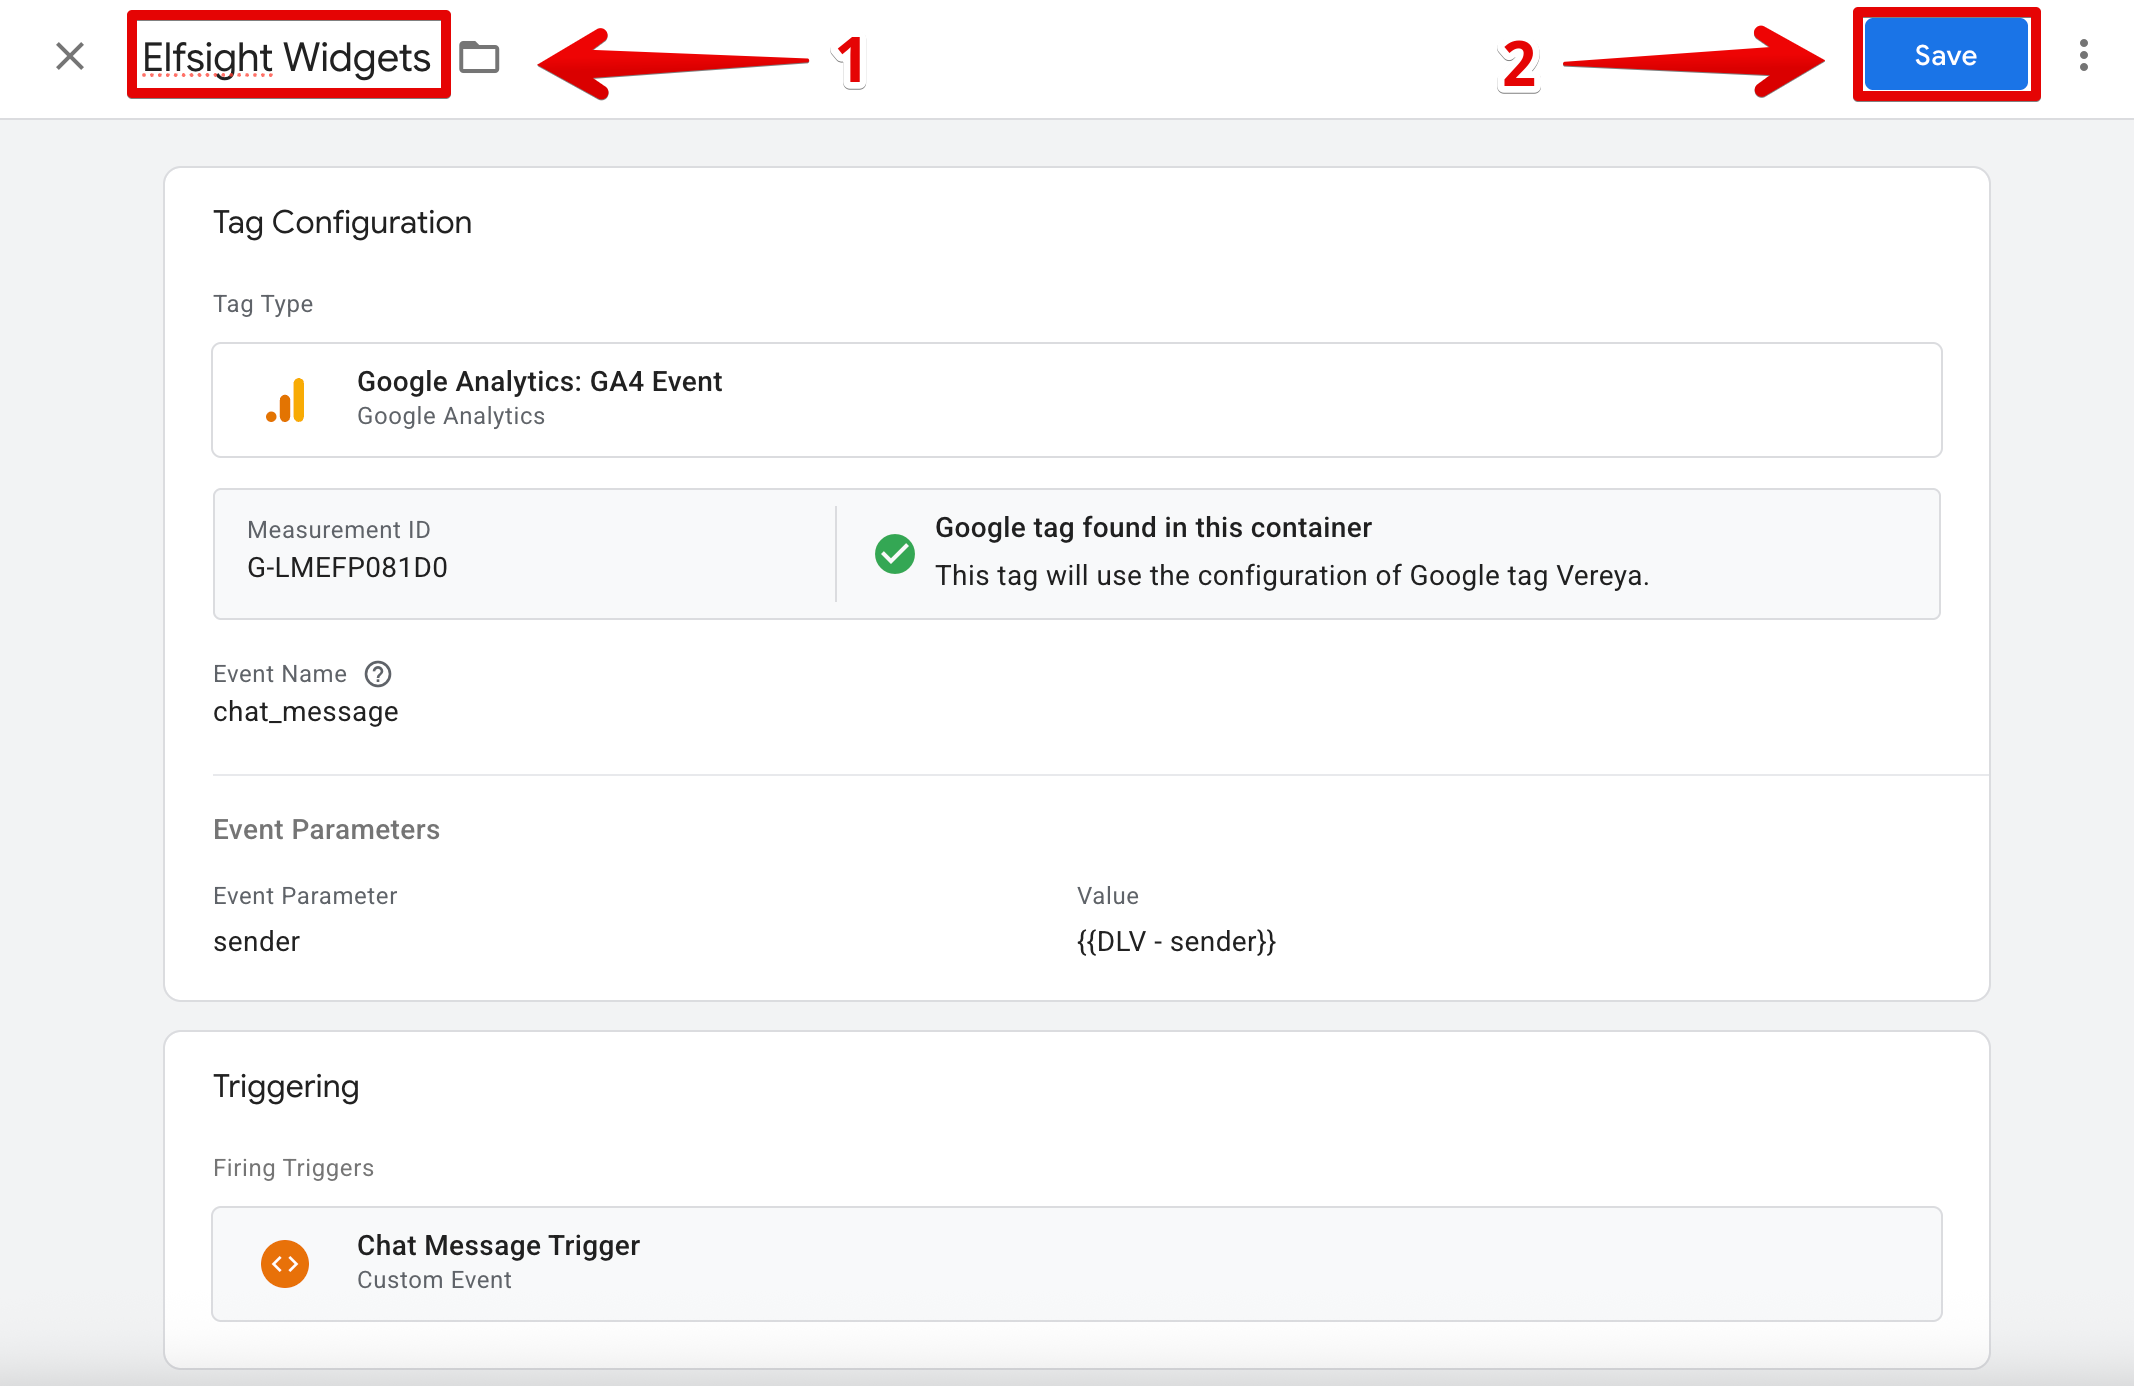
Scroll to Triggering, click it, then click the ➕ icon to create a new trigger. Click Trigger Configuration and choose Custom Event:
Enter the exact event name from your widget in the Event Name field. Optionally name your trigger, then click Save:

- 5
-
Optionally name your tag, then click Save:
That's it! Use Preview to test or Submit to publish your changes.


Once published, your widget events will be captured by GTM and sent to Google Analytics 4.
If you have any questions or run into issues, feel free to contact our Support team — we’ll be happy to help! 😊