Adding Elfsight Widget to Your Webador (JouwWeb) Website
Looking to install your Elfsight widget on your Webador (JouwWeb) website? Follow this simple step-by-step guide to integrate it seamlessly. Just copy your widget installation code, and let’s get started!
Choose how to install your widget
Add Your Widget to a Specific Page
- 1
-
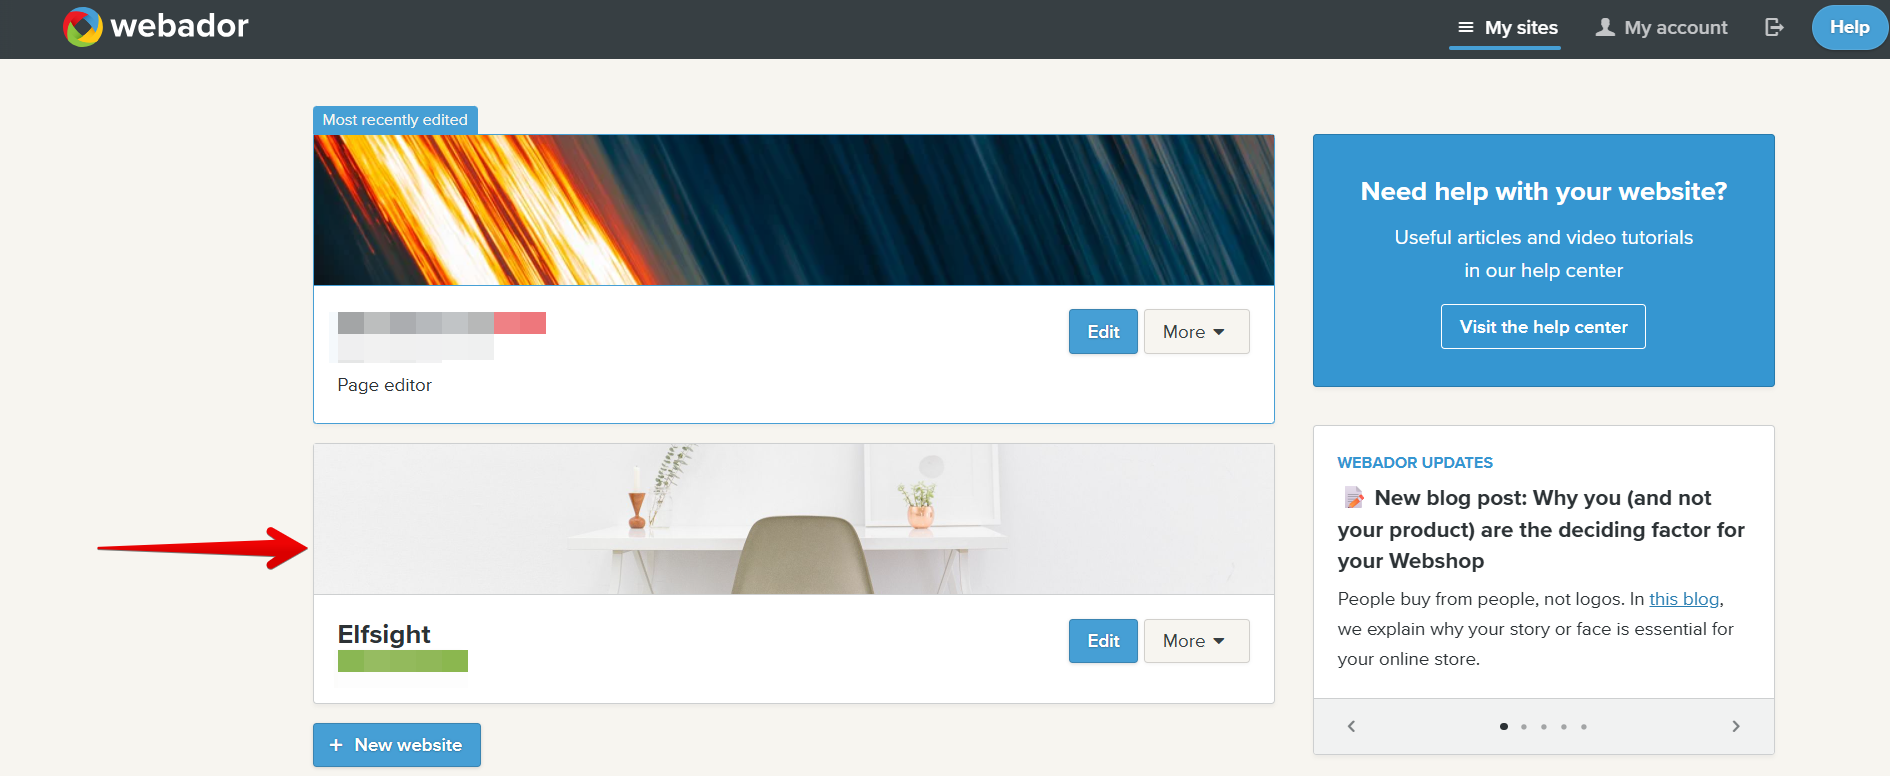
Log in to your Webador dashboard and click on the website where you'd like to install the widget:
If you want the widget to appear on the Home page, continue to Step 2.
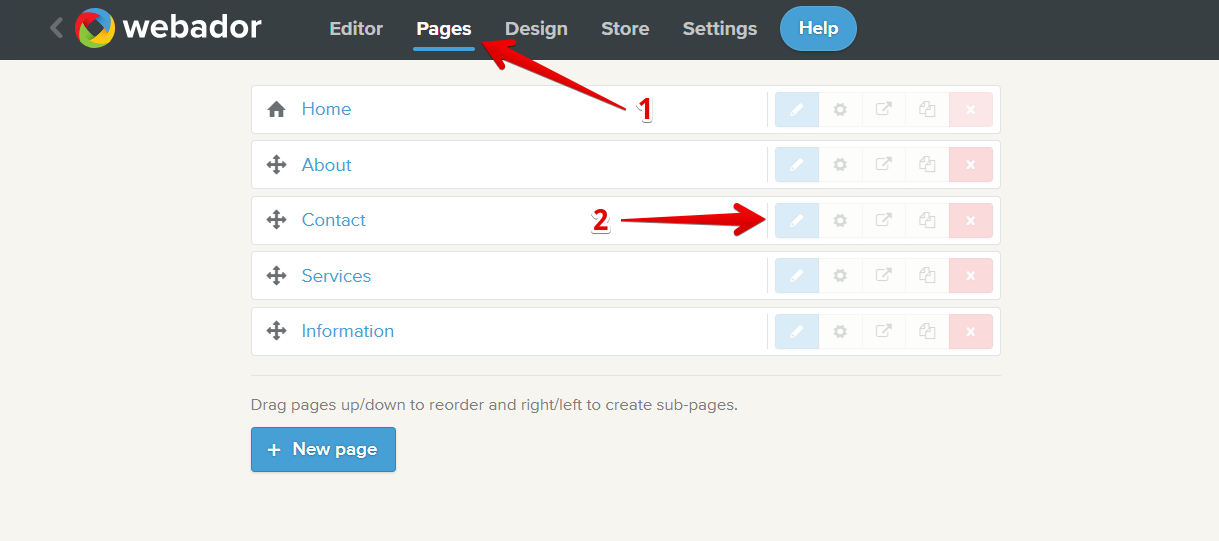
To add the widget to a specific page, go to Pages in the top bar and click the Edit ✏️ button next to the page:
- 2
-
In the Editor, find Embed Code in the left menu and drag & drop it to the desired area:

If you're installing a floating widget, the section can be placed anywhere on the page (for example, above the footer).
- 3
-
Click on the HTML code container → Edit embed:
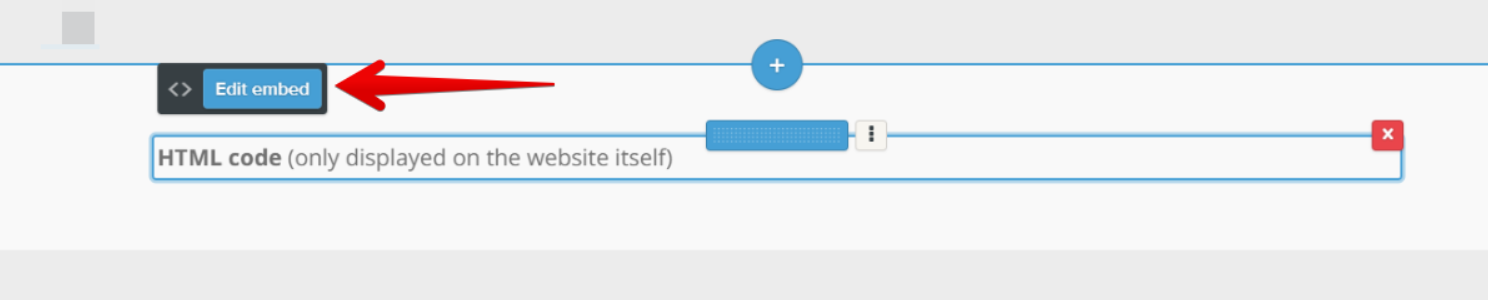
Please note that the embedded widget won't be visible in the Webador Editor and will only appear on the published site. - 4
-
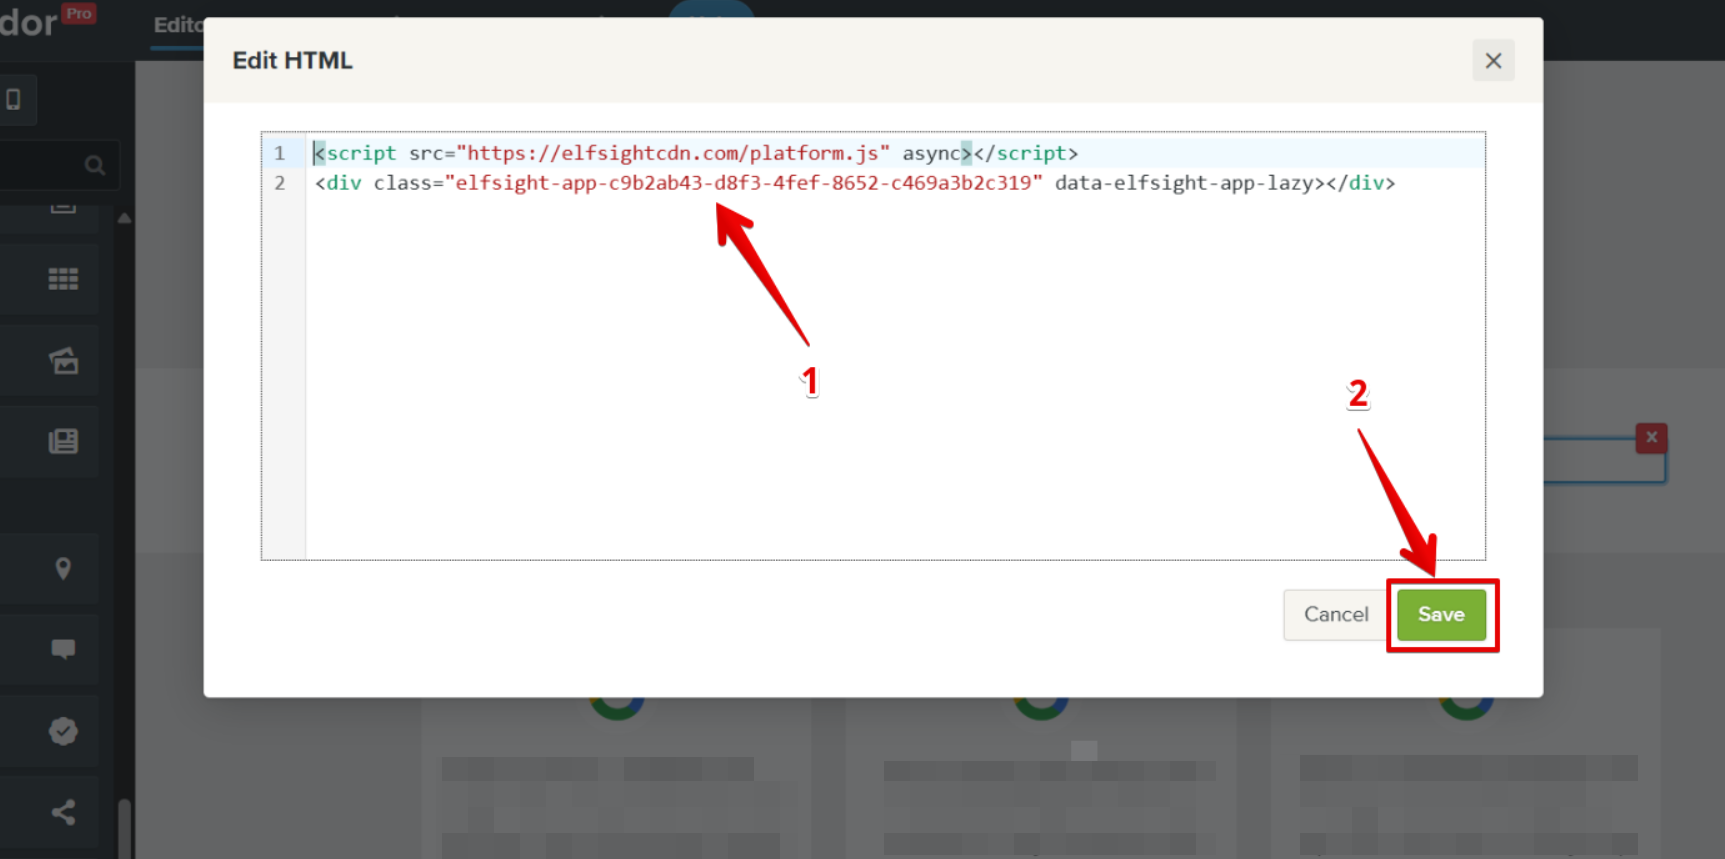
Paste the widget installation code into the popup and click Save:


That's it! The changes will be saved automatically. Feel free to check your Elfsight widget on the live website! 😊
Add Your Widget to All Pages
- 1
-
Log in to your Webador dashboard and click on the website where you'd like to add the widget:
- 2
-
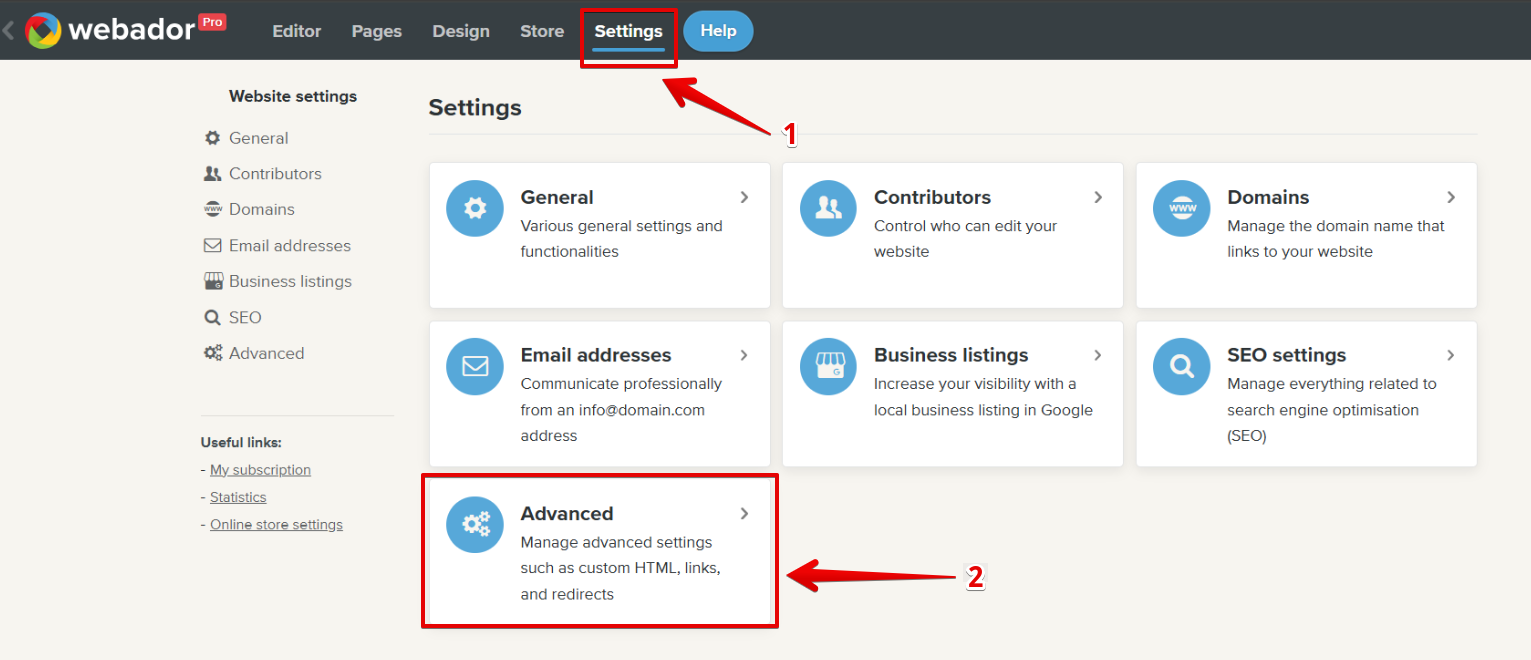
Click Settings in the top bar and select Advanced:
- 3
-
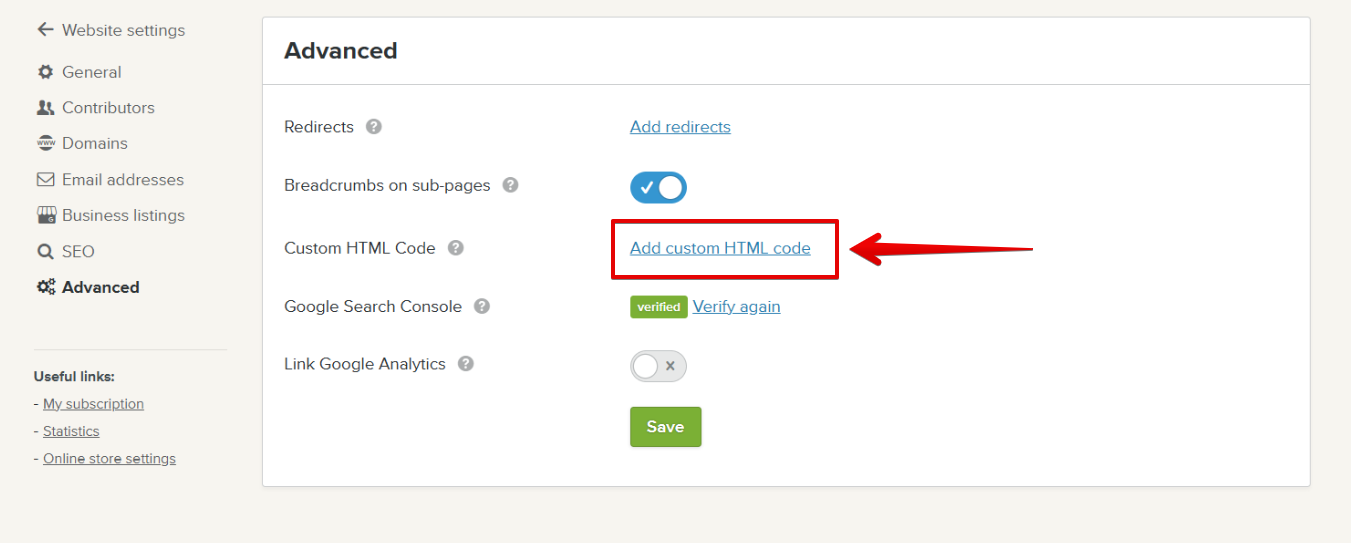
Click Add custom HTML code:
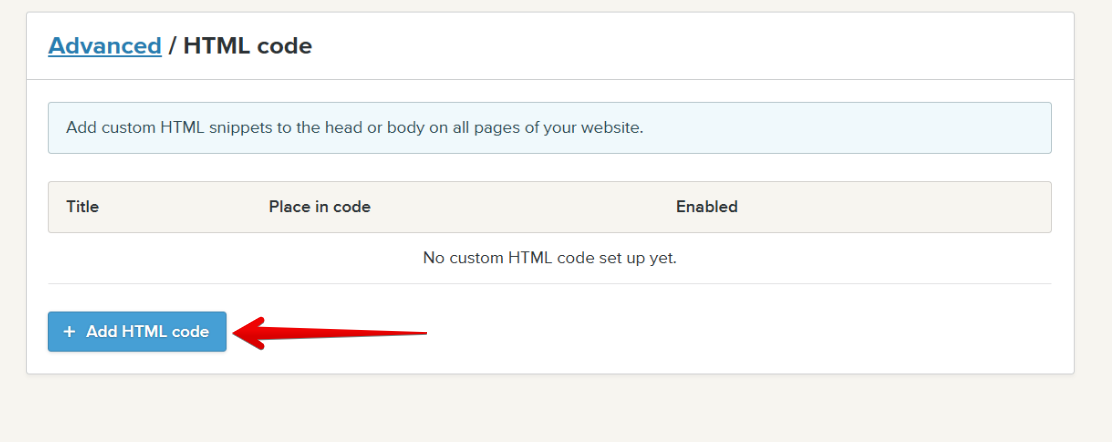
On the new page, press the + Add HTML code button:
- 4
-
Give the custom code a name, ensure the
<body> - endoption is selected, paste the widget installation code, and click Save: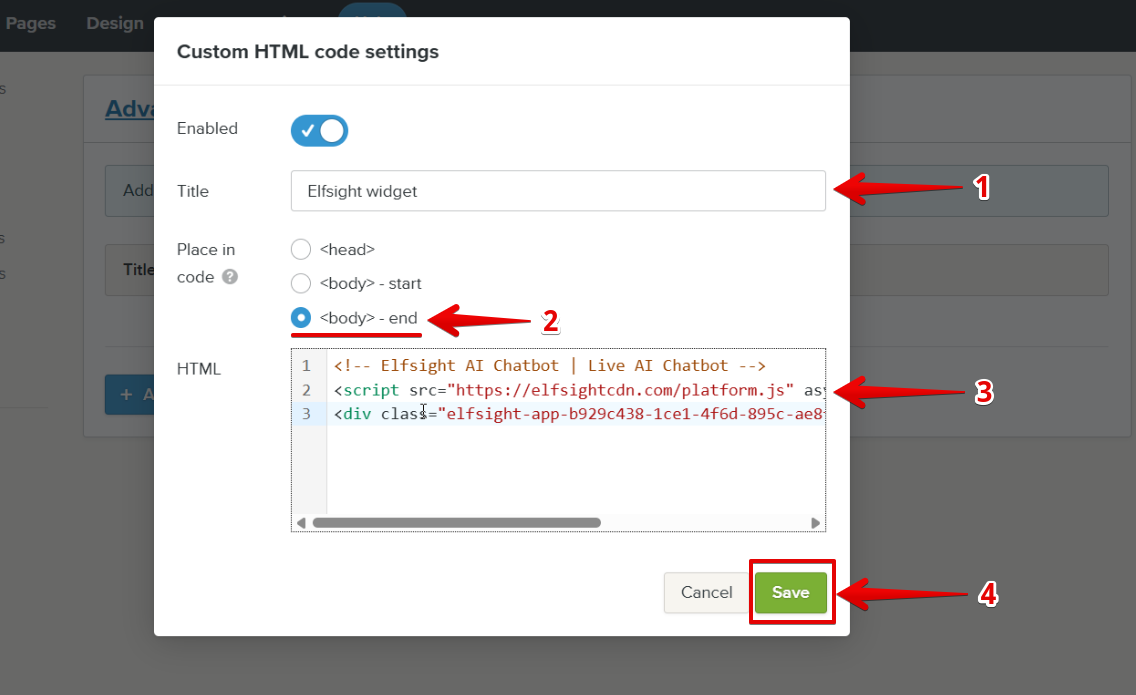


Great! The changes will be saved automatically. Your floating widget is now live across all pages of your Webador site!
Need assistance? We're always here to help! 🙌 Send us a quick request, and we’ll handle the setup for you.