How to Import Events from CSV to Your Event Calendar Widget
Want to easily manage multiple events in your Event Calendar widget at once? Import and export events via CSV to save time, keep data consistent, and make bulk edits a breeze! 🙌
In this article
CSV File Formatting Rules
The Event Calendar accepts CSV files that follow a specific structure. You can download a ready-made template to fill it out with your event details. You can leave unused columns empty, but avoid renaming, removing, reordering, or adding columns:

Important CSV Requirements
📑 Column separators: Use commas, tabs, or semicolons to separate columns. If you use commas as separators, wrap each field in double quotes (").
🧩 Multiple values: Separate multiple items in one field (tags, hosts, venues) with semicolons (;).
🔤 Encoding & limits: Save the file in UTF-8 format. Maximum file size: 1,000 events.
Here are all columns supported by the template, in order:
Event Details
| Column | Description / Format |
|---|---|
| Event Name | The title of your event, displayed in the widget |
| Description | Details or description of the event |
| Start Date & Time❗ | Start date and time in any format, date first |
| End Date & Time❗ | End date and time in any format, date first |
| Time Zone❗ | Supports both IANA ( Europe/London) and GMT offset (GMT+4) |
| All Day Event? (Yes/No) | Mark Yes for all-day events, No otherwise |
| Repeat | Repetition rule (e.g. No repeat, Every day, Every week, etc.) |
Exceptions for repeating events
| Column | Description / Format |
|---|---|
| Exceptions |
Exceptions for repeating events: SKIP
RESCHEDULE
ORG — original event date/time
|
- Exceptions supports multiple rules separated by a line break only.
- Exceptions values must be in uppercase.
- Required fields are marked with an exclamation point (❗).
- The End Date can match the Start Date for single-day events.
- Start Date & Time and End Date & Time must have the date first and use leading zeros for single-digit months and days (e.g.,
04/07/2026 14:30).
Event Type & Venue
| Column | Description / Format |
|---|---|
| Event Type Name | Category name for the event |
| Event Type Color | Color for the event type |
| Event Type Icon URL | Link to an icon image for the event type |
| Venue Name | Name of the venue or place |
| Venue Address | Address or location details |
| Venue Website | Website or map link for the venue |
- You can create new event types and venues via CSV as long as the Event Type Name or Venue Name is filled in.
- Supported color formats: HEX, RGB, transparent (e.g.
#FF5733,rgb(255,0,0),transparent). - For URLs, use this format:
https://www.yourlink... - Use semicolons (
;) to separate multiple event types and venues.
Organizer Information
| Column | Description / Format |
|---|---|
| Host Name | Organizer or host name |
| Host Phone | Phone number for the organizer |
| Host Email | Email address for the organizer |
| Host Website | Organizer’s website URL |
| Host Logo URL | Link to the organizer’s logo image |
- You can create new hosts via CSV as long as the Host Name is filled in.
- For URLs, use this format:
https://www.yourlink... - Use semicolons (
;) to separate multiple hosts.
Event Content & Media
| Column | Description / Format |
|---|---|
| Tags | Keywords for filtering |
| Custom Event Color | Custom color for this specific event card |
| Show Button (Yes/No) | Display a call-to-action button |
| Button Text | Label for the call-to-action button |
| Button Caption | Short description below the button |
| Button Link | URL opened when the button is clicked |
| Image Name | Alt text for the event image |
| Image URL | Link to an image for the event |
| Video URL | Public YouTube or Vimeo video URL related to the event |
| File Name | Name of an attached file (e.g., brochure, agenda) |
| File URL | Link to the attached file |
- You can create new tags via CSV as long as the Tags are filled in.
- Supported color formats for event colors: HEX, RGB, transparent (e.g.
#FF5733,rgb(255,0,0),transparent). - For URLs, use this format:
https://www.yourlink... - Use semicolons (
;) to separate multiple tags.
Visibility
| Column | Description / Format |
|---|---|
| Is Hidden? (Yes/No) | Mark Yes to hide the event from public view |
- Hidden events remain in your CSV and settings but won’t appear in the live calendar.
Tips on Working with CSV Files
To make editing your CSV even simpler, upload the template file to Google Drive and use Google Sheets:
- 1
-
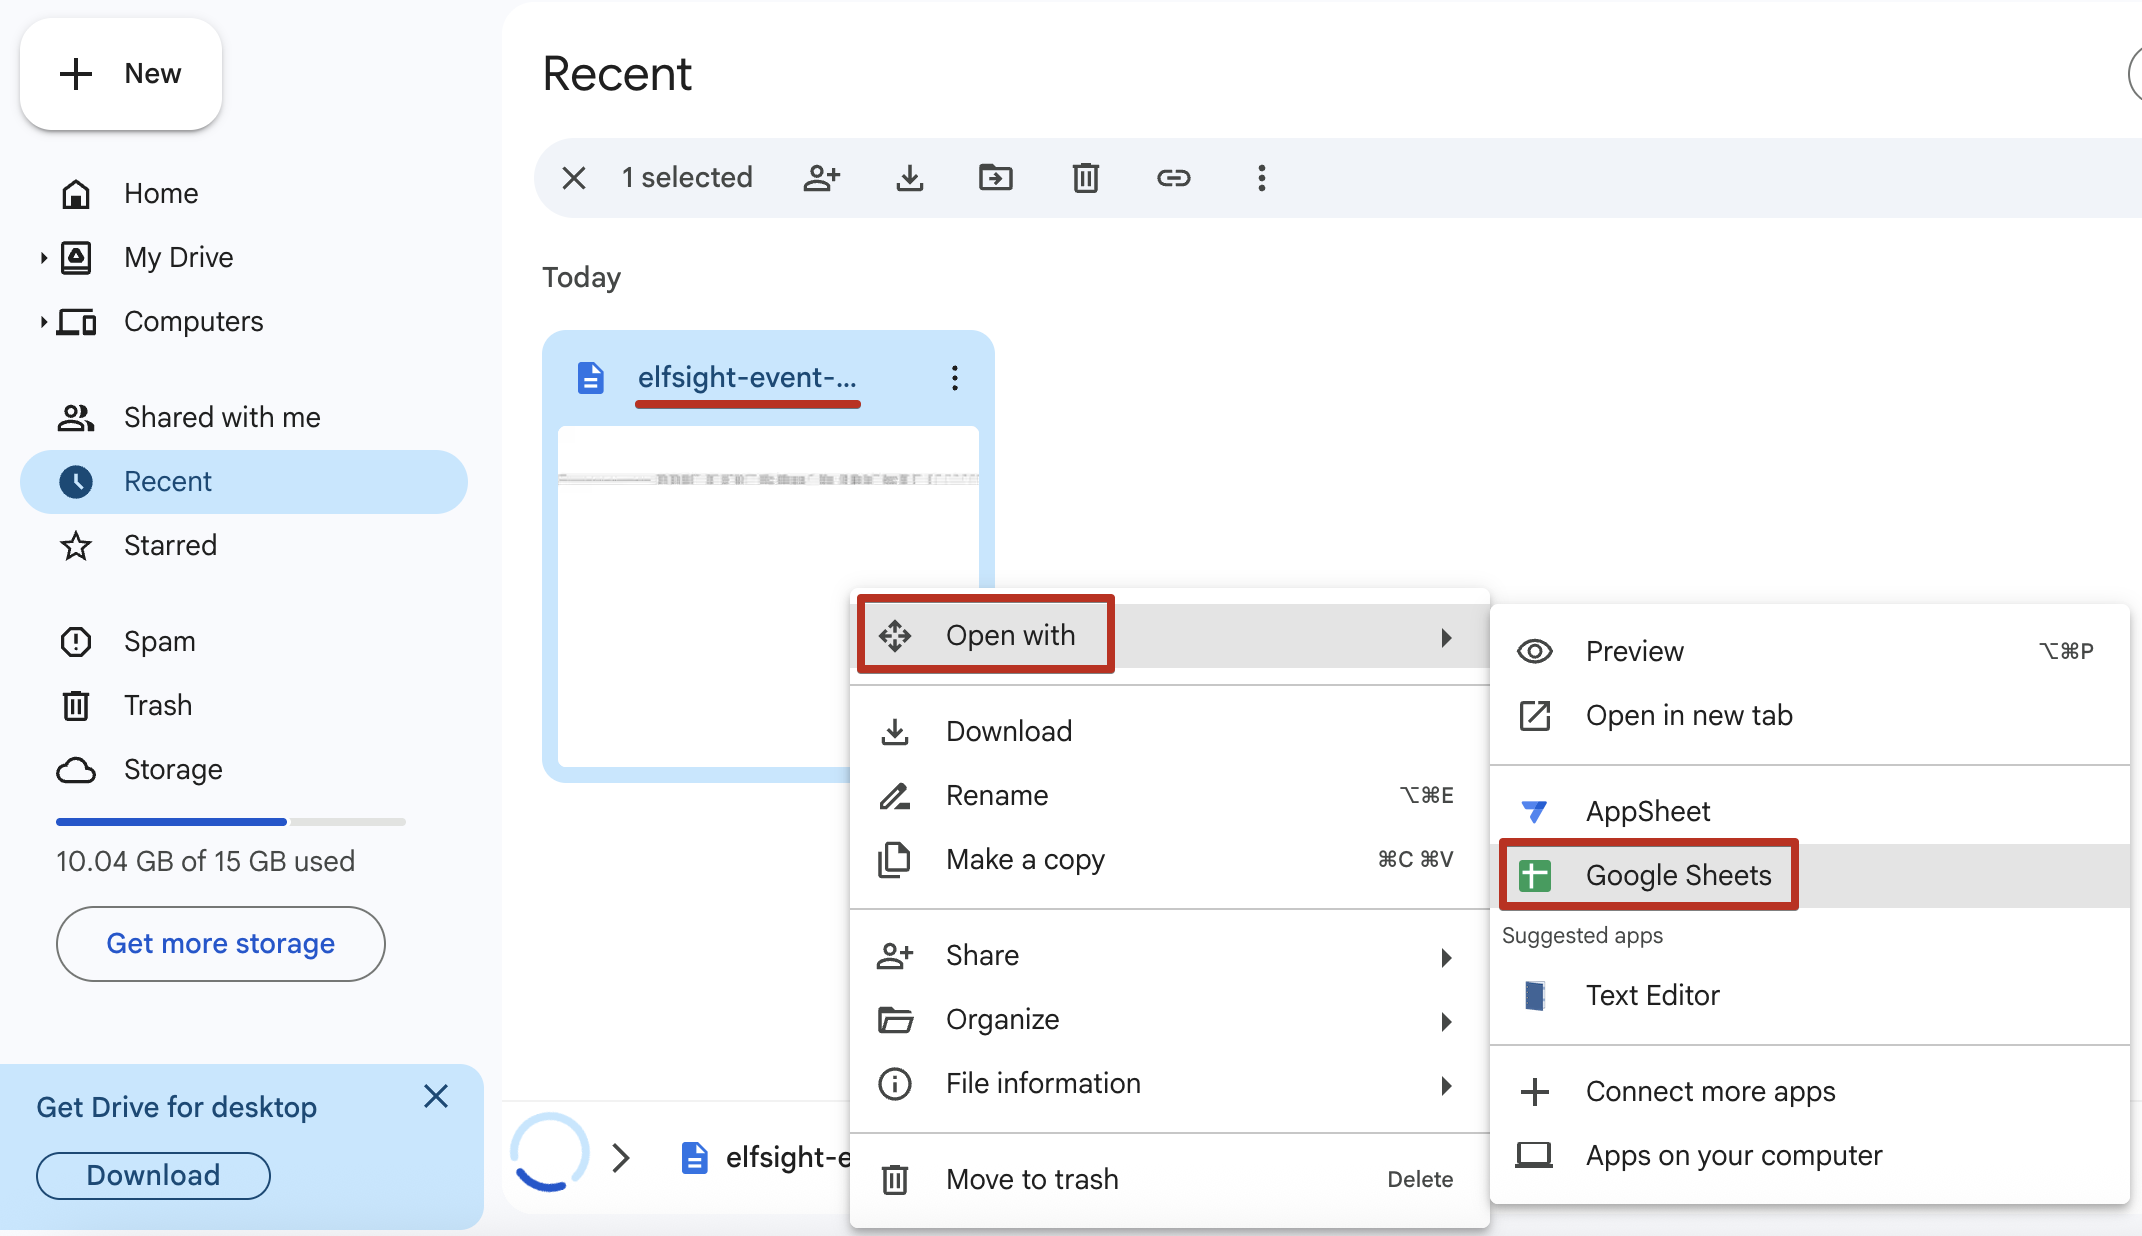
Open your Google Drive and click + New:

Upload your file:

- 2
-
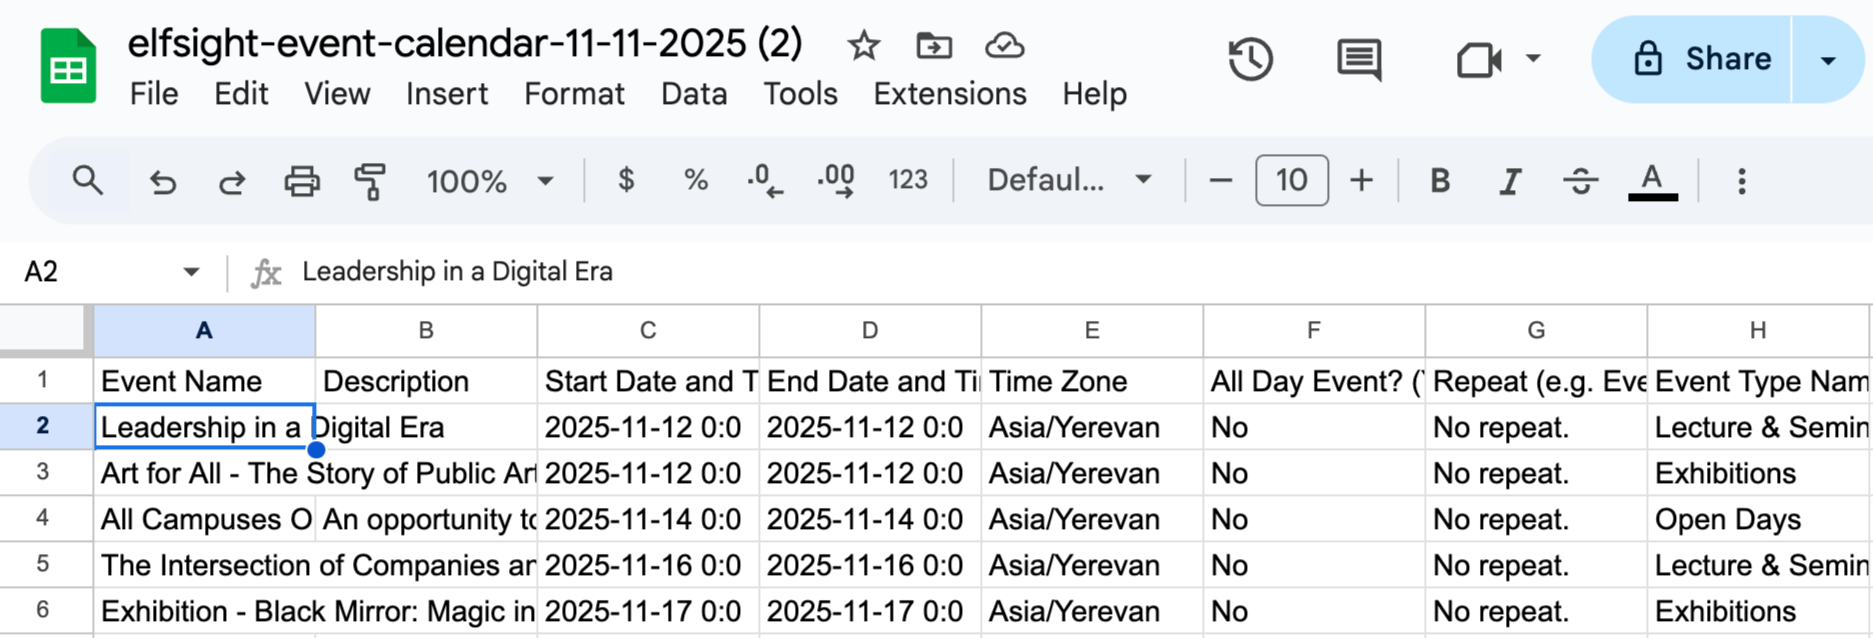
Open the file in Google Sheets to get started:
Use the columns in Google Sheets to easily add your event details:
- 3
-
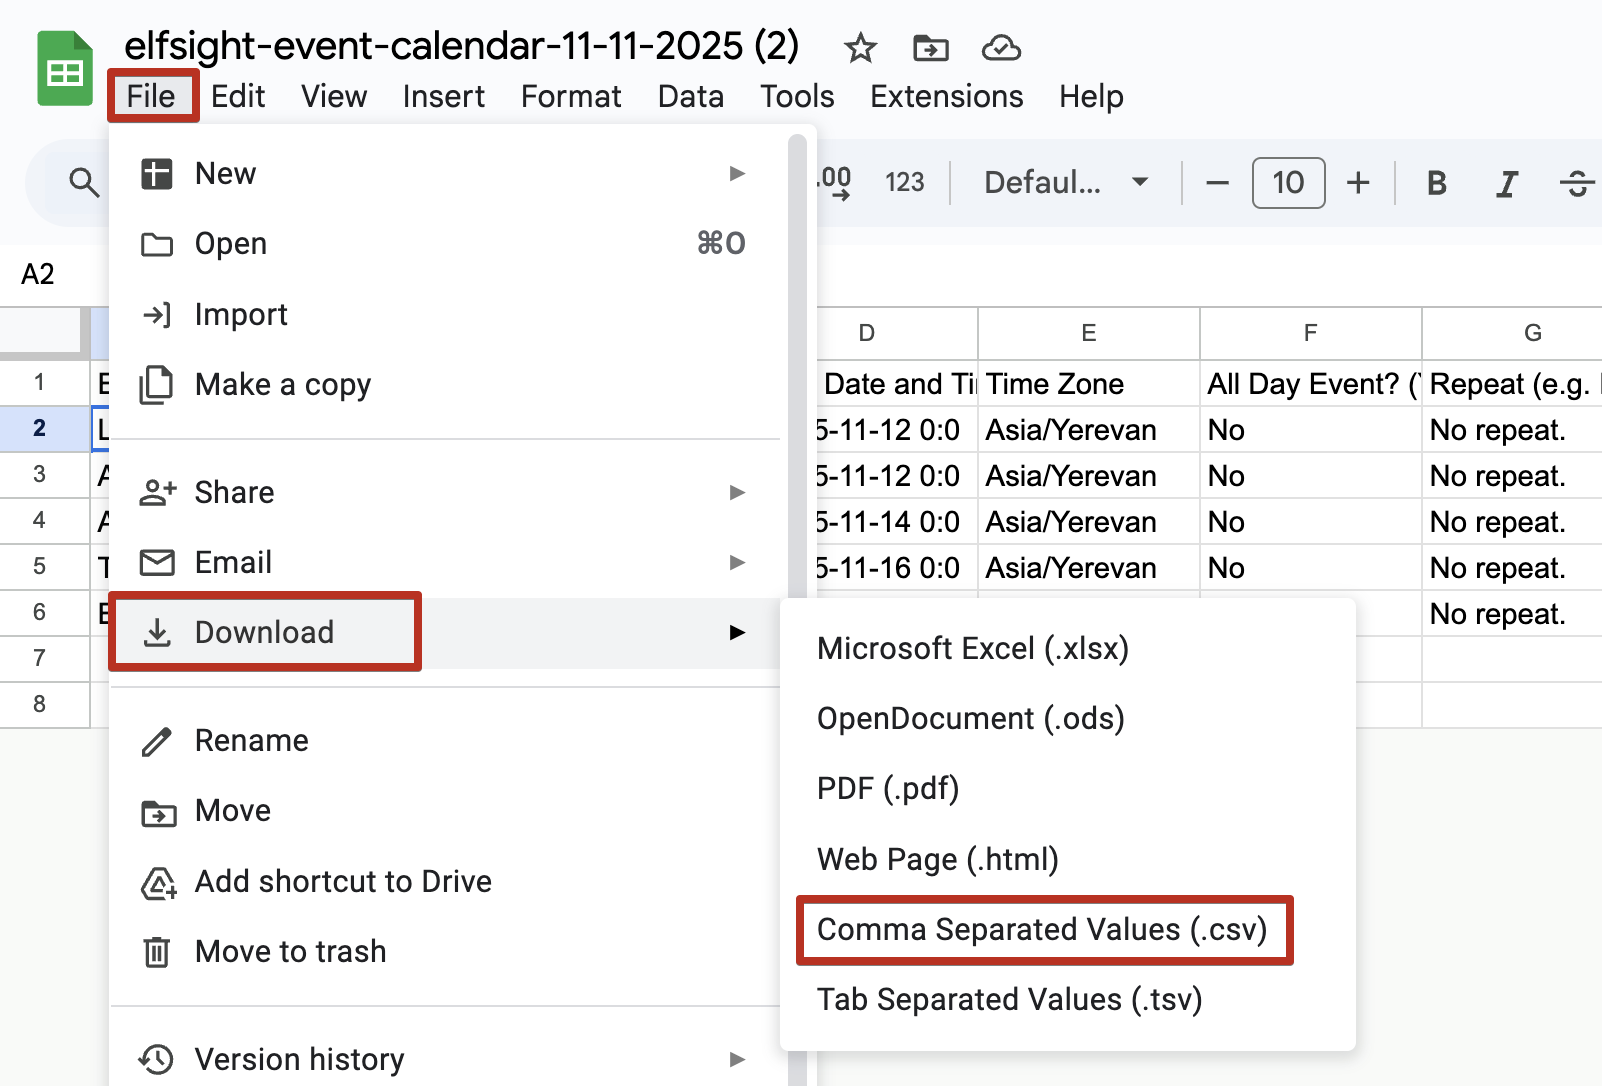
When you're done editing, click File → Download, and save it as a CSV file:


Before uploading the file to your widget, verify that it’s in UTF-8 encoding, doesn’t contain any extra symbols, and stays within the 1,000-event limit to ensure everything runs smoothly.
Importing Events
Follow these steps to upload a CSV and create events in bulk. The first step in the editor depends on whether your widget is new or already has events.
- 1
-
New widget
On the Events tab, click Import from CSV: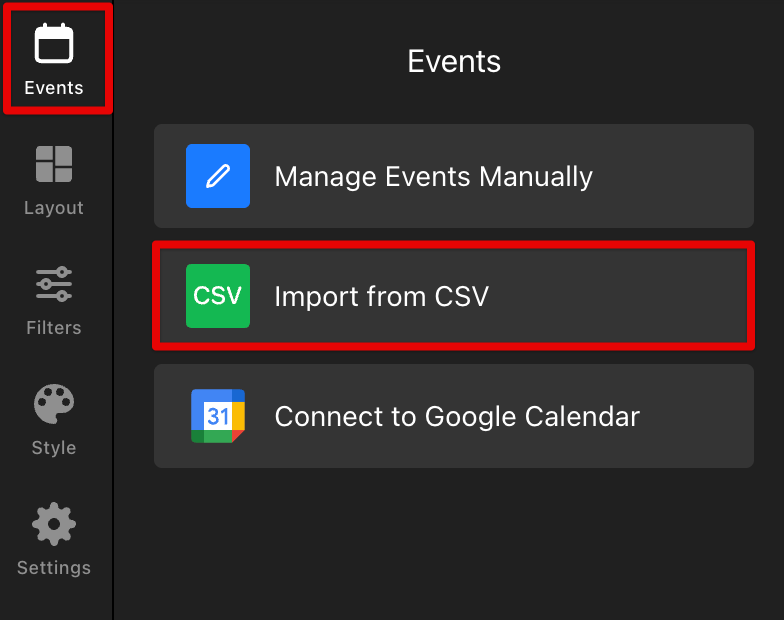 Widget with existing events
Open the Events tab, click the three dots (⋯) menu, then choose Import from CSV: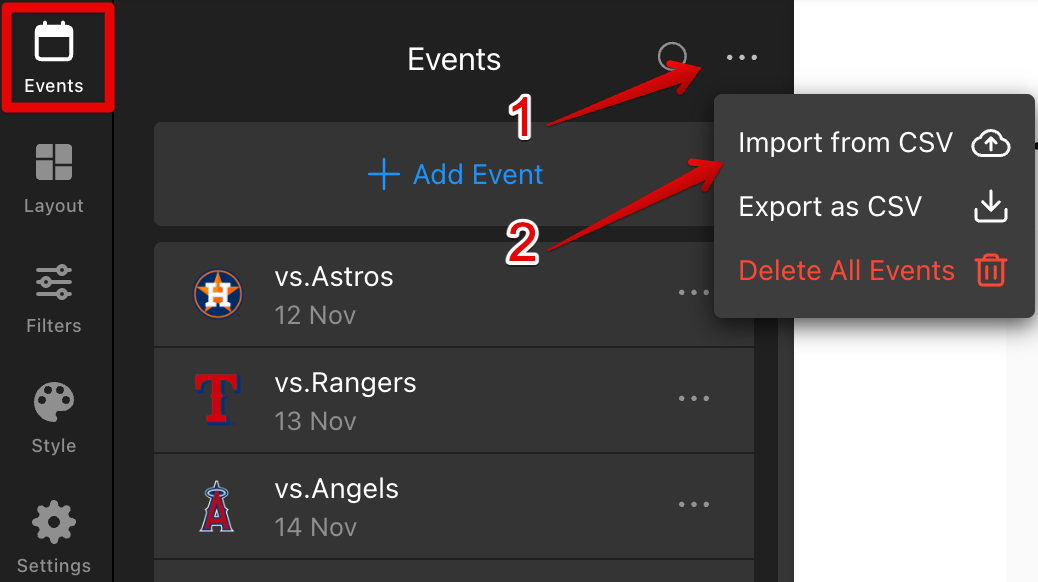
⚠️ Important: When you upload a CSV, all current events and filters will be replaced with those in your file. - 2
-
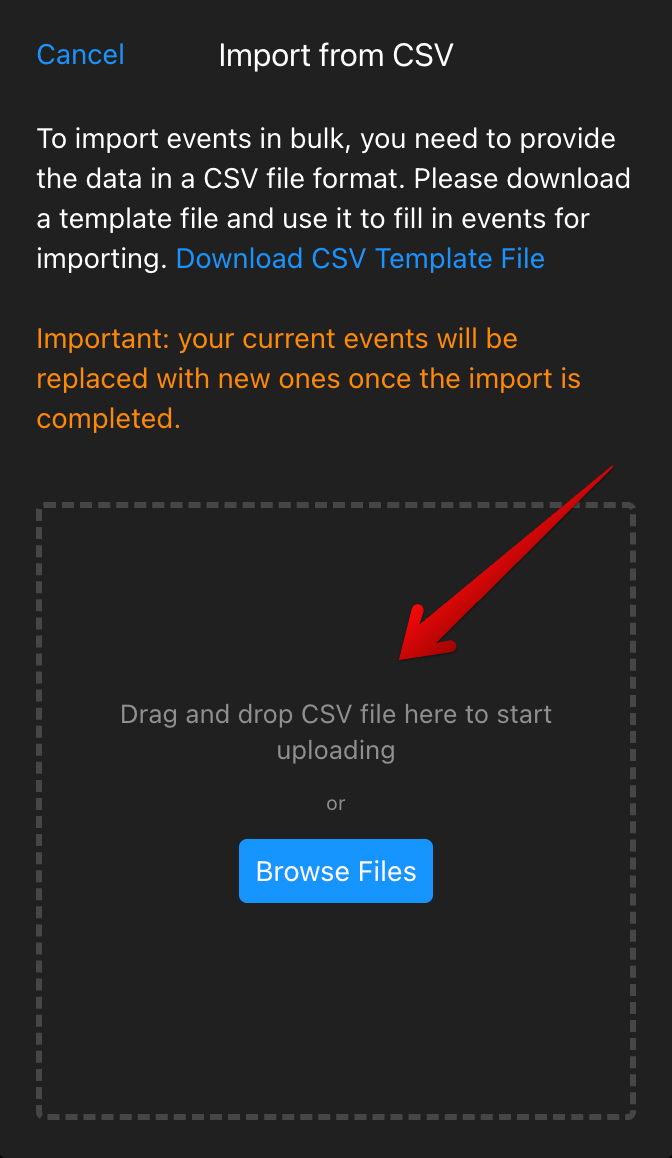
In the import dialog, you can download a template and upload your CSV file via drag & drop or browse:
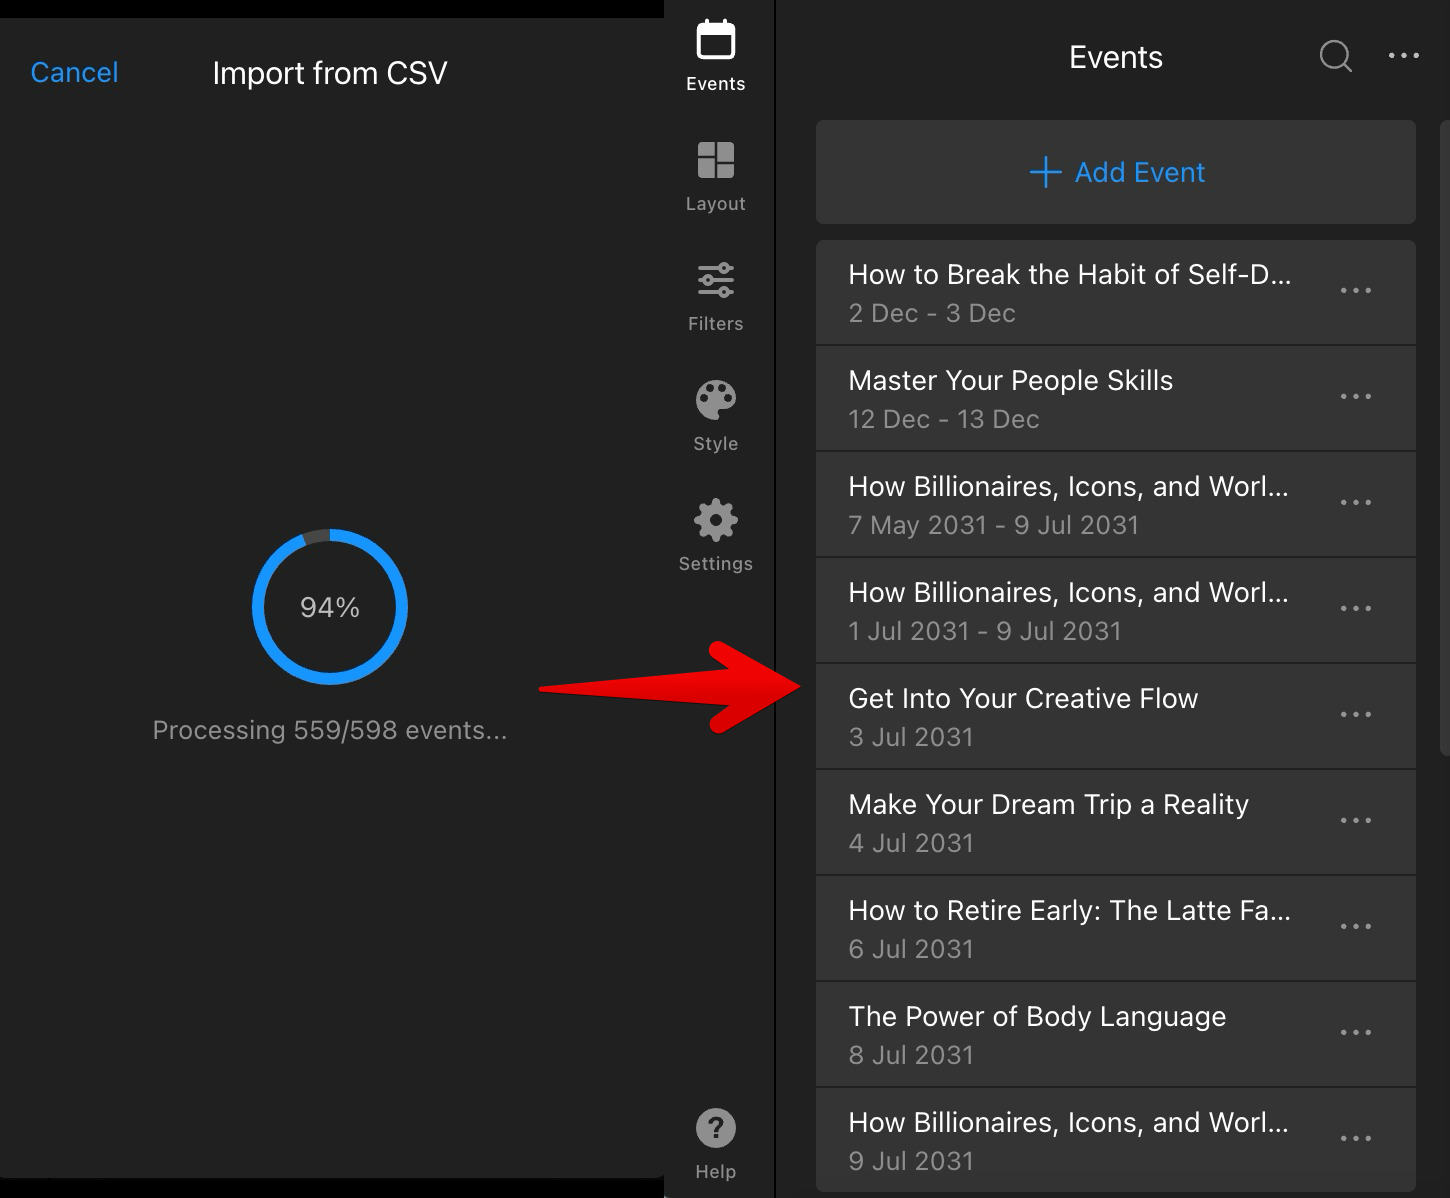
- 3
-
Wait for processing to complete. After the import finishes, your events will appear in the list:
 Widget with existing events


Exporting Events
Export your current events to a CSV file to edit them externally or keep a backup.
- 1
-
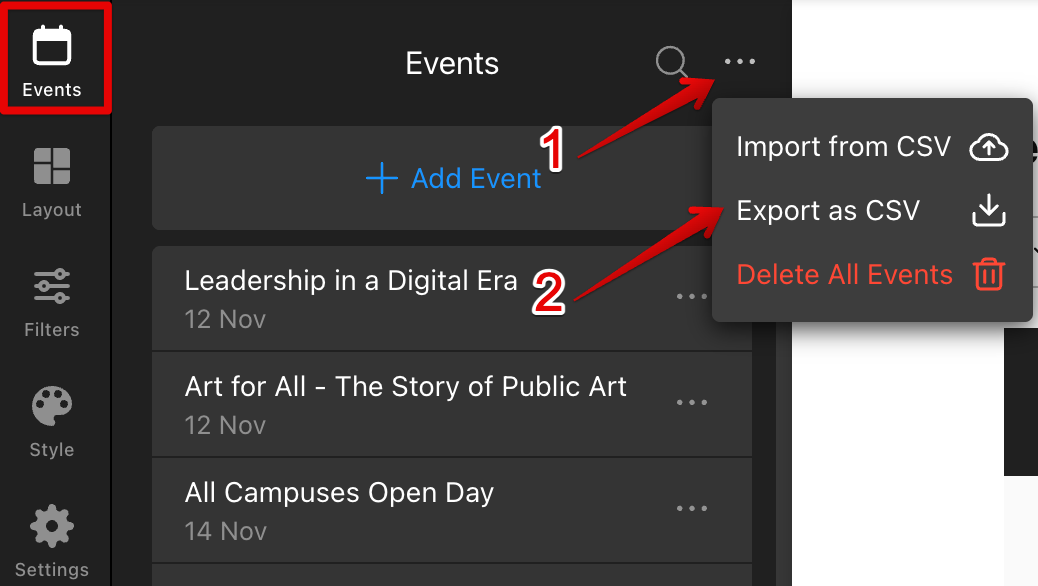
In the Events tab, click the three dots (⋯) menu and choose Export as CSV:
- 2
-
Your browser will download a file named like elfsight-event-calendar-MM-DD-YYYY.csv:
Now you can open the CSV, make your edits (keeping column order intact), save, and re-import it if needed.


That’s it! With CSV import and export, you can efficiently manage large schedules in just a few clicks. 🚀