Get Google Maps API Key: Step 2 – Enable APIs & Restrict Key
Setting up your Google Maps widget involves three simple steps. You're currently on:
- Step 1 – Create API Key & Enable Billing
- 👉 Step 2 – Enable APIs & Restrict Key
- Step 3 – Add Key to Widget
In this step, you’ll enable the required Google Maps APIs and secure your API key with proper restrictions. API restrictions limit which Google services your key can use, while website restrictions make sure the key works only on selected websites.
In this guide
1. Enable required APIs
- 1
-
Find or create your project
Make sure you’re working in the correct Google Cloud project by checking the project picker at the top of the Google Cloud Console:
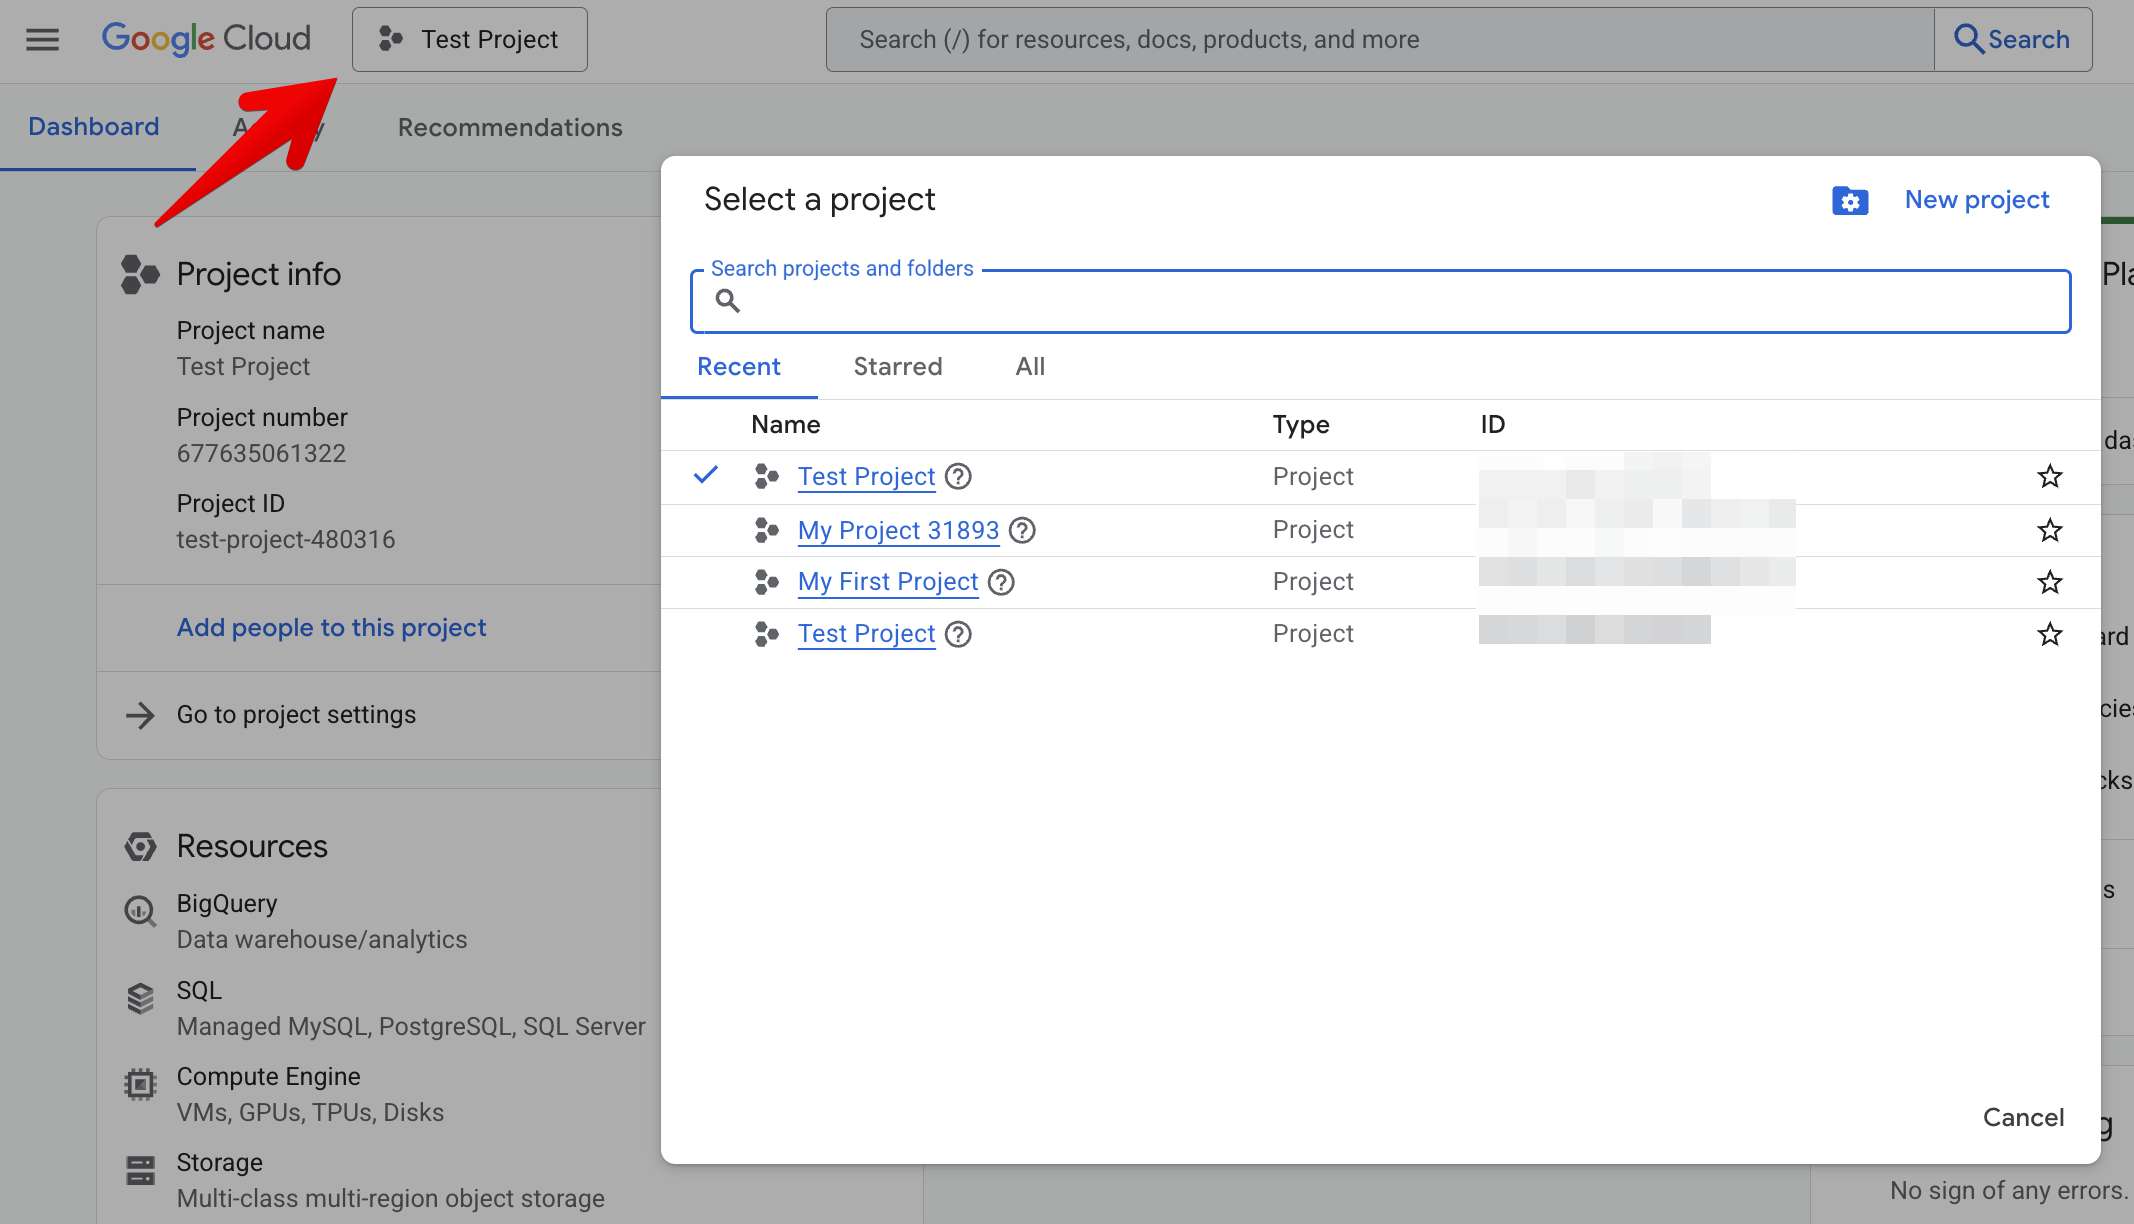 If you don’t have a project yet, create one by following Google’s official guide: How to create a Google Cloud project.
 - 2
-
Check for required APIs
Go to Navigation Menu → APIs & Services → Enabled APIs & services: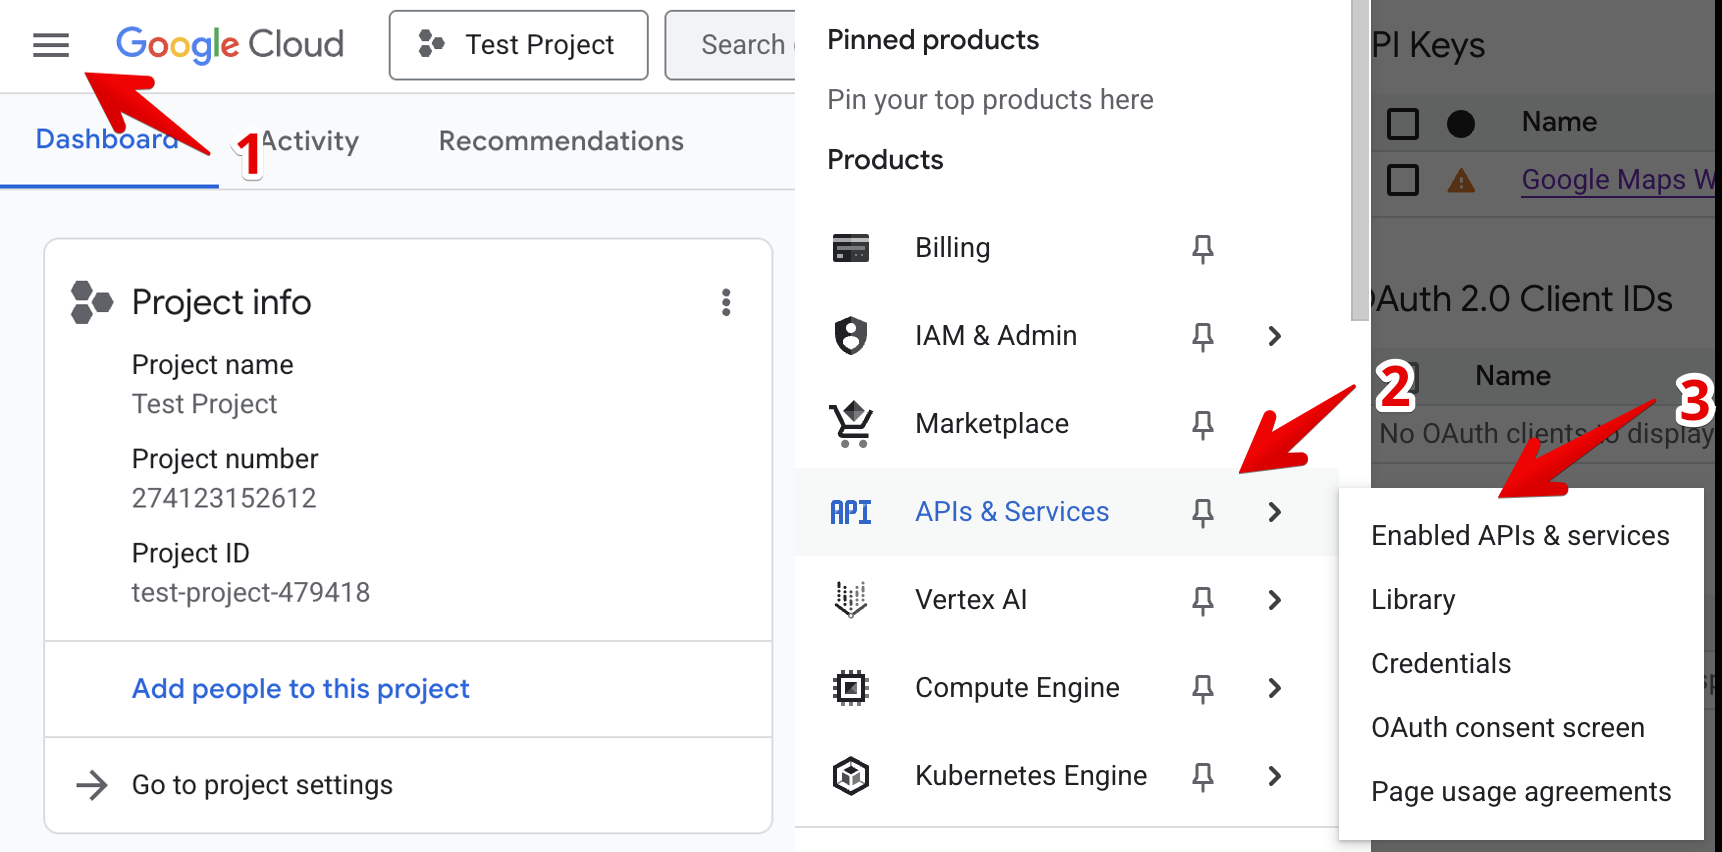
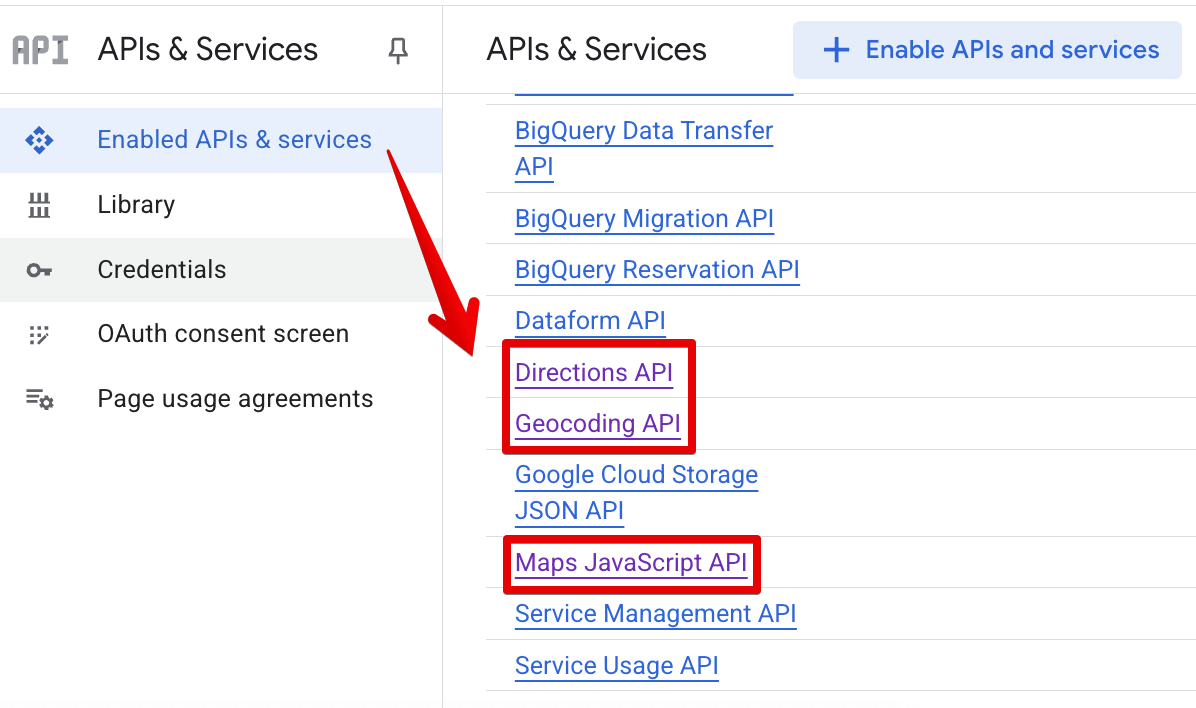
Scroll down to the list and check whether these three APIs are enabled:
If all three APIs are listed, you’re good to go. If you don’t see any of them in the list, you'll need to activate them first.
If all three APIs are already enabled, you can move on to the next step: Restrict your API key. - 3
-
Add missing APIs
If one or more APIs are missing, enable them manually:
- Click + Enable APIs and services.
- Search for the required API in the Library.
- Open the API page and click Enable.
- Repeat these steps for each required API.

It may take up to 5 minutes for newly enabled APIs to become fully active.
 If you don’t have a project yet, create one by following Google’s official guide:

2. Restrict your API key
To protect your API key, restrict where it can be used and which APIs it can access.
- 1
-
Open your API key settings
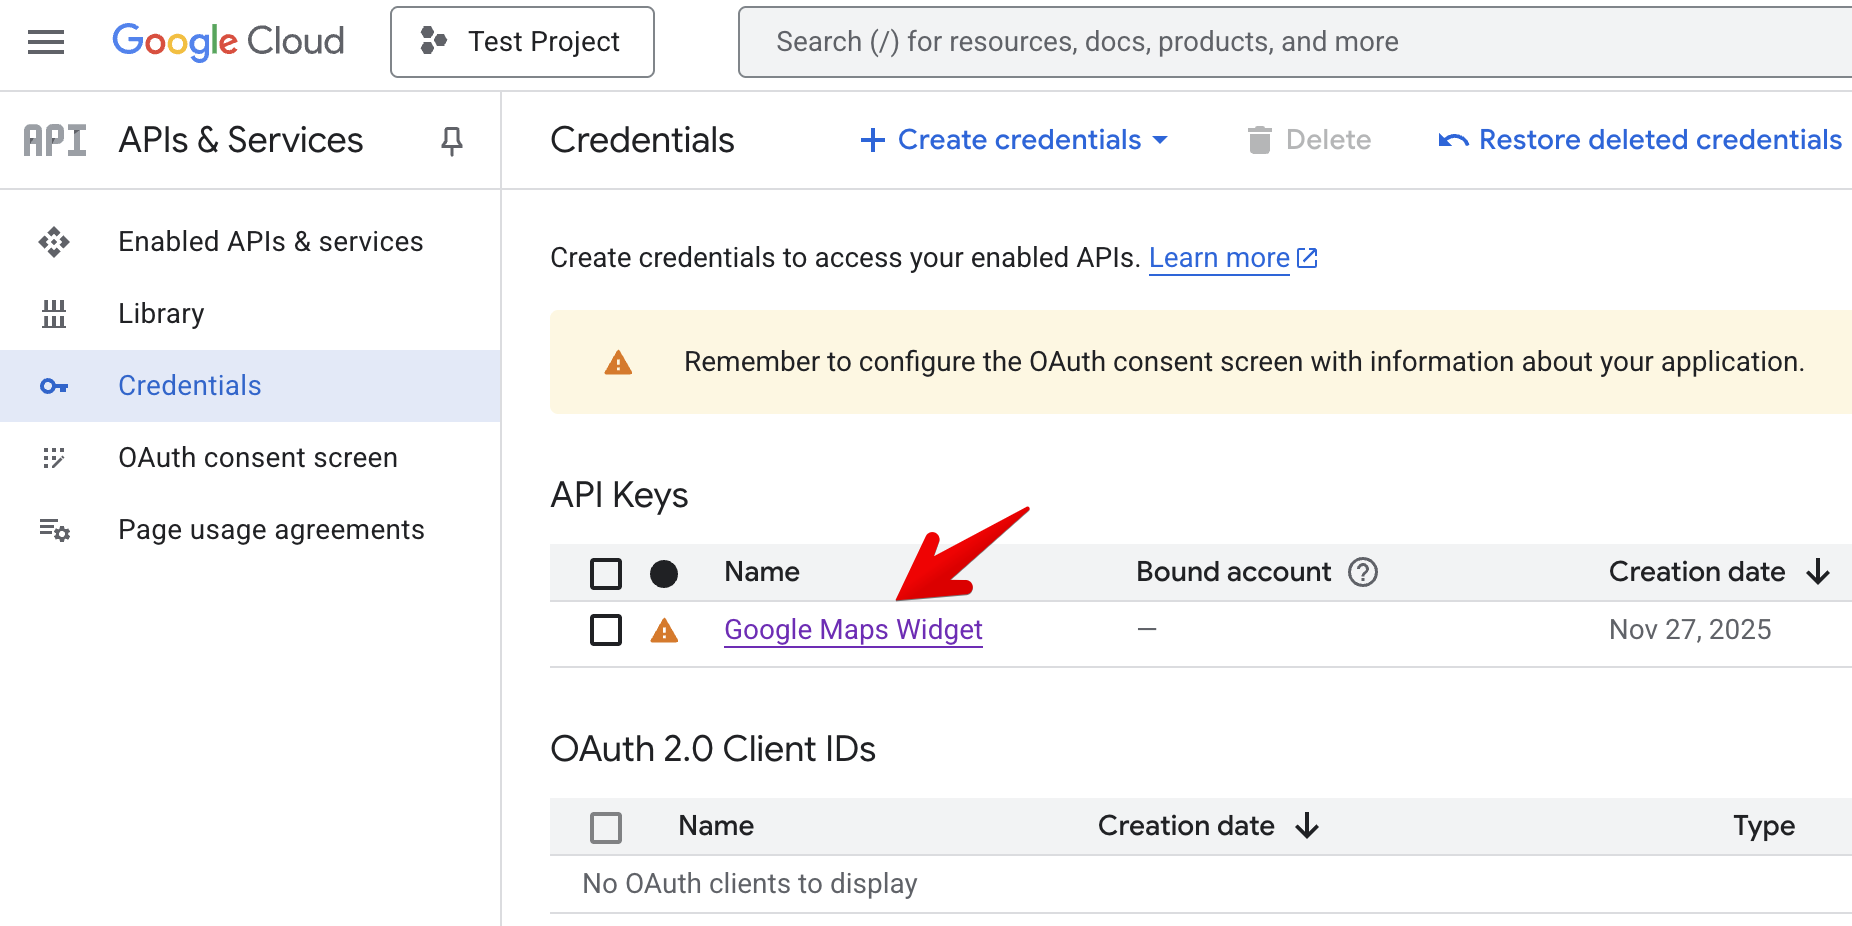
Go to Navigation Menu → APIs & Services → Credentials:

Find your API key and click on it:
- 2
-
Set website restrictions
Under Application restrictions, select Websites and click Add: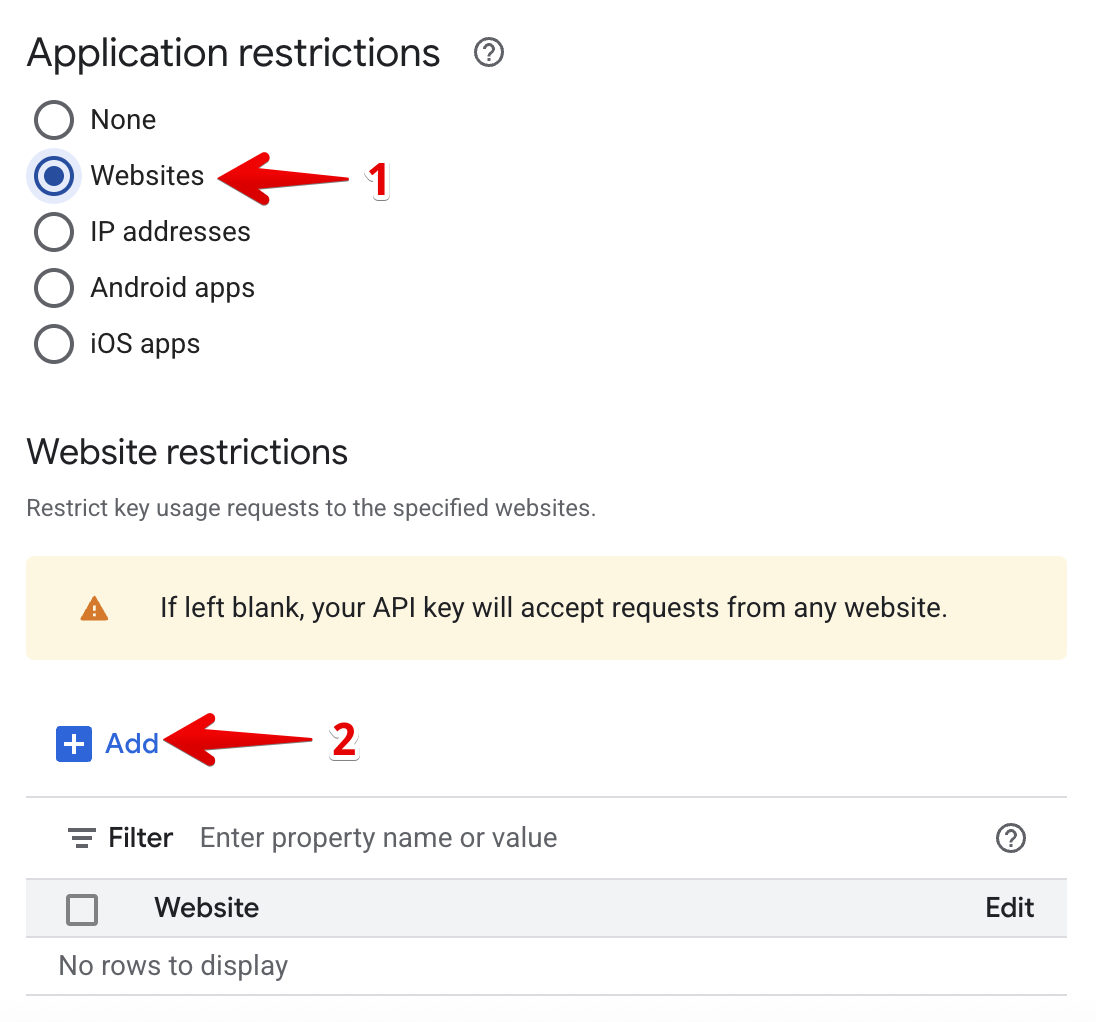
We suggest limiting your API key to your domain and Elfsight apps only. Add each domain separately:
- *.elfsight.com/*
- https://your-domain.com/*
- https://www.your-domain.com/*
Replace your-domain.com with your actual website domain. 
If you’re installing the widget via Share Link, also add:
- *.elf.site/*
- https://widget.elfsig.ht/*

If needed, you can restrict domains differently, depending on where you want the API key to work. Refer to the instructions on the right side of the API key editor or check Google's documentation on HTTP referrers. - 3
-
Set API restrictions
This step restricts your API key to work only with the APIs enabled in Step 1. Scroll to API restrictions, select Restrict key, and allow access only to these three APIs:
- Directions API
- Geocoding API
- Maps JavaScript API
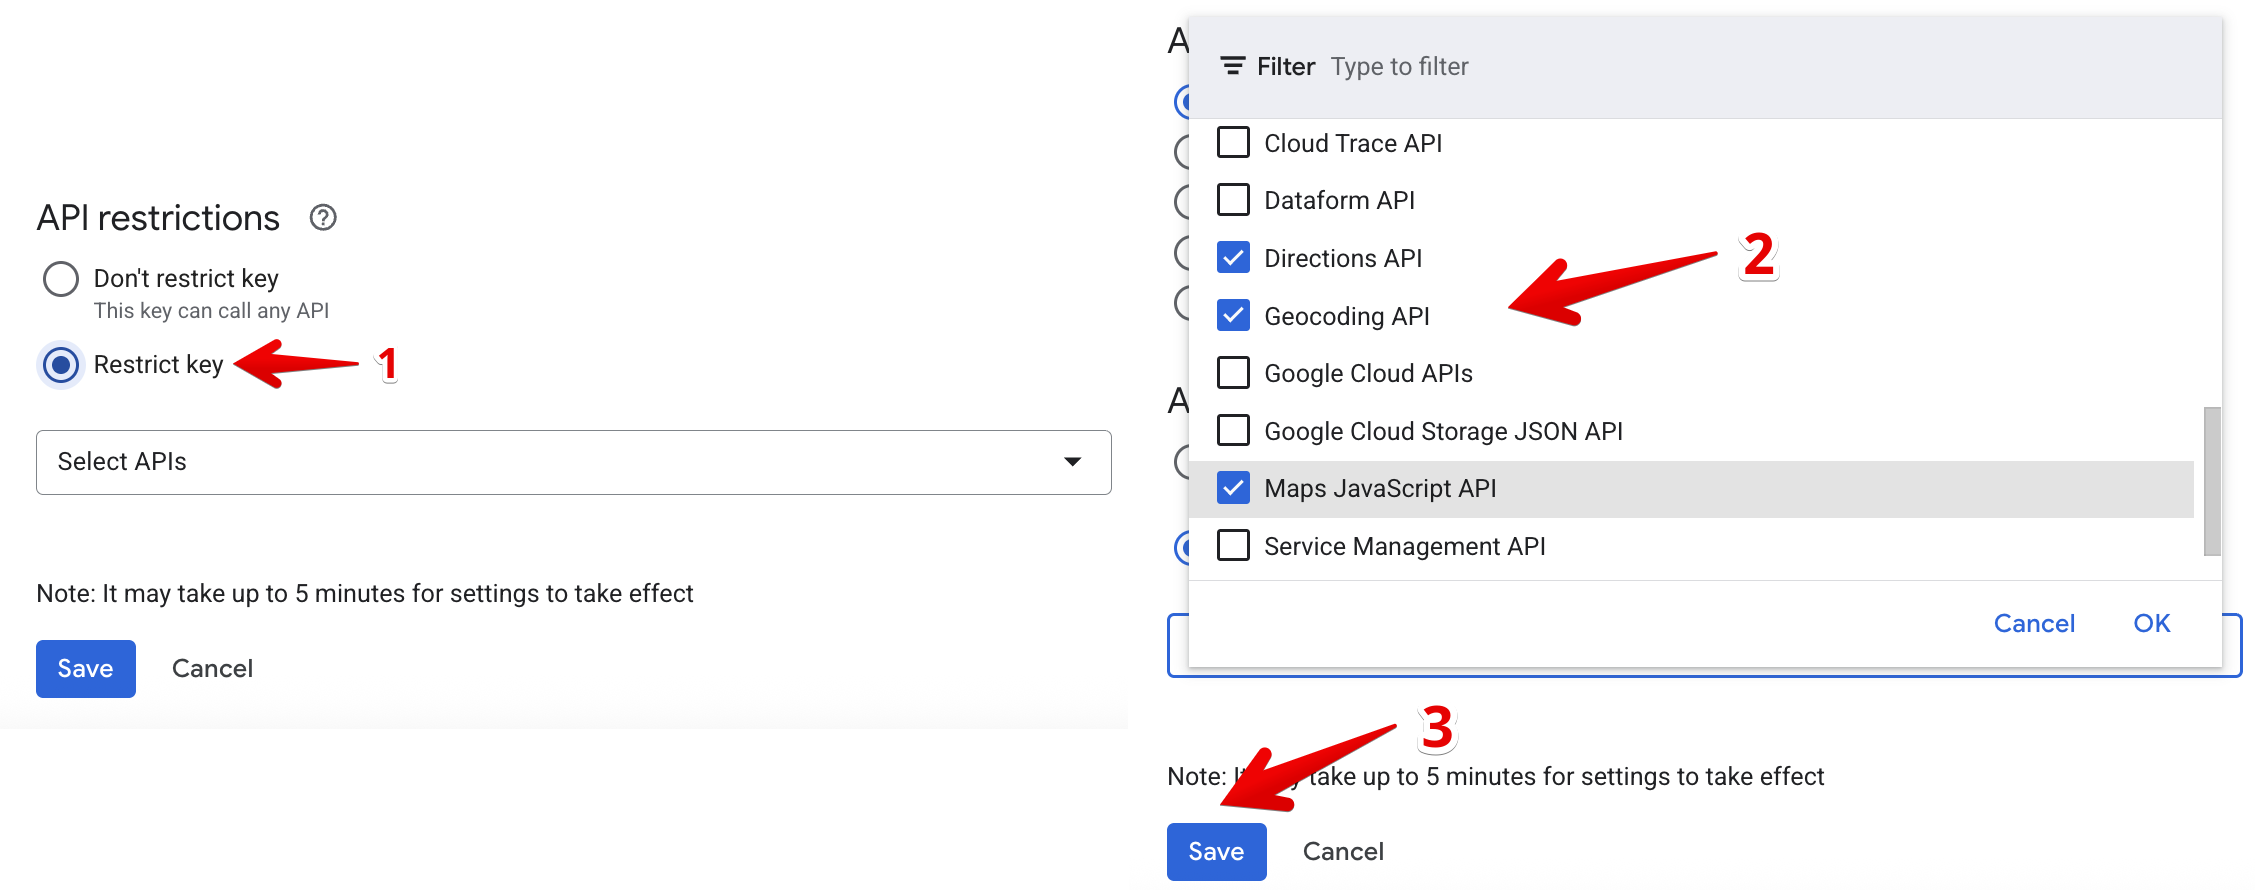
Click Save to apply all changes.
It may take up to 5 minutes for the restrictions to take effect.


✅ That’s it! Your API key is now properly secured and ready to be added to your widget.
Step 1 – Create API Key & Enable Billing
Step 3 – Add Key to Widget