Get Google Maps API Key: Step 1 – Create API Key & Enable Billing
Setting up your Google Maps widget API key involves three simple steps. You're currently on:
- 👉 Step 1 – Create API Key & Enable Billing
- Step 2 – Enable APIs & Restrict Key
- Step 3 – Add Key to Widget
To use your Google Cloud API key with our Google Maps widget, billing needs to be enabled. In this guide, you’ll find simple steps for both new and existing Google Cloud users.
Steps to enable billing
I don't have a Google Cloud account
If you’re new to Google Cloud Platform, this guide walks you through the setup process, including account creation, detail confirmation, and adding a payment method.
- 1
-
Register a Google Cloud account
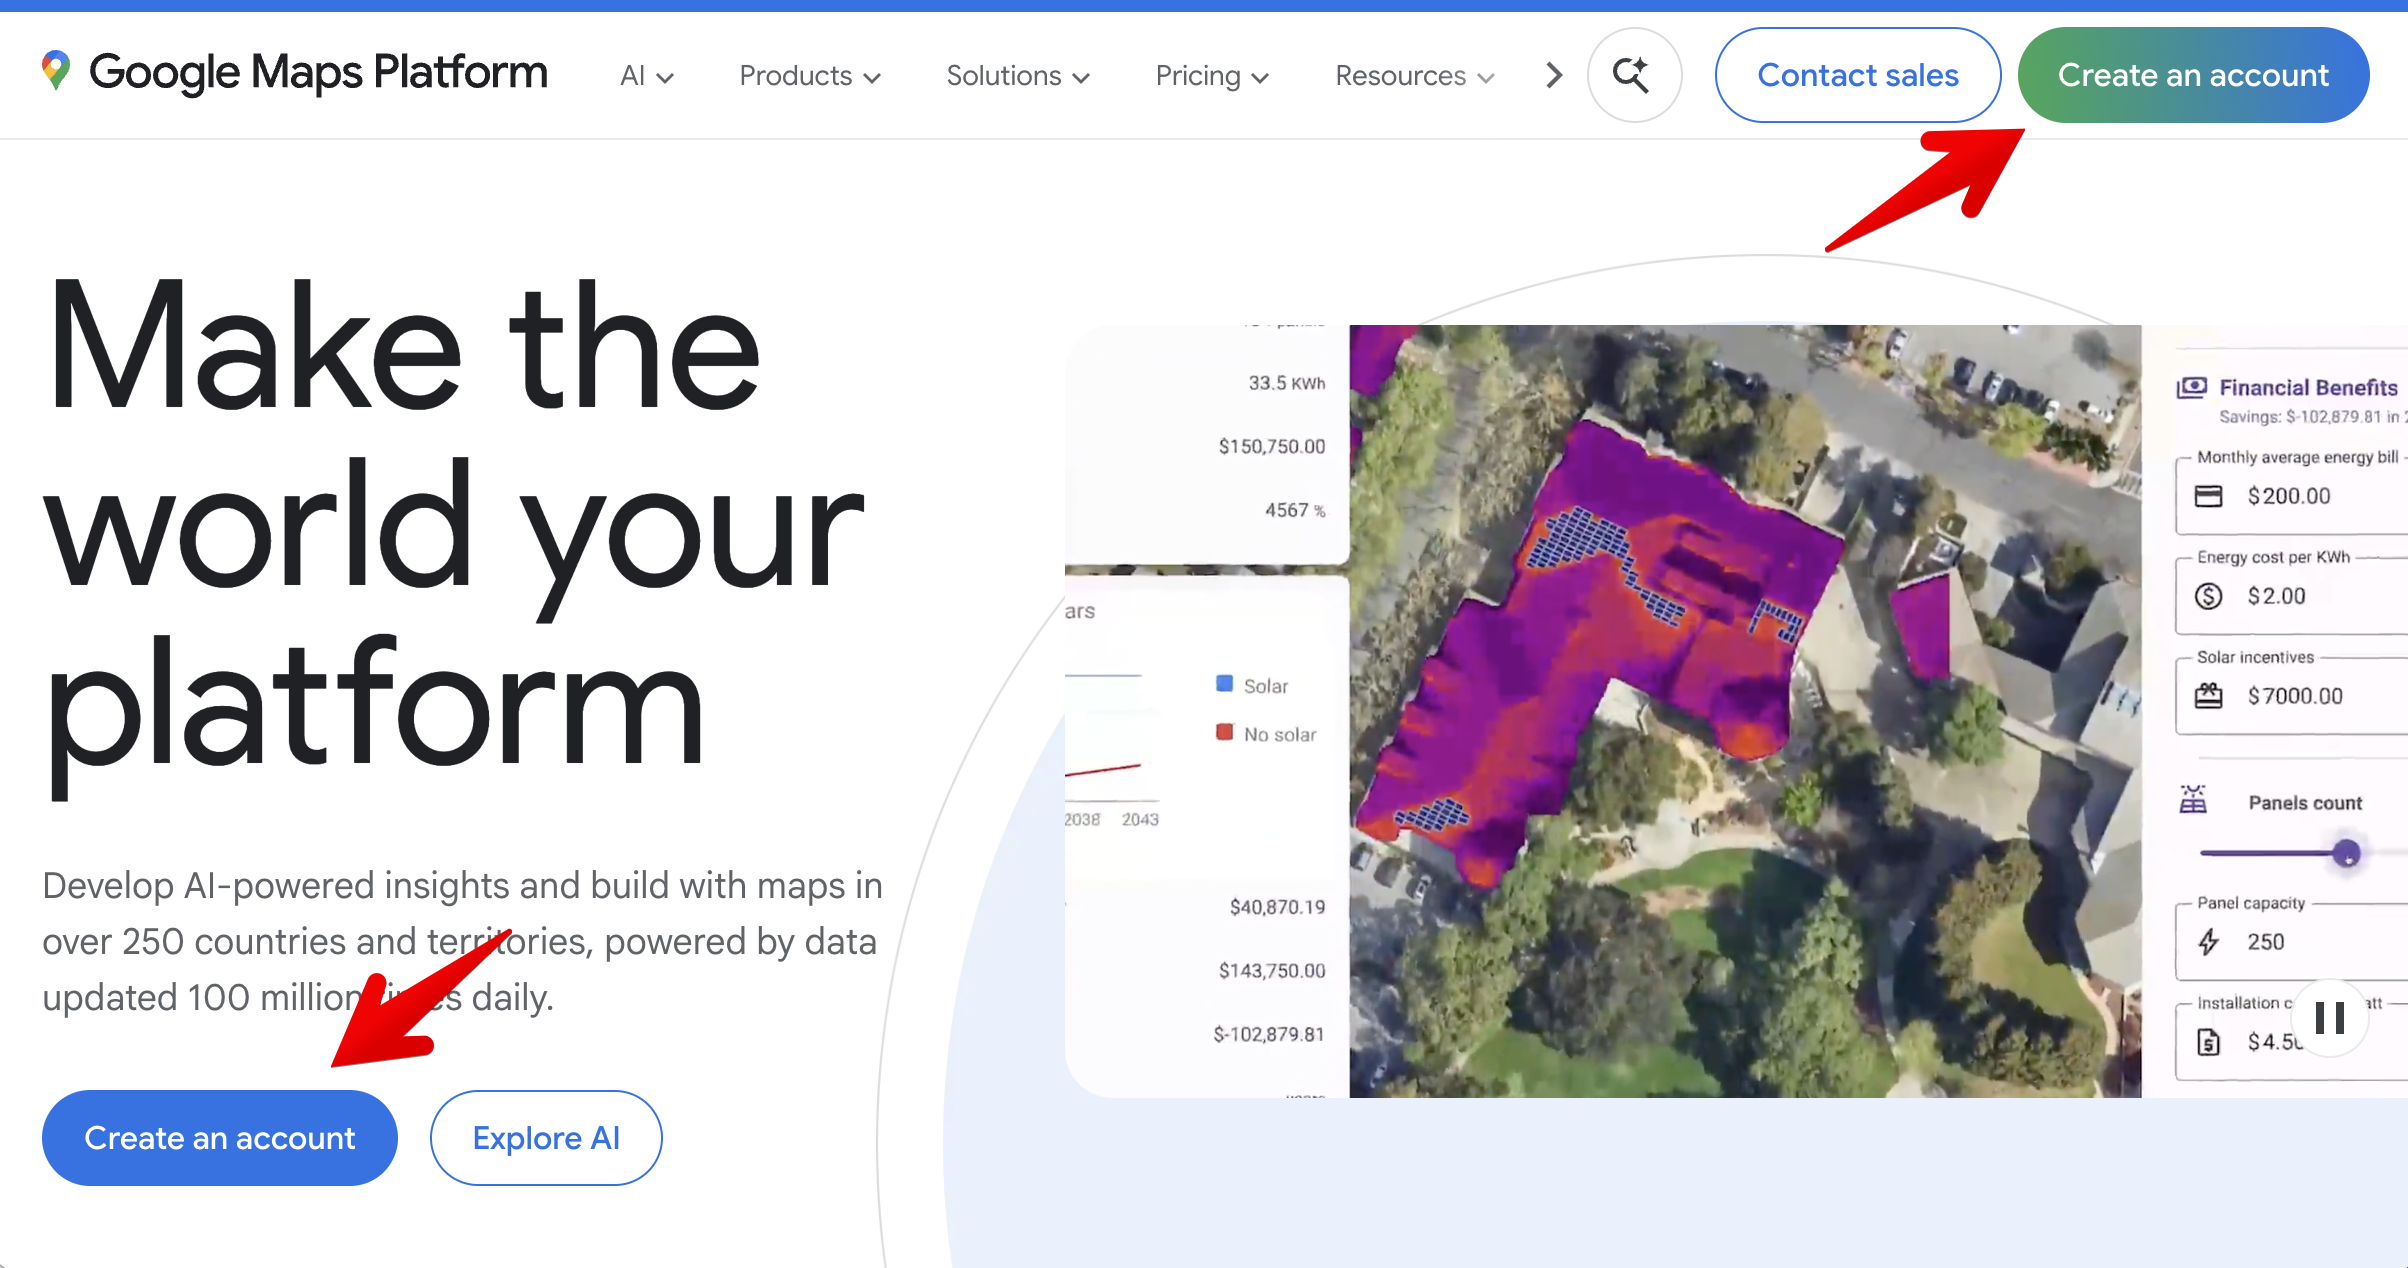
Visit the Google Maps Platform and click Create an account:
Select your country and agree to the Google Cloud Platform Terms of Service:

-
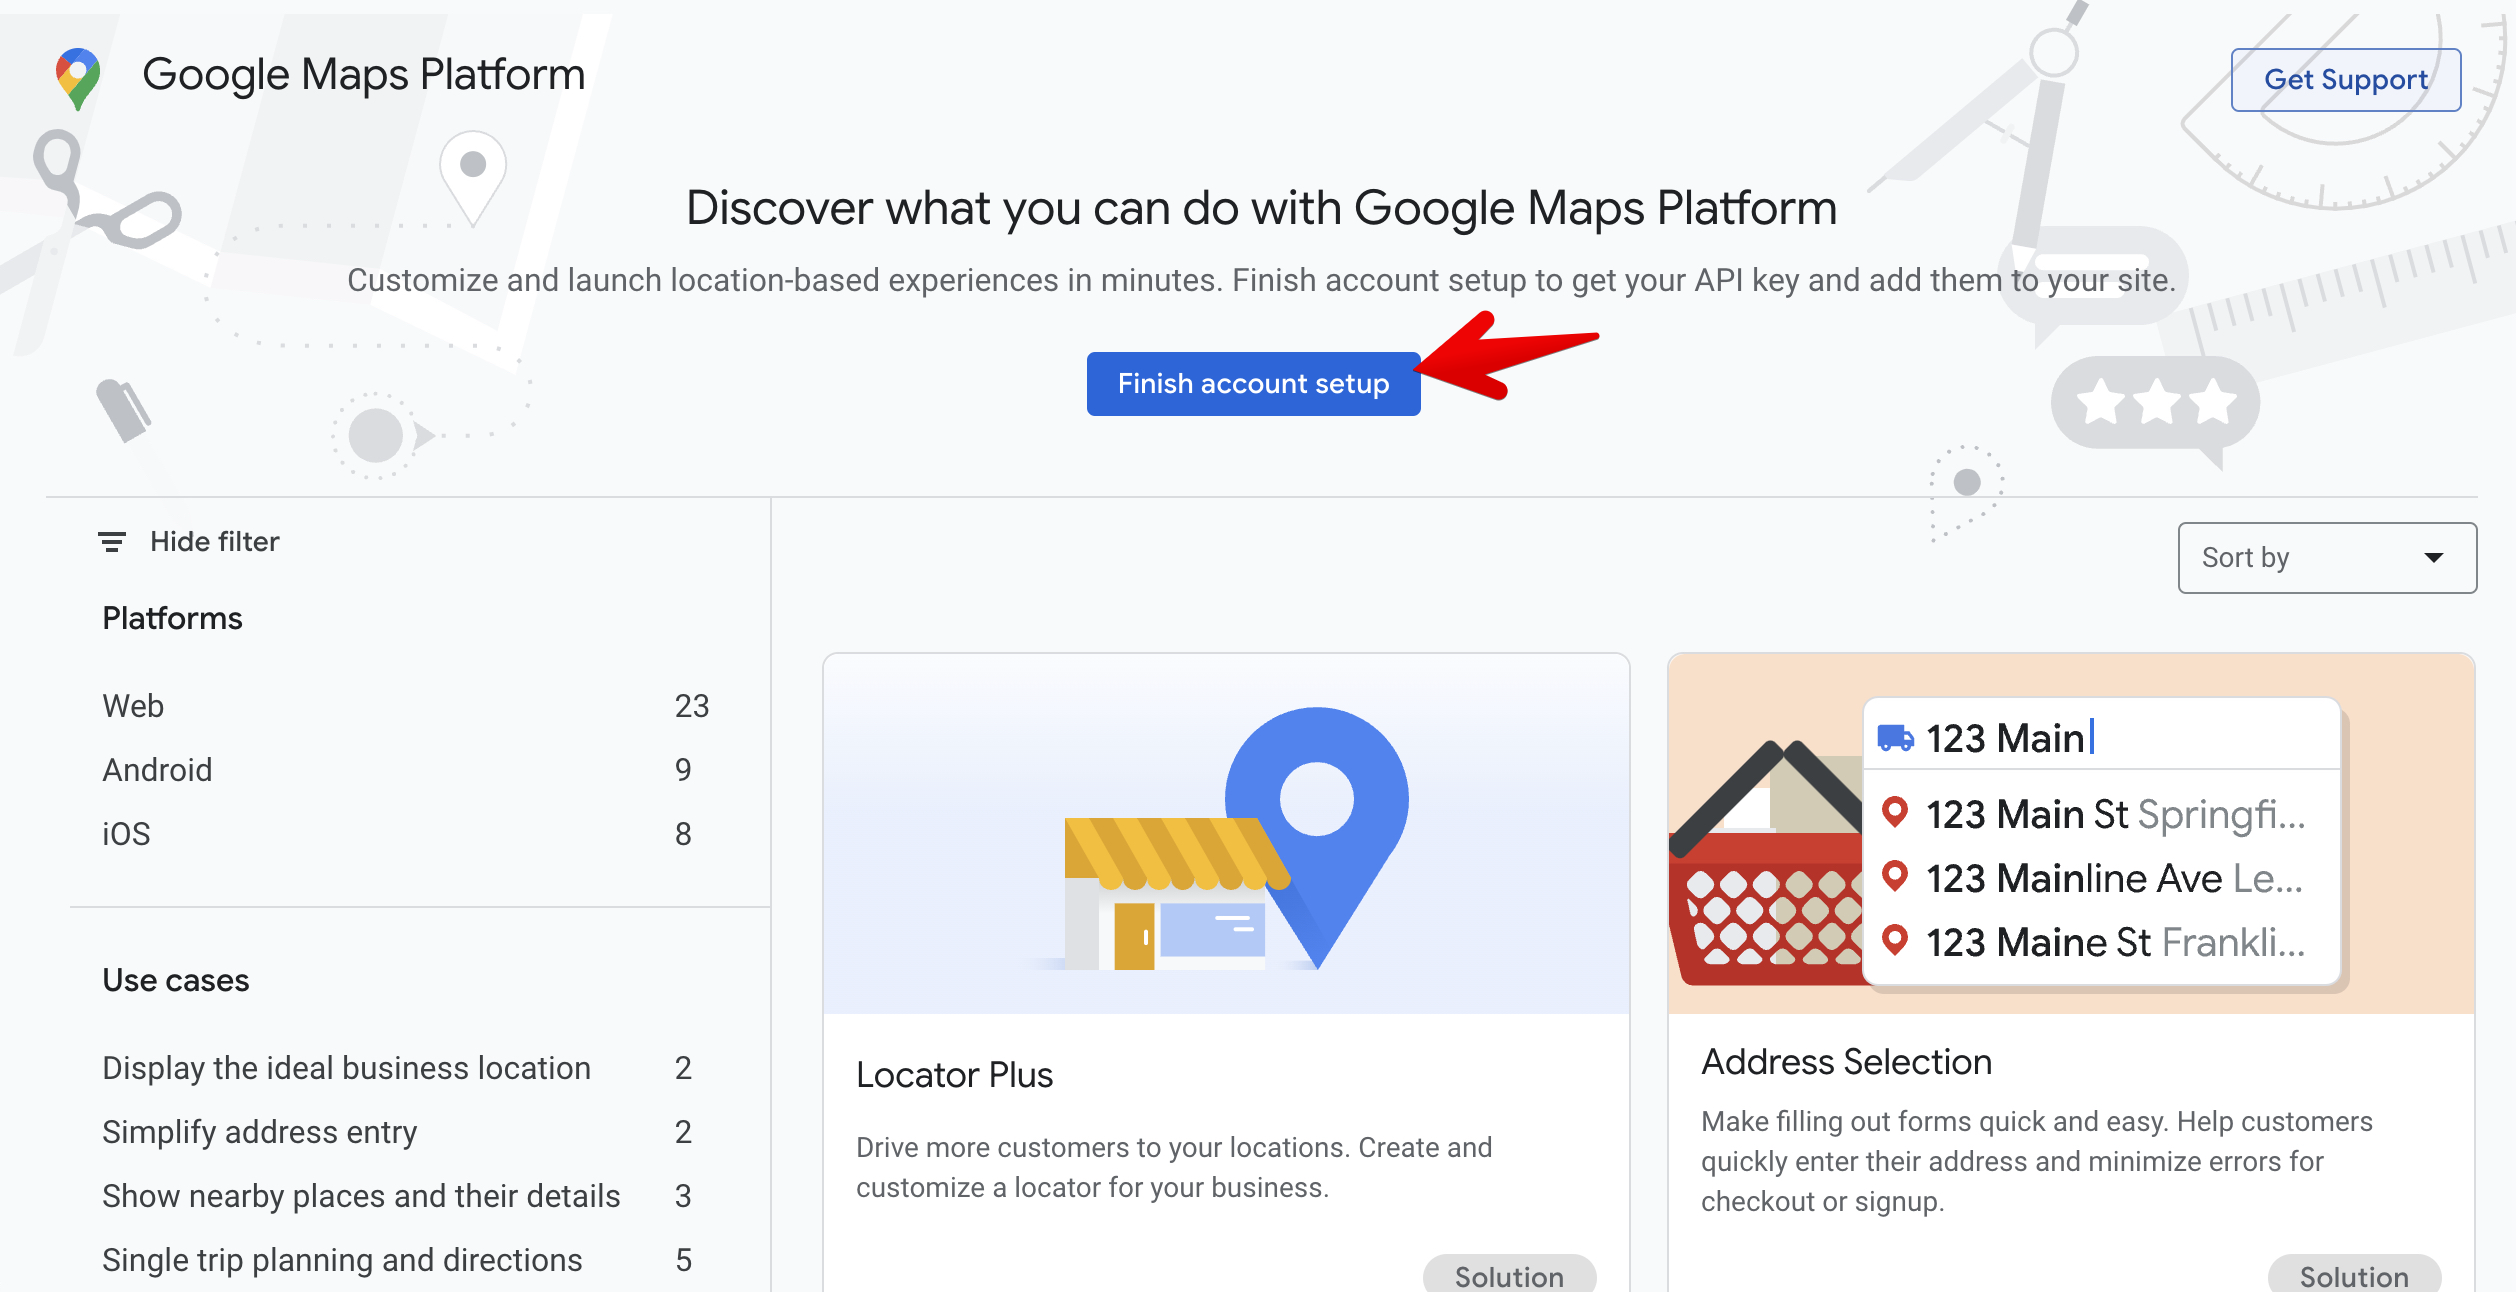
Click Finish account setup to continue:
- 2
-
Confirm your account information
Choose your country and click Agree & continue:

- 3
-
Verify your payment method
Click Create new payments profile, fill out the required fields, and click Create:

Click Add payment method and follow the steps to add a payment method:

Google uses your card for verification only—you won’t be charged unless you upgrade to a paid account. You’ll also receive 10,000 free Google Maps API requests per month. Learn more about Google’s billing here: Google Cloud Program. Click Start free:

- 4
-
Finish the setup
Now you’re all set! You can skip the personalization form if you'd like:

Your API key is created automatically along with your first project and billing account. Copy and save it somewhere secure for later. Select Enable all Google Maps APIs for this project, then click Go to Google Maps Platform:

If prompted to restrict the API key, click Maybe later:

Your account is ready! 🎉


I have a Google Cloud account
If you already use Google Cloud Platform, all you need to do is create (or select) a project, make sure it’s linked to a billing account, and then generate an API key for that project.
- 1
-
Create or select a Google Cloud project
Every API key in Google Cloud must belong to a specific project. If you don’t have one yet, create a new project by following Google’s guide: How to create a Google Cloud project.
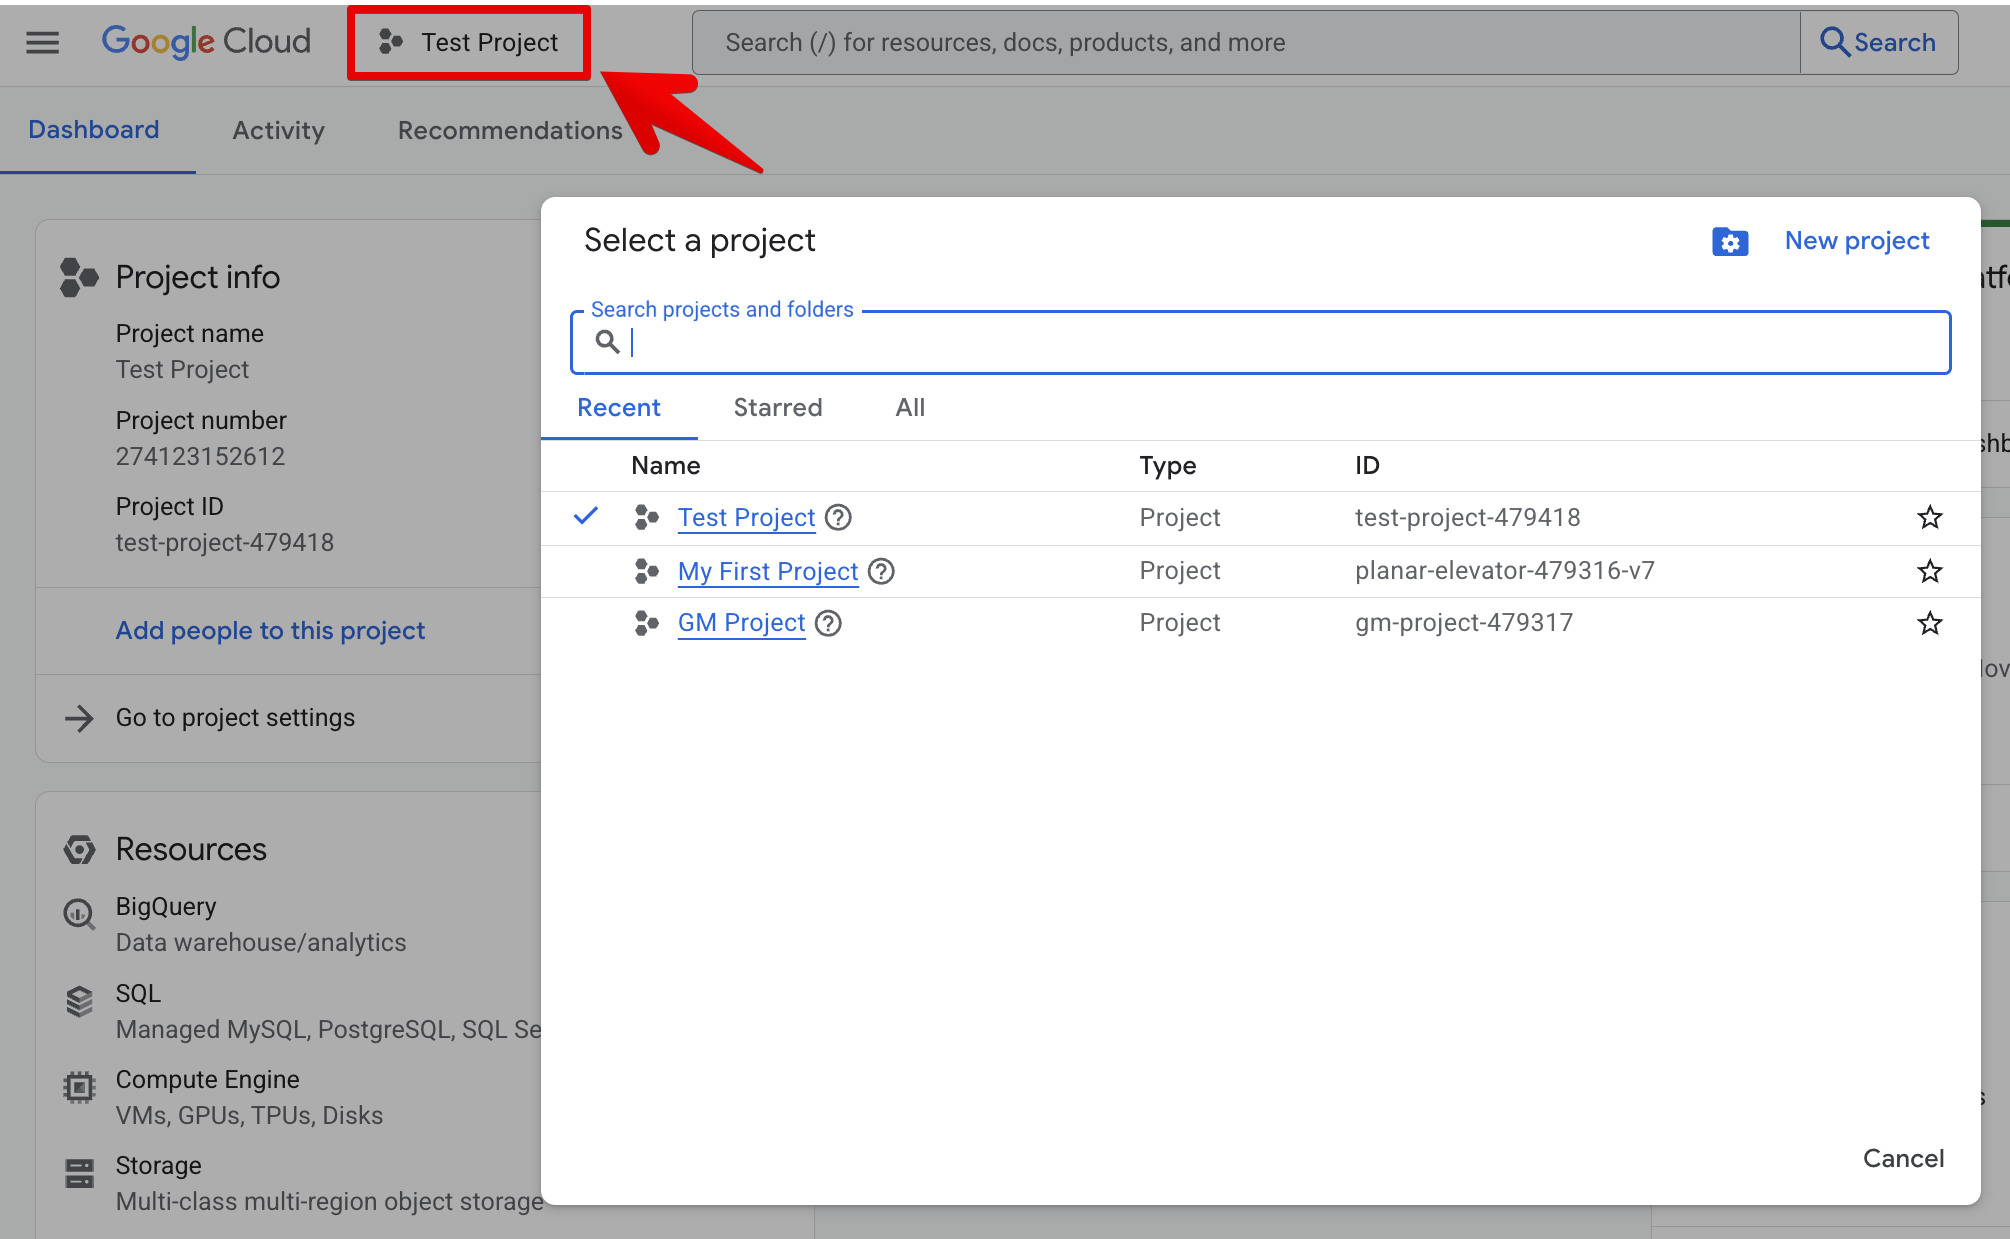
If you already have a project you'd like to use, simply select it from the project selector at the top of the Google Cloud Console:
- 2
-
Make sure the project is linked to a billing account
Google Maps APIs require an active billing account. First, open the billing settings here: Billing account management.
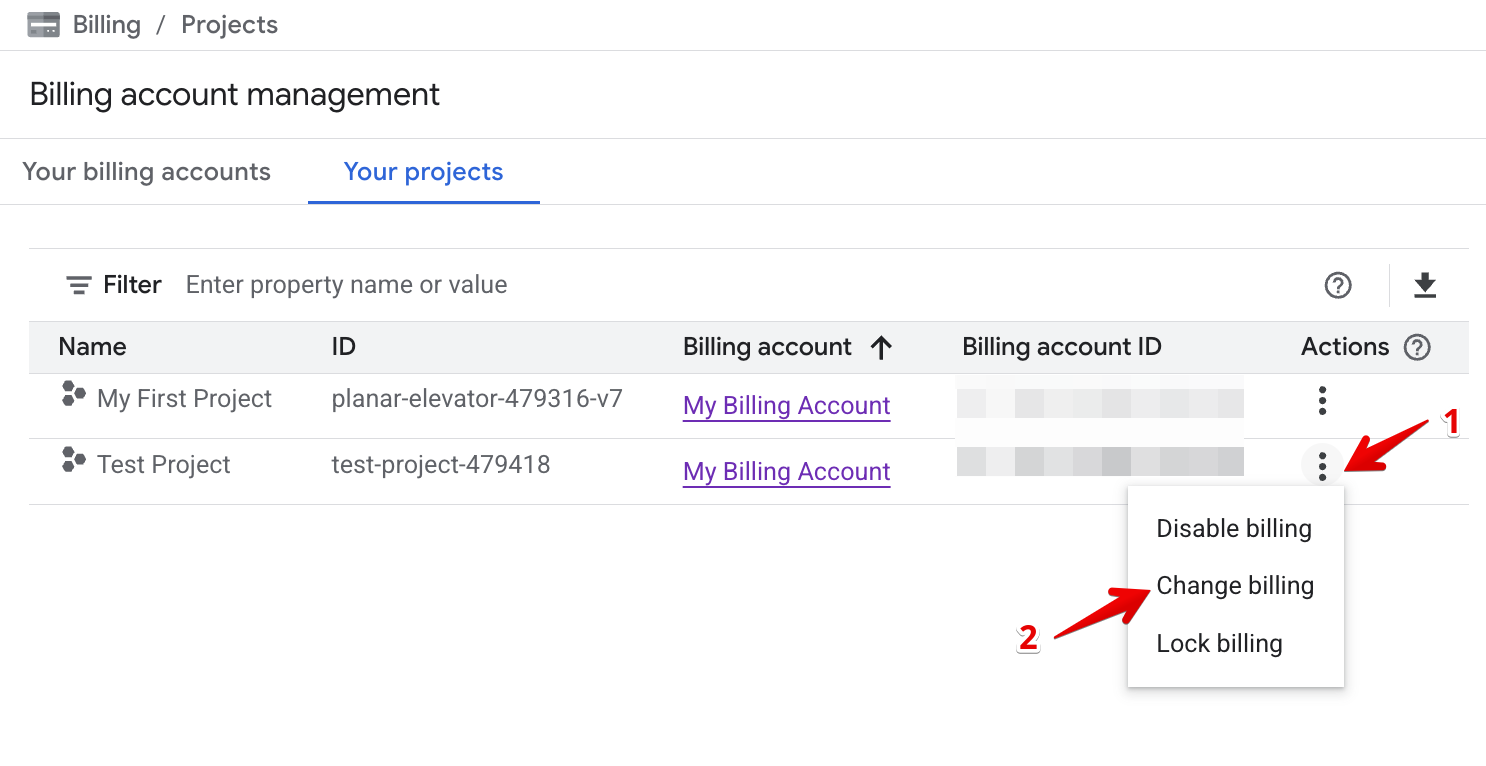
Find your project in the list and make sure it shows an active billing account. If not, click the three-dot menu next to the project and select Change billing:
What if I don't have a billing account?
If you're already using Google Cloud Platform and don't have a billing account, you can create one at My billing accounts by clicking Create account:

Set the account name and choose your country:

Fill in the form, then click Create:

Next, click Add payment method and follow the steps to set up your payment method:

Finally, confirm your details:

Google uses your card for verification only—you won’t be charged unless you upgrade to a paid account. You’ll also receive 10,000 free Google Maps API requests per month. Learn more about Google’s billing here: Google Cloud Program. - 3
-
Create an API key for your project
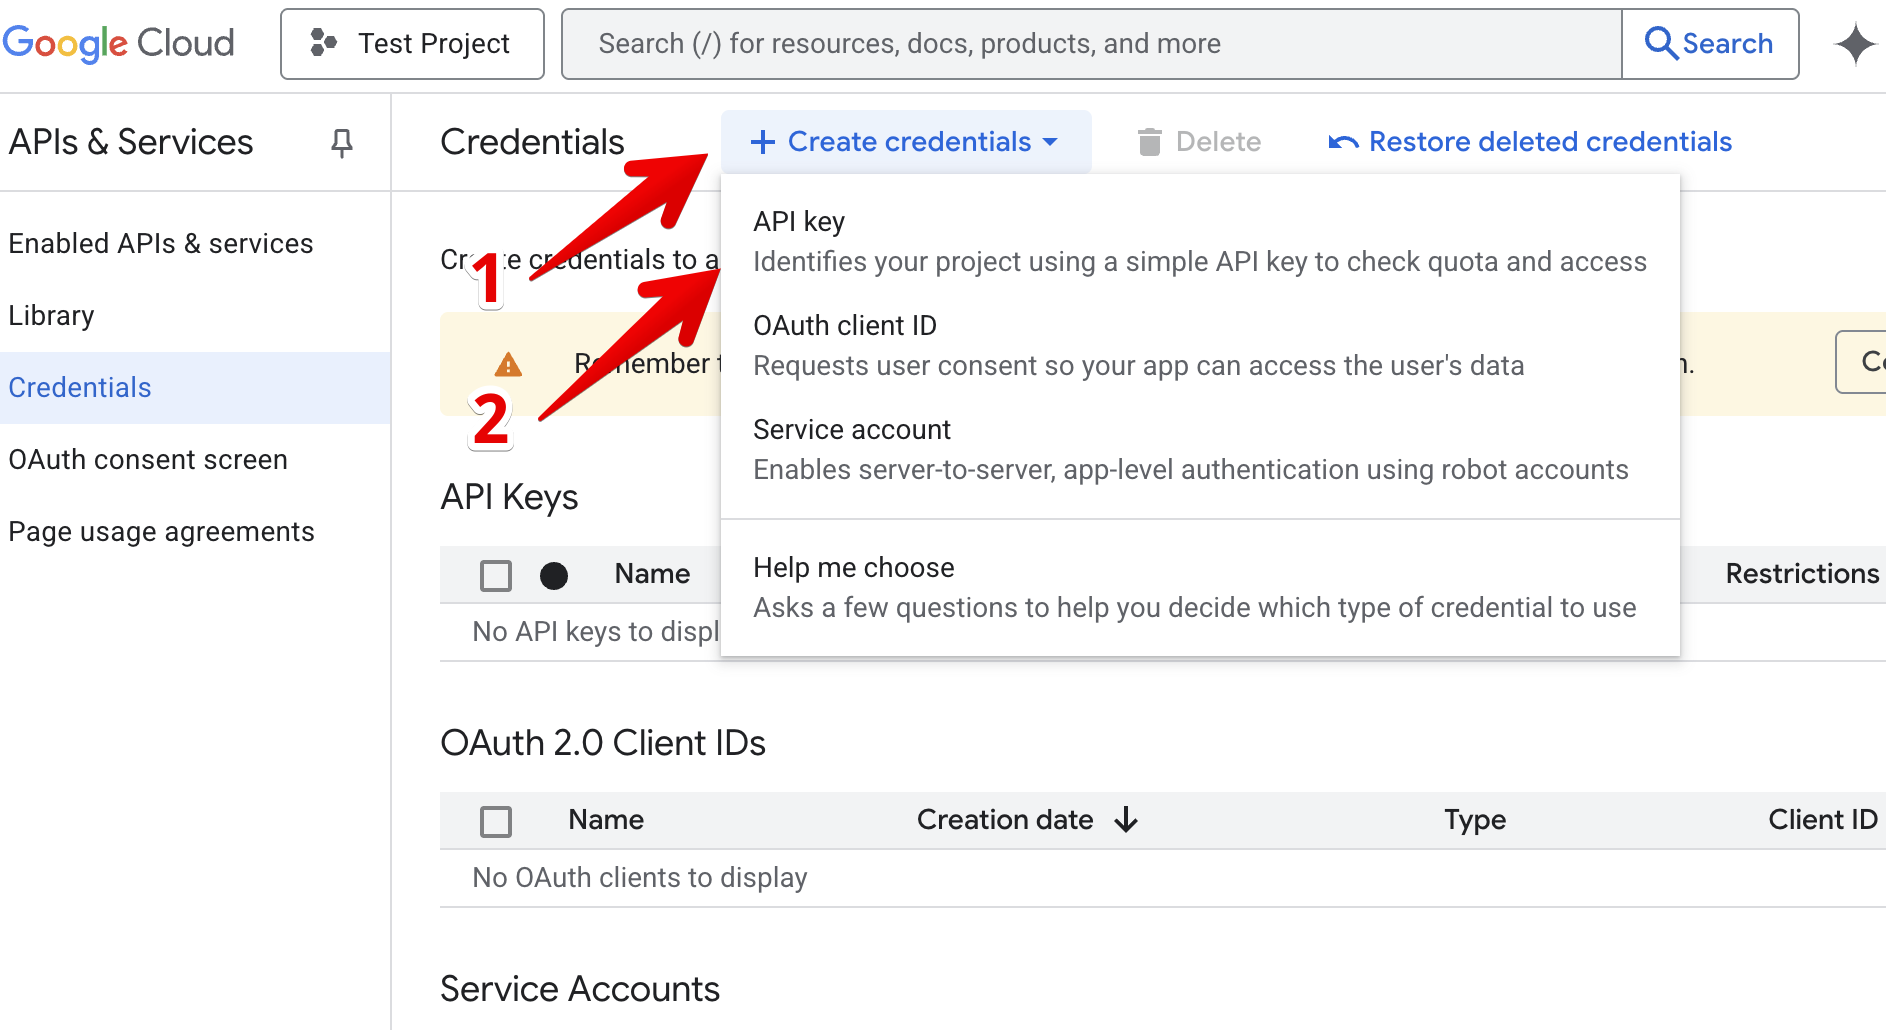
Once your project and billing are ready, you can generate your API key. In the Google Cloud Console, go to Navigation Menu → APIs & Services → Credentials:
Click Create credentials and select API key:
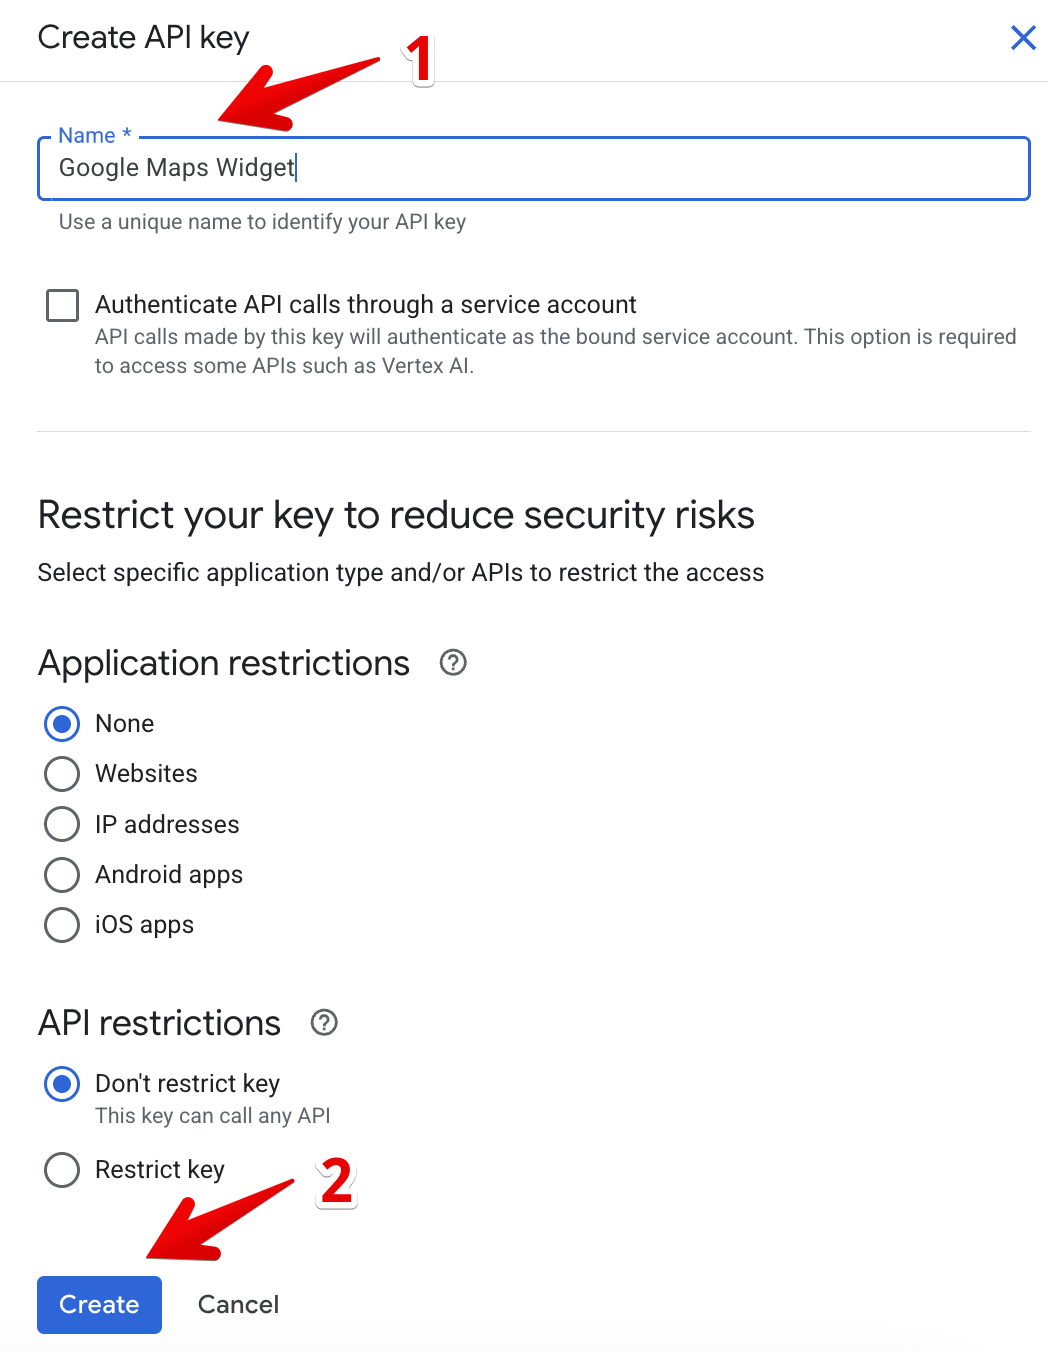
Name your key (for example, "Google Maps Widget") and click Create:
- 4
-
Complete your API key setup
On the next screen, you’ll see your new API key. Copy and save it somewhere secure for later, then click Close:


Great job! You’re now ready to enable the required APIs and set restrictions for your key.