Adding Shopify Liquid Section for Elfsight Installation Code
Sometimes, when installing your widget on Shopify, you may notice that the Custom Liquid section is missing in the Shopify editor. In this case, you'll need to add it manually. This guide will walk you through the process.
- 1
-
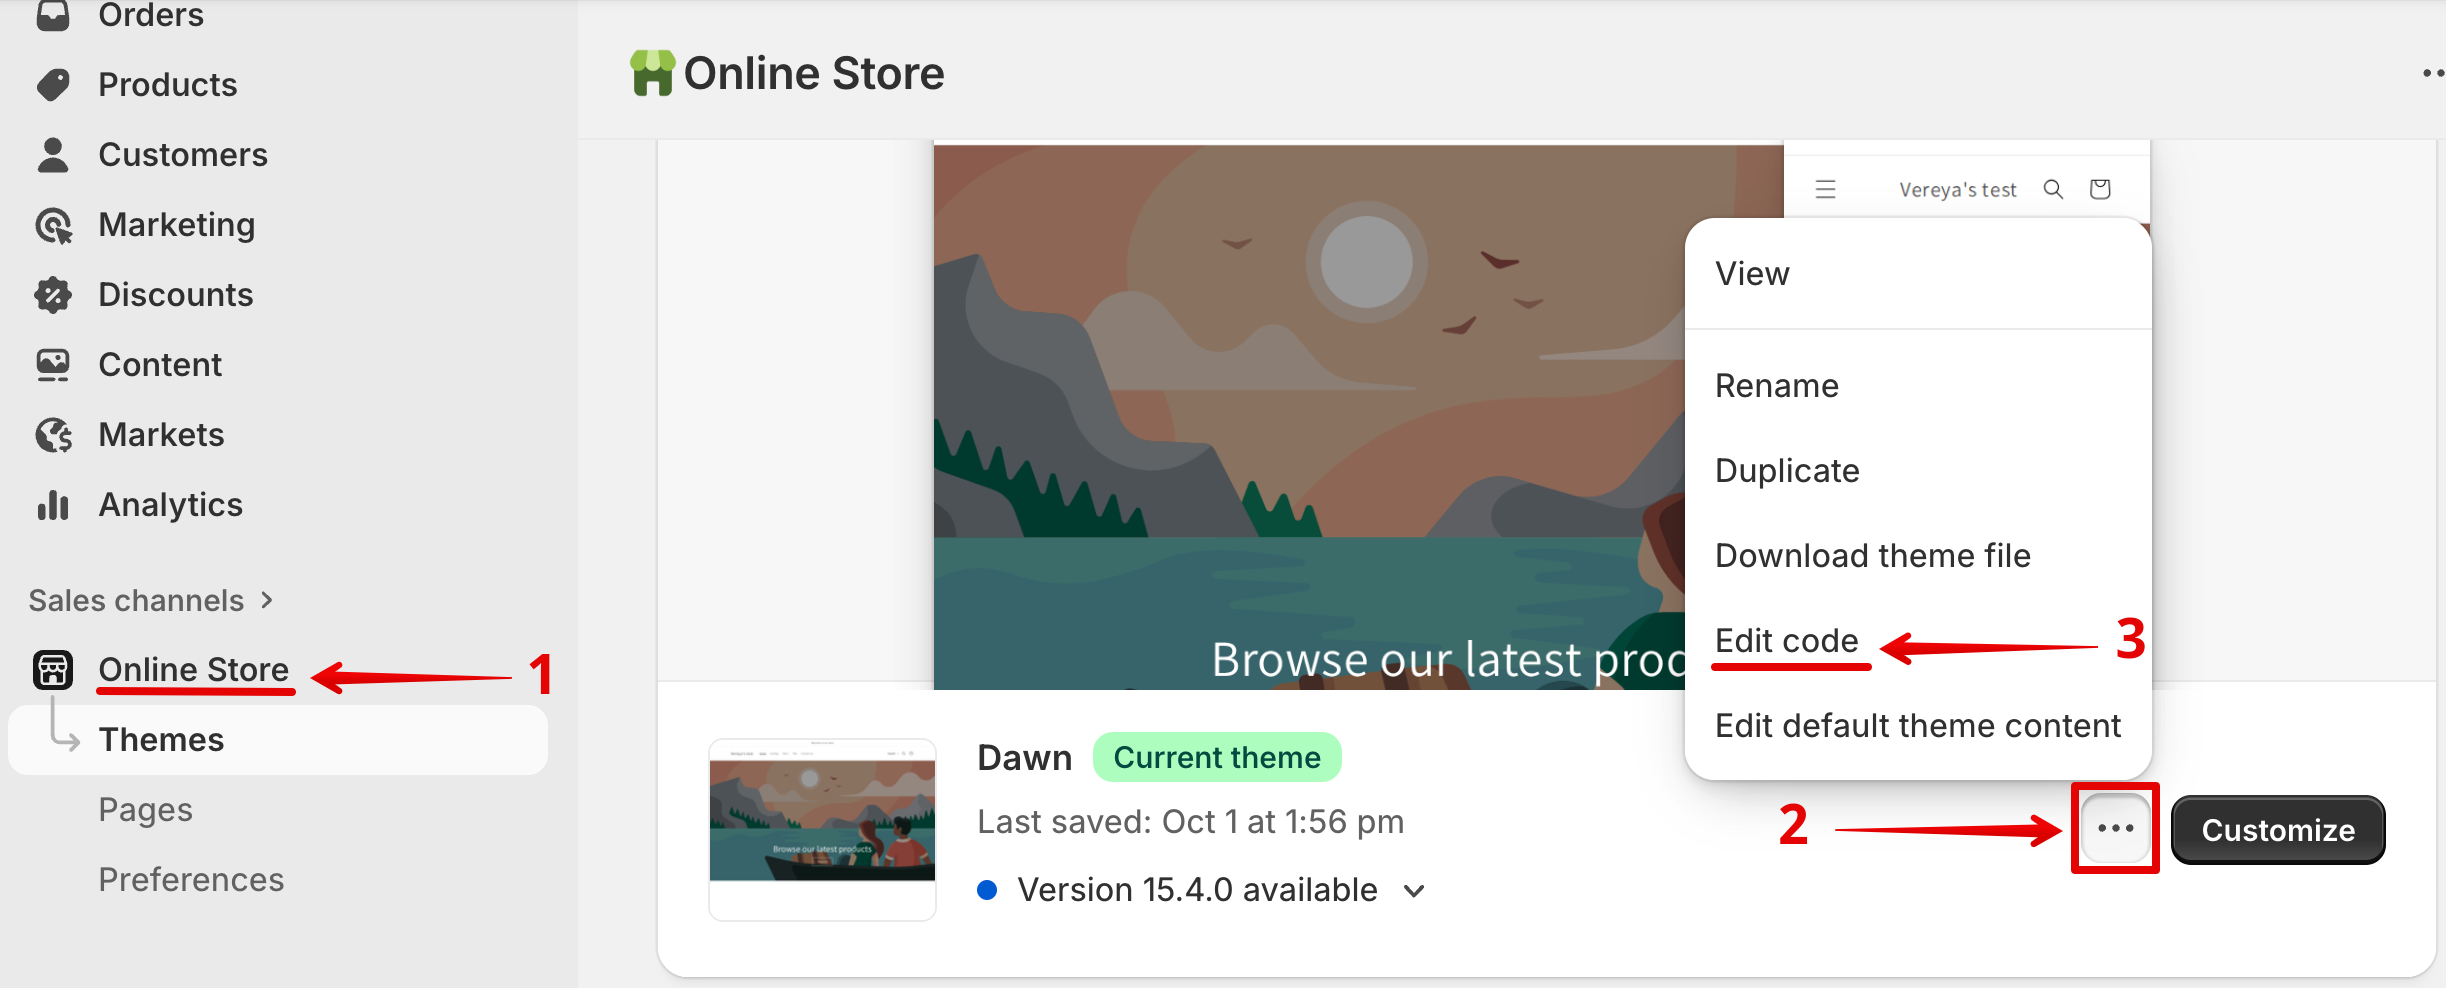
In your Shopify admin panel, go to Online Store. Click the three dots button next to your website section, and choose Edit Code:
- 2
-
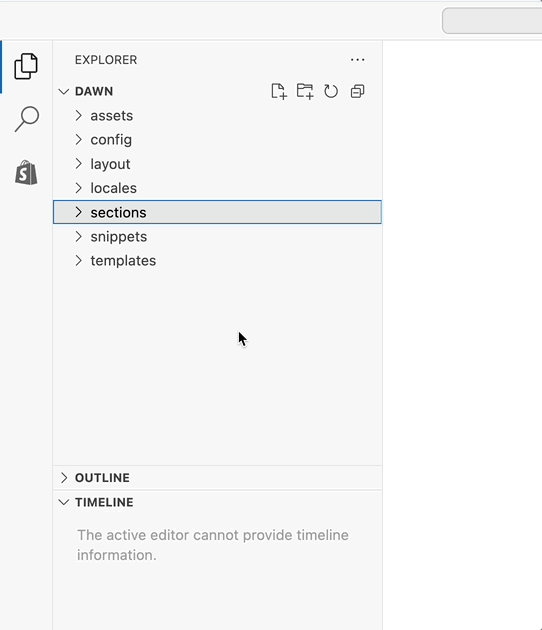
Right-click on the Sections folder, select New File, type
elfsight-widget.liquid, and press Enter:
- 3
-
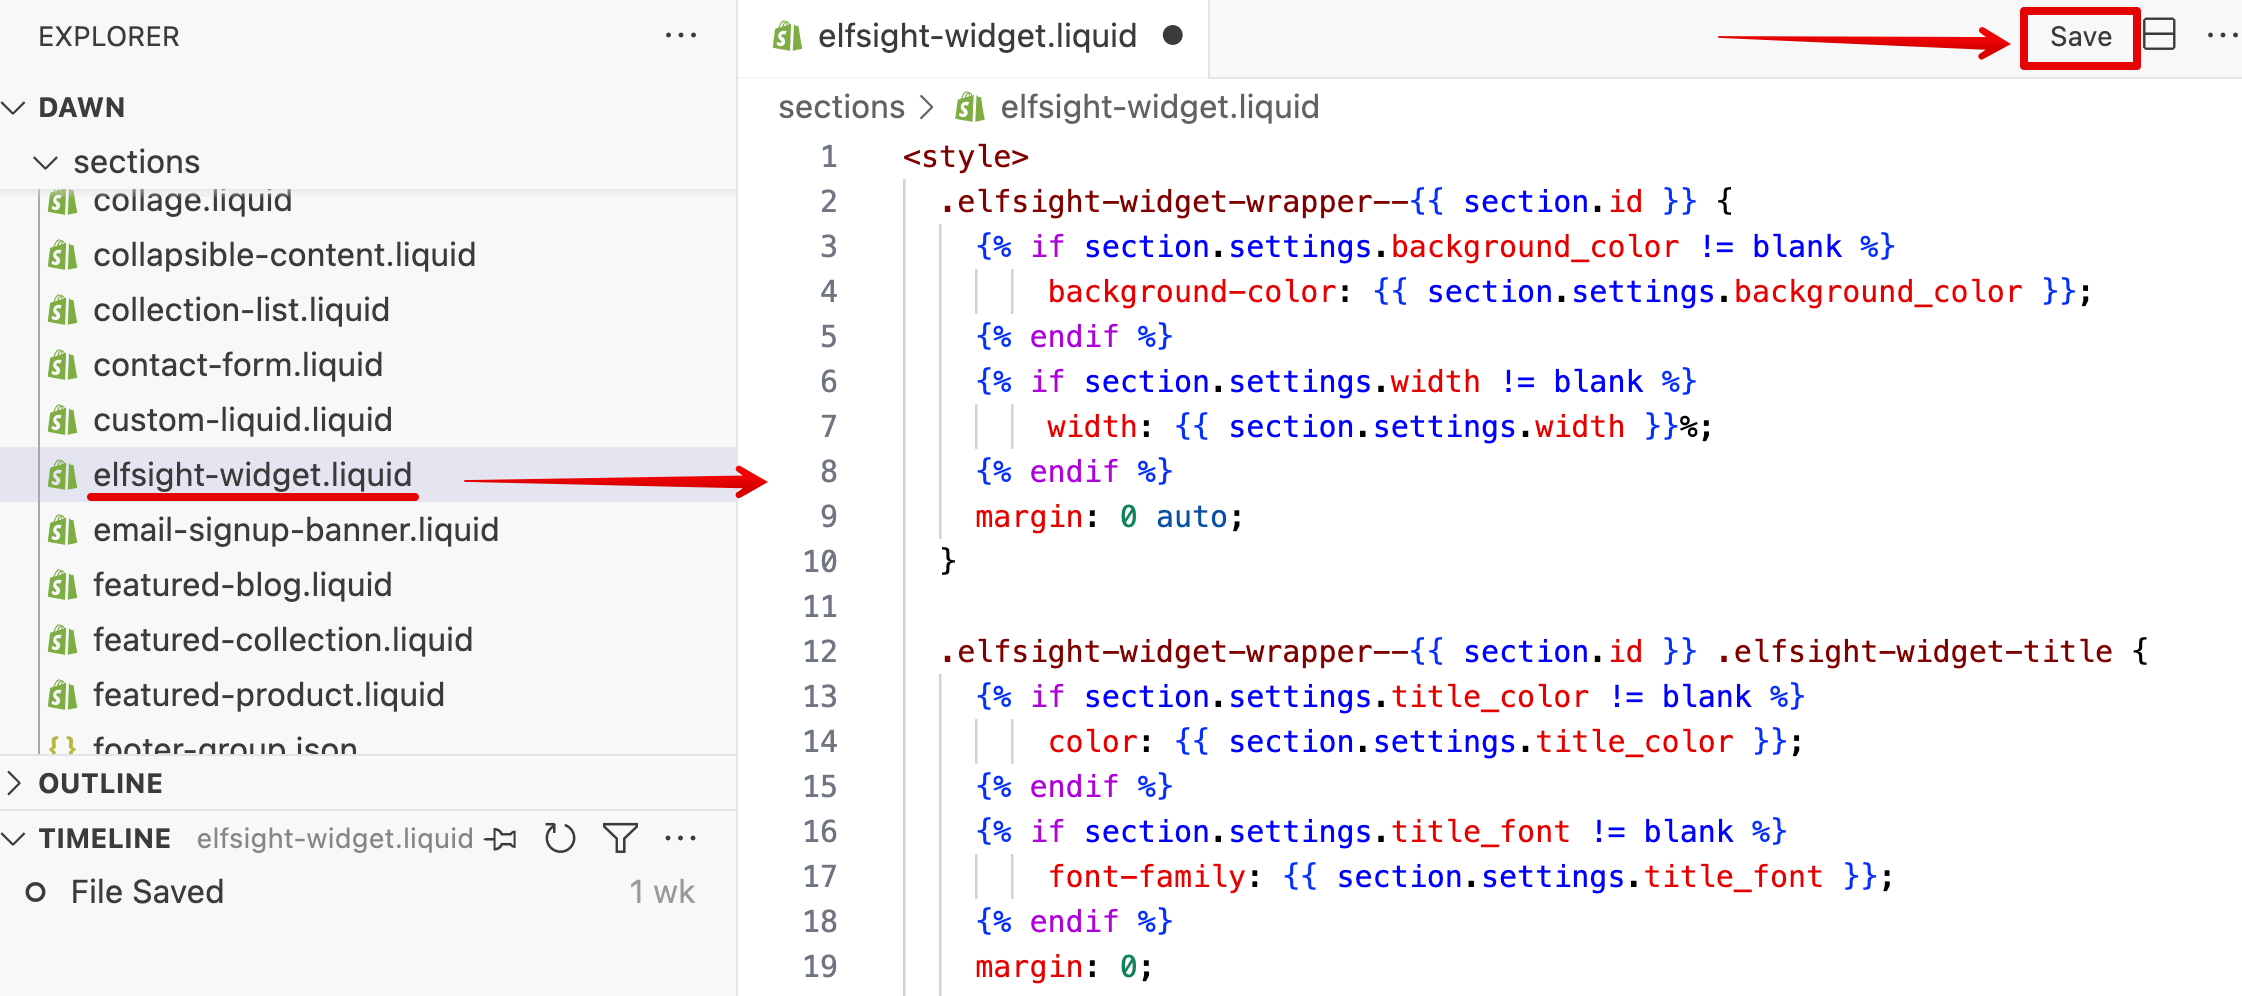
Select
elfsight-widget.liquidfrom the Sections list, and add the following code to it:<style> .elfsight-widget-wrapper--{{ section.id }} { {% if section.settings.background_color != blank %} background-color: {{ section.settings.background_color }}; {% endif %} {% if section.settings.width != blank %} width: {{ section.settings.width }}%; {% endif %} margin: 0 auto; } .elfsight-widget-wrapper--{{ section.id }} .elfsight-widget-title { {% if section.settings.title_color != blank %} color: {{ section.settings.title_color }}; {% endif %} {% if section.settings.title_font != blank %} font-family: {{ section.settings.title_font }}; {% endif %} margin: 0; padding: 20px; } </style> <div class="elfsight-widget-wrapper elfsight-widget-wrapper--{{ section.id }}">{% if section.settings.title != blank %}<h2 class="elfsight-widget-title text-center"> {{ section.settings.title | escape }}</h2> {% endif %} {% if section.settings.code != blank %} {{ section.settings.code }} {% endif %}</div> {% schema %}{"name":"Elfsight widget","settings":[{"type":"header","content":"Title"},{"type":"text","id":"title","label":"Heading"},{"type":"color","id":"title_color","label":"Title color","default":"#3a3a3a"},{"type":"text","id":"title_font","label":"Title font"},{"type":"header","content":"Layout"},{"type":"range","id":"width","label":"Width of section","min":10,"max":100,"unit":"%","default":100},{"type":"color","id":"background_color","label":"Background color"},{"type":"header","content":"Widget"},{"type":"textarea","id":"code","label":"Installation code"}],"presets":[{"category":"Advanced layout","name":"Elfsight widget"}]}{% endschema %}Then, Save the changes:


Congratulations! You’ve successfully created a Shopify liquid section for your installation code. Now, you can proceed with installing the widget on your Shopify website using the Elfsight widget section:

If you're still having trouble, we're here to assist!🧝You can request installation by following the steps in this guide, or simply contact our Support Team.