Adding Elfsight Widget to PrestaShop Website
Want to add an Elfsight widget to your PrestaShop site? Follow this easy guide to integrate it smoothly. Simply copy your widget installation code and let’s get started! 🚀
Steps to install your widget
1. Install the PrestaShop HTML Box Module
Due to PrestaShop’s limitations, the widget can’t be installed directly through the page editor. To do that, you’ll need to install a dedicated module that runs the script on your website.
It's free and simple! Just follow the steps:
- 1
-
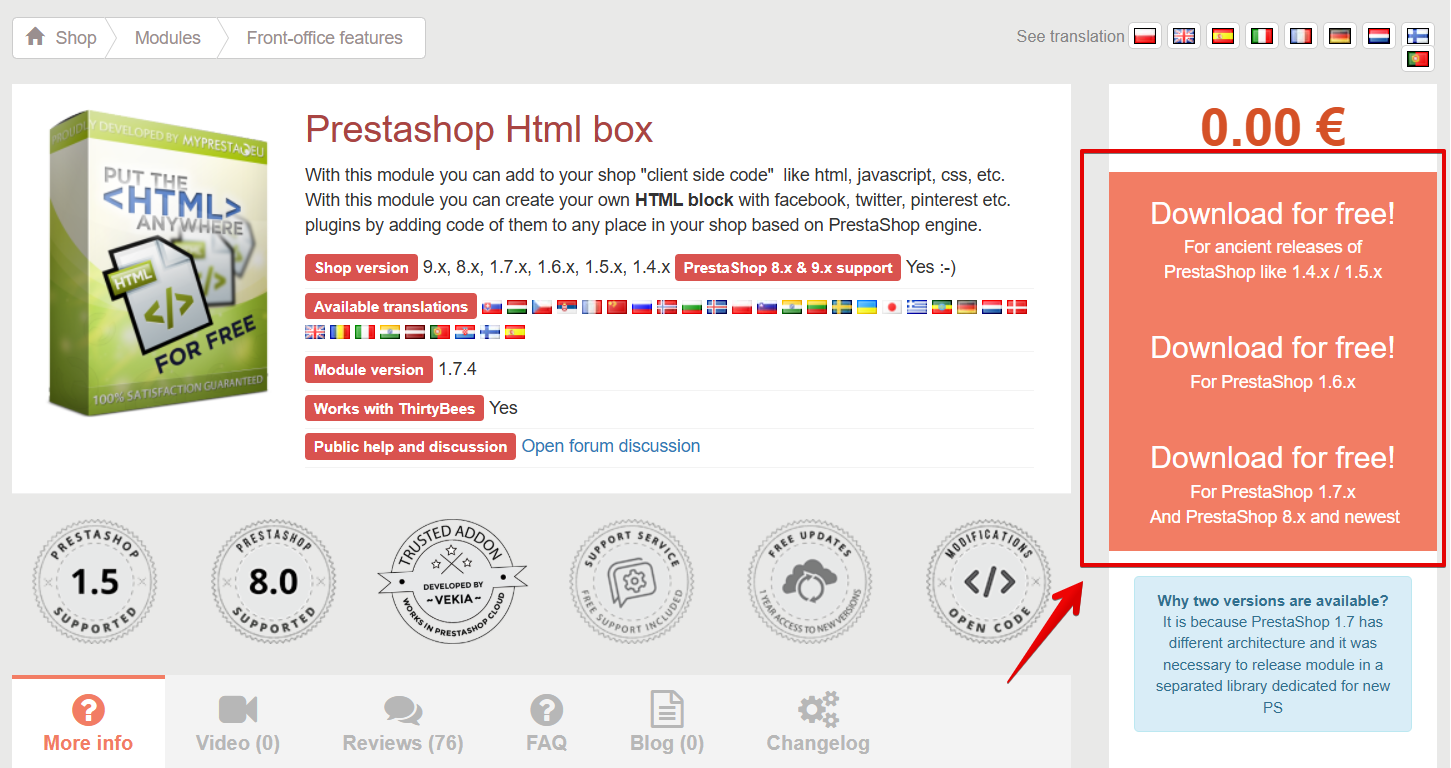
On the PrestaShop HTML Box page, choose the file for your PrestaShop version and download the module:


- 3
-
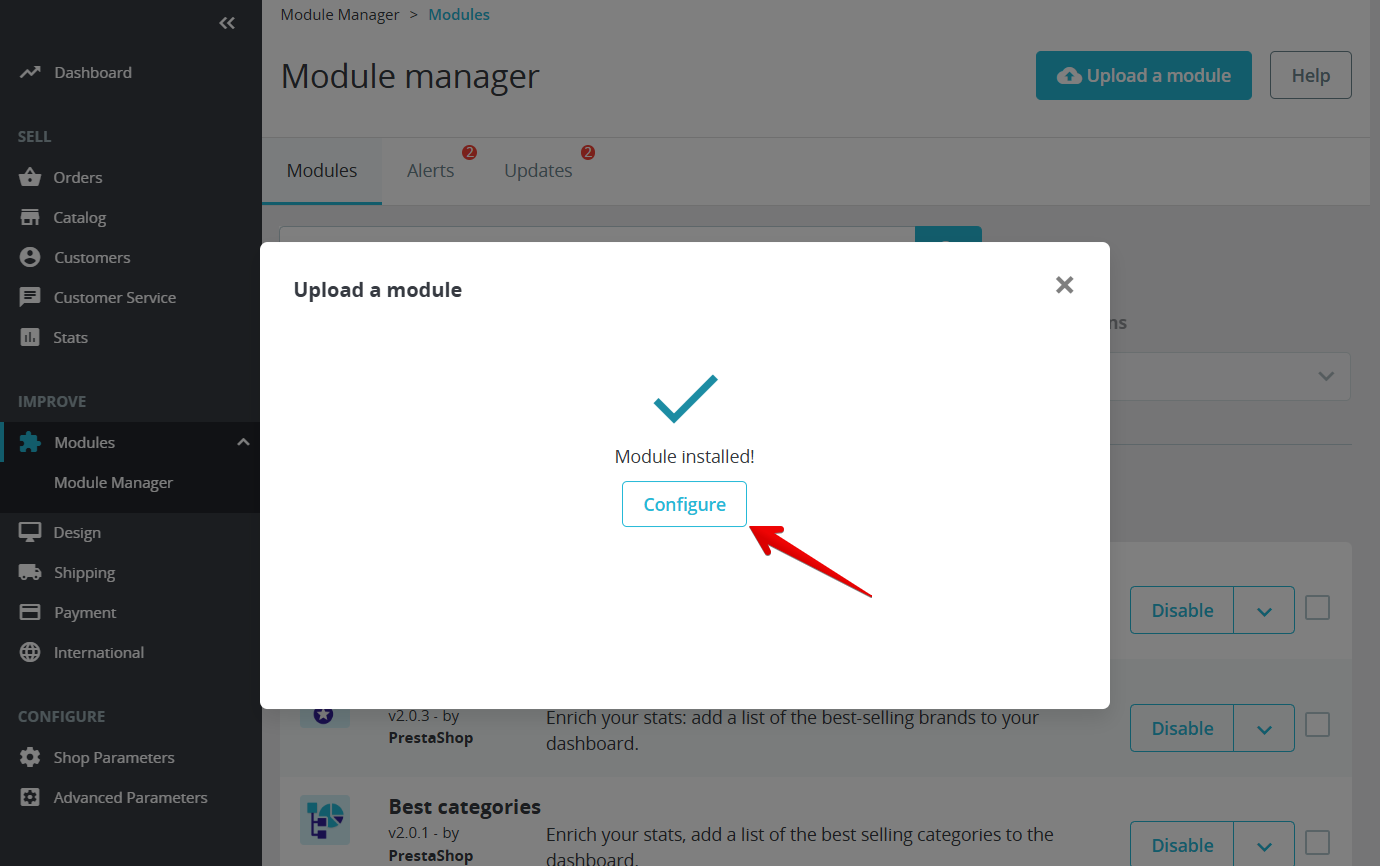
Upload the .zip file of the module you just downloaded. Once installed, click Configure in the popup to continue with the installation:
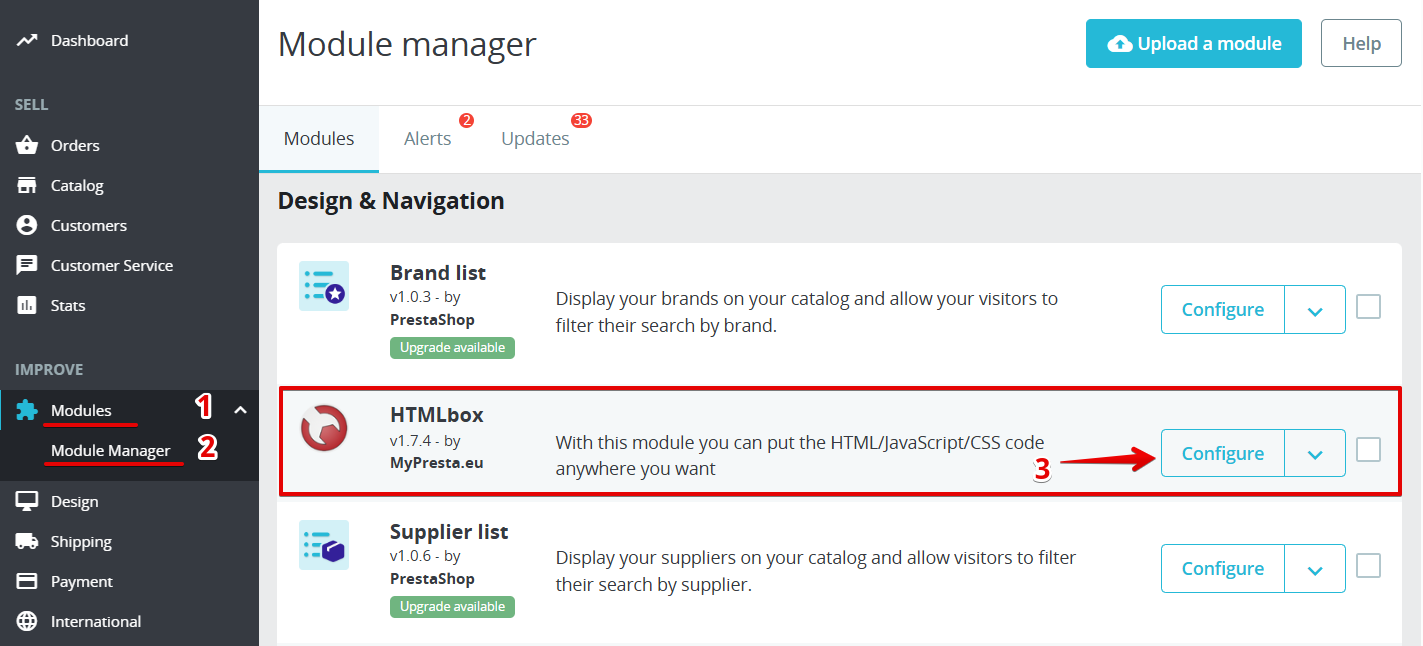
If you need to adjust the code later, you can access the module settings anytime by going to Modules → Module Manager and clicking Configure next to HTMLbox:


2. Add the Widget to Your Website
Choose where to place your widget
Add a Floating or Static Widget to the Home Page
After installing the PrestaShop HTML Box module, you can add your widget to the Home page. Follow these steps:
- 1
-
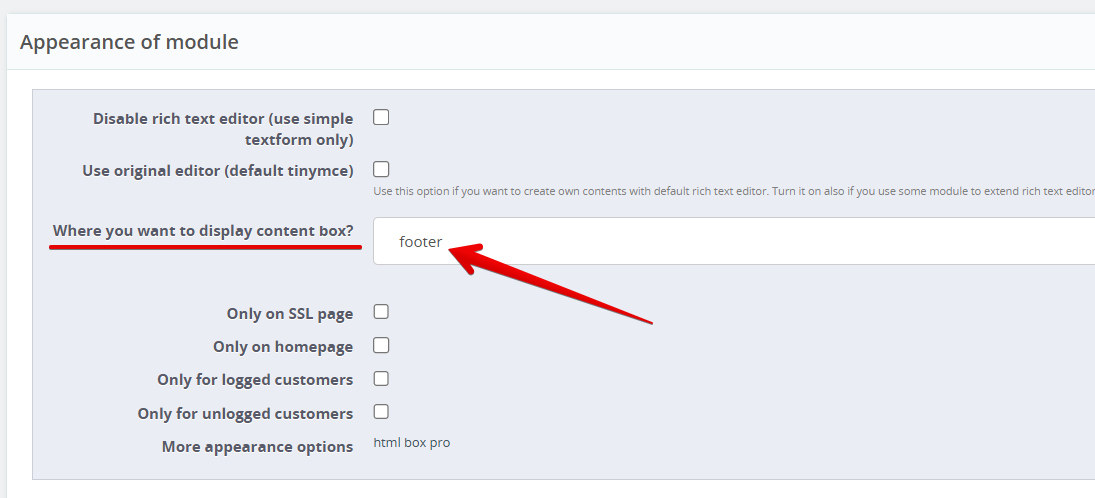
In the module settings, select Footer from the Where you want to display content box? dropdown:
- 2
-
Scroll to the input field and click the Source Code
</>icon: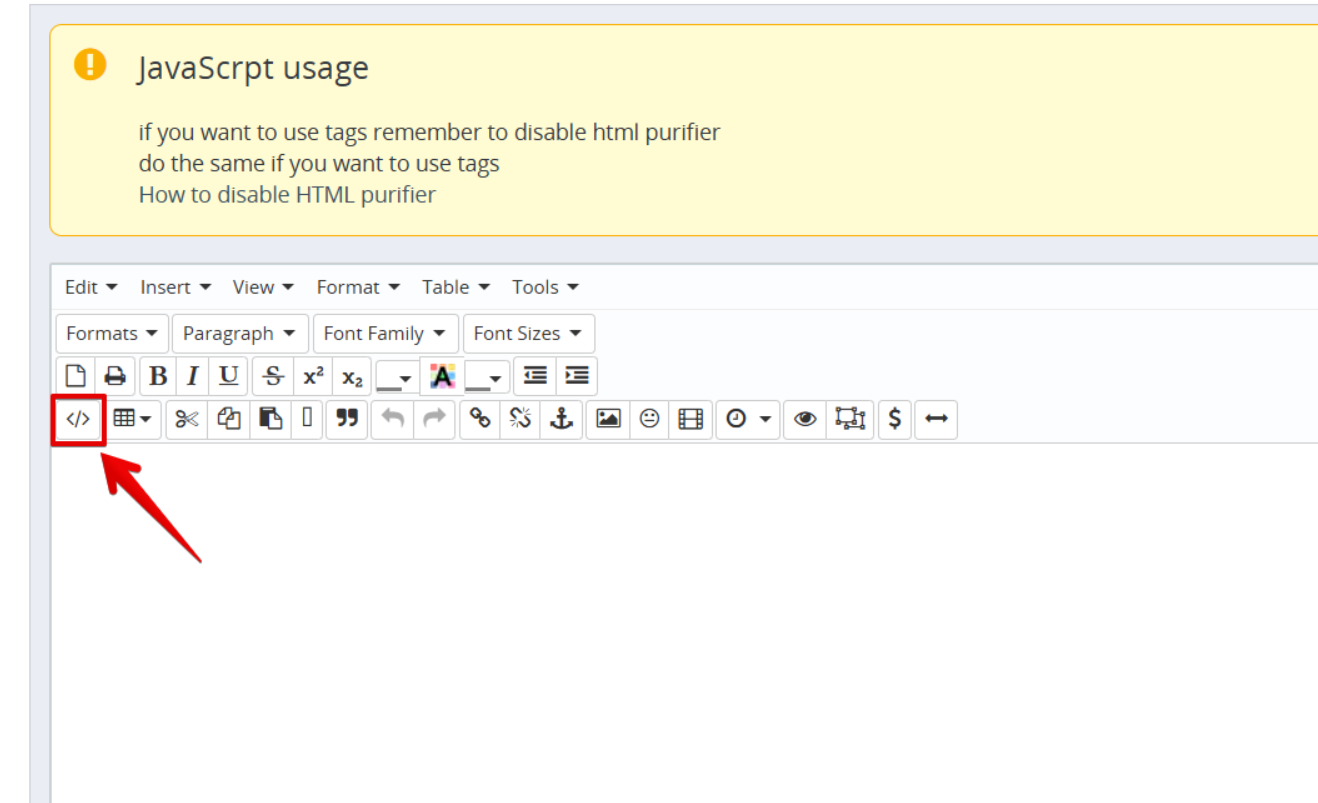
- 3
-
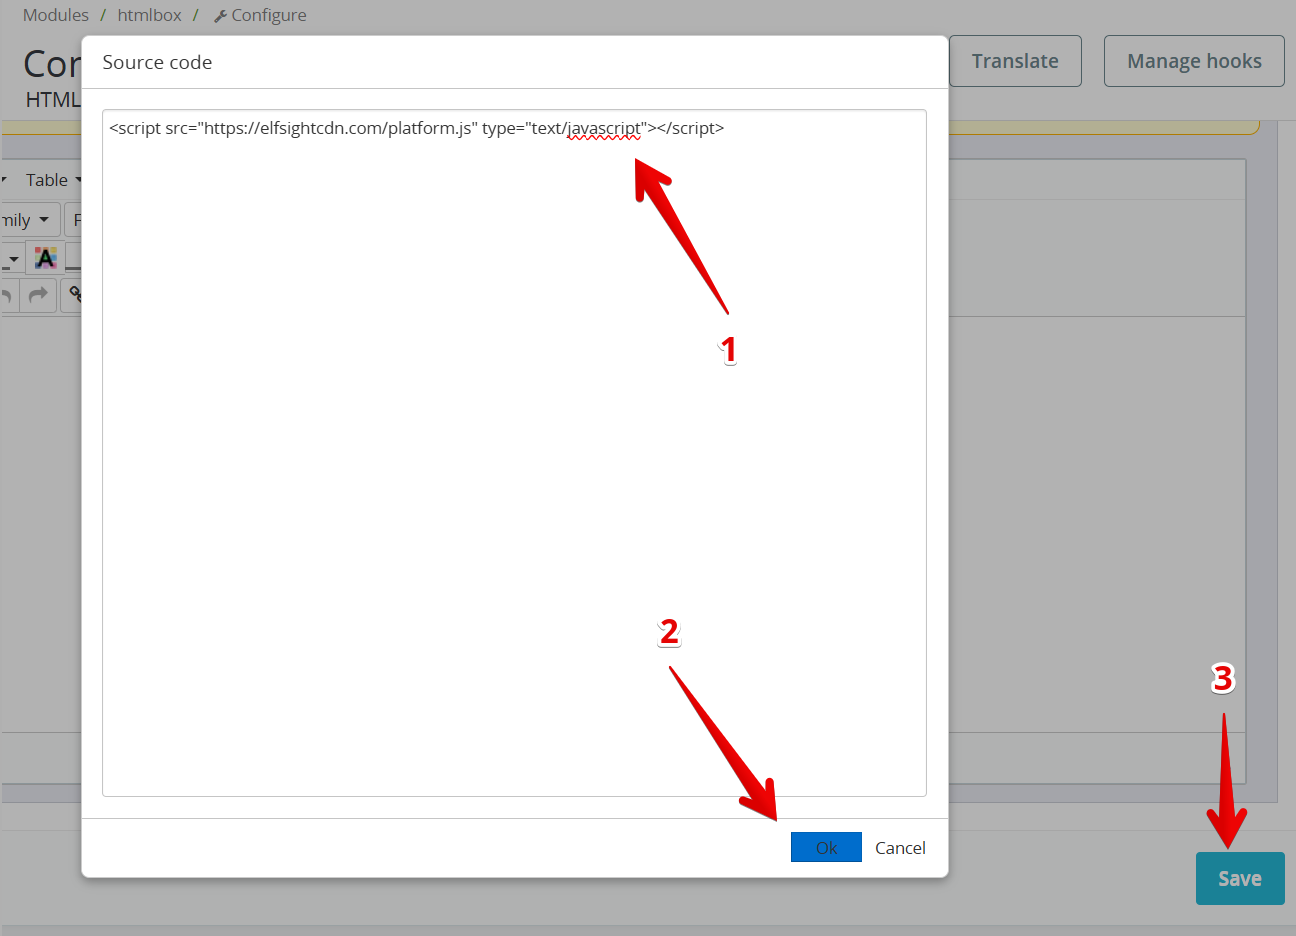
Paste the first line of the installation code into the popup. Here's what it looks like:
<script src="https://elfsightcdn.com/platform.js" async></script>
Then, click Ok and Save:
- 4
-
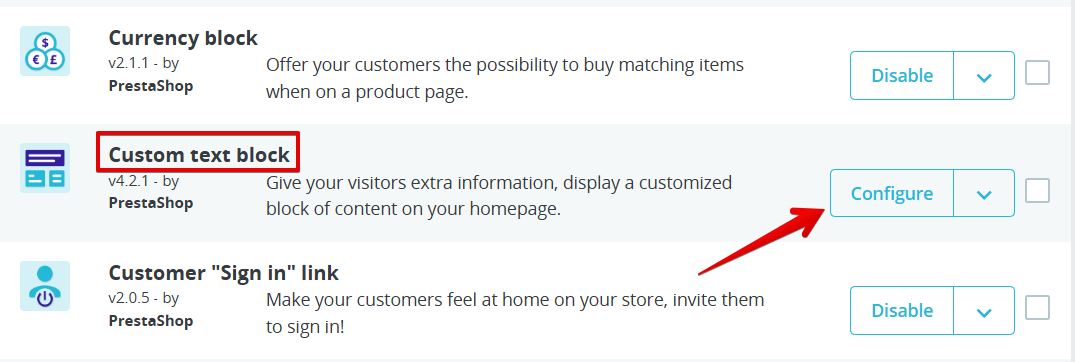
Go to Modules → Module Manager and scroll to the Theme modules section:

Find Custom Text Block and click Configure:
- 5
-
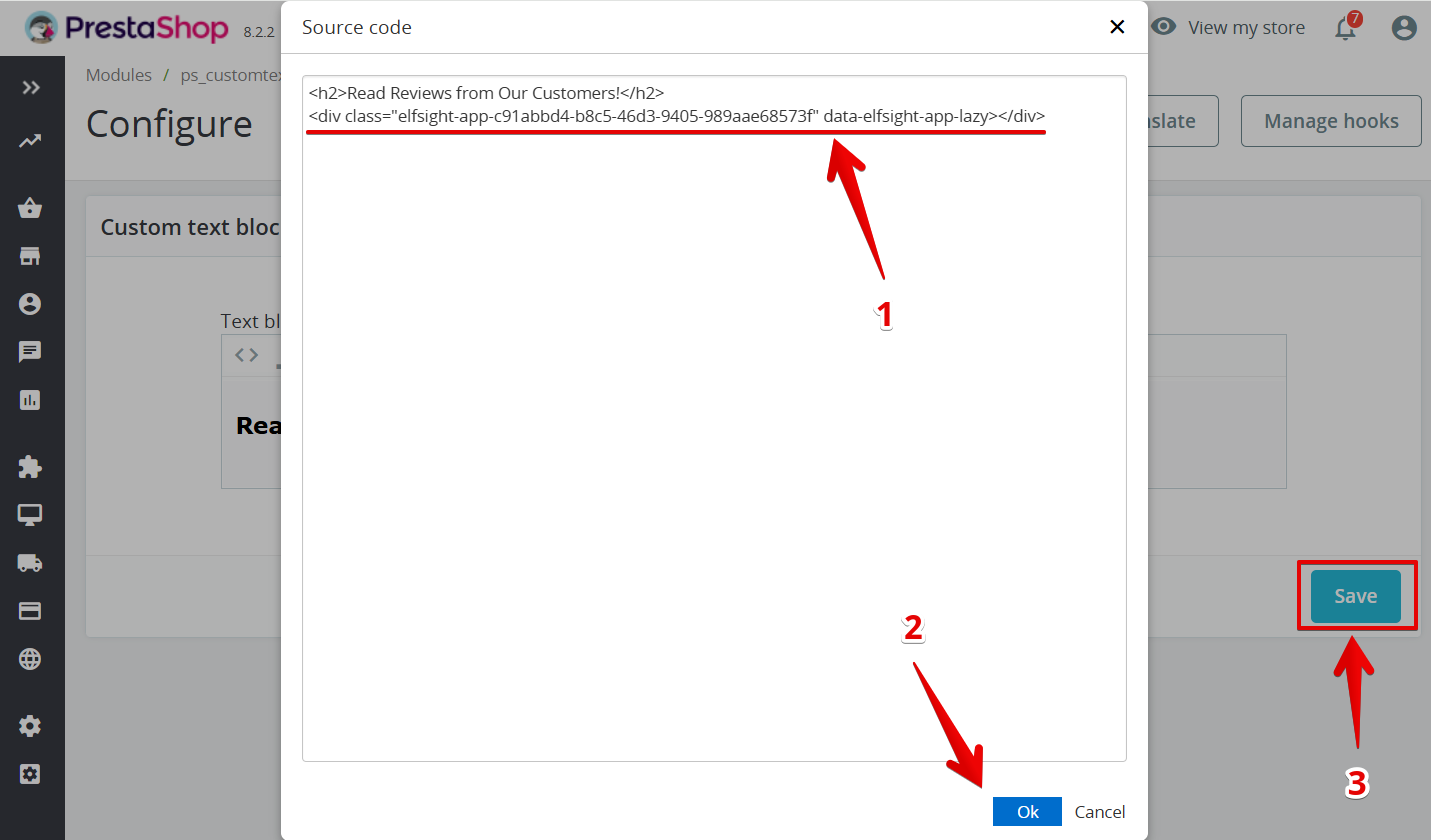
Click on the Source Code
</>icon: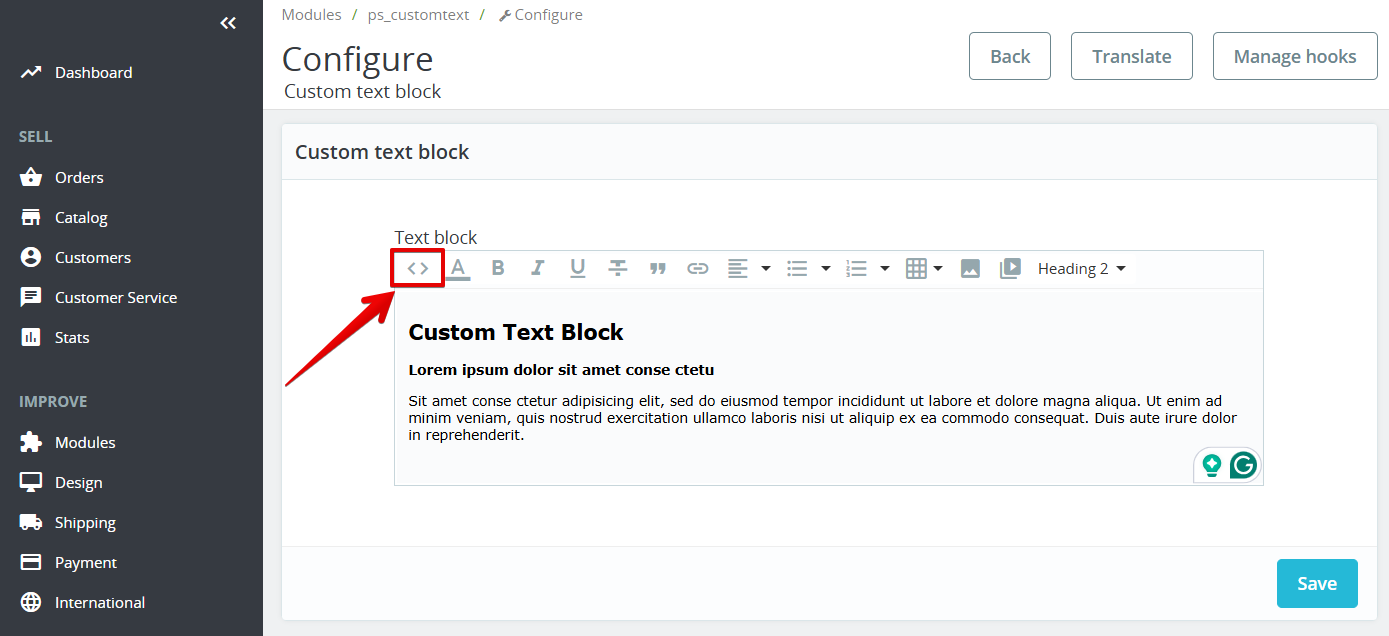
- 6
-
Remove the default text or edit it as you need. Paste the second line of your widget installation code and click Ok and Save:
If the widget isn't showing or the installation code changes after saving, try disabling the Use HTMLPurifier Library toggle in Shop Parameters → General and repeat the steps.


Done! The widget is now installed on your Home page.
Add a Floating or Static Widget to Other Pages (Contact, Blog, etc.)
After installing the PrestaShop HTML Box module as described above, follow these steps to add your widget to a specific page:
- 1
-
In the module settings, select Footer from the Where you want to display content box? dropdown:
- 2
-
Scroll to the input field and click the Source Code
</>icon:
- 3
-
Paste the first line of installation code into the popup. Here's what it looks like:
<script src="https://elfsightcdn.com/platform.js" async></script>
Then, click Ok and Save:
- 4
-
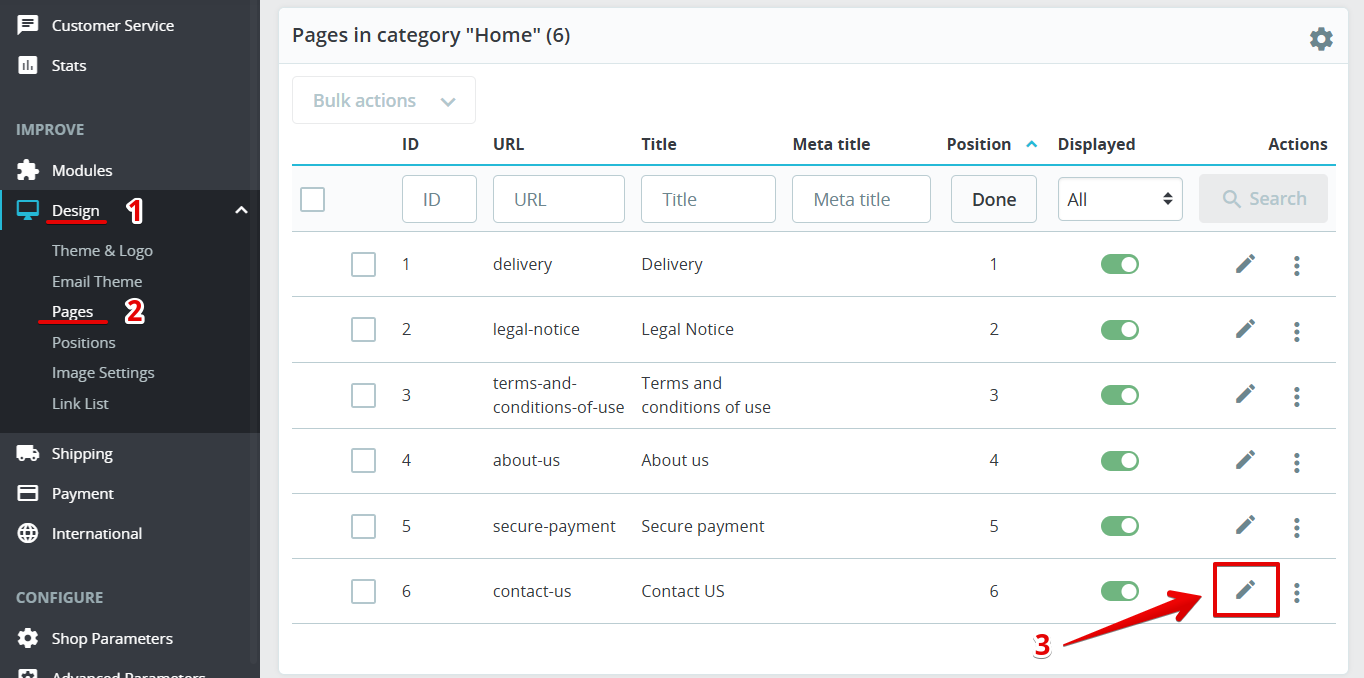
Go to Design → Pages, choose the page for your widget, and click Edit:
- 5
-
Scroll down to Page Content and click the Source Code
</>icon: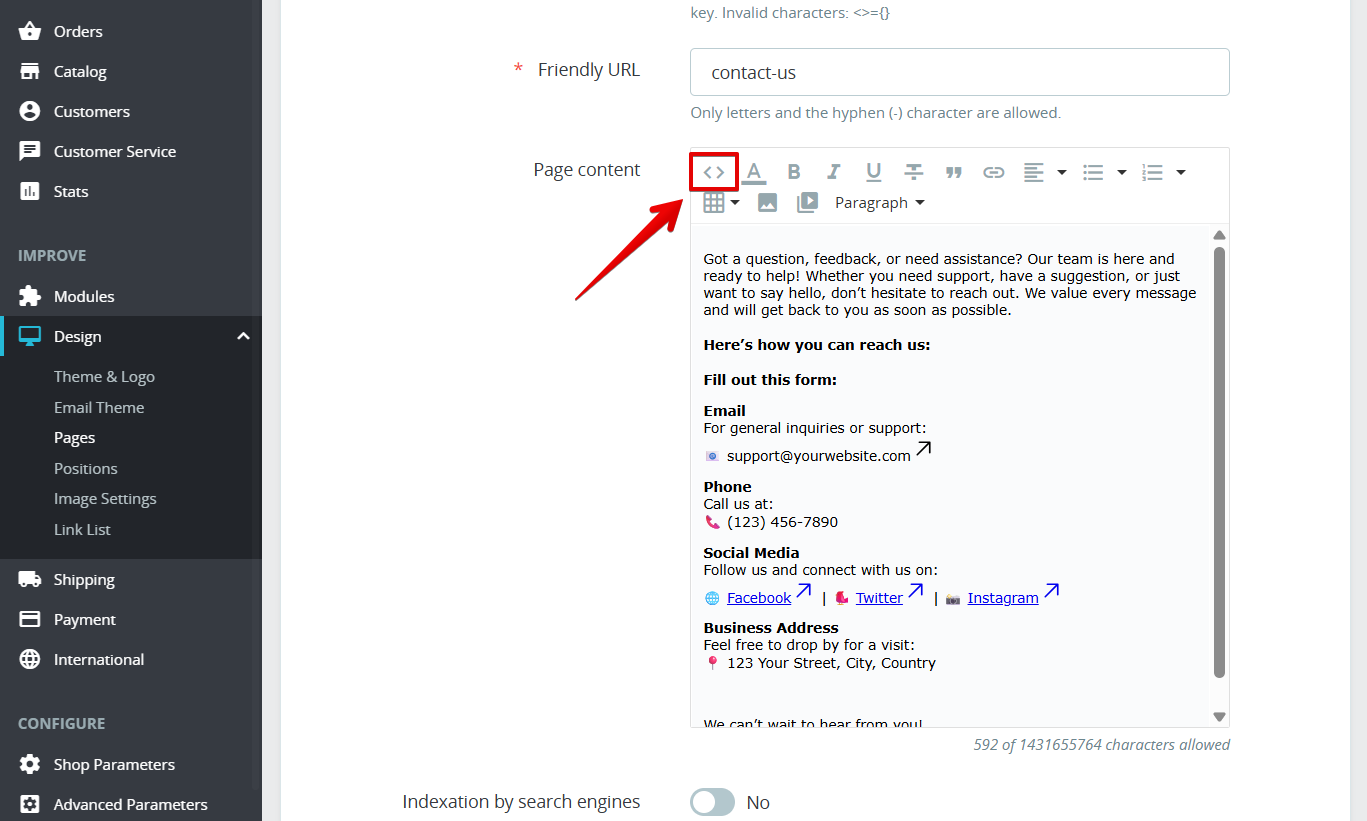
- 6
-
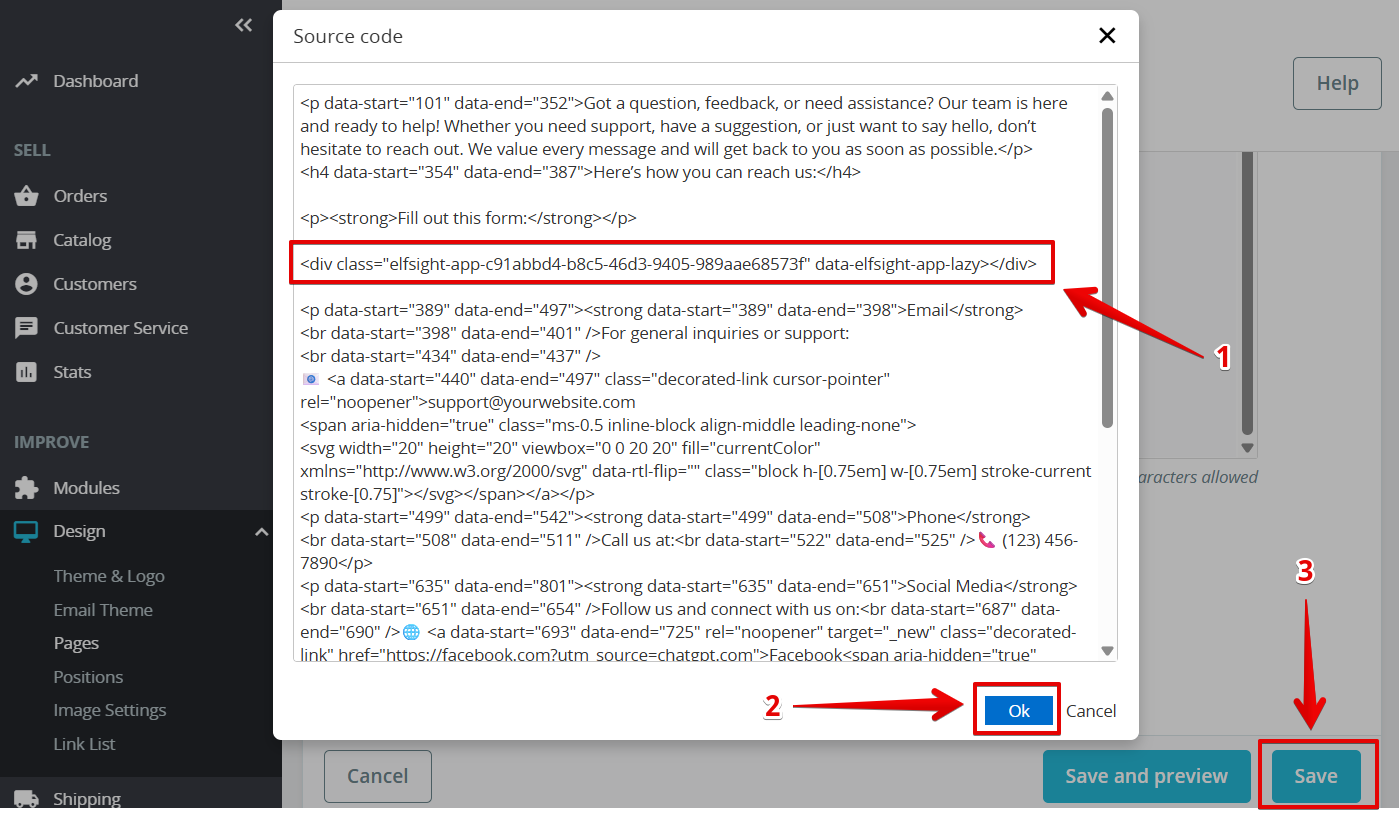
Paste the second line of the widget installation code in the spot where you want the widget to be displayed. Then, click Ok and Save:
If the widget isn't showing or the installation code changes after saving, try disabling the Use HTMLPurifier Library toggle in Shop Parameters → General and repeat the steps.


All set! You have successfully added the widget to a specific page of your PrestaShop website!
Add a Floating Widget to All Pages
Once you have installed PrestaShop HTML Box module as described here, only a few steps are left:
- 1
-
In the module settings, select Footer from the Where you want to display content box? dropdown:
- 2
-
Scroll to the input field and click the Source Code
</>icon:
- 3
-
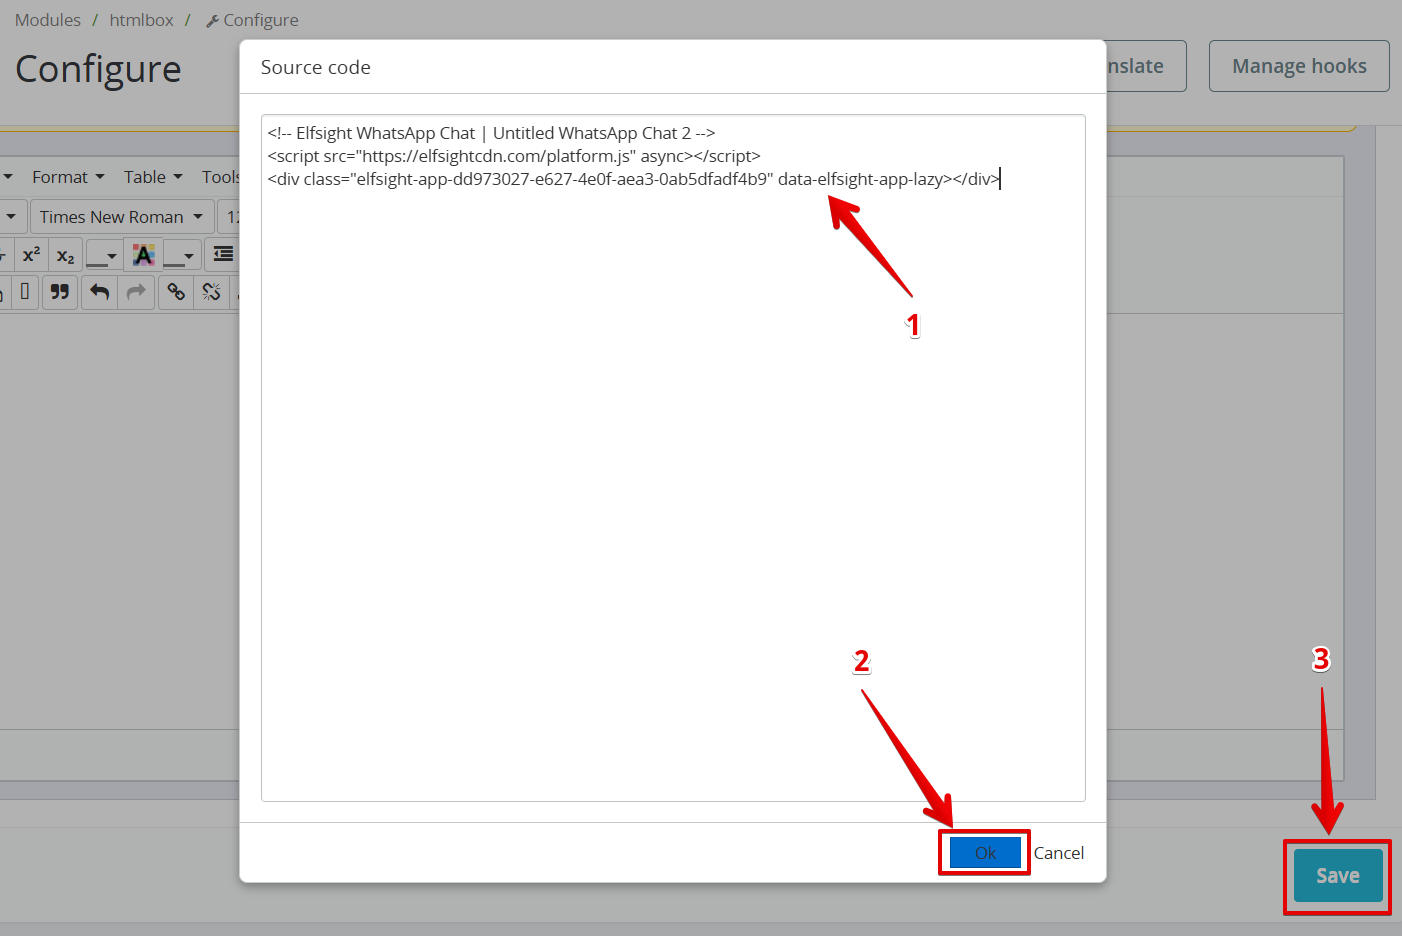
Paste the widget installation code into the popup. Then, click Ok and Save:
If the widget isn't showing or the installation code changes after saving, try disabling the Use HTMLPurifier Library toggle in Shop Parameters → General and repeat the steps.
That's it! Now you have a floating widget installed on all pages of your PrestaShop site!
Stuck with the installation or need help with a different setup? Let us assist you! Send us a quick request, and we’ll handle the installation for you. 🙌