How to Integrate Your Form Widget with Make.com
In this article, we’ll show you how to connect Make.com to your Elfsight Form widget. This integration lets you automatically send form submissions to thousands of apps, automate workflows, and manage customer data efficiently.
In this article
What Is Make.com?
Make.com is a no-code automation platform that connects your widget submissions with over 1,500 apps and services, including CRMs, spreadsheets, email marketing platforms, project management tools, and more.
For example, when a visitor submits your form, Make.com can automatically save the data to Google Sheets, create a lead in your CRM, and add the contact to your email marketing workflow:
Form widget → Make.com → Google Sheets → CRM → Email marketing platform
Connect Your Widget to Make.com
Follow these steps to link your widget to Make.com:
- 1
-
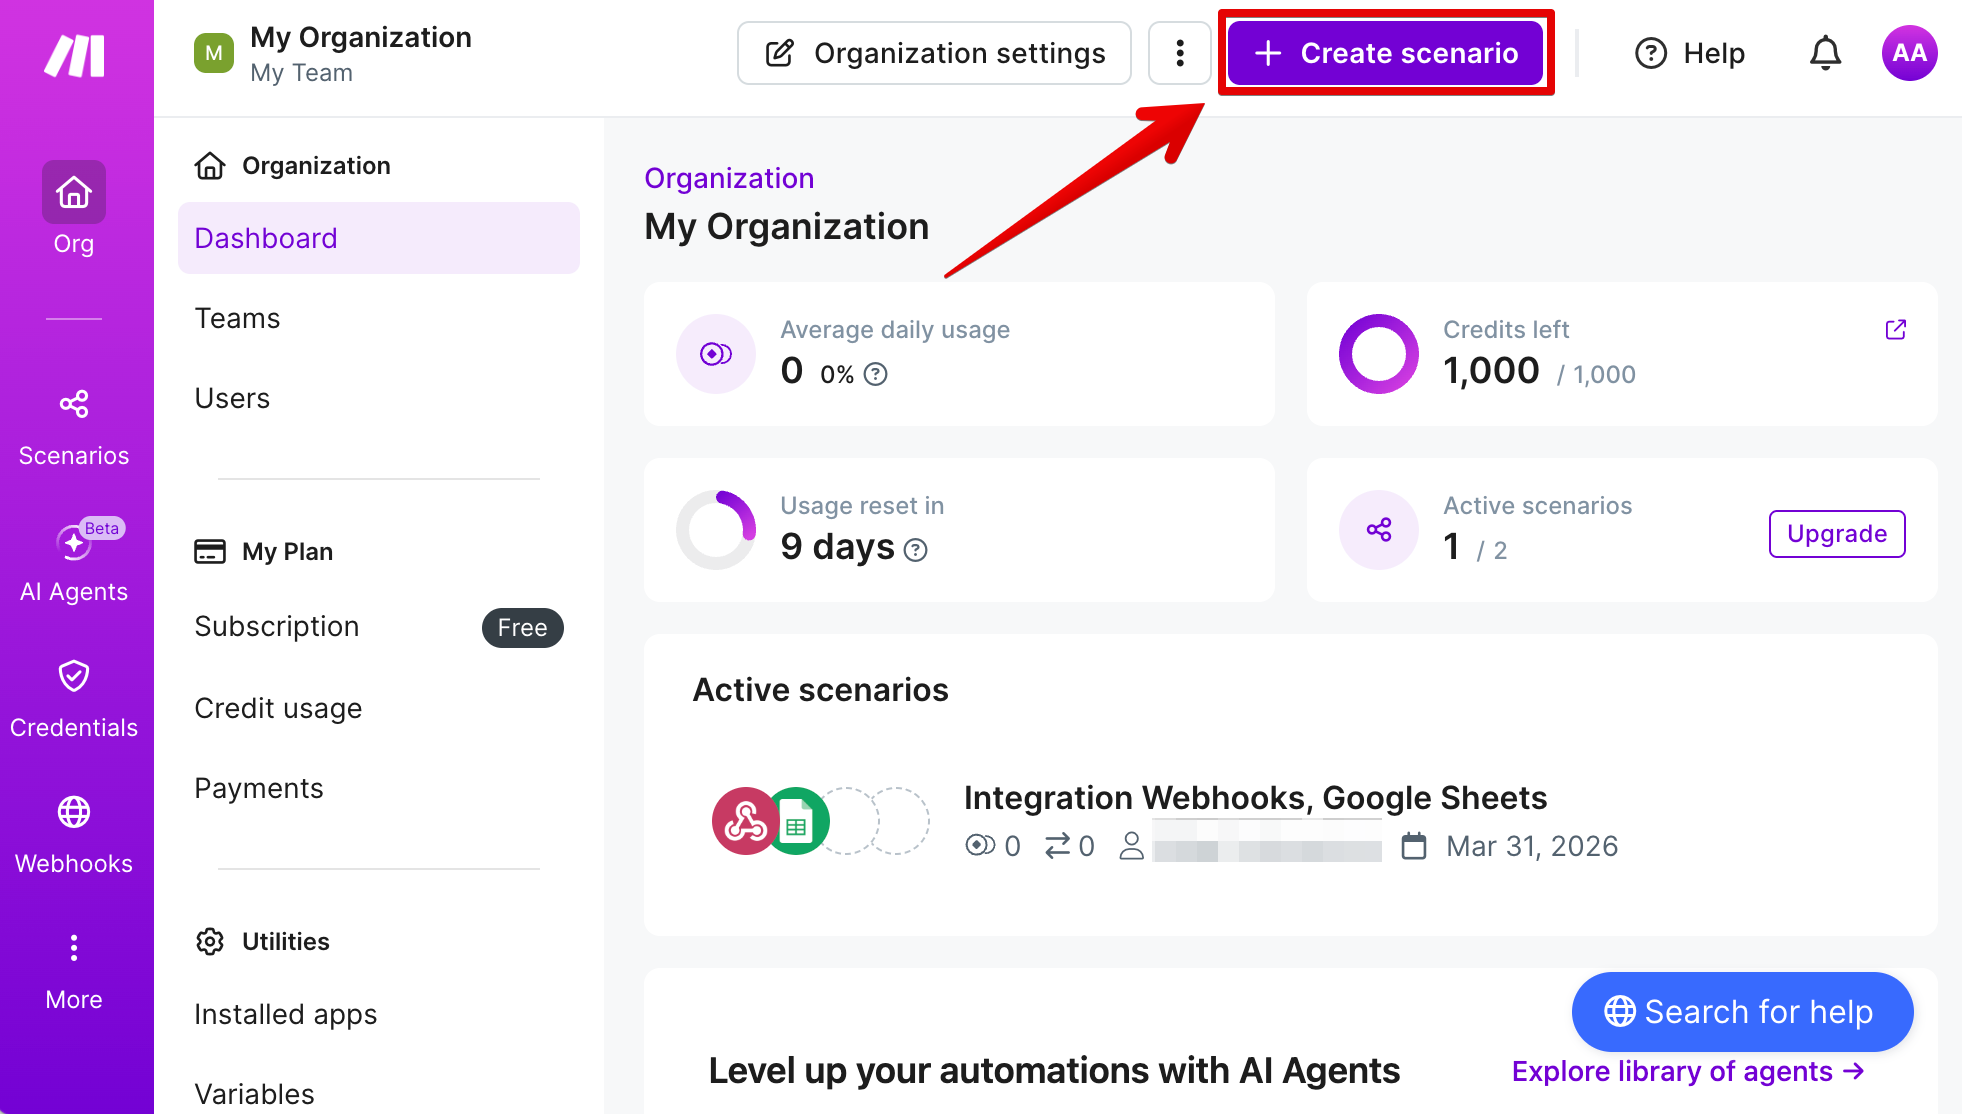
Create a new scenario
Log in to your Make.com dashboard and click the Create scenario button:
- 2
-
Add a Custom webhook trigger
Click the large ➕ button to add a module and select Webhooks from the list:
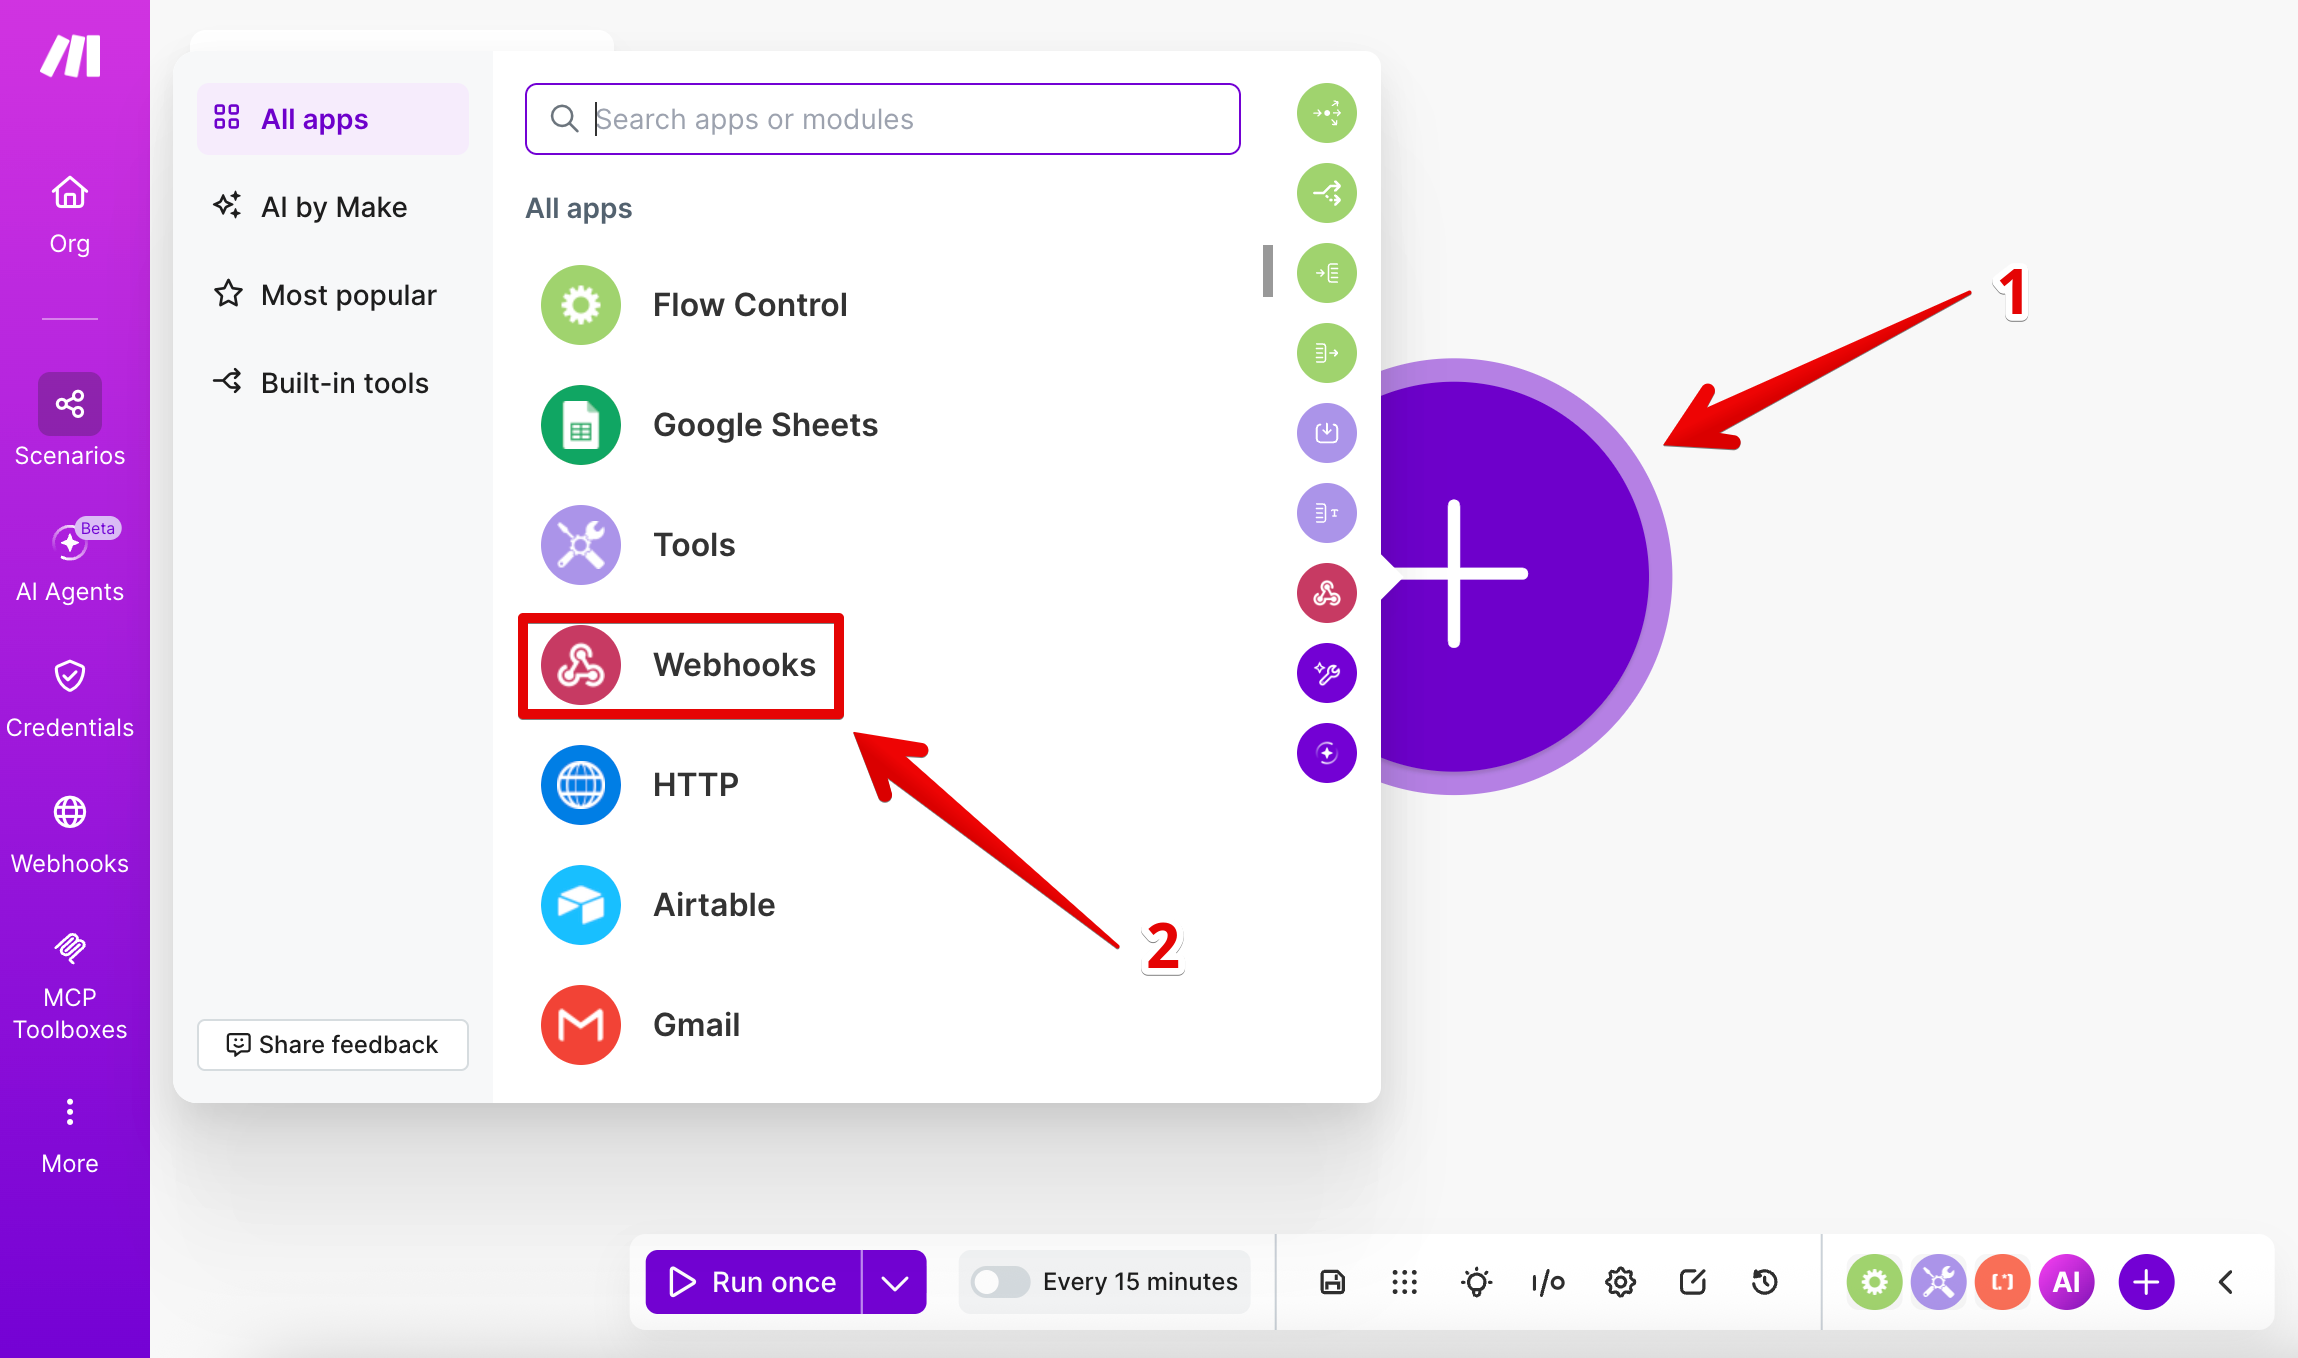
Choose the Custom webhook trigger:
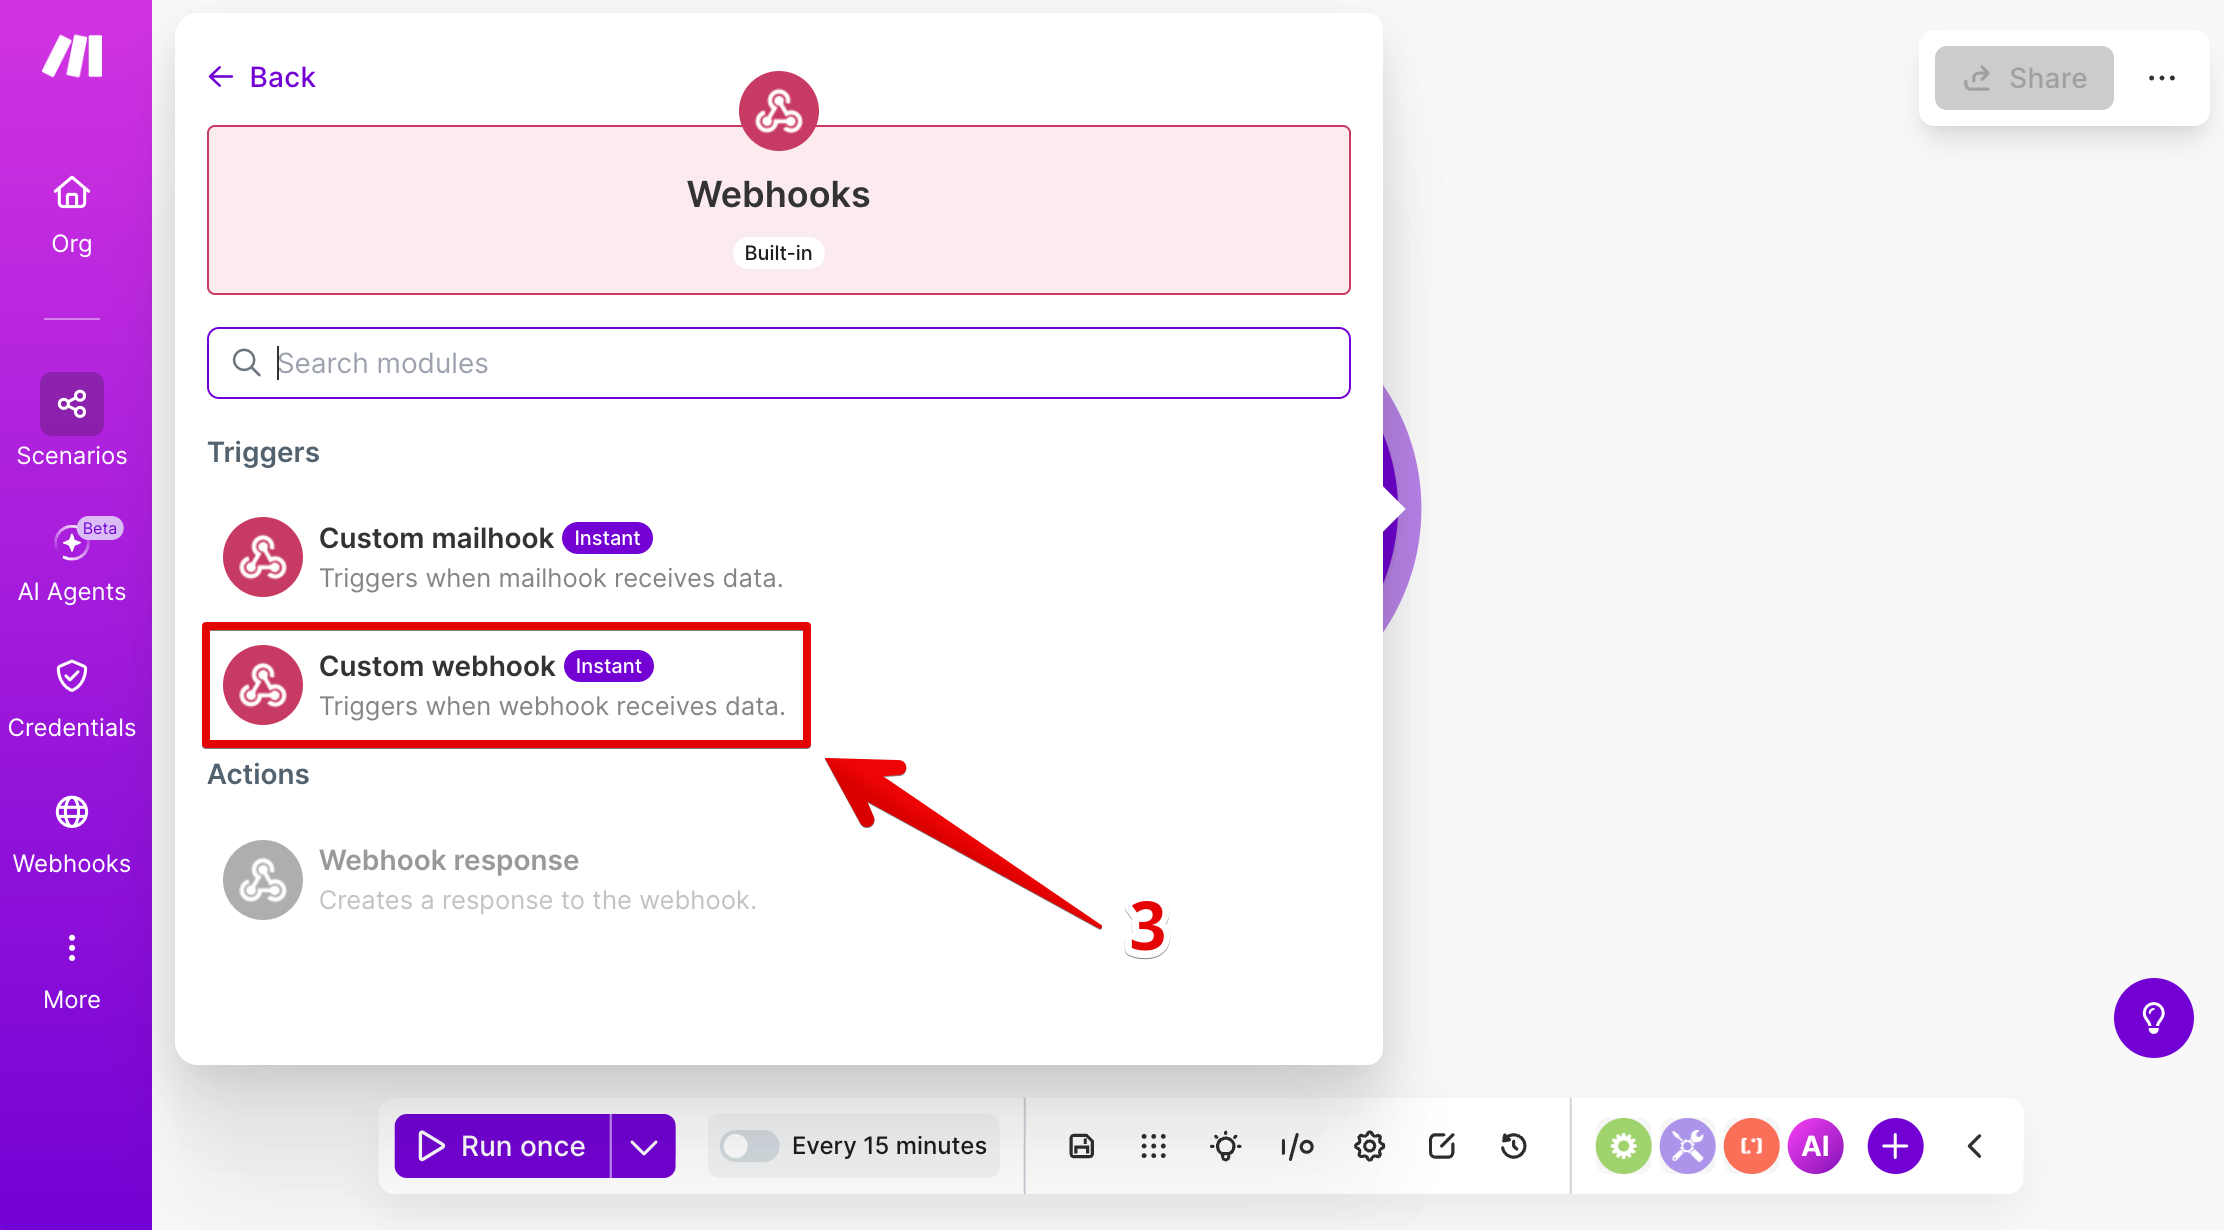
- 3
-
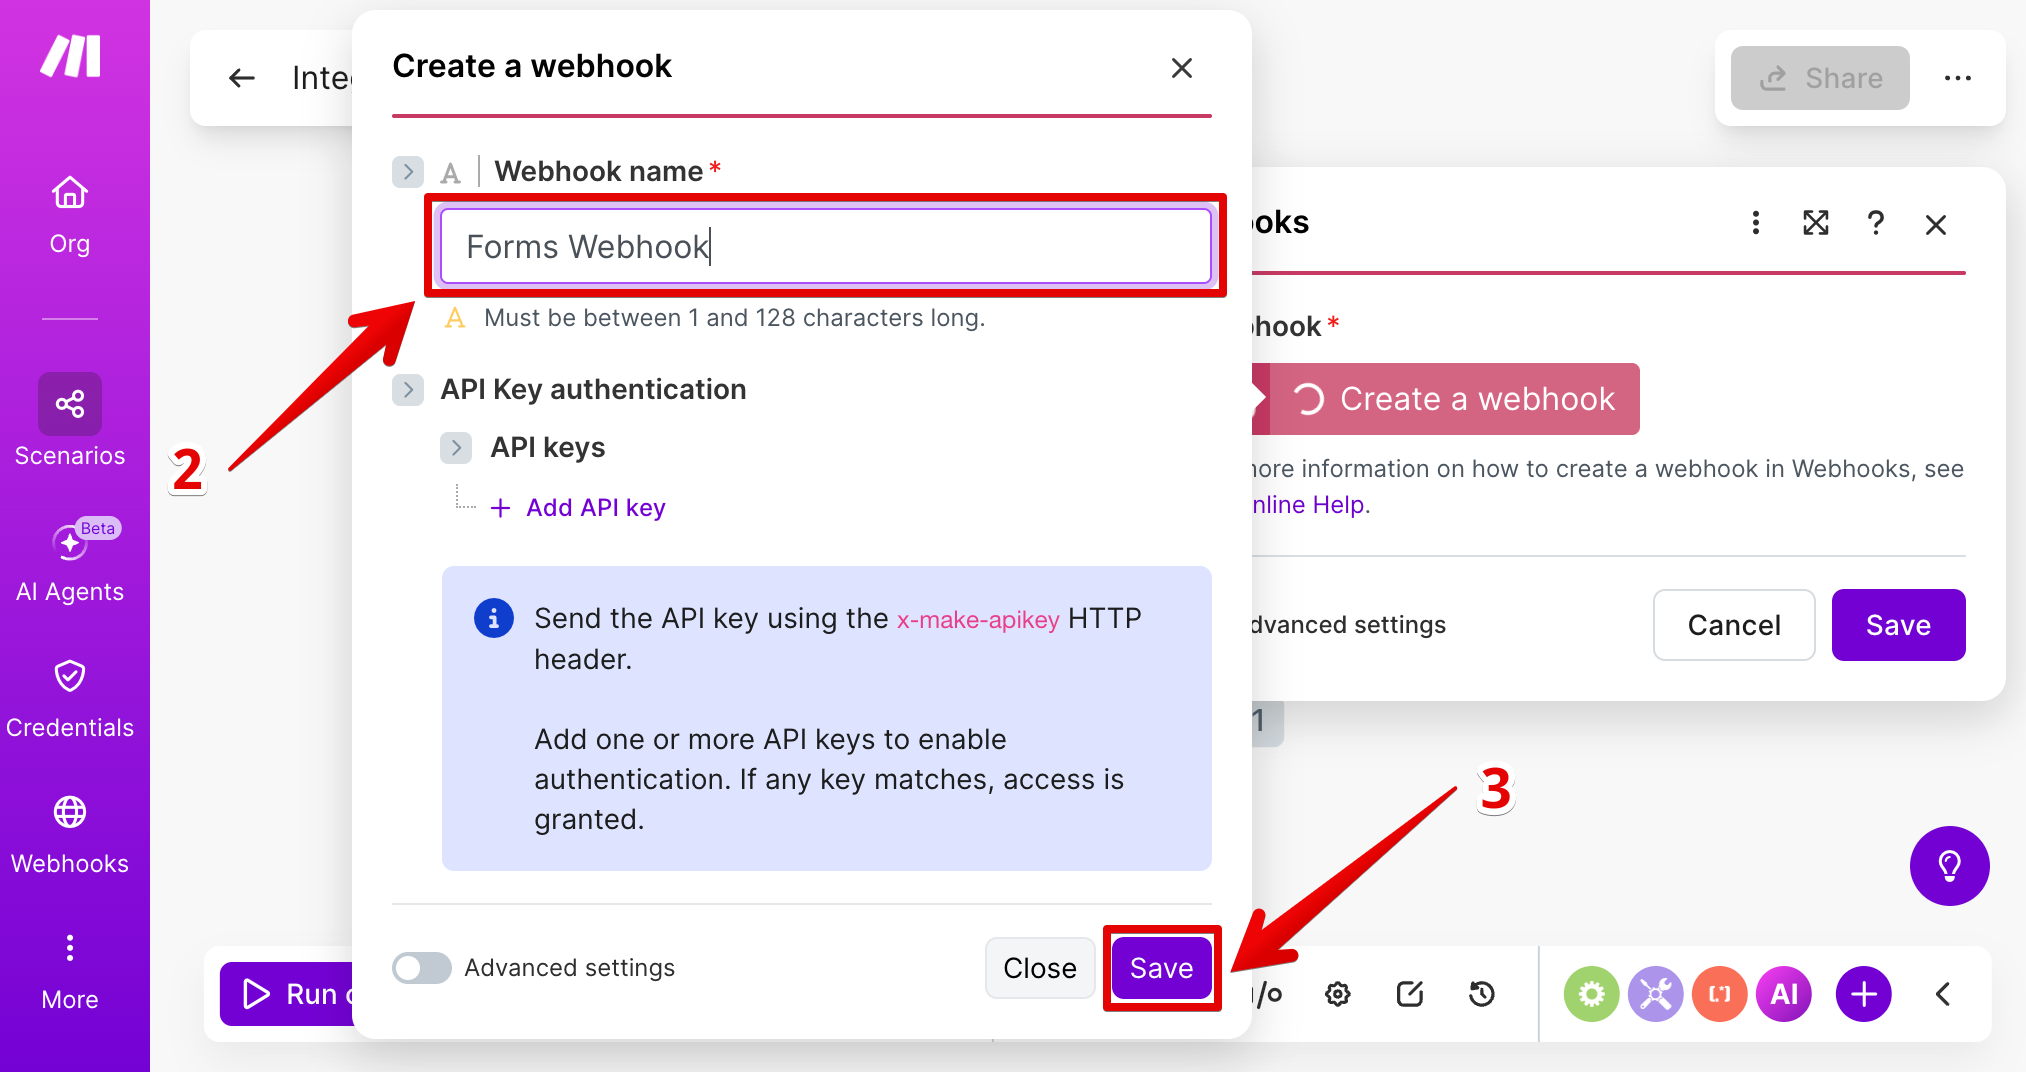
Create a webhook
Click the Create a webhook button:
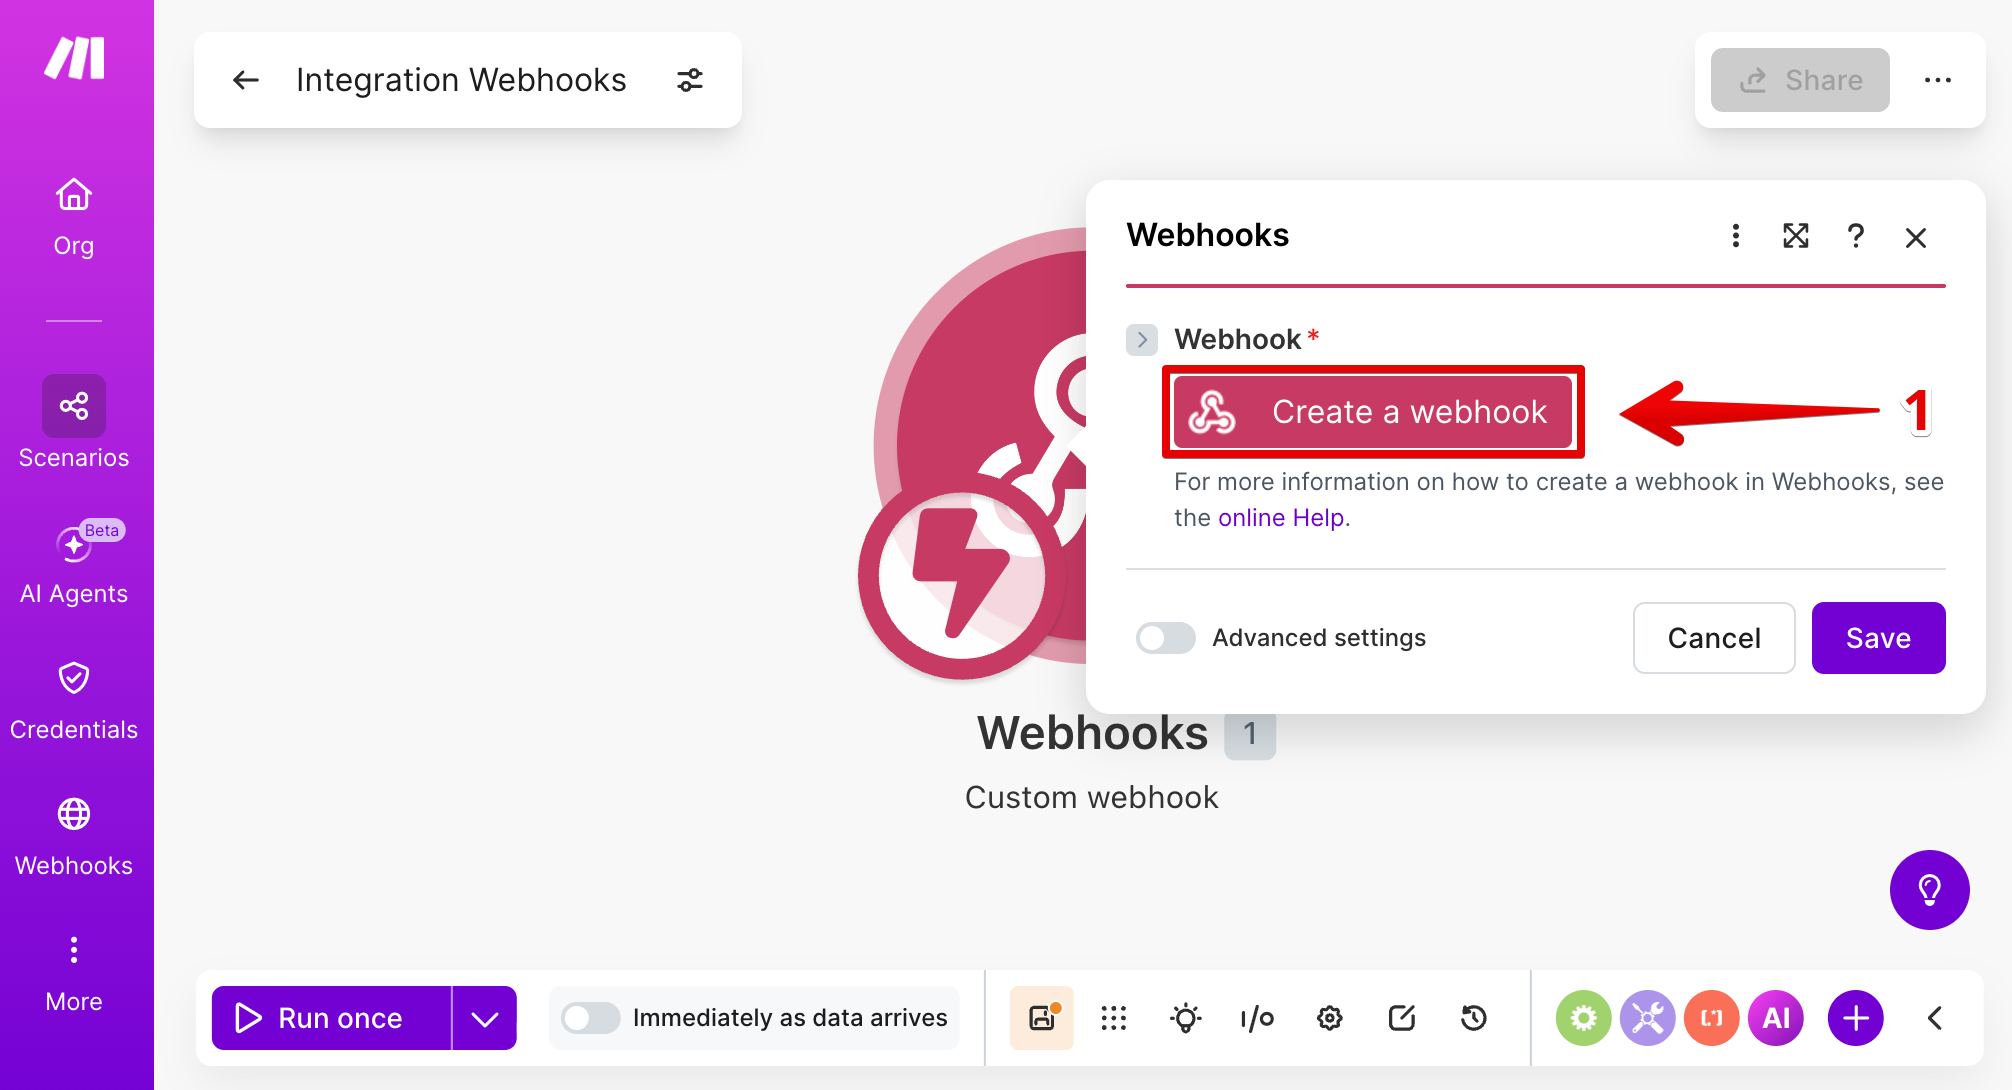
Enter a name for your webhook and click Save:
- 4
-
Copy your webhook link
Make.com will generate a unique webhook URL. Copy it using the Copy address to clipboard button:
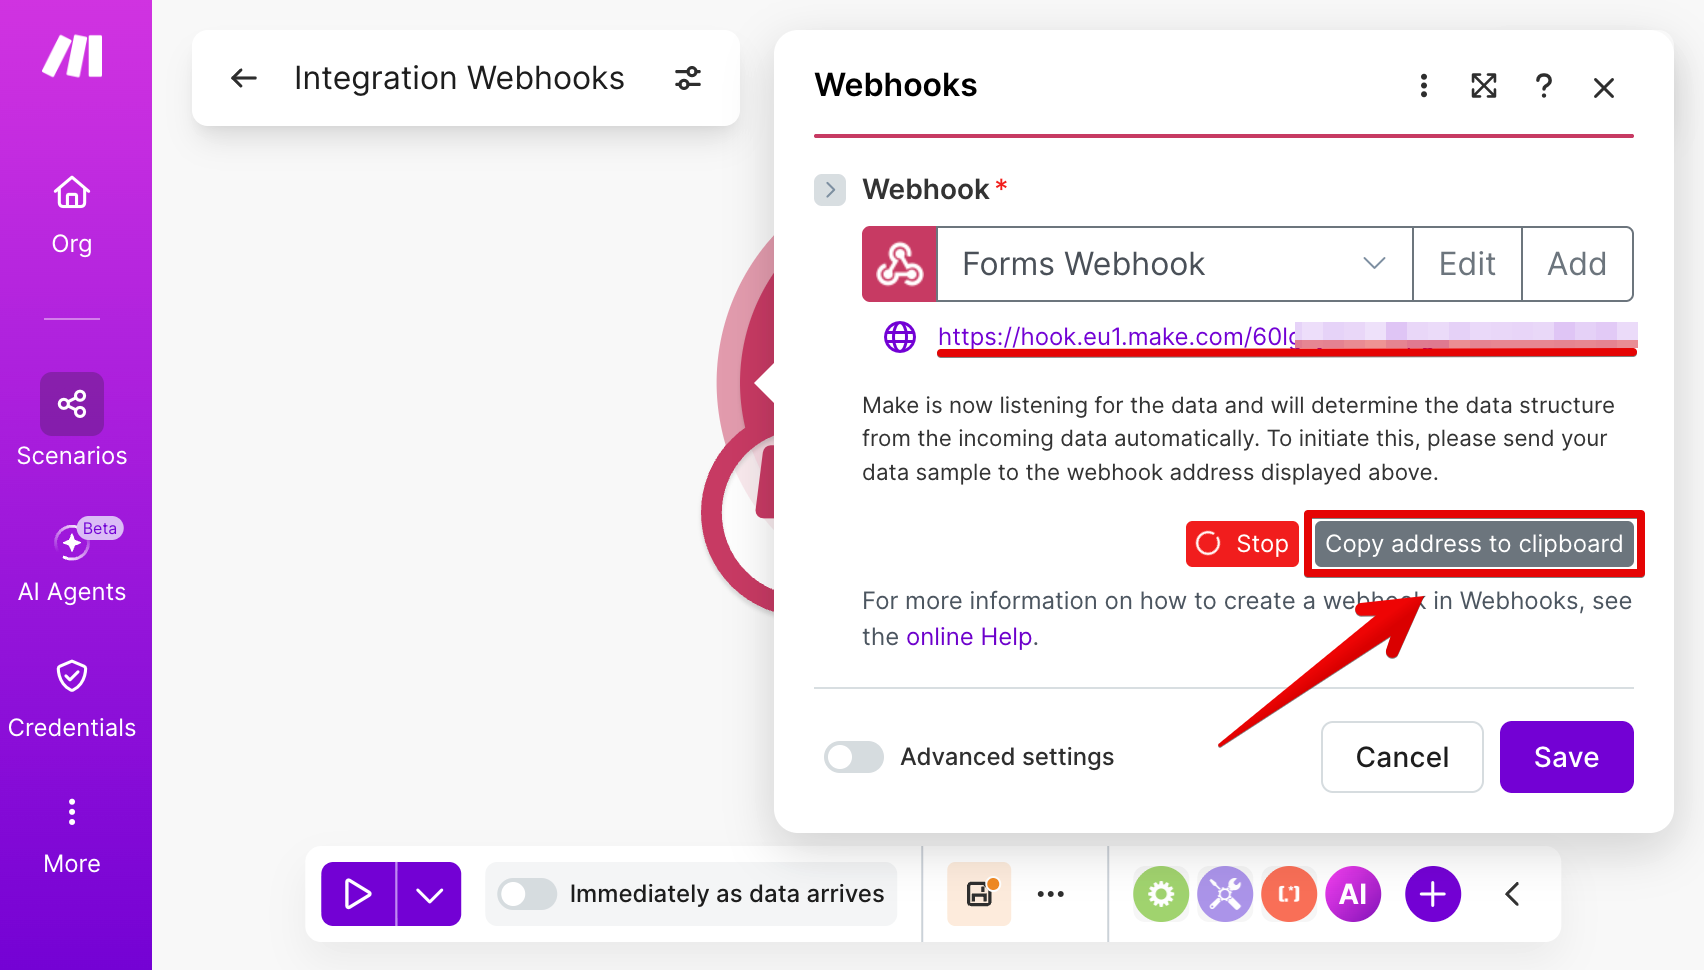
⚠️ Don’t close the webhook window yet — you’ll need it in the next steps. - 5
-
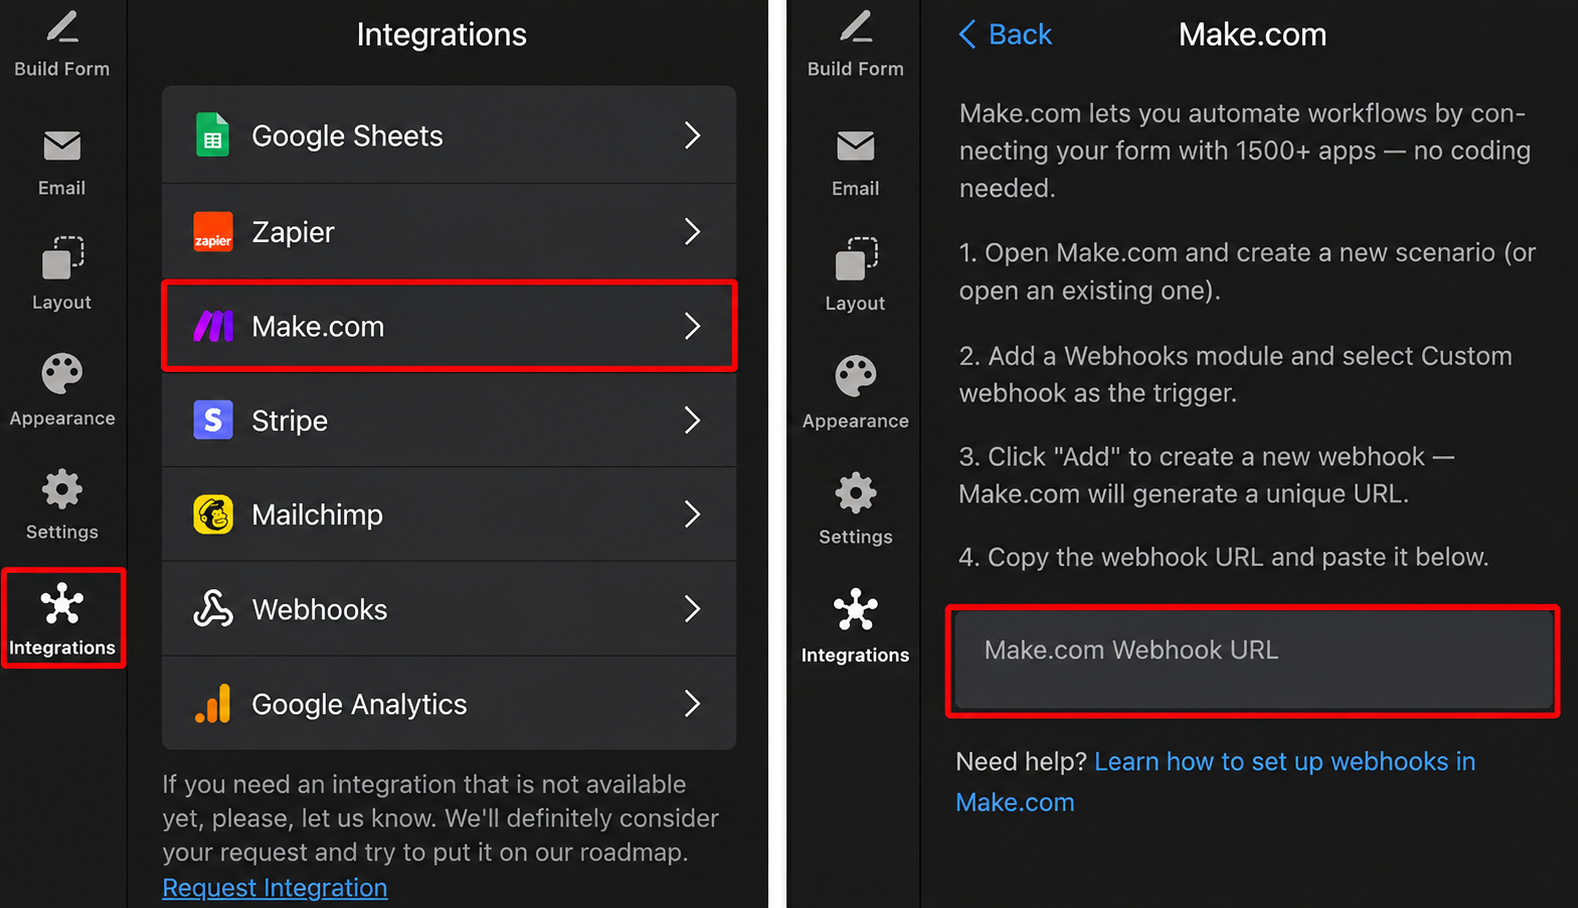
Paste the webhook URL into your widget
Open your widget editor and go to Integrations → Make.com. Paste the webhook link into the corresponding field:
Your Elfsight widget is now connected to Make.com! ✨ Before publishing, let’s test the connection and make sure everything works correctly.
Test the Connection and Build Your Automation
Once your widget is connected, follow the steps below to complete your automation setup.
- 1
-
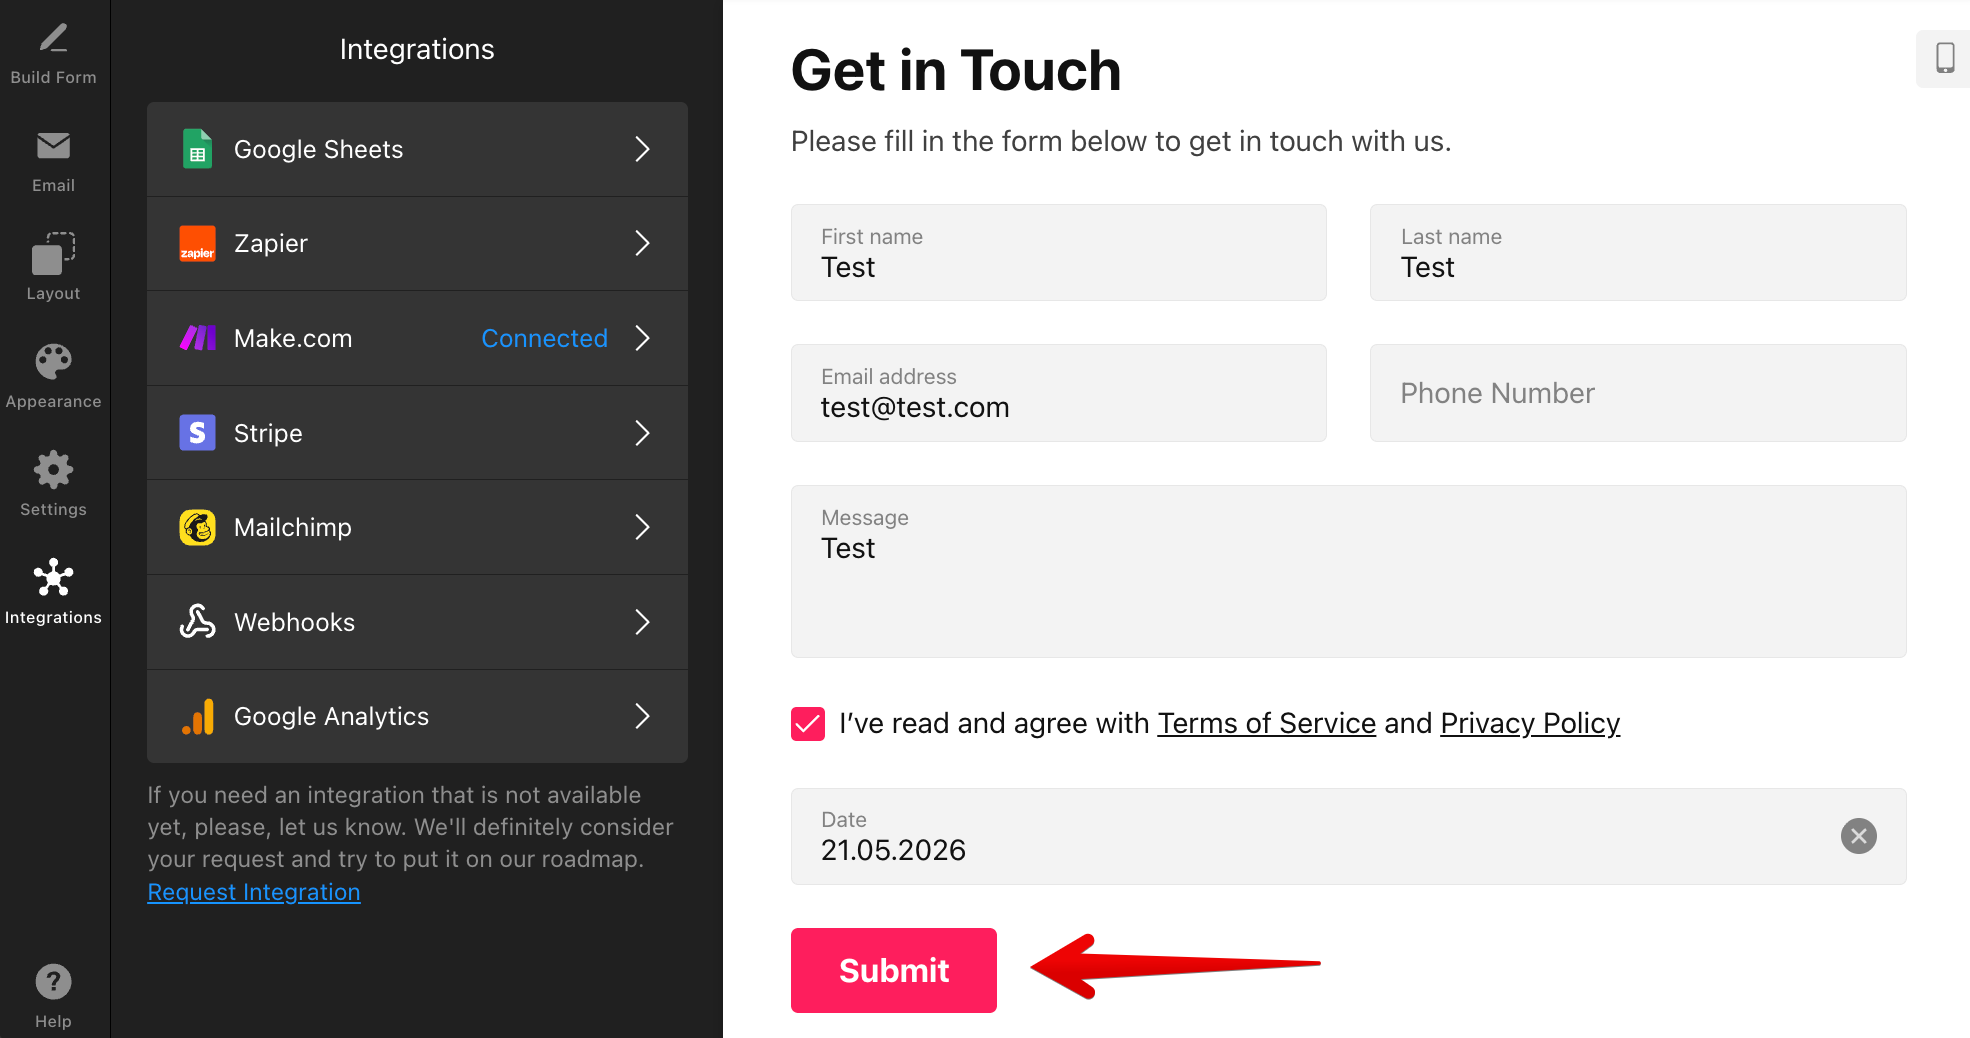
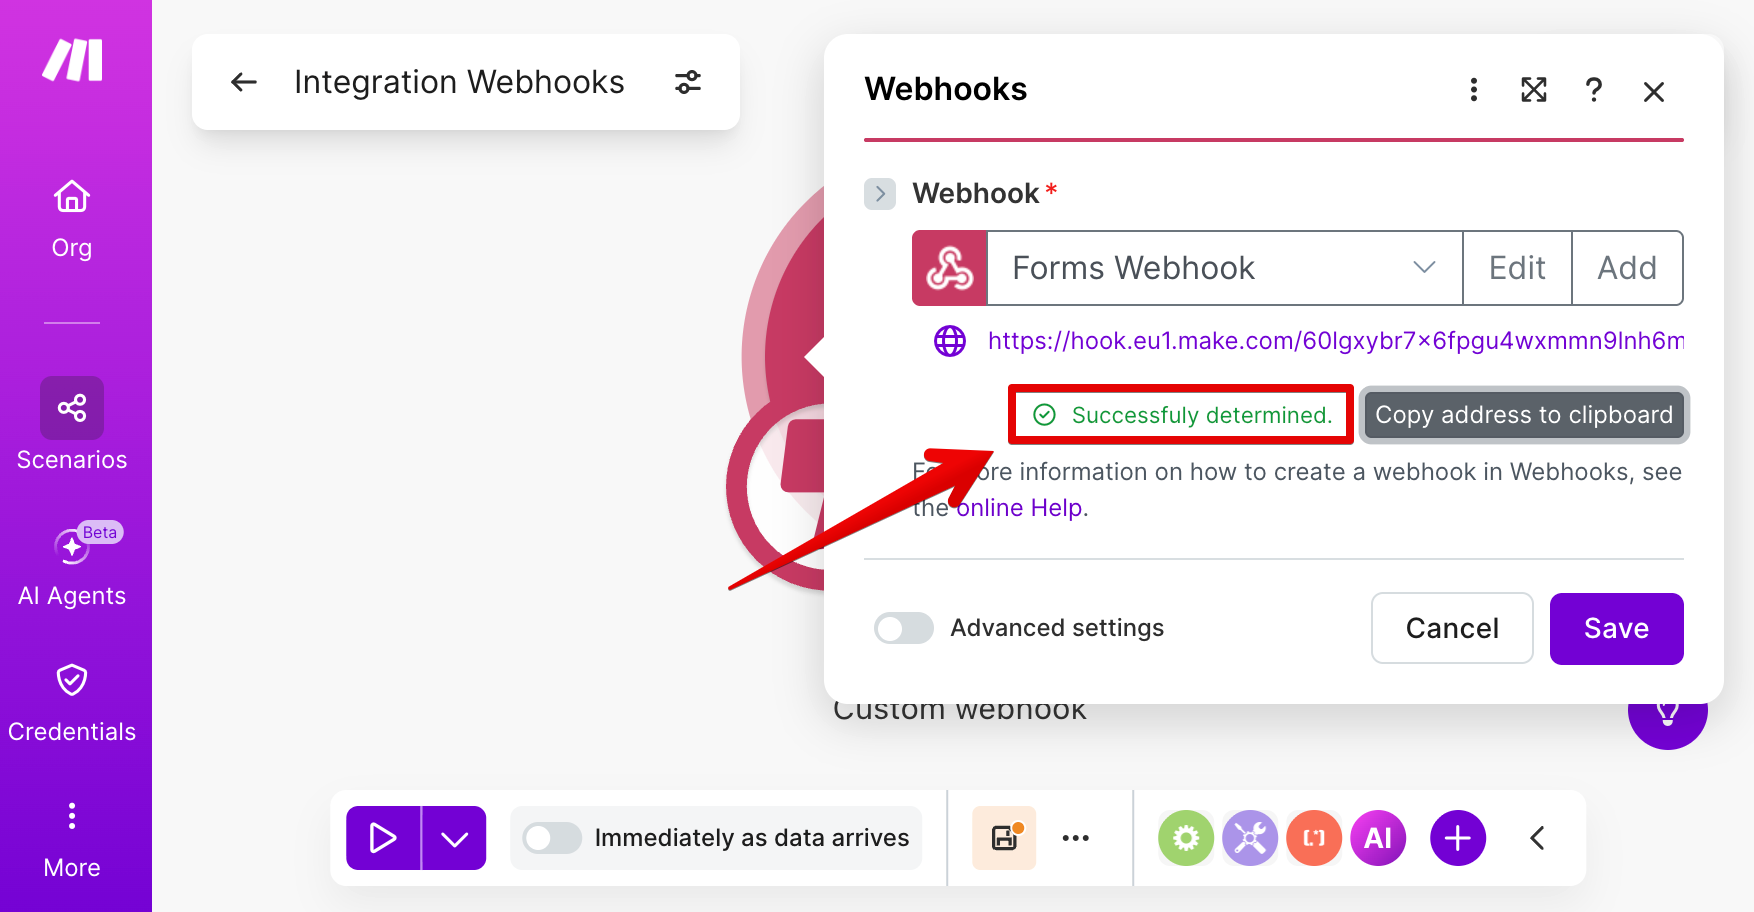
Send a test form submission
Fill out your form in the widget editor and submit a test entry. Make.com will automatically detect the form fields from the submission:
Once the connection is successful, you’ll see the Successfully determined message in Make.com:
- 2
-
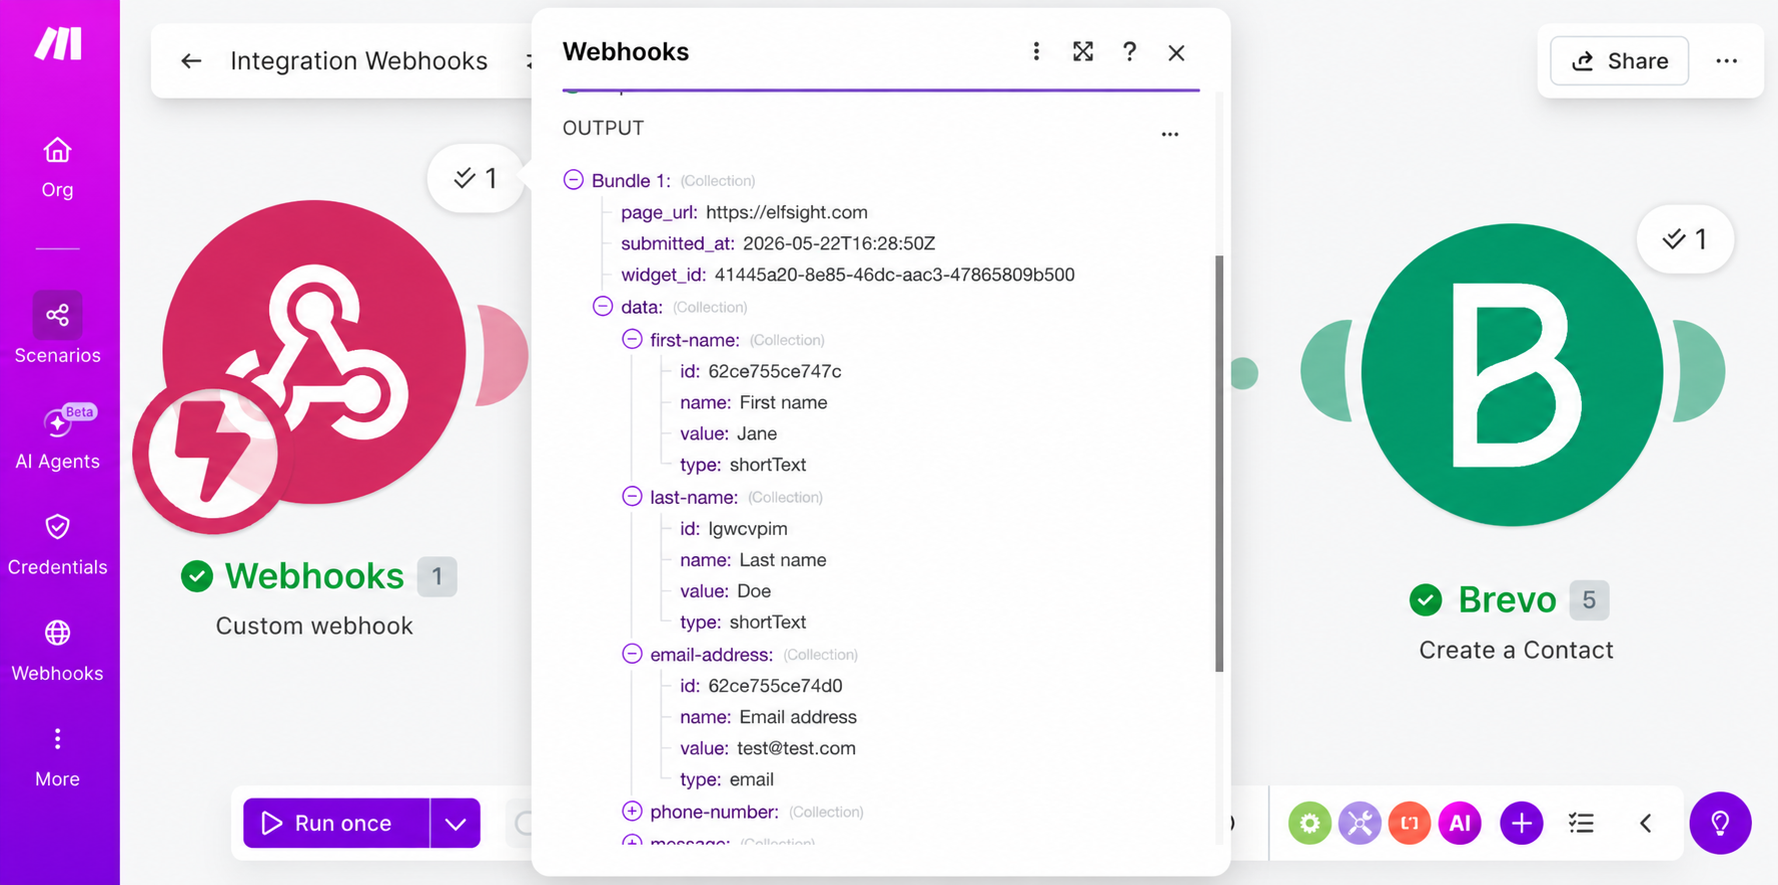
Set up your automation
Your webhook is now connected. You can continue building your workflow by adding apps and actions like Google Sheets, Mailchimp, Slack, or CRMs.
In this example, form submissions are being sent to Brevo:
- 3
-
Publish your widget
Once everything is set up, don’t forget to click Publish in the widget editor to apply the changes on your live website.
All set! 🎉 If you have any questions or run into any issues while setting up the integration, feel free to contact our Support Team — we’ll be happy to help.