How to Make a Form Appear as a Popup
If you're looking to increase the visibility of your Form widget or make it stand out on your website, turning it into a popup is a great solution. A popup form can catch your visitors' attention and encourage them to engage with your content.
In this guide, we’ll walk you through a few easy ways to transform your form into a popup.
In this article
Using а Floating Pane Layout
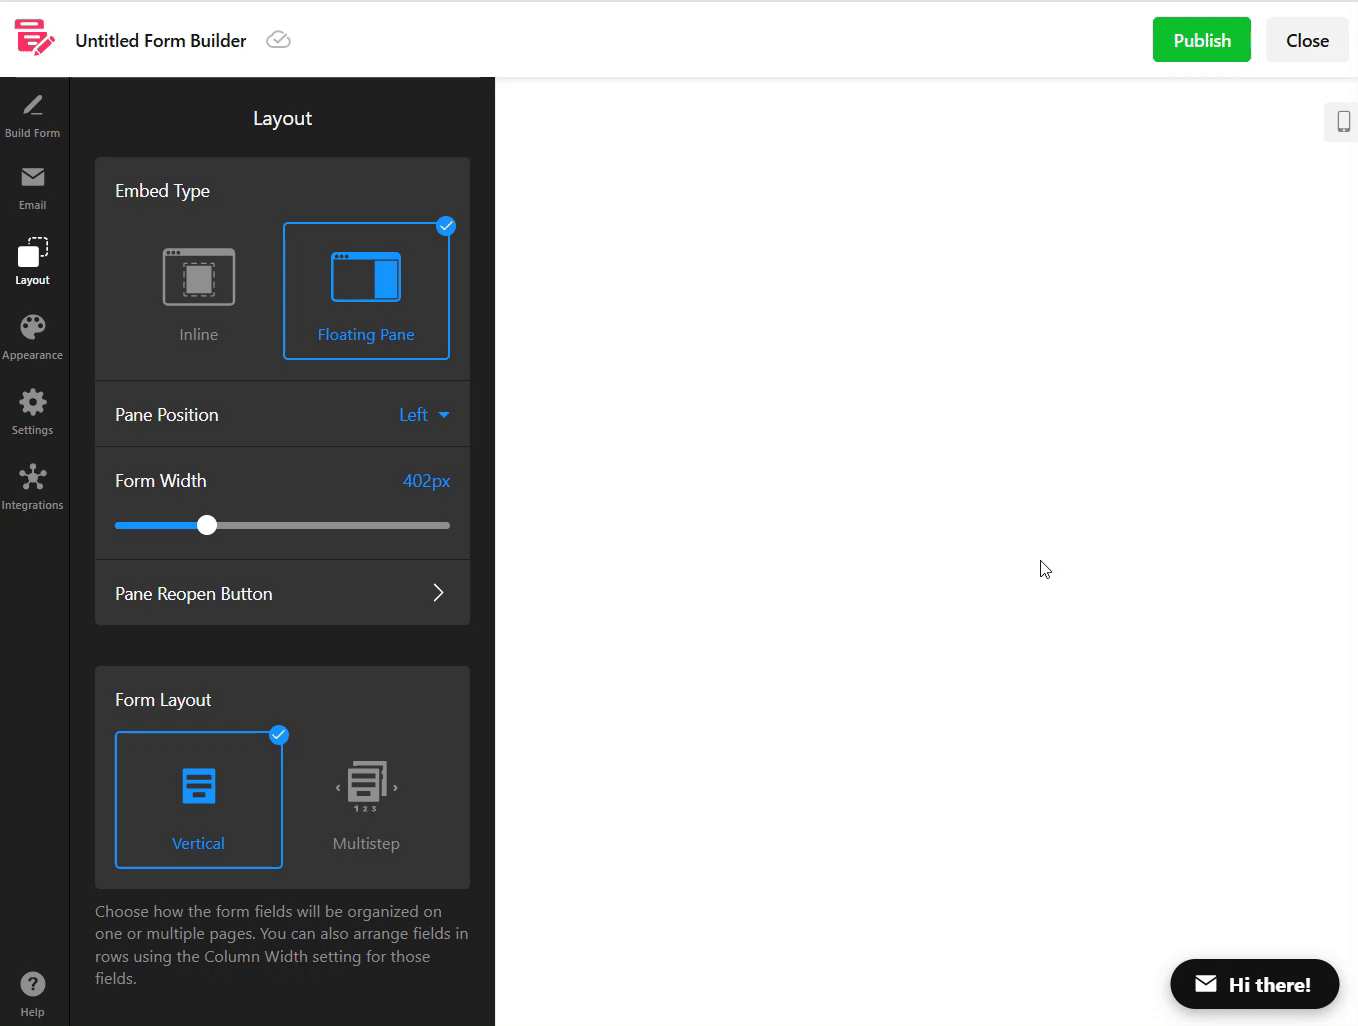
The Form Builder widget includes a built-in Floating Pane layout that helps capture attention without interrupting the user's experience.
The Floating Pane slides in from either the left or right side of the screen, letting users interact with it while keeping the website content visible. It also includes a Pane Reopen button for easy access to the form.
To set it up, select the Floating Pane option in the Layout tab and adjust it to your needs:
If you'd like the Floating Pane form to resemble a traditional popup, you can easily customize it by adding a CSS code. This will help center the form and round its corners for a more polished look. Here is the CSS code:
  [class*="Pane__PaneContent-sc"] {
  height: 600px;
  left: 50%;
  top: 50%;
  transform: translateX(-50%) translateY(-50%) !important;
  border-radius: 20px;
  overflow-y: auto;
}

[class*="WidgetBackground__Container-sc"] {
  max-height: 100%;
  overflow: auto;
}
Add this code in the widget editor under Appearance → Custom CSS:
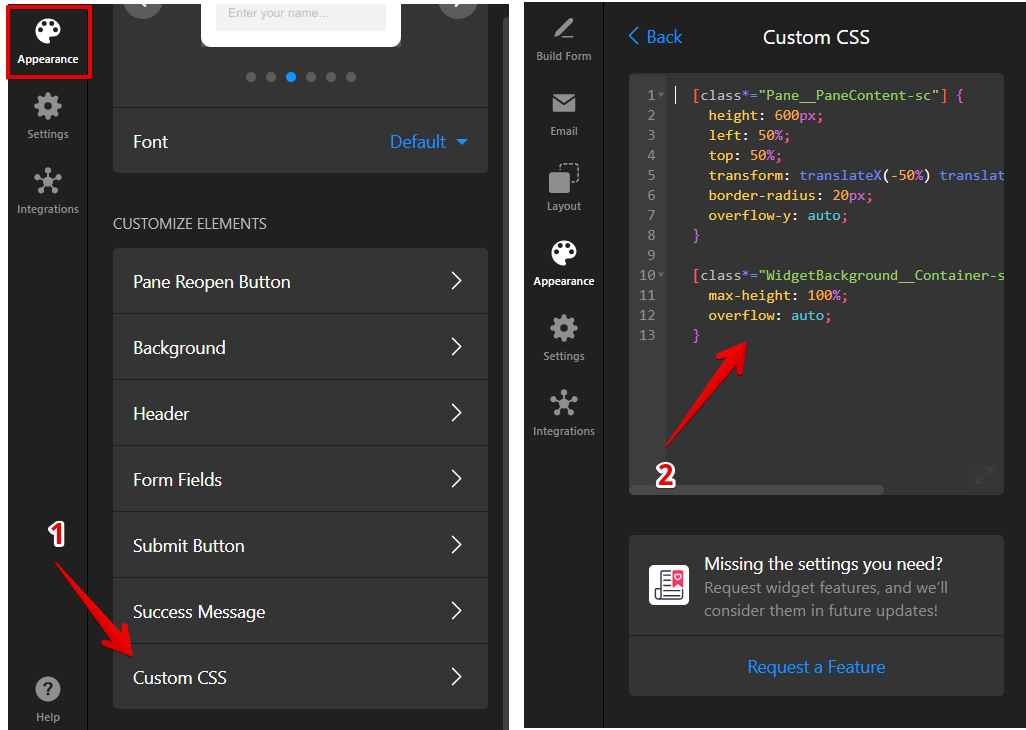
Well done! Here’s an example of what your form will look like after applying the CSS code:

Using a Popup Widget with а Form Block
As an alternative to the Form Builder app, you can use our Popup widget and integrate a Form block into it. This allows you to create a fully functional form directly inside a popup.
Here are the steps to follow:
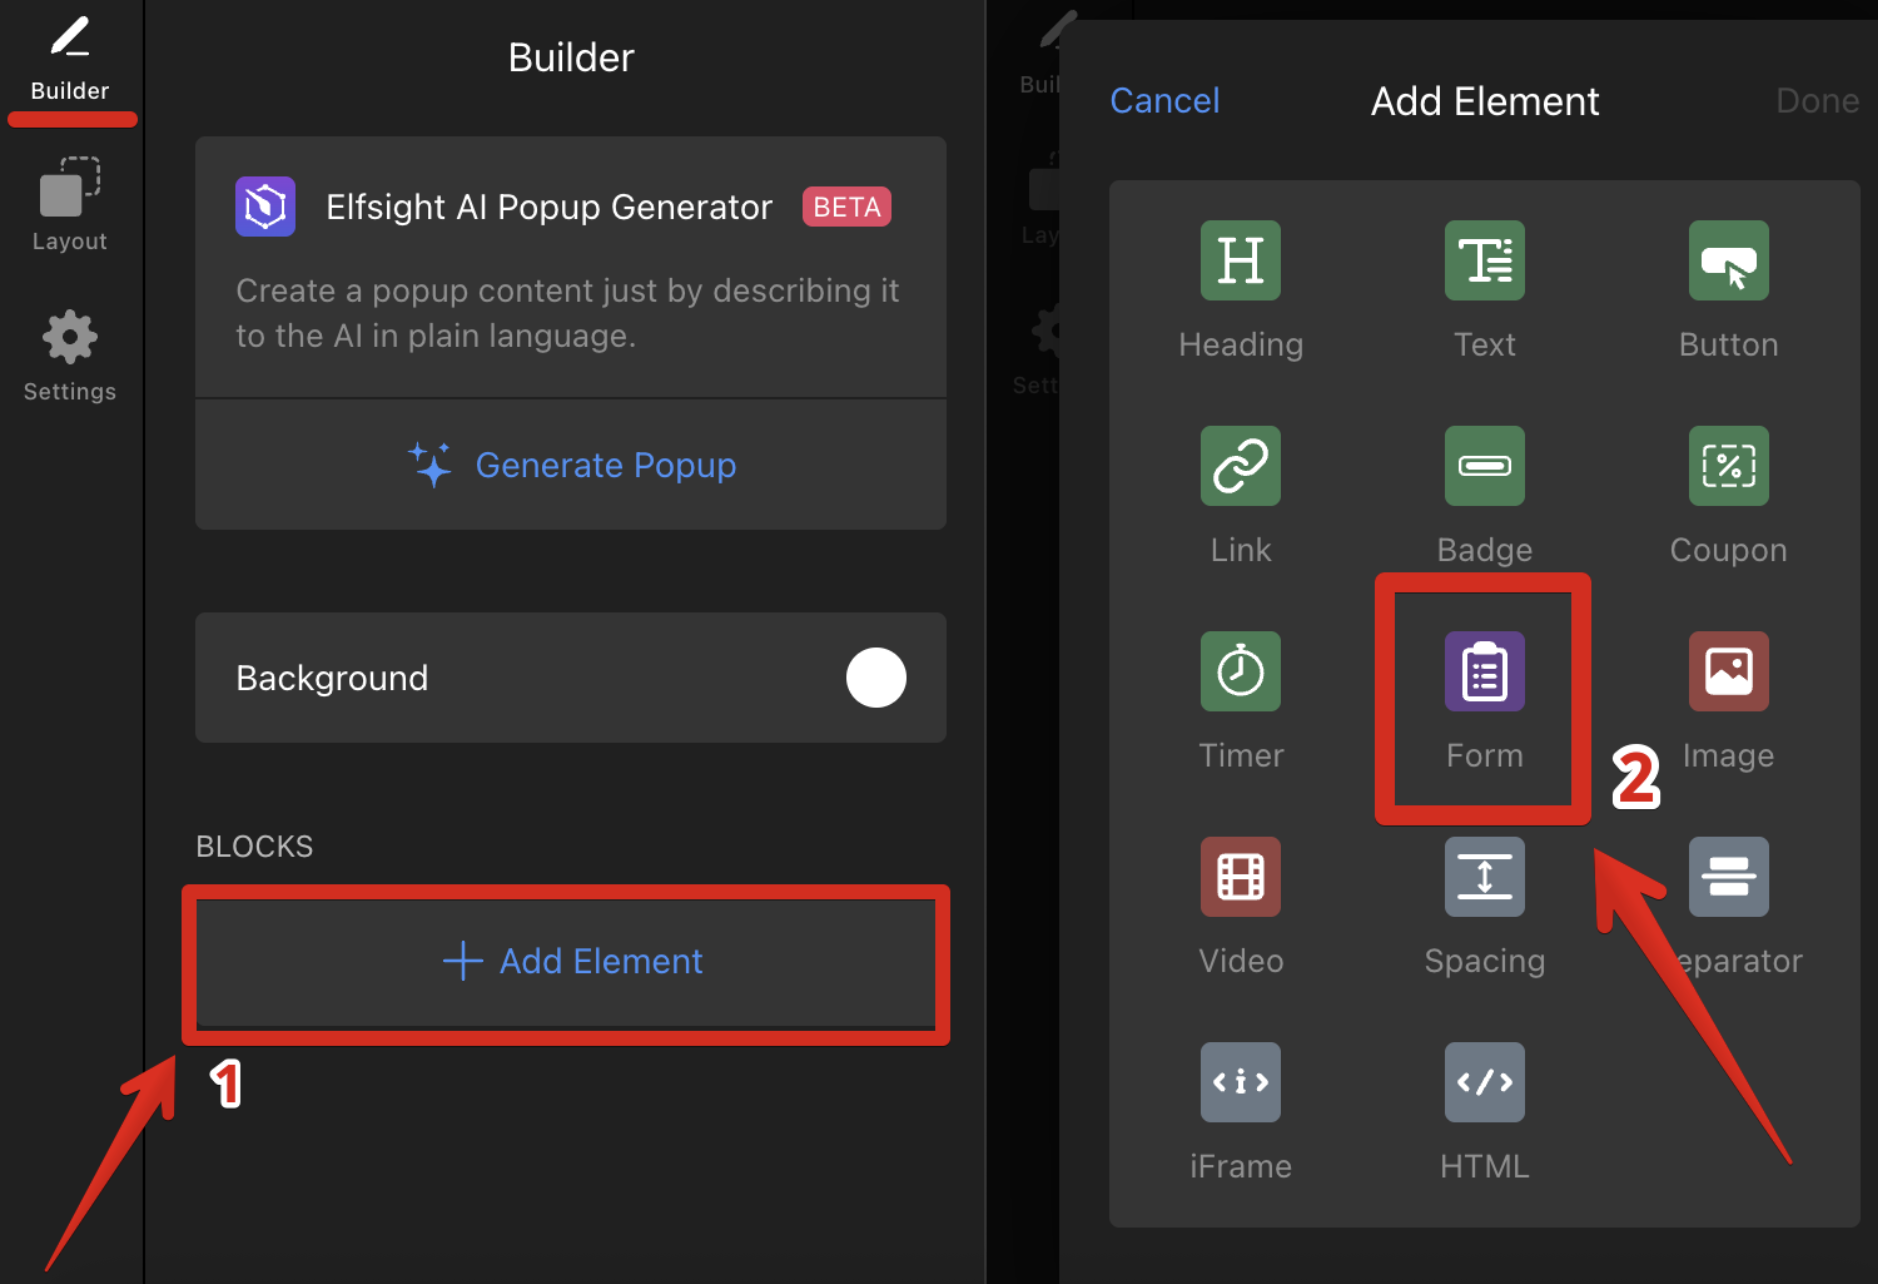
- 1
- Go to the Builder tab of the Popup widget and click + Add Element.
- 2
-
Select the Form element:
- 3
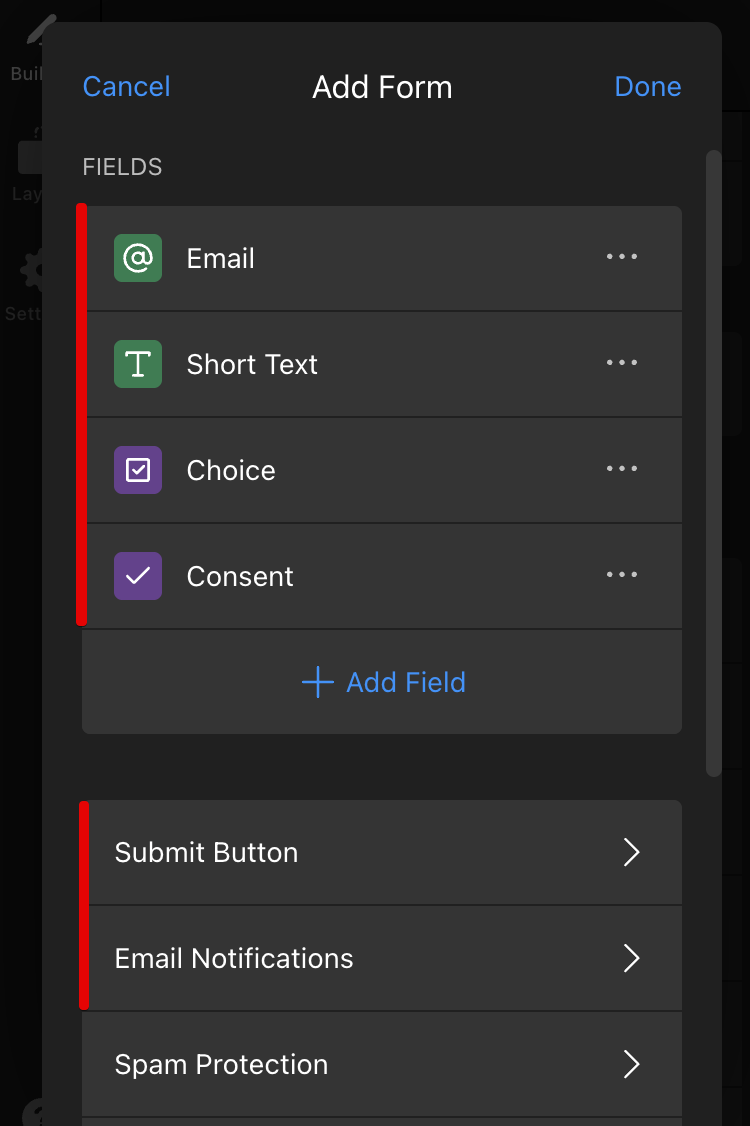
-
Customize your form by adding fields, specifying the post-submit action of the Submit button, and configuring email notifications:


Great! You now have a form created within the Popup widget.
Integrating Your Form Builder Widget into а Popup
You can combine two of our widgets — Form Builder and Popup — to create a popup form. This ensures your form is highly visible, as popups appear on top of the content, making it an excellent tool for capturing information from your site visitors.
Follow these steps to add your form inside Popup:
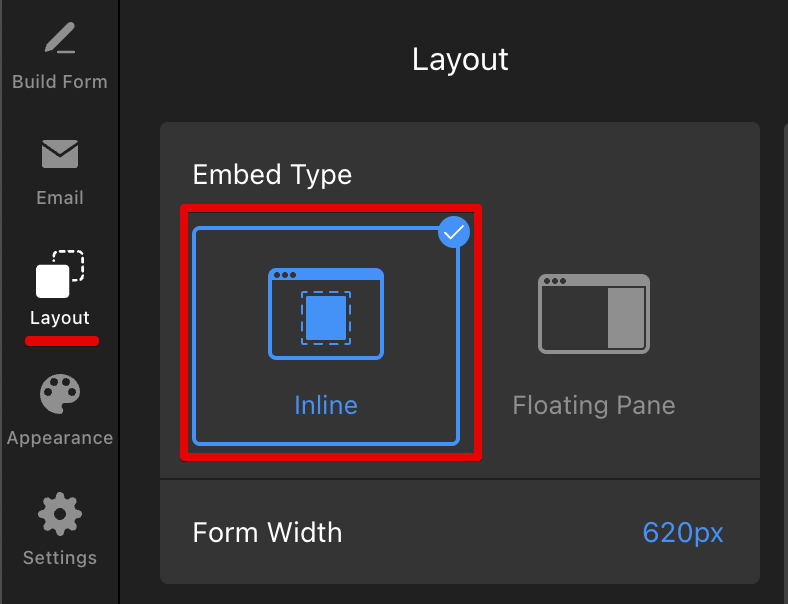
- 1
- Create a Form Builder widget with the Inline layout:
-
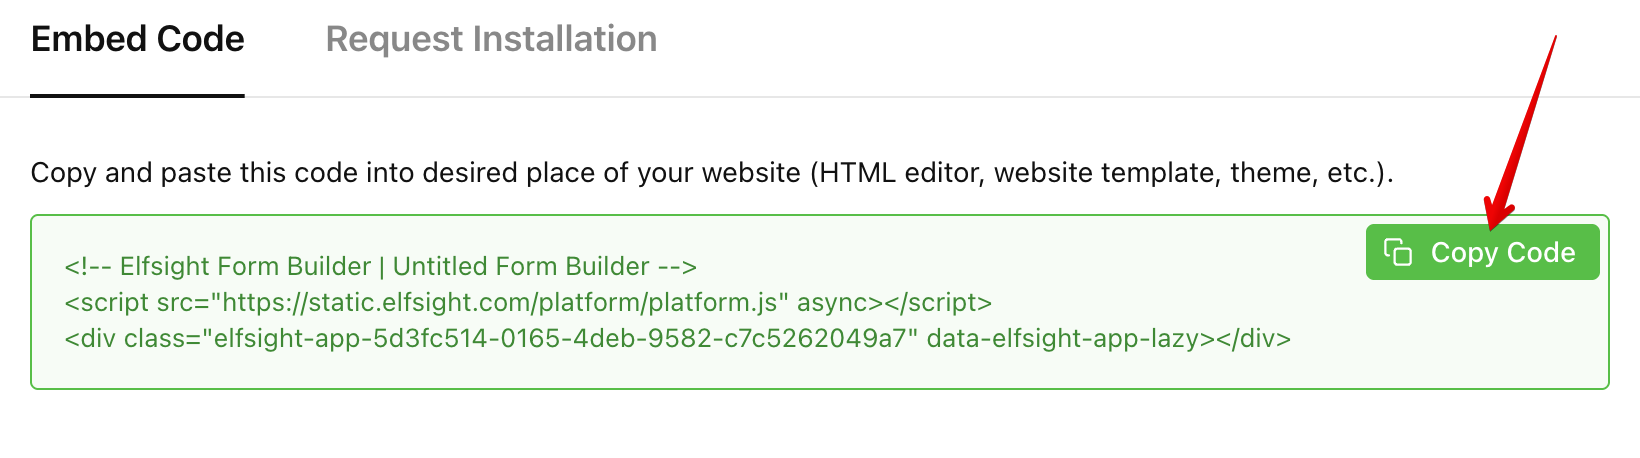
- 2
-
Copy the widget's installation code:
If you are unsure where to find the widget’s code, check out this guide: Where to get Elfsight widget installation code. - 3
- Open the Popup widget editor and customize your Popup widget.
- 4
-
Go to the Builder tab and add an HTML block to it:
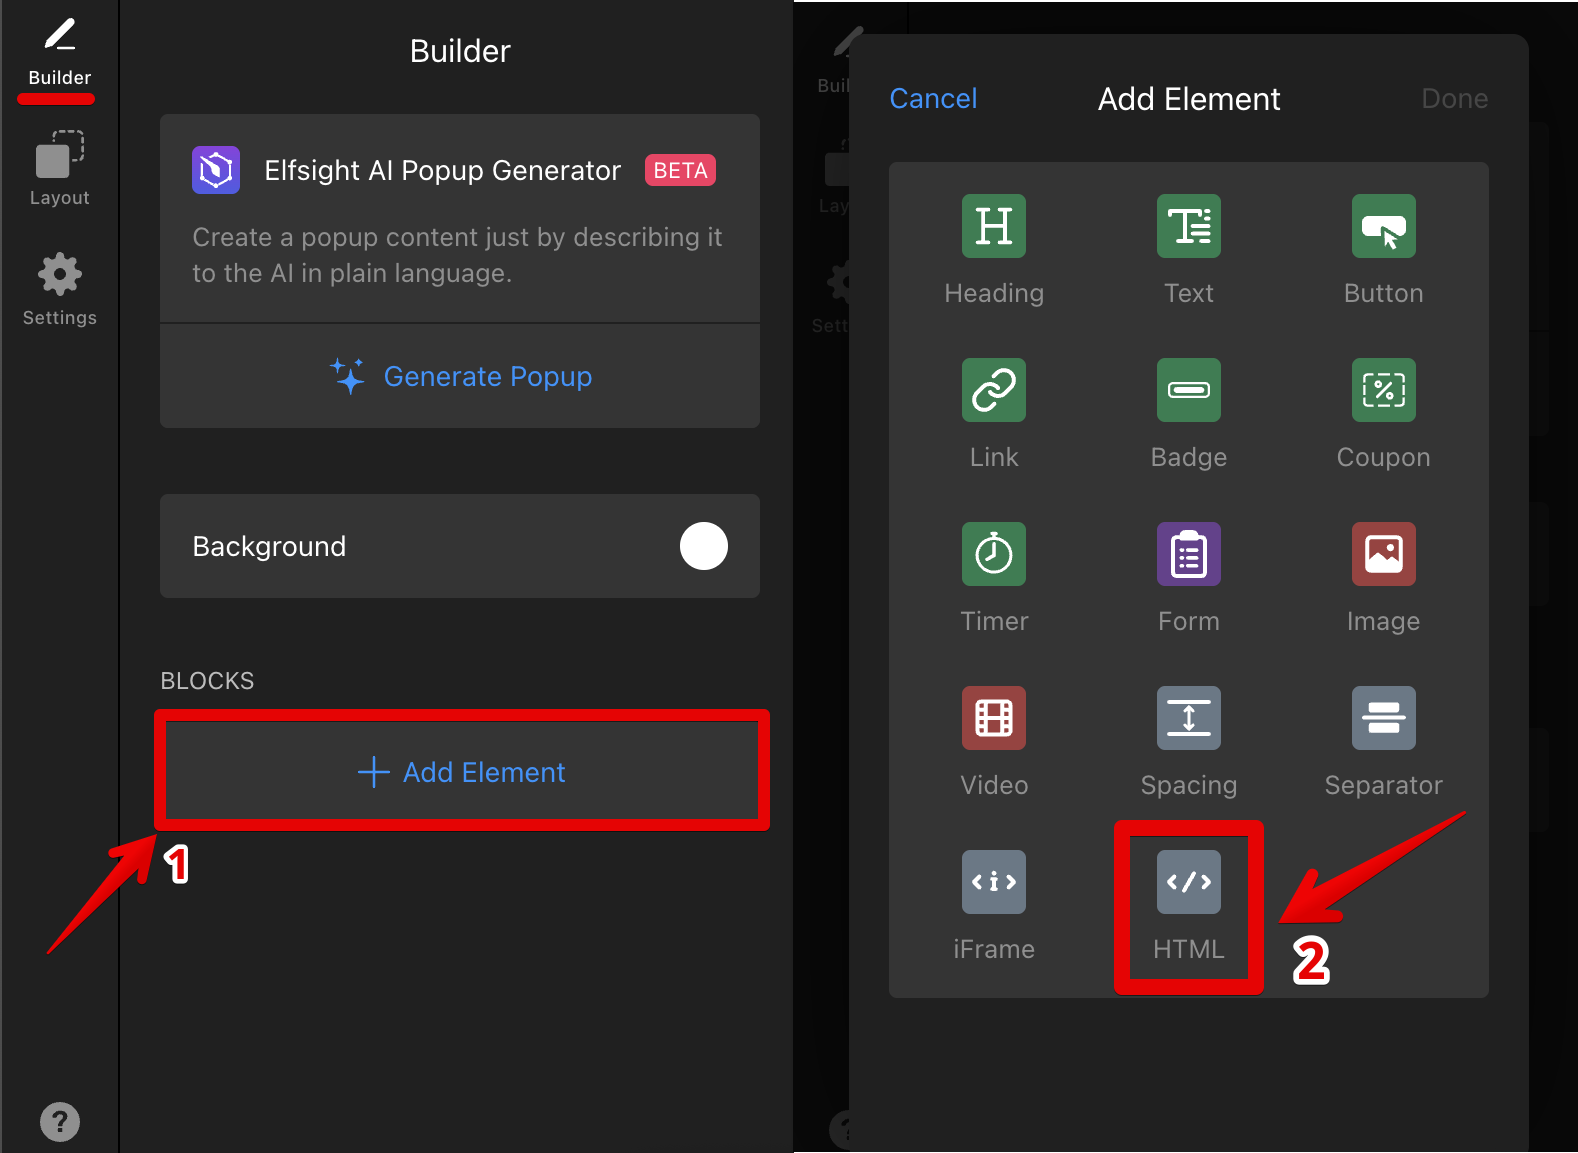
- 5
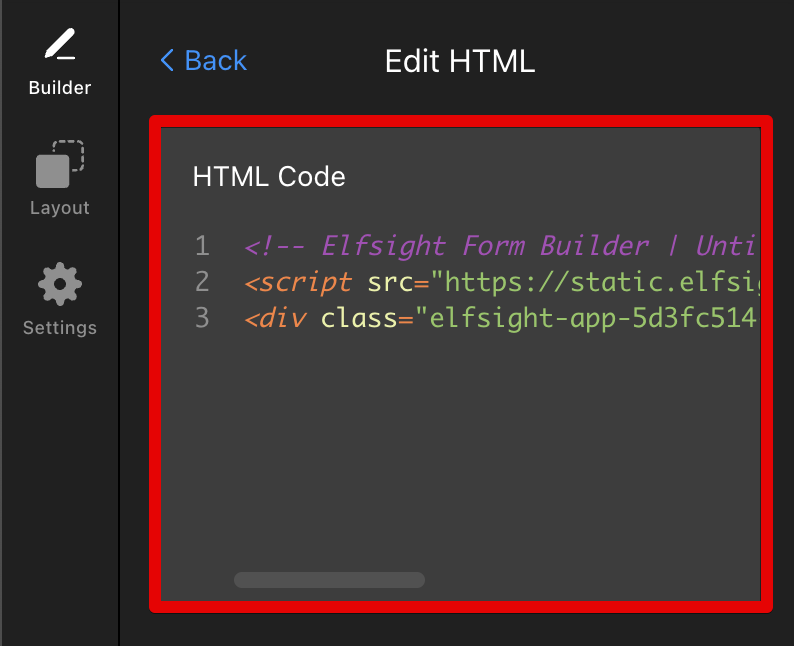
-
Paste the installation code of the Form Builder widget into the Popup widget’s HTML block:


Well done! Now you have the form integrated into the Popup widget.
We hope this article helped you set up the popup form to your liking! If you run into any trouble or have additional questions, feel free to Contact our Support Team. We're here to assist! 😊