Step 3: Adjust Line Chat's Triggers and Display Settings
Setting up your Line Chat widget involves four simple steps. You’re currently on:
- Step 1 – Connect Line Chat to LINE Messenger
- Step 2 – Customize Line Chat Content
- 👉 Step 3 – Adjust Line Chat's Triggers and Display Settings
- Step 4 – Customize Line Chat's Style
In this step, we’ll set up the key settings for your Line Chat widget to make sure it works perfectly. Head to the Settings tab in the widget editor to get started.
In this article
Position
The Position setting allows you to control the widget’s placement on the page. Choose Embed (static) for a fixed spot or Floating to have it move with users as they scroll:

Chat Display Settings
The Chat Display Settings section includes 4 settings: Pages, Devices, Visitors, and Date & Time. Here's how you can use each to customize your widget:
- 1
-
The Pages setting lets you specify where the widget will be displayed:

- All Pages — display the widget on every page.
- Excluded Pages — exclude specific pages from displaying the widget.
- Specific Pages — display the widget on certain pages only.
- 2
-
The Devices setting lets you choose which devices will display the widget:

- 3
-
The Visitors setting allows you to target different types of visitors:

- All visitors — show the widget to everyone.
- New visitors — show the widget only to first-time visitors.
- Returning visitors — show the widget to visitors who have been to your site before.
- 4
-
The Date & Time setting allows you to schedule when the widget will be displayed:


Open Chat Triggers
The Open Chat Triggers settings allow you to choose which visitor actions will automatically open the chat window:
- On Page Load — open the chat as soon as the page loads.
- Time on Page — open the chat after a visitor spends a certain amount of time on the page.
- Time on Site — open the chat after a visitor spends a set time on your website.
- Scroll Position — open the chat after a visitor scrolls down a percentage of the page.
- Exit Intent — open the chat when a visitor tries to leave the site or close the browser.
You can also set a time in the Remember Visitor section—once a visitor closes the chat, it won’t open again during the selected period.
Notifications
The Notifications settings let you control the red badge that highlights the chat:

Google Analytics
In the Google Analytics section, set up events to track chat interactions in Google Analytics 4 or Google Tag Manager. Click ➕Add Event and choose the actions you want to track: 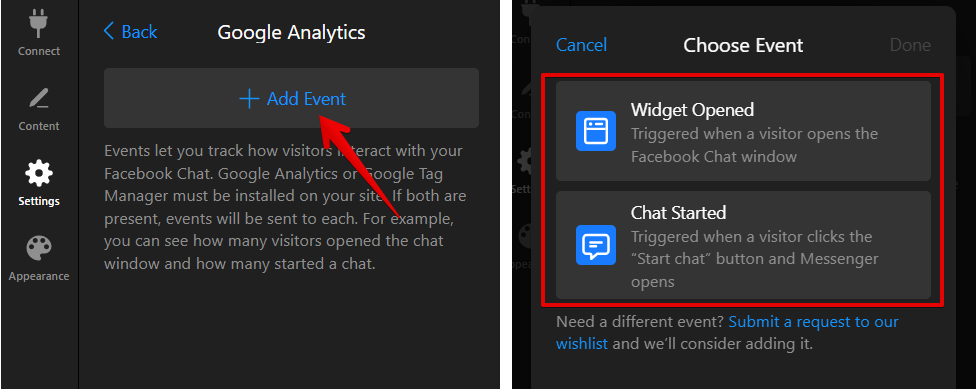
Well done! You’ve configured the essential features of your Line Chat widget. Now, take it a step further by customizing it to boost visitor engagement on your site.