How to Manually Add Schema Markup from a Reviews Widget
Our Reviews widgets come with a powerful feature: Schema Markup for improved visibility in search engines.
Sometimes, due to CMS peculiarities or other factors, the built-in markup might not work as expected. If that happens, don’t worry—you can easily add it manually. Let’s walk through the steps! 🚀
Adding Schema Markup to Your Website
- 1
-
Go to the web page with your widget and open Developer Tools on the Elements tab.
You can do this by pressing Ctrl + Shift + J (Windows) or Cmd + Option + C (MacOS), or just right-click on the page and choose Inspect:

- 2
-
Open the search bar (Ctrl + F for Windows or Cmd + F for MacOS) and search for application/ld+json

- 3
-
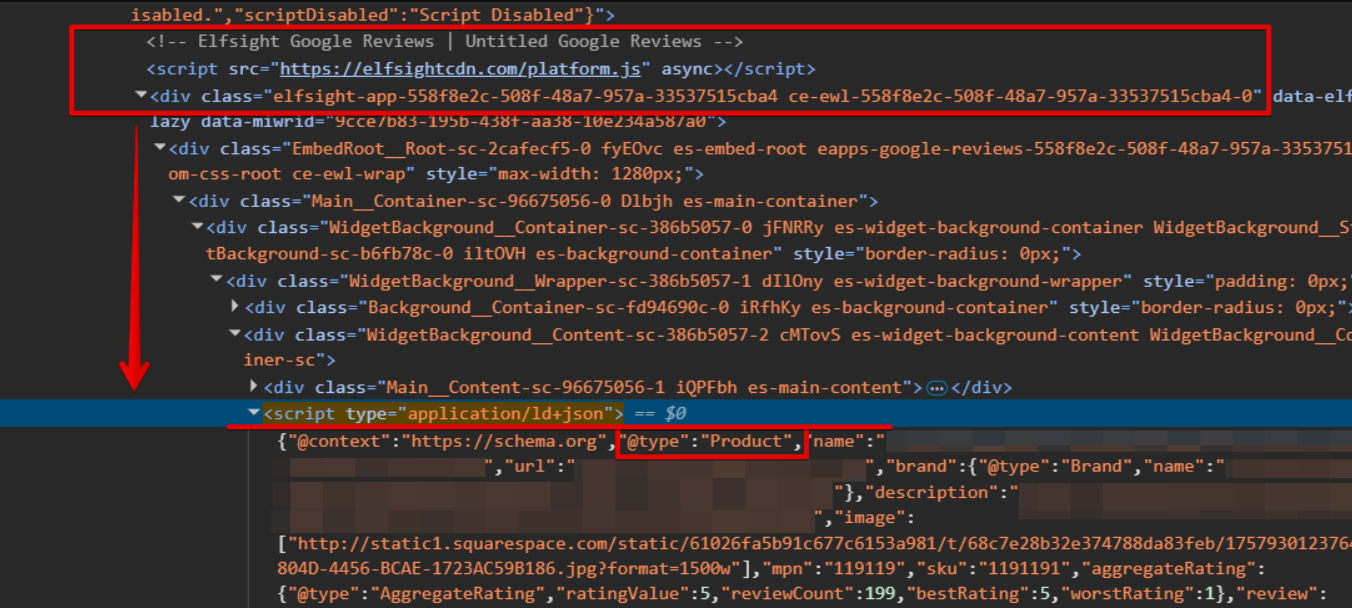
Find the <script type="application/ld+json"> element, right-click it, and select Copy → Copy element:

What if I see multiple application/ld+json lines?
In this case, here’s how you can identify the correct Schema markup for your widget:- Ensure it’s of the Product type. Check the “@type” field value by expanding the arrows.
- It will be within the widget. Find the widget code and expand the arrows to confirm:
- 4
-
Go to your website’s backend, paste the copied element next to the widget installation code, and save the changes:

- 5
-
Go to your widget editor and disable the built-in schema in Settings → Schema.org → Enable Schema.org Markup:

- 6
-
Re-index your page on Google. You can find the instructions for this here.


And you’re done! Your Schema markup is now visible to Google and other search engines, helping improve your SEO performance.