How to Set Up Pricing and Currency in Your Pricing Table
When setting up your Pricing Table widget, you might want to adjust the price, discount, and currency. This guide will help you easily configure these settings and make your table look exactly how you want.
- 1
-
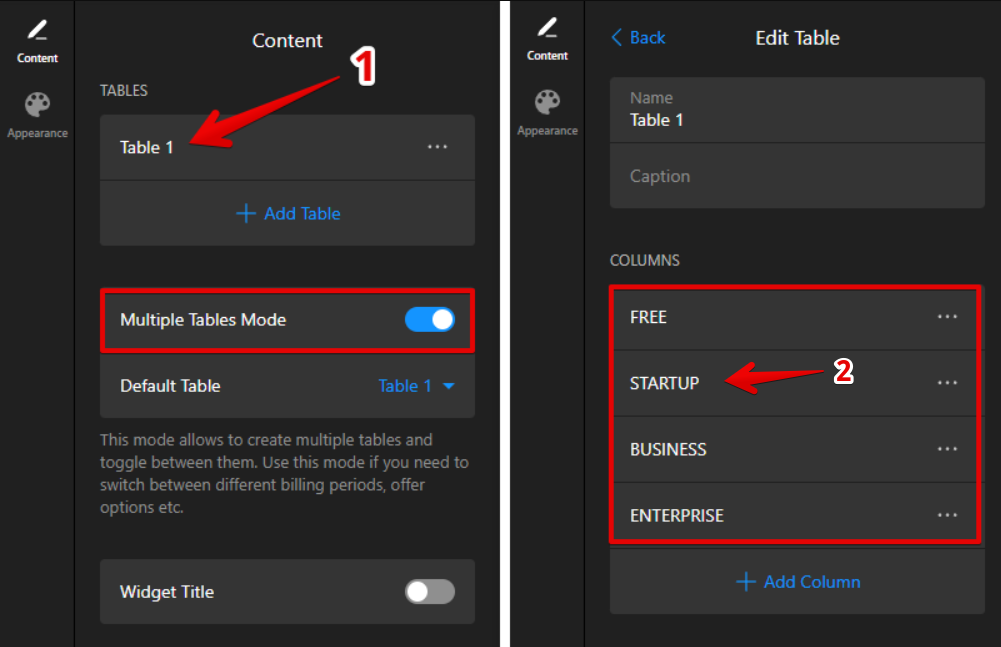
Start by opening the Content tab. If you're using Multiple Tables Mode, make sure to select the correct table first. Choose the column where you'd like to adjust pricing:
- 2
-
Scroll down to the Price section. Click on the Price field to open all available pricing options. Here’s what you can do:
- Choose Pricing Model
Define how your price will be displayed and structured. Depending on the model you choose, extra fields may appear for deeper customization: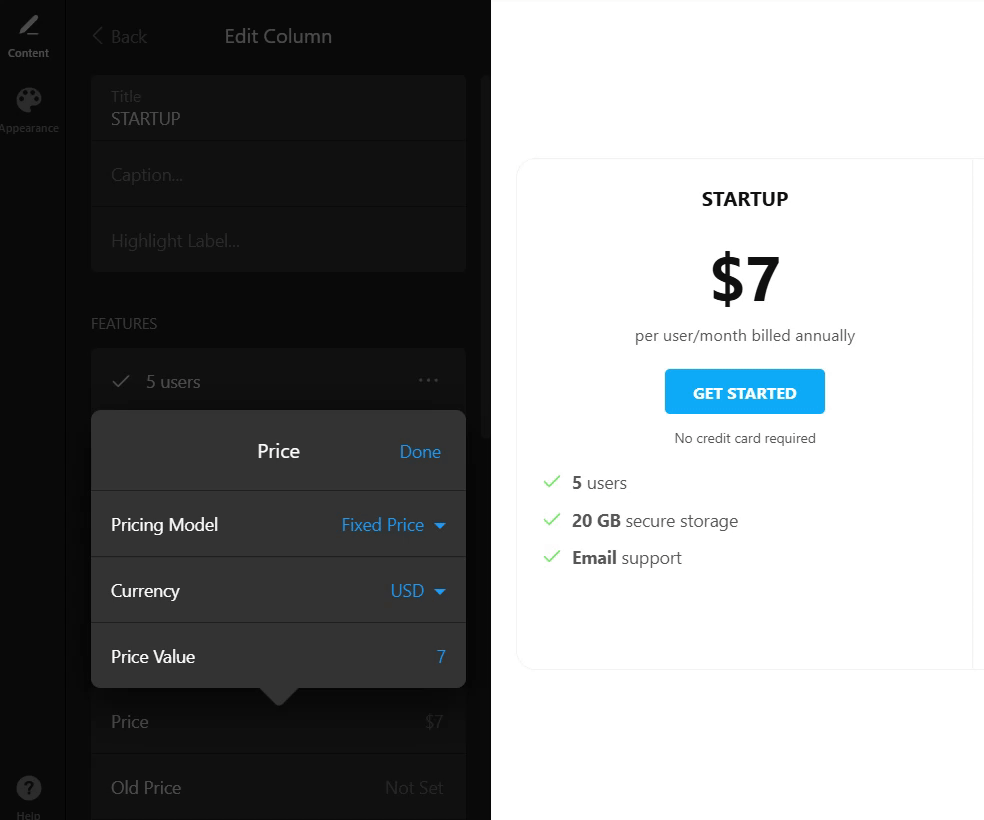
- Select Currency
Pick the currency you want to display (e.g., USD, EUR). This field is available for most pricing models, except ones like Free that don’t require currency: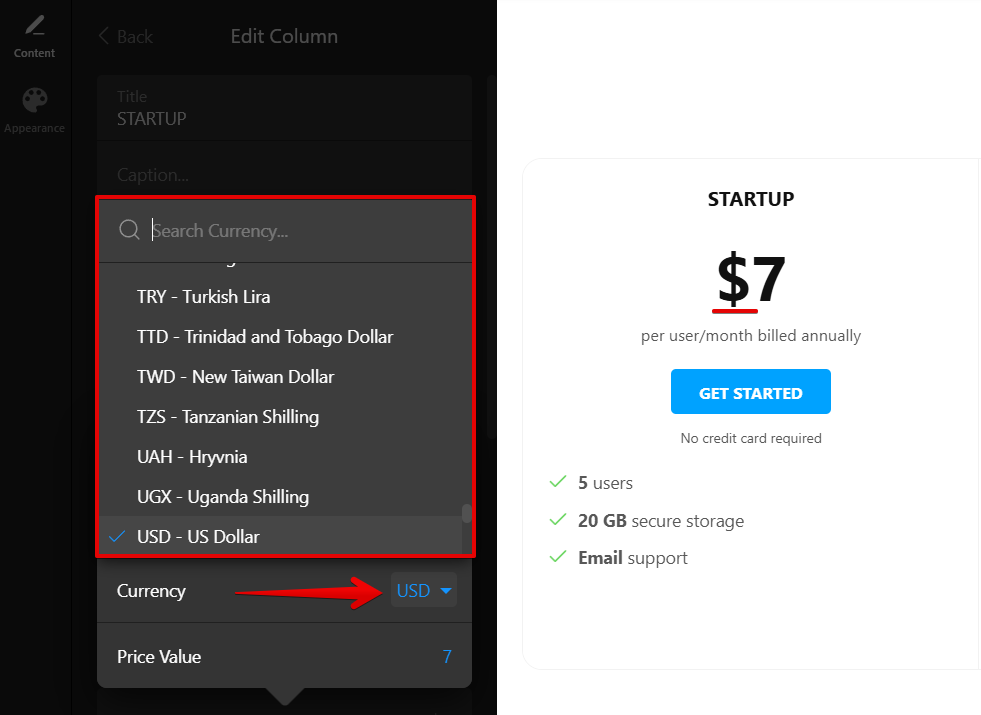
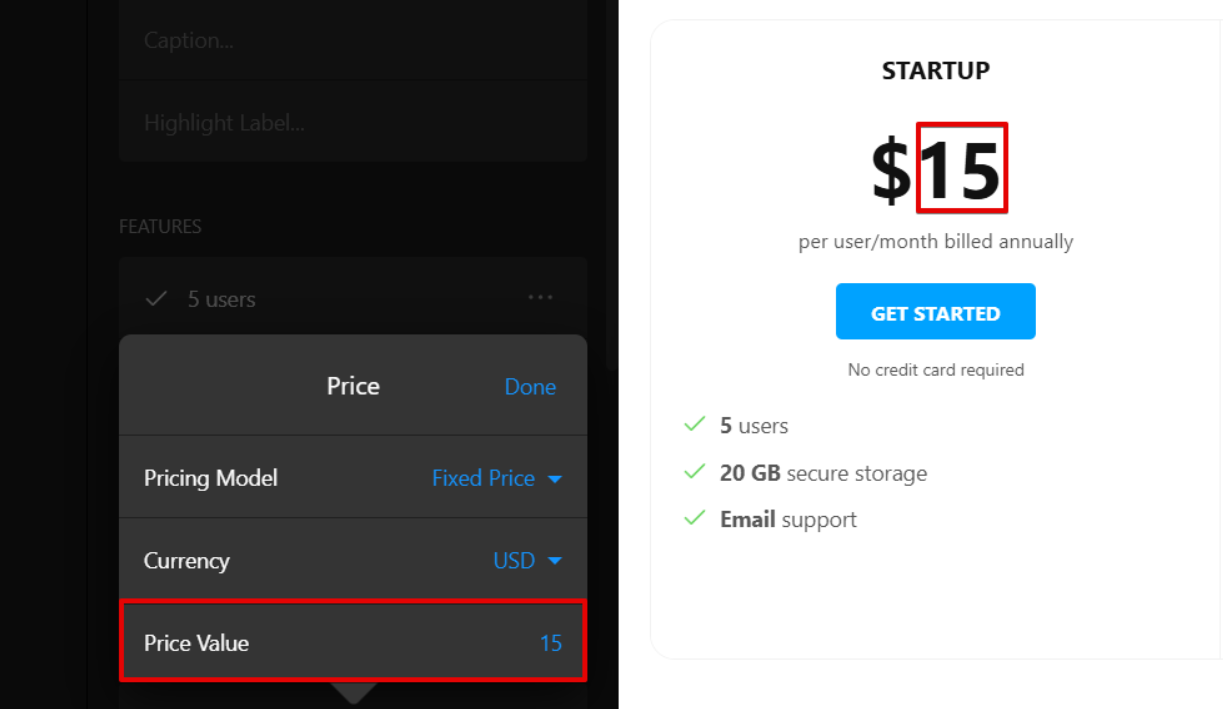
- Set Price Value
Enter the actual price for your product or service:
Note: The available settings may vary depending on the selected Pricing Model. For instance, some models include extra fields like Billing Period or Unit Type, while others, such as Free or Custom, may not have these options. - Choose Pricing Model
- 3
-
In the same Price section, you can set it to display the original price along with a discount value. Here’s how to do it:
- Add Old Price
Enable the toggle to show the previous price and enter it in the Old Price Value field: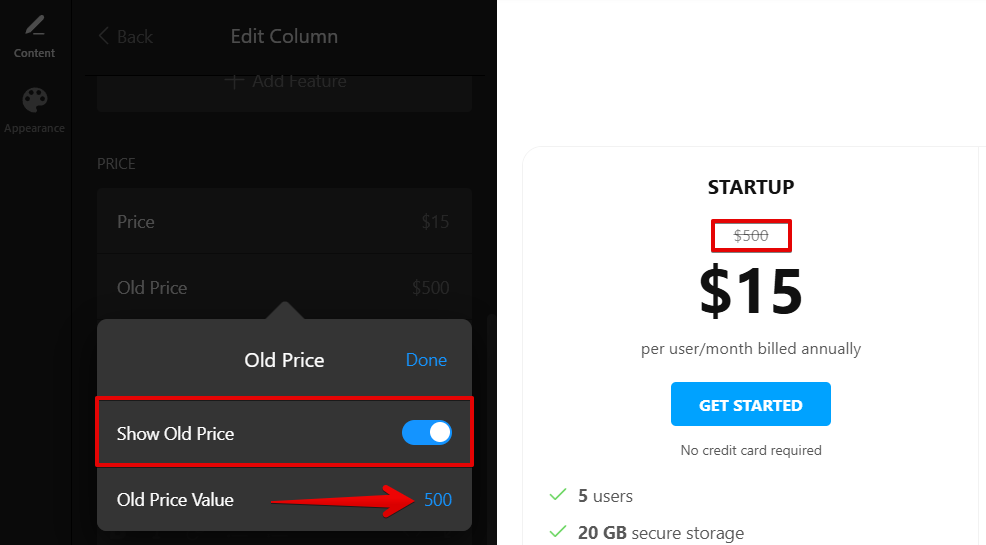
- Adjust Discount
Toggle the switch to display a discount and choose the discount type from the available options: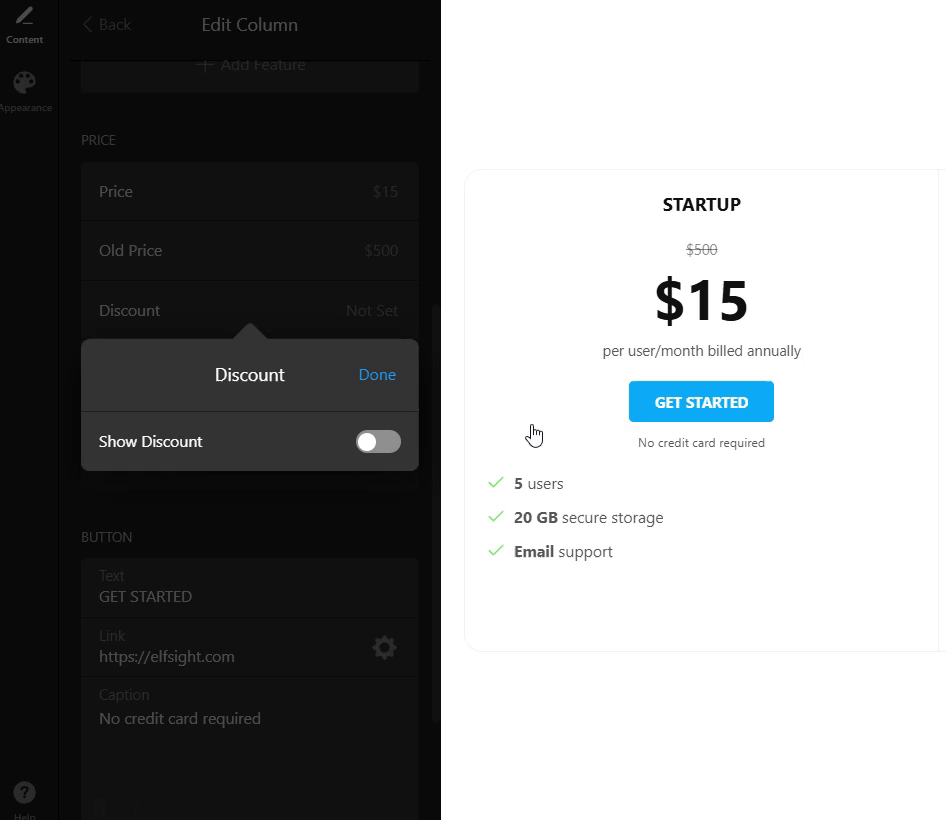
- Add Old Price


That's it — now you know how to set up prices, discounts, and currency in your Pricing Table widget. 🙌 If you have any questions or need a hand, feel free to reach out to our Support Team, we’re always here to help!